background image

improve the performance of the appliance and save elec-

tricity consumption.
Important! Take care of not to damage the cooling system.
Many proprietary kitchen surface cleaners contain chemi-

cals that can attack/damage the plastics used in this appli-

ance. For this reason it is recommended that the outer

casing of this appliance is only cleaned with warm water

with a little washing-up liquid added.

After cleaning, reconnect the equipment to the mains sup-

ply.

Defrosting of the refrigerator

Frost is automatically eliminated from the evaporator of

the refrigerator compartment every time the motor com-

pressor stops, during normal use. The defrost water

drains out through a trough into a special container at the

back of the appliance, over the motor compressor, where

it evaporates.

It is important to periodically clean the defrost water drain

hole in the middle of the refrigerator compartment channel

to prevent the water overflowing and dripping onto the

food inside. Use the special cleaner provided, which you

will find already inserted into the drain hole.

Defrosting of the freezer

The freezer compartment of this model, on the other hand,

is a "no frost" type. This means that there is no buildup of

frost when it is in operation, neither on the internal walls

nor on the foods.

The absence of frost is due to the continuous circulation

of cold air inside the compartment, driven by an automati-

cally controlled fan.

Periods of non-operation

When the appliance is not in use for long periods, take the

following precautions:
• disconnect the appliance from electricity supply
• remove all food
• defrost (if foreseen) and clean the appliance and all ac-

cessories

• leave the door/doors ajar to prevent unpleasant smells.

If the cabinet will be kept on, ask somebody to check it

once in a while to prevent the food inside from spoiling in

case of a power failure.

What to do if…

Warning! Before troubleshooting, disconnect the

mains plug from the mains socket.

Only a qualified electrician or competent person must do

the troubleshooting that is not in this manual.

Important! There are some sounds during normal use

(compressor, refrigerant circulation).


7

Downloaded from Fridge-Manual.com Manuals

Summary of Contents for ZBB 6286

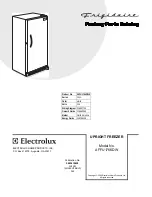
Page 1: ...r manual 2 HU Használati útmutató 14 ES Manual de instrucciones 28 PT Manual de instruções 40 Fridge Freezer Hűtő fagyasztó Frigorífico congelador Combinado ZBB 6286 Downloaded from Fridge Manual com Manuals ...
Page 2: ...rom children There is risk of suffocation If you are discarding the appliance pull the plug out of the socket cut the connection cable as close to the appliance as you can and remove the door to prevent playing children to suffer electric shock or to close themselves into it If this appliance featuring magnetic door seals is to re place an older appliance having a spring lock latch on the door or ...

Page 3: ...pliance Ice lollies can cause frost burns if consumed straight from the appliance Care and cleaning Before maintenance switch off the appliance and dis connect the mains plug from the mains socket Do not clean the appliance with metal objects Do not use sharp objects to remove frost from the ap pliance Use a plastic scraper Regularly examine the drain in the refrigerator for de frosted water If ne...

Page 4: ...ally regulated To operate the appliance proceed as follows turn the Temperature Regulator toward lower settings to obtain the minimum coldness turn the Temperature Regulator toward higher settings to obtain the maximum coldness A medium setting is generally the most suitable However the exact setting should be chosen keeping in mind that the temperature inside the appliance depends on room tempera...

Page 5: ...ailable for this operation Small pieces may even be cooked still frozen directly from the freezer in this case cooking will take longer Ice cube production This appliance is equipped with one or more trays for the production of ice cubes Fill these trays with water then put them in the freezer compartment Important Do not use metallic instruments to remove the trays from the freezer Movable shelve...

Page 6: ... the latter lean foods store better and longer than fatty ones salt reduces the storage life of food water ices if consumed immediately after removal from the freezer compartment can possibly cause the skin to be freeze burnt it is advisable to show the freezing in date on each in dividual pack to enable you to keep tab of the storage time Hints for storage of frozen food To obtain the best perfor...

Page 7: ...leaner provided which you will find already inserted into the drain hole Defrosting of the freezer The freezer compartment of this model on the other hand is a no frost type This means that there is no buildup of frost when it is in operation neither on the internal walls nor on the foods The absence of frost is due to the continuous circulation of cold air inside the compartment driven by an auto...

Page 8: ...ng proc ess frost defrosts on the rear plate This is correct Water flows into the refrigerator The water outlet is clogged Clean the water outlet Products prevent that water flows into the water collector Make sure that products do not touch the rear plate Water flows on the ground The melting water outlet does not flow in the evaporative tray above the com pressor Attach the melting water outlet ...

Page 9: ... in the direction of the arrow 3 Replace the bulb with one of the same power and specifically designed for household appliances the maximum power is shown on the light bulb cover 4 Replace the light cover by sliding it into its original position 5 Reconnect the appliance 6 Open the door and check if the light comes on Closing the door 1 Clean the door gaskets 2 If necessary adjust the door Refer t...

Page 10: ... 32 C N 16 C to 32 C ST 16 C to 38 C T 16 C to 43 C Electrical connection Before plugging in ensure that the voltage and frequency shown on the rating plate correspond to your domestic power supply The appliance must be earthed The power supply cable plug is provided with a contact for this purpose If the do mestic power supply socket is not earthed connect the appliance to a separate earth in com...

Page 11: ...e appli ance as shown in figure A1 A 2 Drill the hinge cover A as shown in figure Apply the covers A and A1 in the accessories bag in to the middle hinge 1 2 3 Install the appliance in the niche Push the appliance in the direction of the arrows 1 until the upper gap cover stops against the kitchen furniture Push the appliance in the direction of the arrows 2 against the cupboard on the opposite si...

Page 12: ...o 90o 10 Install the part Ha on the inner side of the kitch en furniture Ha Hc 11 Push the part Hc on the part Ha Hb Ha 8 mm 12 Open the appliance door and the kitchen furni ture door at an angle of 90 Insert the small square Hb into guide Ha Put together the appliance door and the furniture door and mark the holes Ha 8 mm K 13 Remove the brackets and mark a distance of 8 mm from the outer edge of...

Page 13: ...waste Instead it should be taken to the appropriate collection point for the recycling of electrical and electronic equipment By ensuring this product is disposed of correctly you will help prevent potential negative consequences for the environment and human health which could otherwise be caused by inappropriate waste handling of this product For more detailed information about recycling of this...

Page 14: ...entális ké pességű illetve megfelelő tapasztalatok és ismeretek híján lévő személyek beleértve a gyermekeket is használhassák hacsak a biztonságukért felelős személy nem biz tosít számukra felügyeletet és útmutatást a készülék használatára vonatkozóan Gondoskodni kell a gyermekek felügyeleté ről annak biztosítása érdekében hogy ne játsszanak a készülékkel Minden csomagolóanyagot tartson a gyer mek...

Page 15: ... bőrsérüléseket illetve fagyás miatti égési sérüléseket ered ményezhet Ne tegye ki hosszú időn keresztül közvet len napsütésnek a készüléket Az ebben a készülékben működő izzólám pák ha vannak ilyenek a készülékben ki zárólag háztartási eszközökhöz kifejlesz tett különleges fényforrások Nem alkalma sak helyiségek megvilágítására Napi használat Ne tegyen meleg edényt a készülék műa nyag részeire Ne...

Page 16: ...relve vízcsatlakozóval Szerviz A készülék szervizeléséhez szükséges minden villanyszerelési munkát szakkép zett villanyszerelőnek vagy kompetens sze mélynek kell elvégeznie A készüléket kizárólag arra felhatalmazott szervizközpont javíthatja és csak eredeti pótalkatrészek használhatók Környezetvédelem Ez a készülék sem a hűtőfolyadék kerin gető rendszerben sem a szigetelő anyagokban nem tartalmaz ...

Page 17: ...rítsa ki Fontos Ne használjon mosószereket vagy súrolóporokat mert ezek megsérthetik a fel ületét Napi használat Friss élelmiszer lefagyasztása A fagyasztórekesz alkalmas friss élelmisze rek lefagyasztására valamint fagyasztott és mélyhűtött élelmiszerek hosszú távú tárolásá ra Friss élelmiszer lefagyasztásához aktiválja a Action Freeze funkciót legalább 24 órával az előtt hogy a lefagyasztani kív...

Page 18: ...yilakkal jelölt irányba amíg ki nem szabadul majd szükség sze rint tegye új helyre Hasznos javaslatok és tanácsok Energiatakarékossági ötletek Ne nyitogassa gyakran az ajtót illetve ne hagyja a feltétlenül szükségesnél tovább nyitva Ha a környezeti hőmérséklet magas a hő mérséklet szabályozó magas beállításon van és a készülék teljesen meg van töltve be előfordulhat hogy a kompresszor folya matosa...

Page 19: ...utóbbiaknak megemelkedik a hőmérsékle te a zsírszegény ételeket könnyebben és hos szabb ideig lehet tárolni mint a zsírosakat a só csökkenti az élelmiszerek élettarta mát ha a vízből képződött jeget a fagyasztóre keszből történő kivétel után rögtön fo gyasztani kezdik fagyásból eredő égési sérüléseket okozhat a bőrön ajánlatos minden egyes csomagon feltün tetni a lefagyasztás dátumát hogy nyomon l...

Page 20: ... elvezető csatornán keresztül egy a kompresszoron el helyezett tartályba kerül ahol párolgásával hozzájárul a kompresszor hűtéséhez Fontos hogy a vízelvezető csatorna közepén látható lefolyónyílást amely a jégmentesítés ből származó vizet befogadja rendszeresen megtisztítsa nehogy a víz túlfolyjon és rácsö pögjön a készülékben lévő élelmiszerekre Használja a kapott speciális tisztítót amely már el...

Page 21: ...an Csatlakoztasson egy másik elektromos készüléket a háló zati csatlakozóaljzatba Forduljon szakképzett villany szerelőhöz A lámpa nem működik A lámpa készenléti üzemmód ban van Csukja be majd nyissa ki az aj tót A lámpa hibás Olvassa el az Izzócsere c részt A kompresszor folyama tosan működik A hőmérséklet nincs helyesen beállítva Állítson be magasabb hőmér sékletet Az ajtó nincs jól becsukva Olv...

Page 22: ...s hideglevegő keringetés a készülékben Gondoskodjon arról hogy le gyen hideglevegő keringetés a készülékben A fagyasztóban a hő mérséklet túl magas A termékek túl közel vannak egymáshoz Tárolja a termékeket úgy hogy ne akadályozzák a hidegleve gő keringést Túl sok a dér Az élelmiszer nincs megfelelő en becsomagolva Csomagolja be megfelelően az élelmiszereket Az ajtó nincs jól becsukva Olvassa el A...

Page 23: ...lke mm 560 Mélység a fülke mm 550 Hűtőtér nettó térfogata liter 210 Fagyasztótér nettó térfogata liter 55 Energiaosztály A és G között ahol az A a leghatékonyabb a G a legke vésbé hatékony A Energiafogyasztás a használattól és az elhelyezéstől függően kWh év 364 Fagyasztótér csillagszám jele Áramkimaradási biztomság óra 13 Fagyasztási teljesítmény kg 24 óra 4 Klímaosztály SN N ST Feszültség Volt 2...

Page 24: ...si hálózati csatlakozóaljzat nincs leföldelve csatlakoz tassa a készüléket az érvényben lévő jogsza bályok szerint külön földpólushoz miután konzultált egy képesített villanyszerelővel A gyártó minden felelősséget elhárít magától ha a fenti biztonsági óvintézkedéseket nem tartják be Ez a készülék megfelel az EGK irányelvek nek Az ajtó nyitásirányának megfordítása A készülék ajtaja jobbra nyílik Ha...

Page 25: ...llítsa a készülé ket a fülkébe Tolja a készüléket a nyilak irányába 1 amíg a felső takaró lemez neki nem üt közik a konyhabútor nak Tolja a készüléket a konyhaszekrénynek a nyilak irányába 2 a zsanérral ellent étes oldalon 44mm 4mm 4 Igazítsa el a ké szüléket a fülkében Ügyeljen arra hogy a készülék és a konyhaszekrény elülső széle közötti távolság 44 mm le gyen A tartozékok tasak jában lévő alsó ...

Page 26: ...irányból kell csatlakoznia a búto rajtóhoz 1 Lazítsa meg a rögzítő konzo lokban E lévő csavarokat 2 Vegye le a kon zolokat E 3 Húzza meg is mét a csavaro kat Ha Hb Hd Hc 9 Válassza le a Ha Hb Hc és Hd alkatrészeket 21 mm 21 mm 50 mm 50 mm 90o 90o 10 Szerelje fel a Ha alkatrészt a konyhabútor belső oldalára Ha Hc 11 Nyomja a Hc al katrészt a Ha alkat részre Hb Ha 8 mm 12 Nyissa ki a ké szülék ajtaj...

Page 27: ...ti hőmérséklet emelkedik a tömítés mérete megnő Környezetvédelmi tudnivalók A terméken vagy a csomagoláson található szimbólum azt jelzi hogy a termék nem kezelhető háztartási hulladékként Ehelyett a terméket el kell szállítani az elektromos és elektronikai készülékek újrahasznosítására szakosodott megfelelő begyűjtő helyre Azzal hogy gondoskodik ezen termék helyes hulladékba helyezéséről segít me...

Page 28: ...ectrodo méstico Mantenga los materiales de embalaje alejados de los niños Existe riesgo de asfixia Si va a desechar el aparato extraiga el enchufe de la toma corte el cable de conexión tan cerca del aparato como pueda y retire la puerta para impedir que los ni ños al jugar puedan sufrir descargas eléctricas o que dar atrapados en su interior Si este aparato que cuenta con juntas de puerta mag néti...

Page 29: ...l aparato sobre el almacenamiento Consulte las instrucciones correspondientes No coloque bebidas carbonatadas o con gas en el con gelador ya que se genera presión en el recipiente que podría estallar y dañar el aparato Si se consumen polos helados retirados directamente del aparato se pueden sufrir quemaduras causadas por el hielo Cuidado y limpieza Antes de realizar tareas de mantenimiento apague...

Page 30: ...zca el enchufe en la toma Gire el regulador de temperatura hacia la derecha a un ajuste intermedio Se ilumina el indicador Apagado Para apagar el aparato gire el regulador de temperatura hasta la posición O Se apaga el indicador Regulación de la temperatura La temperatura se regula automáticamente Para utilizar el aparato proceda como se indica Gire el regulador de temperatura hacia ajustes más ba...

Page 31: ...roducirse una descongelación accidental por ejemplo por un corte del suministro eléctrico si la interrupción ha sido más prolongada que el valor indicado en la tabla de características técnicas bajo tiempo de elevación los alimentos descongelados deben consumirse cuanto antes o cocinarlos de inmediato y volverlos a congelar después de que se hayan enfriado Descongelación Los alimentos ultracongela...

Page 32: ...ico Consejos sobre la congelación Estos consejos son importantes para poder aprovechar al máximo el proceso de congelación la cantidad máxima de alimentos que puede congelarse en 24 horas se muestra en la placa de datos técnicos el proceso de congelación requiere 24 horas Durante ese periodo no deben añadirse otros alimentos para congelación congele sólo productos alimenticios de máxima cali dad f...

Page 33: ...gorífico La escarcha se elimina automáticamente del evaporador del frigorífico cada vez que se detiene el compresor du rante el funcionamiento normal El agua de la descongela ción se descarga hacia un recipiente especial situado en la parte posterior del aparato sobre el motor compresor donde se evapora Es importante limpiar periódicamente el orificio de salida del agua de descongelación situado e...

Page 34: ...s alta La puerta no está bien cerrada Consulte la sección Cierre de la puer ta La puerta se ha abierto con excesiva frecuencia No mantenga abierta la puerta más tiempo del necesario La temperatura de los productos es demasiado alta Deje que la temperatura de los alimen tos descienda a la temperatura ambiente antes de guardarlos La temperatura ambiente es demasia do alta Reduzca la temperatura ambi...

Page 35: ...o que el aire frío pueda circular entre ellos Hay demasiada escarcha Los alimentos no están envueltos co rrectamente Envuelva los alimentos correctamente La puerta no está bien cerrada Consulte la sección Cierre de la puer ta Cambio de la bombilla Siga estos pasos para cambiar la bombilla 1 Desenchufe el aparato 2 Pulse el gancho trasero al tiempo que desliza la tapa en la dirección de la flecha 3...

Page 36: ...C a 32 C N 16 C a 32 C ST 16 C a 38 C T 16 C a 43 C Conexión eléctrica Antes de conectar el aparato compruebe que el voltaje y la frecuencia que aparecen en la placa de datos técnicos se corresponden con el suministro de la vivienda El aparato debe tener conexión a tierra El enchufe del ca ble de alimentación se suministra con un contacto para tal fin Si la toma de red de la vivienda carece de con...

Page 37: ...orte la cinta selladora adhesiva y péguela al aparato como se muestra en la figura A1 A 2 Taladre la tapa de la bisagra A como se mues tra en la figura Coloque las tapas A y A1 en la bolsa de accesorios en la bisagra intermedia 1 2 3 Instale el aparato en el hueco Empuje el aparato en el sentido de las flechas 1 hasta que la cubierta de separación superior haga tope contra el mueble de cocina Empu...

Page 38: ... Instale la pieza Ha en el lado interno del mueble de cocina Ha Hc 11 Empuje la pieza Hc contra la pieza Ha Hb Ha 8 mm 12 Abra la puerta del apa rato y la del mueble de co cina en un ángulo de 90 Introduzca el cuadrado pe queño Hb en la guía Ha Coloque juntas la puerta del aparato y la puerta del mueble de cocina y mar que los orificios Ha 8 mm K 13 Quite las escuadras y ponga una marca a una dist...

Page 39: ...ien al distribuidor en el acto de la compra de un nuevo producto similar al que se deshecha bien a un punto municipal de recolección selectiva de equipos eléctricos y electrónicos para su reciclaje Al asegurarse de que este producto se desecha correctamente usted ayudará a evitar posibles consecuencias negativas para el medio ambiente y la salud pública lo cual podría ocurrir si este producto no s...

Page 40: ...odas as embalagens fora do alcance das crianças Existe o risco de asfixia Se eliminar o aparelho retire a ficha da tomada corte o cabo eléctrico o mais perto do aparelho possível e re tire a porta para evitar que crianças a brincar sofram choques eléctricos ou se fechem dentro do aparelho Se este aparelho com vedantes de porta magnéticos for substituir um aparelho mais velho com fecho de mola ling...

Page 41: ...zer com que expluda provocando danos no aparelho Os gelados de gelo podem provocar queimaduras de gelos se forem consumidos imediatamente depois de retirados do aparelho Limpeza e manutenção Antes da manutenção desligue o aparelho e retire a fi cha da tomada Não limpe o aparelho com objectos de metal Não utilize objectos afiados para remover o gelo do aparelho Utilize um raspador de plástico Inspe...

Page 42: ...luz piloto apaga se Regulação da temperatura A temperatura é regulada automaticamente Para utilizar o aparelho proceda do seguinte modo rode o Regulador da Temperatura para definições infe riores para obter a frescura mínima rode o Regulador da Temperatura para definições su periores para obter a frescura máxima Normalmente uma definição média é a mais ade quada No entanto a definição exacta deve ...

Page 43: ... frigorífico ou à temperatura ambiente dependendo do tempo dispo nível para esta operação Os pedaços pequenos podem mesmo ser cozinhados ain da congelados directamente do congelador neste caso a confecção irá demorar mais Produção de cubos de gelo Este aparelho possui um ou mais tabuleiros para a produ ção de cubos de gelo Encha estes tabuleiros com água de seguida coloque os no compartimento do c...

Page 44: ...ssária embrulhe os alimentos em folha de alumínio ou polite no e certifique se de que as embalagens são herméti cas Não permita que os alimentos frescos e descongelados entrem em contacto com os alimentos já congelados evitando assim o aumento de temperatura dos alimen tos congelados os alimentos sem gordura são melhores para armaze nar que os alimentos com gordura o sal reduz o tempo de armazenam...

Page 45: ...e descarga da água resultante da descongelação no centro do canal do compartimento do frigorífico para evitar que um fluxo excessivo de água pingue sobre os alimentos Utilize o agente de limpeza fornecido que irá encontrar já inserido no orifício de descarga Descongelar o congelador O compartimento do congelador deste modelo por sua vez é do tipo no frost Isto significa que não há qual quer formaç...

Page 46: ...A temperatura ambiente está demasia do alta Diminua a temperatura ambiente A água escorre na placa traseira do frigorífico Durante o processo de descongelação automático o gelo é descongelado na placa traseira Isto está correcto A água escorre para o frigorífico A saída de água está obstruída Limpe a saída de água Os produtos evitam que a água escor ra para o colector de água Certifique se de que ...

Page 47: ... porta Substituir a lâmpada Se necessitar de substituir a lâmpada execute os seguin tes passos 1 Desligue a ficha da tomada eléctrica 2 Prima o gancho traseiro e ao mesmo tempo deslize a tampa da lâmpada na direcção da seta 3 Substitua a lâmpada por uma com a mesma potência e especialmente concebida para aparelhos domésti cos a potência máxima está indicada na cobertura da lâmpada 4 Instale a tamp...

Page 48: ... 16 C a 38 C T 16 C a 43 C Ligação eléctrica Antes de ligar certifique se de que a tensão e a frequência indicadas na placa de dados correspondem à fonte de ali mentação doméstica O aparelho deve ter uma ligação à terra A ficha do cabo de alimentação é fornecida com um contacto para este ob jectivo Se a tomada da fonte de alimentação doméstica não estiver ligada à terra ligue o aparelho a uma liga...

Page 49: ...dante e apli que a no aparelho como ilustrado na figura A1 A 2 Perfure a tampa da do bradiça A tal como ilus trado na figura Aplique as tampas A e A1 estão no saco de acessó rios na dobradiça do meio 1 2 3 Instale o aparelho no nicho Empurre o aparelho na di recção das setas 1 até que a tampa do espaço superior pare contra o mó vel de cozinha Empurre o aparelho na di recção das setas 2 con tra o a...

Page 50: ...90o 10 Coloque a peça Ha no lado interior do móvel da cozinha Ha Hc 11 Pressione a peça Hc contra a peça Ha Hb Ha 8 mm 12 Abra a porta do apare lho e a porta do armário de cozinha a um ângulo de 90 Insira o quadrado pequeno Hb na calha Ha Junte a porta do aparelho e a porta de armário e marque os pontos dos ori fícios Ha 8 mm K 13 Retire os suportes e marque uma distância de 8 mm a partir da extre...

Page 51: ...o centro de recolha selectiva para a reciclagem de equipamento eléctrico e electrónico Ao garantir uma eliminação adequada deste produto irá ajudar a evitar eventuais consequências negativas para o meio ambiente e para a saúde pública que de outra forma poderiam ser provocadas por um tratamento incorrecto do produto Para obter informações mais pormenorizadas sobre a reciclagem deste produto contac...

Page 52: ...www zanussi com shop 222320898 A 322011 Downloaded from Fridge Manual com Manuals ...

Reviews: