background image

12

DIMENSIONS

Height

85

cm

Width

59.5

cm

Depth

60

cm

POWER SUPPLY VOLTAGE AND FREQUENCY

220-240 V / 50 Hz

TOTAL POWER ABSORBED

90 W

AVERAGE DAILY UNITS ELECTRICITY(*)

0,56 kWh

GROSS CAPACITY

110 l

NET CAPACITY

96 l

STAR RATING

(*)This figure is based on standard test results in accordance with European Standard EN153 (Actual
consumption will depend on how the appliance is used and where it is located).

Installation

Positioning

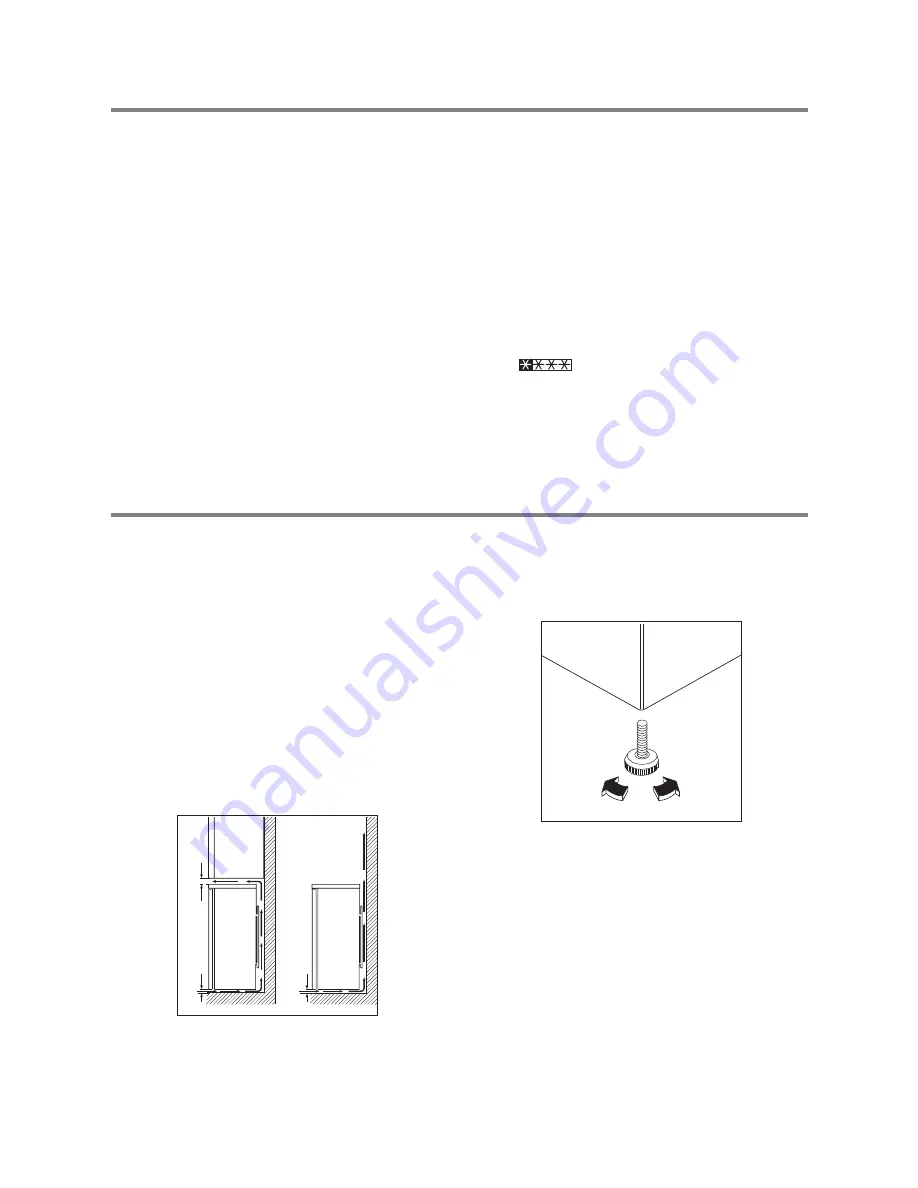
For this appliance to work efficiently, it must not be
located where the temperatures will fall below 10¡C
(50¡F) or rise above 32¡C (90¡F), e.g.
conservatories.

For correct operation this appliance must be located
in a dry atmosphere, away from heat sources, e.g.
cookers, radiators, boilers and direct sunlight.

You should also ensure that air can circulate freely
around the back and the top of the cabinet. There
should be 100mm (4Ó) between the top of the cabinet
and any overhanging kitchen furniture. Alternatively
allow 50mm (2Ó) between the top of the cabinet and
any overhanging kitchen furniture and a gap of
25mm (1Ó) on either side of the appliance.

Do not obstruct the space underneath. The back of
the cabinet may be placed close to the wall but must
not touch it. DO NOT install in places with restricted
ventilation.

50-100 mm

10 mm

10 mm

A

B

NP006

Adjust the level of the appliance by screwing out the
adjustable foot, or feet, at the bottom of the cabinet
using your fingers.

D200

Technical Specifications

Summary of Contents for 110 W

Page 1: ...2222701 92 FREEZER ZEF 110 W INSTRUCTION BOOKLET ...

Page 2: ...Prior to Installation Check the appliance for transport damage Under no circumstance should a damaged appliance be installed In the event of damage please contact your retailer Installation This appliance is heavy Care should be taken when moving it It is dangerous to alter the specifications or attempt to modify this product in any way Ensure that the appliance does not stand on the electrical su...

Page 3: ... disposing of your appliance use an authorised disposal site Remove the plug and ensure that any locks or catches are removed to prevent young children being trapped inside Contents Instructions for the User Important Safety Instructions 2 Operation 4 Before use 4 Freezer controls 4 Starting your appliance 4 Temperature control 4 Warning light red 4 Freezing fresh food 5 Frozen food storage 5 Free...

Page 4: ...on Ç 16 CÈ minimum cold Position Ç 24 CÈ maximum cold Turn the thermostat control knob to the required position An intermediate position 18 C is usually the most suitable although the temperature will be affected by Room temperature How often the door is opened Warning light red If the temperature warning light lights up it indicates that the temperature within the freezer has reached a level wher...

Page 5: ...red by the retailer and furthermore be sure that these frozen foodstuffs are transferred from the foodstore to the consumer in the shortest possible time a temperature increase of the frozen food could shorten its storage period It is also advisable not to exceed the storage period indicated by the producer of the food Finally do not open the door frequently or leave it open longer than is absolut...

Page 6: ... to put it in the refrigerator to thaw slowly Ensure that food placed in the freezer is dated and labelled and used in date order to ensure that food is consumed at its best It is important that food is used before its Òbest beforeÓ date Always wash your hands with soapy water and dry them with a clean towel before handling food Keep work surfaces clean and avoid cross contamination by not using t...

Page 7: ...o not re freeze the food without checking its condition The following guidelines should assist you Ice cream once thawed should be discarded Fruits Vegetables if soft should be cooked and used up Breads Cakes can be re frozen without danger Shellfish should be refrigerated and used up quickly Cooked Dishes i e casseroles should be refrigerated and used up Large Pieces of Meat can be re frozen prov...

Page 8: ... at the back of the appliance with a brush or vacuum cleaner see figure You MUST ensure that the appliance is switched OFF An accumulation of dust will affect the performance of the appliance and cause excessive electricity consumption Warning Before any maintenance or cleaning work is carried out DISCONNECT the appliance from the ELECTRICITY supply Important This appliance contains hydrocarbons i...

Page 9: ...is not left open Check that nothing is preventing the door from closing Is the door gasket intact and clean Has advised periodic defrosting been carried out Refer to normal operating sounds Something not Working Before contacting your local Service Force Centre check the following points IMPORTANT If you call out an engineer to a fault listed below or to repair a fault caused by incorrect use or i...

Page 10: ...ce Centre covering your post code area For the address of your local Service Force Centre and further information about Service Force please visit the website at www serviceforce co uk Before calling out an engineer please ensure you have read the details under the heading ÒSomething Not Working Ó When you contact the Service Force Centre you will need to give the following details 1 Your name add...

Page 11: ...s to put right an appliance which is improperly installed or calls to appliances outside the United Kingdom Appliances found to be in use within a commercial environment plus those which are subject to rental agreements Products of Zanussi Electrolux manufacture which are not marketed by Zanussi Electrolux European Guarantee If you should move to another country within Europe then your guarantee m...

Page 12: ...nce must be located in a dry atmosphere away from heat sources e g cookers radiators boilers and direct sunlight You should also ensure that air can circulate freely around the back and the top of the cabinet There should be 100mm 4Ó between the top of the cabinet and any overhanging kitchen furniture Alternatively allow 50mm 2Ó between the top of the cabinet and any overhanging kitchen furniture ...

Page 13: ...Refit the door and the bottom hinge 5 to the left hand side 7 Unscrew the handle 3 Refit it on the opposite side after having pushed in the plugs with a punch Cover the holes left open with the plugs contained in the documentation pack When positioning the bottom hinge blade on the reverse side the securing screws will require a degree of exersion when fitting It is therefore advisable to lubricat...

Page 14: ...al Service Force Centre This appliance complies with the following E E C Directive 73 23 EEC of 19 2 73 Low Voltage Directive and subsequent amendments 87 308 of 2 6 87 Radio Interference Suppression and subsequent amendments 89 336 EEC of 3 5 89 Electromagnetic Compatibility Directive and subsequent amendments Please ensure that when the appliance is installed it is easily accessible for the engi...

Page 15: ......

Page 16: ... Electrolux plc 2003 922 725 695 ...

Reviews: