


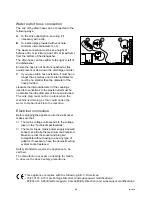

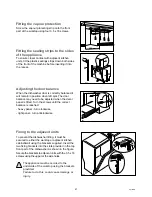


Water outlet hose connection
The end of the drain hose can be connected in the
following ways:
A
To the sink outlet siphon, securing it if
necessary with a clip.
B
To a stand pipe provided with vent-hole,
minimum internal diameter 4 cm.
The waste connection must be at a height of
between 30 cm (minimum) and 100 cm (maximum)
from the bottom of the dishwasher.
The drain hose can face either to the right or left of
the dishwasher
Ensure the hose is not bent or squashed as this
could prevent or slow down the discharge of water.
C
If you use a drain hose extension it must be no
longer than 2 metres and its internal diameter
must be no smaller than the diameter of the
hose provided.
Likewise the internal diameter of the couplings
used for connections to the waste outlet must be
no smaller than the diameter of the hose provided.
The sink plug must not be in place when the
machine is draining as this could cause the
water to siphon back into the machine.
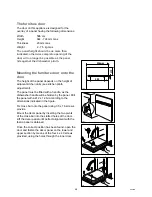
Electrical connection
Before plugging the appliance into the wall socket,
make sure that:
➀
The mains voltage corresponds to the voltage
given in the “Technical specifications”.
➁
The meter, fuses, mains power supply and wall
socket can all take the maximum load required.
Make sure that the socket and plug are
compatible without having to use any type of
adaptor. If necessary, have the domestic wiring
system socket replaced.
Safety standards require the appliance to be
earthed.
The manufacture accepts no liability for failure
to observe the above safety precautions.
45
PWA04GB
CS11
min 30 cm
max 100 cm
+ 2 m max
min 4 cm
Ø 21
Ø 18
Ø 18
Ø 21
A
B
C
This appliance complies with the following E.E.C. Directives:
- 73/23 of 19.2.73 (Low Voltage Directive) and subsequent modifications;
- 89/336 of 3.5.89 (Electromagnetic Compatibility Directive) and subsequent modifications.
Summary of Contents for ZKS 5620 I
Page 1: ...Geschirrsp ler ZKS 5620 I Dishwasher Bedienungsanleitung Instruction book...
Page 26: ......
Page 27: ......


