background image

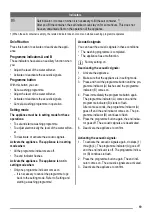
Manual adjustment

1

2

Turn the water hardness
dial to the position 1 or 2
(refer to the table).

Electronic adjustment

1. Activate the appliance.
2. Make sure that the appliance is in setting mode.
3. Press and hold the programme button until the pro-

gramme indicator (A) starts to flash and the pro-
gramme indicator (B) comes on.

4. When the programme indicator (B) goes off and the

end indicator starts to flash, press the programme
button. The programme indicator (A) continues to
flash. The electronic adjustment of the water soft-
ener is activated.

5. The end indicator shows the setting of the water

softener. The number of flashes of the end indica-
tor is the same as the water hardness level (exam-
ple: 5 flashes / pause / 5 flashes = level 5).

6. Press the programme button to change the adjust-

ment. Press the programme button again and
again to change the setting. When the programme
button is pressed, the level number increases.

7. Deactivate the appliance to confirm.

If the water softener is set electronically to the lev-
el 1, the salt indicator light stays off.

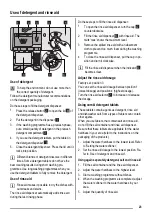
Use of dishwasher salt

1

2

3

Fill the salt container with
1 litre of water (only for
the first time you fill with
salt).

4

5

6

It is correct that water comes out from the salt
container when you fill it with salt.

22


Summary of Contents for KDT10000

Page 1: ...Gebruiks aanwijzing Afwasautomaat User manual Dishwasher Notice d utilisation Lave vaisselle Benutzer information Geschirrsp ler KDT10000...

Page 2: ...dat ze niet met het apparaat spelen Houd alle verpakkingsmaterialen uit de buurt van kinderen Gevaar voor verstikking of letsel Bewaar alle afwasmiddelen op een veilige plaats Laat kinderen de afwasmi...

Page 3: ...an het apparaat om scha de aan de hydraulische en elektrische onderdelen te voorkomen Belangrijk Houd u aan de instructies in de sjabloon die met het apparaat zijn meegeleverd Installatie van het appa...

Page 4: ...t weg Verwijder de deurvergrendeling Dit voorkomt dat er kinderen of huisdieren in het apparaat vast ko men te zitten Er bestaat gevaar voor verstikking Gooi het apparaat weg bij uw lokale afvalverwer...

Page 5: ...tellen De geluidssignalen in of uitschakelen Schakel het apparaat in Het apparaat staat in de instelmodus als Alle programmalampjes uit zijn Het eindindicatielampje knippert Schakel het apparaat in He...

Page 6: ...ebruik dit programma om het serviesgoed snel te spoelen Hierdoor kunnen voedselres ten niet aan het serviesgoed vastkoeken en ontstaan er geen vieze geurtjes in het appa raat U hoeft voor dit programm...

Page 7: ...erwijdert mineralen en zouten van de watertoevoer Deze mineralen en zouten kunnen schade aan het apparaat toebrengen Pas het niveau van de waterontharder aan als dit ni veau niet overeenstemt met de h...

Page 8: ...de wateront harder Het aantal keren dat het eindlampje knip pert is hetzelfde als het niveau van de wateronthar der bijvoorbeeld 5 keer knipperen pauze 5 keer knipperen niveau 5 6 Druk op de programma...

Page 9: ...deze stappen uit om het glansmiddeldoseerbakje bij te vullen 1 Om het glansmiddeldoseerbakje te openen draait u het dekseltje 4 naar links 2 Vul het glansmiddeldoseerbakje met glansmiddel 6 De markeri...

Page 10: ...t aanraken Leg kleine voorwerpen in de bestekmand Meng lepels met ander bestek om te voorkomen dat ze aan elkaar kleven Als u de voorwerpen in de manden plaatst zorg er dan voor dat het water alle opp...

Page 11: ...afwasprogramma gaat verder vanaf het punt waar het werd onderbroken Het afwasprogramma annuleren Als het afwasprogramma nog niet is begonnen kunt u de selectie veranderen Als u de selectie wilt verand...

Page 12: ...van het apparaat en het bedieningspaneel met een vochtige zachte doek Gebruik alleen neutrale schoonmaakmiddelen Gebruik geen schuurmiddelen schuursponsjes of op losmiddelen bijv aceton Problemen oplo...

Page 13: ...ging is aan Draai de waterkraan dicht en neem contact op met de service afdeling Het afwasprogramma start niet De deur van het apparaat is open Sluit de deur van het apparaat De stekker zit niet in he...

Page 14: ...hines Foutieve instelling waterhardheid Stel de waterontharder af Het deksel van het zoutreservoir is niet goed gesloten Zorg ervoor dat de dop van het zoutreservoir goed gesloten is De glazen en bord...

Page 15: ...fotovolta sche pa nelen en wind Milieubescherming Het symbool op het product of op de verpakking wijst erop dat dit product niet als huishoudafval mag worden behandeld maar moet worden afgegeven bij e...

Page 16: ...s in a safe area Do not let the children touch the detergents Keep children and pets away from the appliance when the door is open General safety Do not change the specifications of this appliance The...

Page 17: ...emperature is less than 0 C The manufacturer is not responsible for frost dam age Water connection Use new hoses to connect the appliance to the water supply Do not use used hoses Do not connect the a...

Page 18: ...t immediately a physician If the detergent gets into the mouth contact immedi ately a physician If the detergent gets into the eyes contact immedi ately a physician and clean the eyes with water Keep...

Page 19: ...iance The appliance is not in setting mode when Only one programme indicator comes on It is necessary to cancel the programme to go back to the setting mode Refer to Setting and starting a washing pro...

Page 20: ...Do not use detergent with this programme Rinse 1 With this programme you can wash a load with fresh soil It gives good washing results in a short time 2 This is the standard programme for test institu...

Page 21: ...als and salts can cause damage to the appliance Adjust the level of the water softener if this does not agree with the water hardness in your area Contact your local water authority to know the water...

Page 22: ...ivated 5 The end indicator shows the setting of the water softener The number of flashes of the end indica tor is the same as the water hardness level exam ple 5 flashes pause 5 flashes level 5 6 Pres...

Page 23: ...nser 6 with rinse aid The mark max shows the maximum level 3 Remove the spilled rinse aid with an absorbent cloth to prevent too much foam during the washing programme 4 To close the rinse aid dispens...

Page 24: ...er can touch all surfaces Put light items in the upper basket Make sure that the items do not move Water droplets can collect on plastic items and non stick pans 1 Arrange the service dishes and large...

Page 25: ...ashing programme If the washing programme has not started you can change the selection To change the selection while a washing programme operates it is necessary to cancel the programme 1 Open the app...

Page 26: ...panel with a moist soft cloth Only use neutral detergents Do not use abrasive products abrasive cleaning pads or solvents acetone What to do if The start of the appliance does not occur or it stops du...

Page 27: ...no damages The anti flood device is on Close the water tap and contact the service centre The start of the washing pro gramme does not occur The appliance door is open Close the appliance door The mai...

Page 28: ...ainer cap is not closed correctly Make sure that the salt container cap is closed correctly There are streaks milky stains or a bluish layer on glasses and dishes Rinse aid dosage is too high Decrease...

Page 29: ...ould be taken to the appropriate collection point for the recycling of electrical and electronic equipment By ensuring this product is disposed of correctly you will help prevent potential negative co...

Page 30: ...onne responsable qui puisse leur assurer une utilisation de l appareil sans danger Surveillez les enfants en veillant ce qu ils ne jouent pas avec cet appareil Ne laissez jamais les emballages la port...

Page 31: ...on le raccordement lectrique et hydraulique la mise en service et la maintenance de l appareil Vous viterez ainsi des risques mobiliers immobi liers et corporels Pendant l installation et avant toute...

Page 32: ...ntactez votre service apr s vente Utilisez exclusivement des pi ces d origine Pour mettre l appareil au rebut Pour viter tout risque corporel ou mat riel D branchez l appareil Coupez le c ble d alimen...

Page 33: ...l appareil Voyants de programme A et B Ces voyants remplissent les fonctions compl mentaires suivantes R gler le niveau de l adoucisseur d eau Activer ou d sactiver les signaux sonores Touche Programm...

Page 34: ...5 Appuyez nouveau sur la touche de programme le voyant Fin s teint Les signaux sonores sont d sactiv s 6 D sactivez l appareil pour confirmer Activation des signaux sonores 1 Pour activer de nouveau l...

Page 35: ...00 110 1 4 1 6 19 21 30 0 9 9 130 140 1 0 1 2 14 16 12 0 1 5 Ces valeurs de consommation peuvent changer en fonction de la pression et de la temp rature de l eau des variations d alimentation lectriqu...

Page 36: ...ez vous au ta bleau R glage lectronique 1 Activer l appareil 2 Assurez vous que l appareil est au mode r glage 3 Appuyez et maintenez la touche de programme jusqu ce que le voyant A commence clignoter...

Page 37: ...que la quantit n cessaire de produit de lavage Respectez les recommandations fournies par le fabri cant du produit de lavage qui figurent sur l emballage du produit Pour remplir le distributeur de pro...

Page 38: ...produits combinent les fonctions de produit de la vage de liquide de rin age et de sel r g n rant Cer tains types de pastilles contiennent d autres agents Lorsque vous utilisez des pastilles qui conti...

Page 39: ...tent pas retirez le s parateur 1 Placez les ustensiles dans l appareil de fa on ce que l eau puisse acc der toutes les surfaces 2 Pour les ustensiles longs rabattez les supports de tasses vers le haut...

Page 40: ...et maintenez la touche de programme jusqu ce que le voyant de programme s teigne et que le voyant Fin commence clignoter Avant de d marrer un nouveau programme de la vage v rifiez qu il y a du produi...

Page 41: ...lu tion au probl me reportez vous au tableau Si vous n y parvenez pas contactez votre service apr s vente Dans le cas de certaines anomalies les voyants cli gnotent pour indiquer un code d alarme Code...

Page 42: ...e linge en fonctionne ment Le programme reprend l o il s tait interrompu Si l anomalie se reproduit contactez votre service apr s vente Si d autres codes d alarme s affichent contactez le ser vice apr...

Page 43: ...dosage du liquide de rin age Il se peut que le produit de lavage soit en cause Utilisez une autre marque de pro duit de lavage La vaisselle est mouill e Vous avez s lectionn un program me de lavage s...

Page 44: ...et recyclage du mat riel lectrique et lectronique En proc dant la mise au rebut de l appareil dans les r gles de l art nous pr servons l environnement et notre s curit s assurant ainsi que les d chet...

Page 45: ...ngeleitet wer den die f r ihre Sicherheit verantwortlich ist Kinder m ssen beaufsichtigt werden so dass sie nicht mit dem Ger t spielen k nnen Halten Sie das Verpackungsmaterial von Kindern fern Ander...

Page 46: ...Fall an Ihren H ndler Entfernen Sie das gesamte Verpackungsmaterial bevor Sie das Ger t montieren und verwenden Der elektrische Anschluss die Klempnerarbeiten und die Montage des Ger ts d rfen nur vo...

Page 47: ...romnetz trennen m chten sondern ziehen Sie dazu immer direkt am Netzstecker Kundendienst Nur qualifizierte Fachkr fte d rfen an dem Ger t Re paraturarbeiten durchf hren Wenden Sie sich hierzu an den K...

Page 48: ...ufenden Sp lprogramms leuchtet die Kontrolllampe f r Salz nie auf auch wenn der Salzbeh lter leer ist Ein Aus Taste Dr cken Sie diese Taste um das Ger t ein und auszu schalten Programm Kontrolllampen...

Page 49: ...pe leuchtet Die Programm Kontrolllampe B blinkt weiterhin 5 Dr cken Sie die Programmwahltaste erneut die Programmende Kontrolllampe erlischt Die akusti schen Signale sind deaktiviert 6 Schalten Sie da...

Page 50: ...r mitgelieferten Brosch re Verbrauchswerte Programm Programmdauer in Minu ten Energie kWh Wasser in Litern 85 95 1 8 2 0 22 25 100 110 1 4 1 6 19 21 30 0 9 9 130 140 1 0 1 2 14 16 12 0 1 5 Druck und T...

Page 51: ...r Wasserh rtegrad TH mmol l Clarke Werte manuell elektro nisch 51 70 91 125 9 1 12 5 64 88 2 1 10 43 50 76 90 7 6 9 0 53 63 2 1 9 37 42 65 75 6 5 7 5 46 52 2 1 8 29 36 51 64 5 1 6 4 36 45 2 1 7 23 28...

Page 52: ...an Die Anzahl der Blinkzeichen der Programmende Kontrolllampe entspricht der Wasserh rtestufe Beispiel 5 Blink zeichen Pause 5 Blinkzeichen H rtestufe 5 6 Dr cken Sie zur nderung der Einstellung die...

Page 53: ...tel hinzu Gehen Sie wie folgt vor um den Klarsp lmittel Dosierer aufzuf llen 1 Zum ffnen des Klarsp lmittel Dosierers drehen Sie die Kappe 4 nach links 2 F llen Sie den Klarsp lmittel Dosierer 6 mit K...

Page 54: ...ste ein Ordnen Sie hohle Gef e z B Tassen Gl ser Pfannen mit der ffnung nach unten ein Achten Sie darauf dass sich kein Wasser in Beh l tern oder Sch sseln sammeln kann Stellen Sie sicher dass das Ges...

Page 55: ...Position befindet Ausw hlen und Starten eines Sp lprogramms Start eines Sp lprogramms 1 Schalten Sie das Ger t ein Stellen Sie sicher dass sich das Ger t im Einstellmodus befindet 2 Um ein Sp lprogram...

Page 56: ...n in das Ger t ein Achten Sie darauf dass das Filtersieb korrekt un ter den beiden F hrun gen D sitzt 6 Setzen Sie das Filtersys tem wieder ein Drehen Sie den Griff im Uhrzei gersinn bis er einrastet...

Page 57: ...laufschlauch ist verstopft Reinigen Sie den Filter Der Wasserzulaufschlauch ist nicht richtig angeschlossen Vergewissern Sie sich dass die Schlauchverbindung in Ordnung ist Der Wasserzulaufschlauch is...

Page 58: ...utzt nicht richtig montiert oder nicht korrekt eingesetzt Kontrollieren Sie ob die Filter sau ber richtig montiert und korrekt ein gesetzt sind Die Reinigungsmittelmenge war nicht ausreichend oder es...

Page 59: ...kanlagen oder Windkraft aufbereiten k nnen Sie durch den Anschluss des Ger ts an die Hei wasserversorgung Energie sparen Umwelttipps Das Symbol auf dem Produkt oder seiner Verpackung weist darauf hin...

Page 60: ...www electrolux com shop 156955390 A 232011...

Reviews: