


9. How to set up native virtual camera?
Tap the round white floating icon (draggable to anywhere on screen) to open the native
virtual camera set up menu,
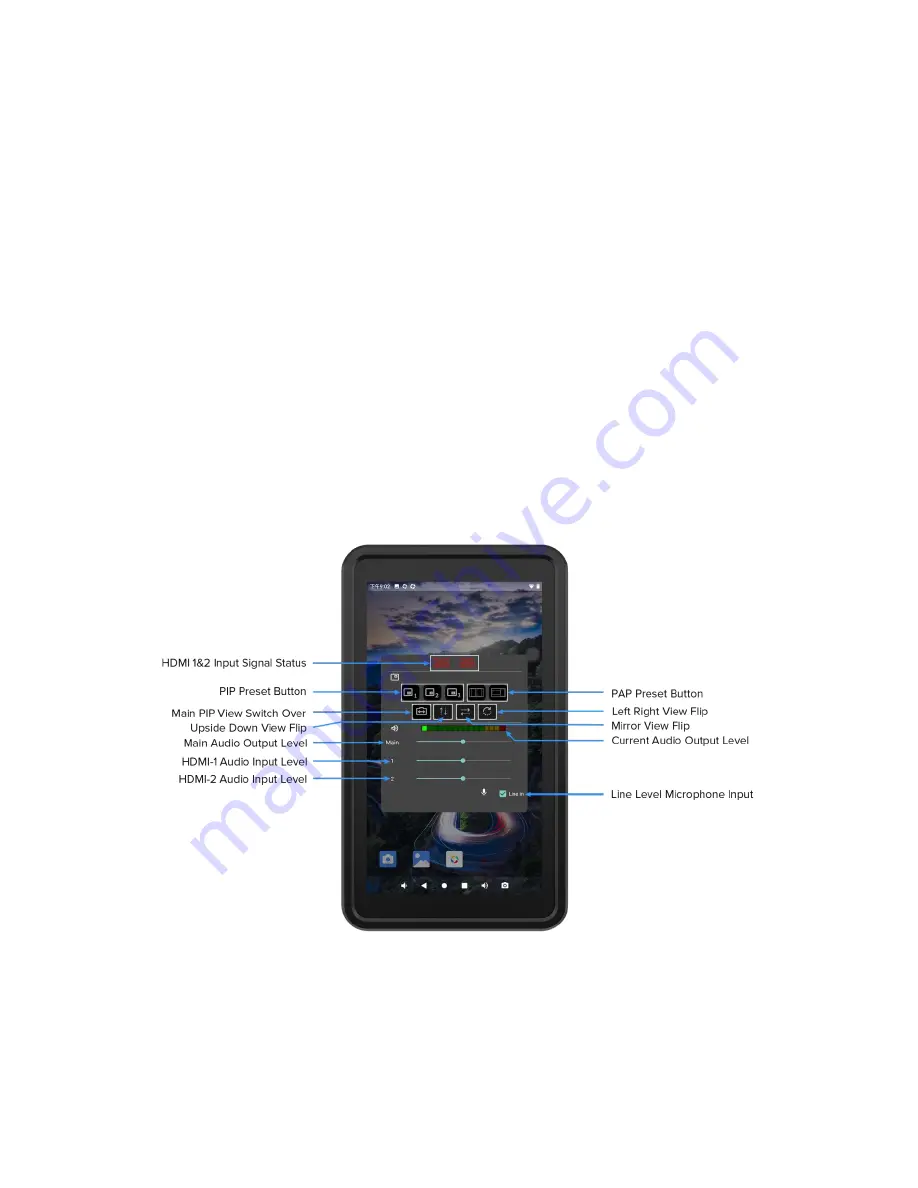
First row displays HDMI input signal status, Left is HDMI-1 & right is HDMI-2. Red indicates no
signal while green indicates signal.
Second row upper portion, first to third from the left are Picture-In-Picture PIP preset buttons,
first & second from the right are Picture-And-Picture PAP preset buttons.
Press and hold the PIP preset button to open the PIP setting menu, Drag the red frame to
move to desired position. Use button on the right hand side to toggle landscape and portrait
direction of PIP. Drag the green dot below to set PIP window size.
Second row lower portion, first from the left is main PIP view switch over, second from the
left is upside down view flip, first from the right is mirror view flip, second from the right is left
right view flip.
Indicator bar next to the speaker icon on the third row shows current audio output level.
Drag the green dot of the slider next to the Main sign to control main audio output level.
Drag the green dot of the slider next to the 1 sign to control HDMI-1 audio input level.
Drag the green dot of the slider next to the 2 sign to control HDMI-2 audio input level.
Check the Line in box on the bottom right corner when using line level microphone input.
Illustration 9
:
Native virtual camera


