background image

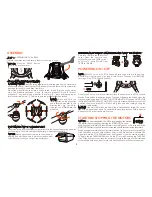
After sliding the icon, the remote control interface will display EXIT and [     ]. When 

the pilot tap the [     ]

 the icon will become [     ]. Then the journey function is 

paused. The copter will continue Journey if raising or lowering the Tilt stick (other 

stick controls will be disabled). When the pilot taps it again, the [      ] will become  

[     ], the copter will continue the journey function. The pilot can exit the function 

by switching mode.

NOTICE: When the Journey function is activated, the Journey distance can be set 

by the pilot.

NOTICE:  The  gimbal  camera  can't  be  controlled  when  journey  function  is 

activated and will remain the previous angle set before.

1/3

2

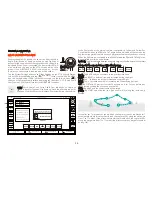
JOUR: Journey function enables Typhoon H to capture the perfect aerial 

selfie much easier. Depending on the pilot's desired setting, Typhoon H 

will go up, out and return.

Tap JOUR to enter the journey function. 
START: Press START, and slide the icon. Typhoon H will up and out and then take a selfie.

BACK: Tap BACK to return to the previous interface.

ORBIT ME: When Orbit Me is enabled, Typhoon H flies a circular path 

around the pilot.

Press ORBIT to enter the ORBIT ME function.

START: Press START, and slide the icon, push the aileron stick to the right or left, 

then Typhoon H will fly around the pilot with the distance between the start point 

and the pilot as the radius.

BACK: Tap BACK to return to the previous interface.

CENTER: Press CENTER to set the current flight position of Typhoon H as the center of a circle.
START: Press START, and slide the icon, push the aileron stick to the right or left, 

Typhoon H will fly around the circle center with distance between the Start point and 

the center point as the radius.
BACK: Tap BACK to return to the previous interface.

POI: Point of Interest allows the pilot to select a subject they would like 

to orbit and have Typhoon H orbit that subject autonomously.

11

Summary of Contents for Typhoon H

Page 1: ...USER MANUAL T1 0 ...

Page 2: ...ING THE ST16 AND THE CGO3 LANDING PROPORTIONAL CONTROL RATE SLIDER FLIGHT MODES TEAM MODE Wizard ST16 Wizard LED STATUS BINDING THE ST16 AND THE CGO3 BINDING THE Typhoon Wizard TO THE Typhoon H FLIGHT CONTROLS FLIGHT MODES CAMERA CONTROLS TAKING PHOTOS AND RECORDING VIDEO GPS FUNCTIONALITY DISABLING GPS COMPASS CALIBRATION LED STATUS INDICATIONS NOTICES AND WARNINGS GENERAL SAFETY PRECAUTIONS AND ...

Page 3: ...ote controller which features a 7 inch Android touchscreen that displays live footage of your flight To meet different needs for function and portability Typhoon H has two configurations the professional version with Intel RealSense equipped with a portable backpack and the advanced version with Sonar Collision Avoidance which features an upgrade path to the professional version with the purchase of...

Page 4: ...n System Video UHD 1 30 1 8000s Up to 1 Mile 1 6km 5 2Ghz 5 8Ghz 4K 30FPS Operating System Number of Channels Control Transmission Distance Range Video Link Frequency Band Android 16 Up to 1 Mile 1 6km Optimum Conditions 5 8GHz WiFi ST16 GROUND STATION Video Transmission Distance Range Optimum Conditions LCD Screen Size Built In Li ion Battery Voltage Capacity FCC Compliance Up to 1 Mile 1 6km CE ...

Page 5: ...arged not over discharged battery A solid green LED indicates the battery is fully charged WARNING All instructions and warnings must be followed exactly to prevent property damage and or serious injury as the mishandling of Li ion LiPo batteries can result in fire FOR THE ST16 GROUND STATION You can charge the ST16 battery by using supplied USB cable and inserting it into the USB port on the charg...

Page 6: ...turn on the ST16 Ground Station and allow it to boot up BEFORE turning Typhoon H on and ALWAYS turn Typhoon H off BEFORE turning off the ST16 Ground Station STARTING STOPPING THE MOTORS NOTICE Only with sustainable GPS or GPS being turned off the motors can be started or stopped by pressing the START STOP button Step back approximately 26 feet 8 meters behind Typhoon H Press and hold the START STO...

Page 7: ... Yaw Control Mode 2 and Mode 1 Throttle Altitude Control Mode 2 Elevator pitch control Mode 1 Take Still Photo Button Landing Gear Switch Sonar Obstacle Avoidance Switch Flight Mode Selection Switch Aileron Roll Control Mode 2 and Mode 1 Elevator Pitch Control Mode 2 Start Stop Video Recording Button Power Switch Mushroom Antenna Antenna Proportional Control Rate Slider Gimbal Tilt Control Slider ...

Page 8: ...tself back to the home point and land NOTICE After the copter takes off the pilot can retract the landing gear by switching up the Landing Gear Switch on the top right side of the ST16 Ground Station Make sure to flip the switch to the downward position when landing WARNING Always land as soon as possible after the first low level voltage battery warning or land immediately after the second level lo...

Page 9: ...ME Watch Me enables the camera to keep tracking the remote controller no matter where and how it moves as the camera can automatically tilt its angle according to the controller Usually the default function under Smart Mode is Follow Me Watch Me function can be switched to by following steps In Watch Me the pilot will always be kept in the frame wherever they move Watch Me Follow Me Button When in...

Page 10: ...ion at the current height when RC signal is lost CAUTION You must be certain there are no obstacles in the Return to Home flight path otherwise Typhoon H may come into contact with them and crash While Typhoon H is in Home Mode you will have a limited amount of directional control To help avoid obstacles we strongly recommend to switch to Smart or Angle Mode then you can switch back to Home Mode WA...

Page 11: ... enter another interface displaying four functions CCC Curve Cable Cam Journey POI Point of Interest and ORBIT ME functions TS01 TS02 TS03 TS04 00 35 25 D R 0 System Setting Channel Setting Model Select 9 12 6V FSK WIFI Roll 120 Pitch 0 300M 125km h TS05 TS06 TS07 TS08 GPS VOL FSK WiFi CHA POS CHA POS 6 7 1 2 3 4 5 CCC Curve Cable Cam Curve Cable Cam allows you to create an invisible route for Typ...

Page 12: ...JOUR to enter the journey function START Press START and slide the icon Typhoon H will up and out and then take a selfie BACK Tap BACK to return to the previous interface ORBIT ME When Orbit Me is enabled Typhoon H flies a circular path around the pilot Press ORBIT to enter the ORBIT ME function START Press START and slide the icon push the aileron stick to the right or left then Typhoon H will fly a...

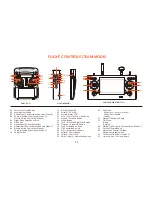
Page 13: ...LOT WIZARD CAMERA OPERATOR ST16 Aircraft Mode LED Wizard GPS LED Aircraft Status LED Turn Fly to the Left Side Button Ascend Forward Button Magic Button Turn Fly to the Right Side Button Descend Backward Button Tilt Control Button down Tilt Control Button up Start Stop Motors Button Wizard Power Button Wizard Power LED Smart Angle Home Mode Switch 11 12 13 14 15 16 17 18 19 20 21 22 23 24 Pan Mode...

Page 14: ...op up warnings alerts STEP 4 Select the existing model you would like to bind to for example Typhoon or create a New Model and if required press OK to bypass any pop up warnings alerts STEP 5 Tap the Flight Settings button and if required press OK to bypass any pop up warnings alerts STEP 6 Tap the Bind button and select the SR24_XXXXX receiver listed in the column under Model then tap OK after th...

Page 15: ... position for the lowest control rates best for first time pilots and required when flying between 5000 feet and 8000 feet Above Mean Sea Level and use the rabbit position for the highest control rates best for experienced pilots and can only be used when flying below 5000 feet MSL Or use a position in between if you prefer SMART MODE When the Flight Mode selection switch is in the top position Typho...

Page 16: ...e and Typhoon H loses GPS signal lock it will switch to Angle Pilot Mode automatically This is why we strongly recom mend learning to fly in Angle Pilot Mode as soon as possible Otherwise if you lose GPS signal lock and are not able to properly control Typhoon H in Angle FOLLOW ME FUNCTION WATCH ME FUNCTION 15 Pilot Mode the aircraft may crash or even fly away IMPORTANT NOTE Crash damage and fly away...

Page 17: ...alization completes Wait a few seconds for the camera to align STEP 2 Tap the settings icon and then switch from single mode to team mode STEP 3 When the Main LED Status Indicator starts to blink the copter enters binding mode STEP 4 Press and hold the Power Button of the Wizard until the Aircraft Mode LED glows solid blue Do not release the Power Button until hearing two beeps from the aircraft t...

Page 18: ...n as possible after the first low level voltage battery warning or land immediately after the second level low voltage battery warning by the Motor LED Status Indicators flashing rapidly Wizard LED STATUS Aircraft Mode LED Wizard GPS LED Aircraft Status LED Wizard Power LED GPS Locked LED solid green TheCommunicationMal functionBetweentheWizard andtheAircraft LEDsolidred GPS Loss of Aircraft LED off...

Page 19: ...de When Angle Mde is enabled the Aircraft Mode LED on the Wizard will glow solid purple Inthismode theaircraftwillmoveinthedirectiontheTyphoonWizard iscontrolledrelative tothefront noseof theaircraft Theaircrafthasnofunctionof FollowMeorWatchMe NOTICE In this mode the Point To Fly Function can t be activated IMPORTANT NOTICE In Angle Mode it is not suggested travelling further than 656 ft 200m The...

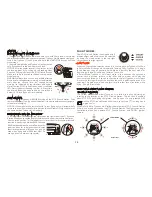
Page 20: ...control 2 TILT Velocity Mode Use the Tilt Control Stick to control 3 PAN Follow Mode The pan direction can t be controlled 4 PAN Follow Controllable The gimbal camera will follow in the pan direction when aileron stick is not pushed Meanwhile the gimbal camera can be controlled by the aileron stick 5 PAN Global Mode Use the aileron to control GIMBAL CAMERA PAN CONTROL There is a gimbal pan mode sw...

Page 21: ...like white balance exposure shutter speed and ISO etc STEP 3 Press and press Video Settings different video resolutions are available CAMERA PARAMETER SETTING In the menu the user can choose different mode based on the situation The camera will adjust parameter according to the light automatically when tapping When tapping the button the parameter at that time will be locked In the menu the exposu...

Page 22: ...mart Mode and Home Mode will work again WARNING Loss of GPS signal lock may result in a crash or even a fly away IMPORTANT NOTE Crash damage and fly aways are NOT covered under warranty NO FLY ZONES With a suitable GPS signal lock it will not be possible to start the motors takeoff or fly Typhoon H in the No Fly Zones within a 4 mile 6 4 kilometer radius of most major airports DISABLING GPS WARNING S...

Page 23: ... then turn it forward as shown by the red arrow above until the two LEDs turn off CAUTION Do not calibrate the compass in parking garages close to buildings or near roads with a metal core For optimum performance only calibrate Typhoon H in open spaces far away from power lines and other metal structures or concrete buildings NOTICE Be sure to perform the compass calibration procedure at least 11 ...

Page 24: ...er Calibration Mode Entered Accelerometer Calibration started Calibration failed CGO3 CAMERA LED STATUS INDICATIONS Without T card or T card Memory Full WiFi Error WiFi Initialized WiFi Connected Recording Video or Taking Still Photos Blinks red green and blue 2 times per second Pulses red 3 times per second Blinks orange very rapidly 10 times per second Blinks red and white rapidly 5 times per se...

Page 25: ...uct in the intended manner as described in the quick start guide and instruction manual can result in damage to the product property and or cause serious injury A Radio Controlled RC multirotor aircraft APV platform drone etc is not a toy If misused it can cause serious bodily harm and damage to property WARNING As the user of this product you are solely and entirely responsible for operating it i...

Page 26: ...the temperature range should be from approximately 40 120 F 5 49 C Do not store the battery or aircraft in a hot garage car or direct sunlight If stored in a hot garage or car the battery can be damaged or even catch fire Never leave batteries chargers and power supplies unattended during use 25 Always operate your aircraft starting with a fully charged battery Always land as soon as possible afte...

Page 27: ...r power supply malfunctions IMPORTANT NOTE It s safer and better for the longevity of the battery to store it only partially charged for any length of time Storing the battery approximately 50 charged is typically best however it will take some careful management of the charge time and the use of a volt meter to achieve this voltage If you have the equipment and skills to achieve the 50 charge lev...

Page 28: ...f the main components exhibit visible damage defects or missing parts Damage and or injury as well as violation of legal regulations caused by operating the model in a magnetic field e g high voltage lines electricity transformer stations radio towers mobile phone masts etc a strong wireless signal environment no fly zones poor visibility and in the event of vision impairments or other impacts on ...

Page 29: ...tion between the equipment and receiver Connect the equipment into an outlet on a circuit different from that to which the receiver is connected Consult the dealer or an experienced radio TV technician for help RF EXPOSURE WARNING This equipment must be installed and operated in accordance with provided instructions and the antenna s used for this transmitter must be installed to provide a separat...

Reviews: