

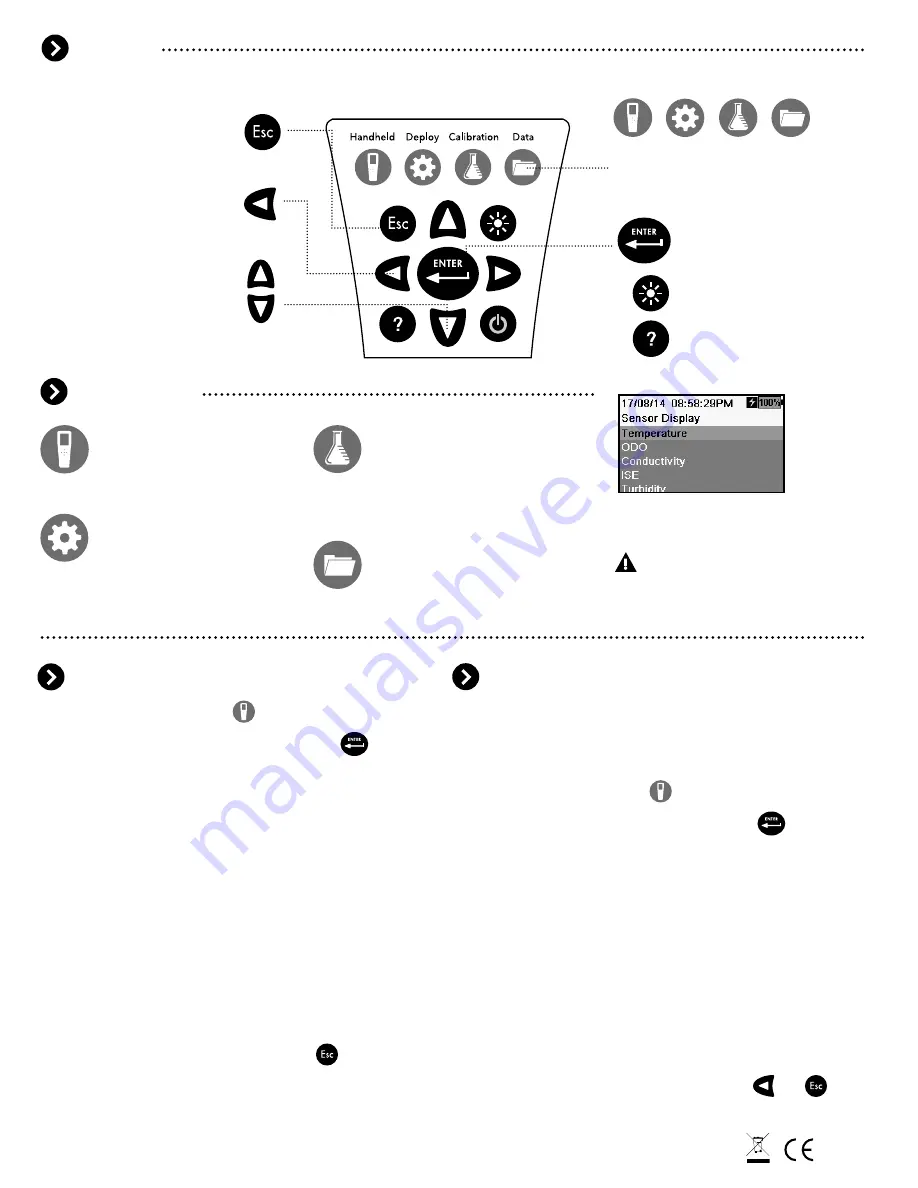
The EXO Handheld has a menu-based interface:
1. Press the Handheld key.
2. Highlight
Display
and press the Enter key.
3. Highlight
Date/Time
and press the Enter key.
4. Highlight
Date Format
and press the Enter key.
Select the desired date format, and then press the
Enter key.
5. Highlight
Date
and press the Enter key. Use the
keypad to enter the correct date, highlight
ENTER
on
the display, and press the Enter key.
6. Highlight Time Format and press the Enter key.
Select the desired time format, and then press the
Enter key.
7. Highlight
Time
and press the Enter key. Use the
keypad to enter the correct time, highlight
ENTER
on
the display, and press the Enter key.
8. Press Esc to return to the Dashboard.
Parameters that appear in the Dashboard for each sensor
can be selected under the Handheld Display menu.
The units chosen to be displayed will also appear in logged
data files. To set the displayed measurement units:
1. Press the Handheld key.
2. Highlight
Display
and press the Enter key.
3. Highlight
Units
and press the Enter key .
4. Select the units you would like to display in the
Dashboard by highlighting them and pressing the Enter
key. Check boxes indicate that more than one
measurement unit can be displayed for the sensor.
(e.g. Dissolved oxygen can be displayed as DO mg/L
and DO %).
Circles indicate that only one measurement unit
can be displayed for the sensor (e.g. Temperature can’t be
displayed as °C and °F).
5. Press the left arrow key to return to the previous screen
or press Esc to return to the Dashboard.
Dashboard:
View and log live data
from the sonde.
The Dashboard is the main display
and does not have a hot key.
or
item# 599973REF dwg# 599973
April 2016 Rev A
YSI
1725 Brannum Lane
Yellow Springs, OH 45387
(800) 765-4974, (937) 767-7241
YSI.com
Navigation
Menu Functions
Setting Date and Time
Setting Displayed Units
Keypad
Press the Esc key to return to
the Dashboard screen or to exit
an alpha/numeric entry screen.
Brightness Control
Activate Help Menu with
built-in product manual.
Press the hot keys to access
the Handheld, Deploy,
Calibration, and Data menus.
To navigate through the menus,
use the up and down arrow
keys to highlight a desired menu
option with the highlight bar.
Press the Enter key to
choose a selection.
Deploy:
View and edit a
sonde’s deployment settings
or check the status of a
current deployment.
Use the left arrow key to
go back one screen.
Handheld:
Edit handheld
settings such as date/time,
displayed measurement units,
and logging options.
Calibration:
Calibrate sensors
installed in the sonde, check the
system’s SmartQC status, and
setup calibration reminders.
Note:
User calibration is highly
recommended before use.
Data:
View, delete, or backup
logged data or calibration
records stored on the handheld;
transfer data from the
connected sonde.


