


17
POINTING THE WIRELESS 6-IN-1 SENSOR TO SOUTH
The outdoor 6-in-1 sensor is calibrated to point to North for the maximum accuracy . However,
for the user's convenience (e .g . users in the Southern hemisphere), it is possible to use the
sensor with the wind vane pointing to South .
1 . Install the 6-in-1 wireless sensor with its wind meter end pointing to South . (Please refer to
INSTALLATION OF THE WIRELESS SENSOR
for mounting details)
2 . In normal mode of the console, press and hold
[ INDEX ]
key for 8 seconds to enter into the
UV index calibration mode, then press
[ INDEX ]
key again until the “N” icon appears on
the weekday location to enter into the sensor orientation mode
3 . Use
[ GRAPH / ]
or
[ HISTORY / V ]
key to change to lower part (Southern Hemisphere) .
4 . Press
[ INDEX ]
key to confirm and exit.
NOTE:
-Changing the hemisphere setting will automatically switch the direction of the moon phase on
the display .
-Pointing to South allows maximum sunlight on the solar panel, especially during winter
season in Southern Hemisphere
DATA LOG
The console automatically stores the weather data in its data logger (default every 30 minutes),
and user can export these data through the PC software* (*Please consult your local distributor
for the PC software download) .
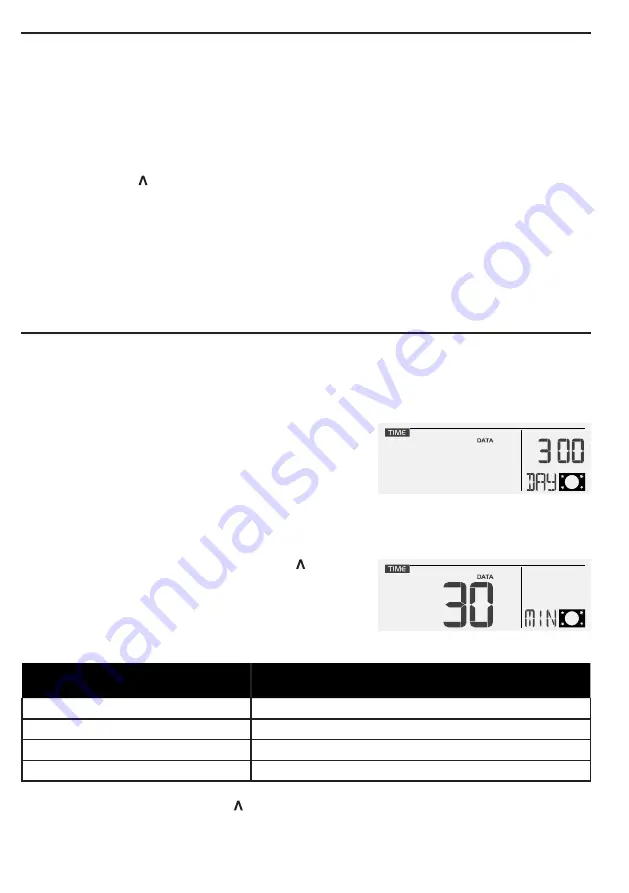
To check data logger memory
Press the
[ DATA ]
key to briefly review the remaining
number of days the console is able to record based on its
current free memory available ( e .g . 300 DAY) . The data
logger will stop recording new data once its memory is full .
To change data interval and clear data
In normal mode, press and hold the
[ DATA ]
key for 2 sec to enter data logger setting mode .
1 . To change data interval: Press
[ GRAPH / ]
or
[ HISTORY / V ]
key to select frequency of data
recording (5/15/30/60 minutes), then press
[ DATA ]
to confirm.
Below table shown the number of days memory will allow for records:
INTERVAL (minutes)
NO. OF DAYS AVAILABLE FOR DATA LOGGING WITH
MEMORY AVAILABLE
5
50
15
150
30 (DEFAULT)
300
60
600
2 . To clear data: Press
[ GRAPH / ]
or
[ HISTORY / V ]
key to select clear all data or not,
then press
[ DATA ]
to confirm and exit setting.


