background image

YO Ambience

User guide

v1.2

page 21/27

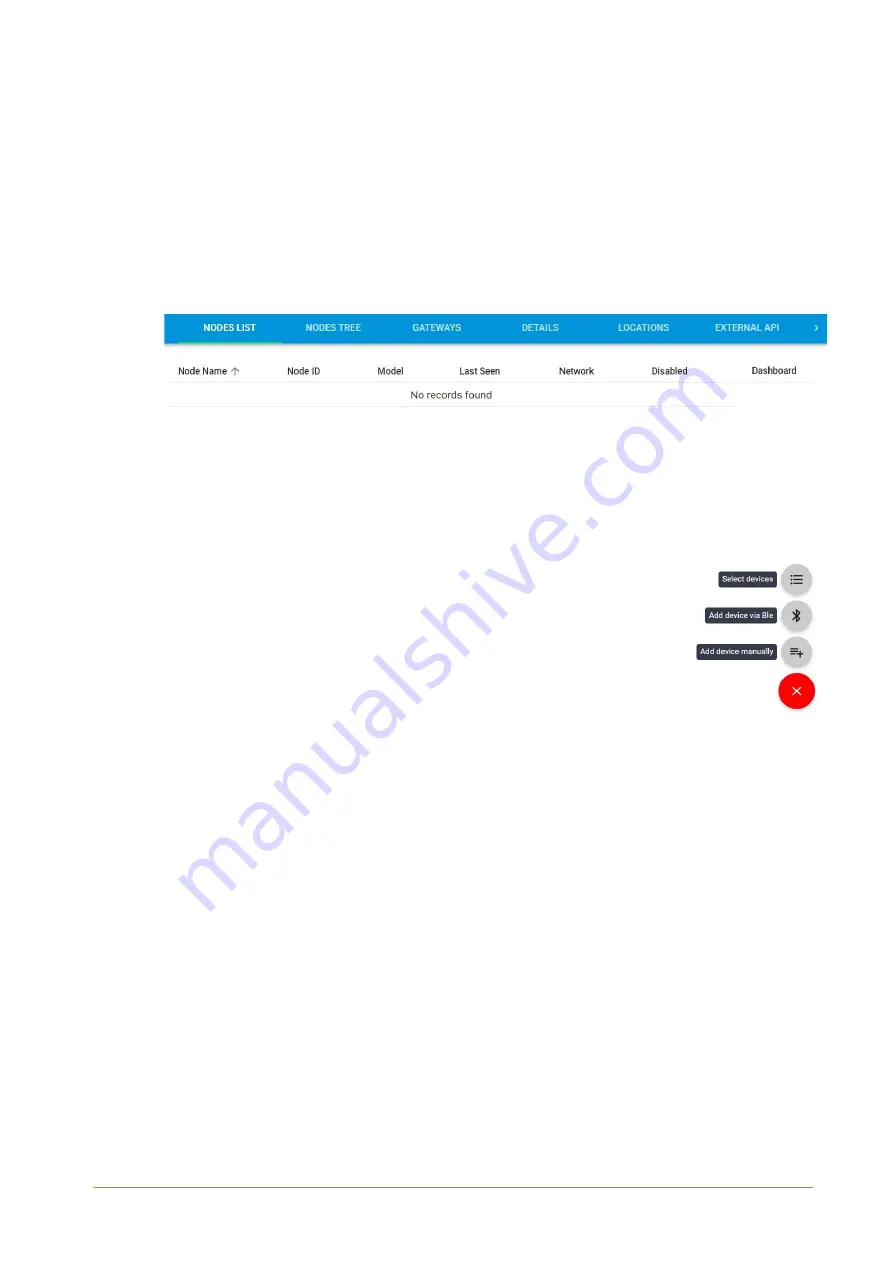
4. Proceed to the application by clicking its name on the list, then press the ‘

’ button to add a

node. Click ‘

Add manually

’. Set the node’s ‘Name’ and ‘Description’ fields, and fill in ‘Node ID’

(

deveui

) and ‘OTAA Key’ (otaa section

– appkey

).

All device identifiers are provided by

Yosensi Support when you order the nodes.

Select a model that is compatible with your device — this choice affects the number of charts
and data source (YO Ambience). You can also set the node’s ‘Location’, if locations have been
pre-defined. If you haven’t defined a suitable location, leave this field set at <None>.

Figure 19

Adding node to the Yosensi Management Platform section view.

www.yo

sensi

.

io

Summary of Contents for YO Ambience

Page 1: ...YO Ambience User guide v1 0...

Page 2: ...YO Ambience User guide v1 2 page 2 27 Release notes Released Version Key changes 25 08 2023 1 0 Initial release www yosensi io...

Page 3: ...ery condition 8 Installation 9 Package contents 9 Safety precautions 9 Installation guide 10 Operation 14 IoT system components 14 Device configuration 15 Configurable parameters 15 Parameters descrip...

Page 4: ...and maintaining optimal indoor environments enhancing occupant comfort productivity and overall well being Additionally it is a wireless battery operated device Figure 1 Device top view Device sticker...

Page 5: ...e device Specifications Physical Figure 3 Dimensions of the device PHYSICAL SPECIFICATION Dimensions Height 25 5 mm Width 86 mm Depth 86 mm Colour white Mounting method Horizontal Vertical can be scre...

Page 6: ...range Accuracy Temperature 40 to 125 C 0 2 C 5 to 60 C Relative humidity 0 to 100 2 20 to 80 CO2 0 to 40 000 ppm 40 ppm 5 from 400 ppm to 5000 ppm Recommended working conditions 10 to 60 C Illuminance...

Page 7: ...to determine if there is a proper amount of light in the room Figure 6 Example of illuminance monitoring chart CO2 sensor The CO2 level is a critical indoor environment parameter because it affects h...

Page 8: ...ttery voltage is used to monitor the device condition and spot anomalies e g a sudden drop or determine the current condition based on the voltage drop over time compared with the initial voltage rati...

Page 9: ...tions near inside electronics Be careful while handling the device dropping it may cause damage that will affect the sensors and other electronics inside When installing the device on the wall remembe...

Page 10: ...YO Ambience User guide v1 2 page 10 27 Installation guide 1 To open the enclosure peel off the lower part as shown in Figure 9 Figure 9 Device opening instructions www yosensi io...

Page 11: ...the polarity indicated on the battery holder Figure 10 Device with placed batteries 3 There are two ways to mount the device into a wall A Install the bottom part of the enclosure and mount four scre...

Page 12: ...nting screws into the centre of the bottom case Then angle the bottom of the enclosure and turn it clockwise Figure 12 Mounting the device using two screws at an angle Figure 13 Mounting the device us...

Page 13: ...YO Ambience User guide v1 2 page 13 27 4 Place the upper part of the device enclosure on the bottom part mounted on a wall Figure 14 Placing device on the wall www yosensi io...

Page 14: ...way 2 Gateway device similar to routers equipped with a LoRa concentrator that receives LoRa packets and sends them to the Internet connected server 3 Server in most cases a cloud based service where...

Page 15: ...neric bluetooth settings device dynamic individual configuration for a specific device this section s structure differs for each device Sample configuration file for the YO Ambience device info devmod...

Page 16: ...EUI Extended Unique Identifier 8 B HEX predefined R W appeui Application EUI 8 B HEX predefined R W appkey Application Key 16 B HEX predefined R W trials Join request trials 1 9 3 R W lorawan abp dev...

Page 17: ...also be changed if needed interval determines the interval for sending broadcast packets used to connect to every BLE receiver around the device subband used for setting the communication frequency s...

Page 18: ...910 3 911 7 MHz channels 40 47 6 Sub band 7 911 9 913 3 MHz channels 48 55 7 Sub band 8 915 5 914 9 MHz channels 56 63 8 AU915 Sub band 1 915 2 916 6 MHz channels 0 7 1 2 R W Sub band 2 916 8 918 2 M...

Page 19: ...rent buttons Configure here you can change and upload the device parameters Update firmware here you can update the firmware to version 3 4 0 and newer Recover device this section restores the firmwar...

Page 20: ...ensi io The application is a representation of each system and together with the node definitions is created by customers The basic integration of a node into the Yosensi Management Platform is descri...

Page 21: ...section appkey All device identifiers are provided by Yosensi Support when you order the nodes Select a model that is compatible with your device this choice affects the number of charts and data sour...

Page 22: ...Node configuration Click on the link in the Node Name column Go to the KEYS tab and switch LoRa Type from OTAA to ABP and fill in the blank spaces then press update The identifiers Device Address deva...

Page 23: ...pplication click the bottom right button Fill in the Name and Description fields and select the Application Profile which is the region definition 4 Proceed to the application by clicking its name on...

Page 24: ...f YO Ambience payload with description 02 7D 00 00 08 00 01 10 80 0D 00 01 01 06 10 00 00 3B 6C 00 01 02 F3 1A 00 01 01 39 Payload header First measurement battery voltage 0x02 0x7D 0x00 0x00 0x08 0x0...

Page 25: ...YO Ambience User guide v1 2 page 25 27 Compliance statements www yosensi io...

Page 26: ...YO Ambience User guide v1 2 page 26 27 www yosensi io...

Page 27: ...YO Ambience User guide v1 2 page 27 27 www yosensi io...

Reviews: