5. CHANGING SETTINGS
IM 2493WVP-1
15
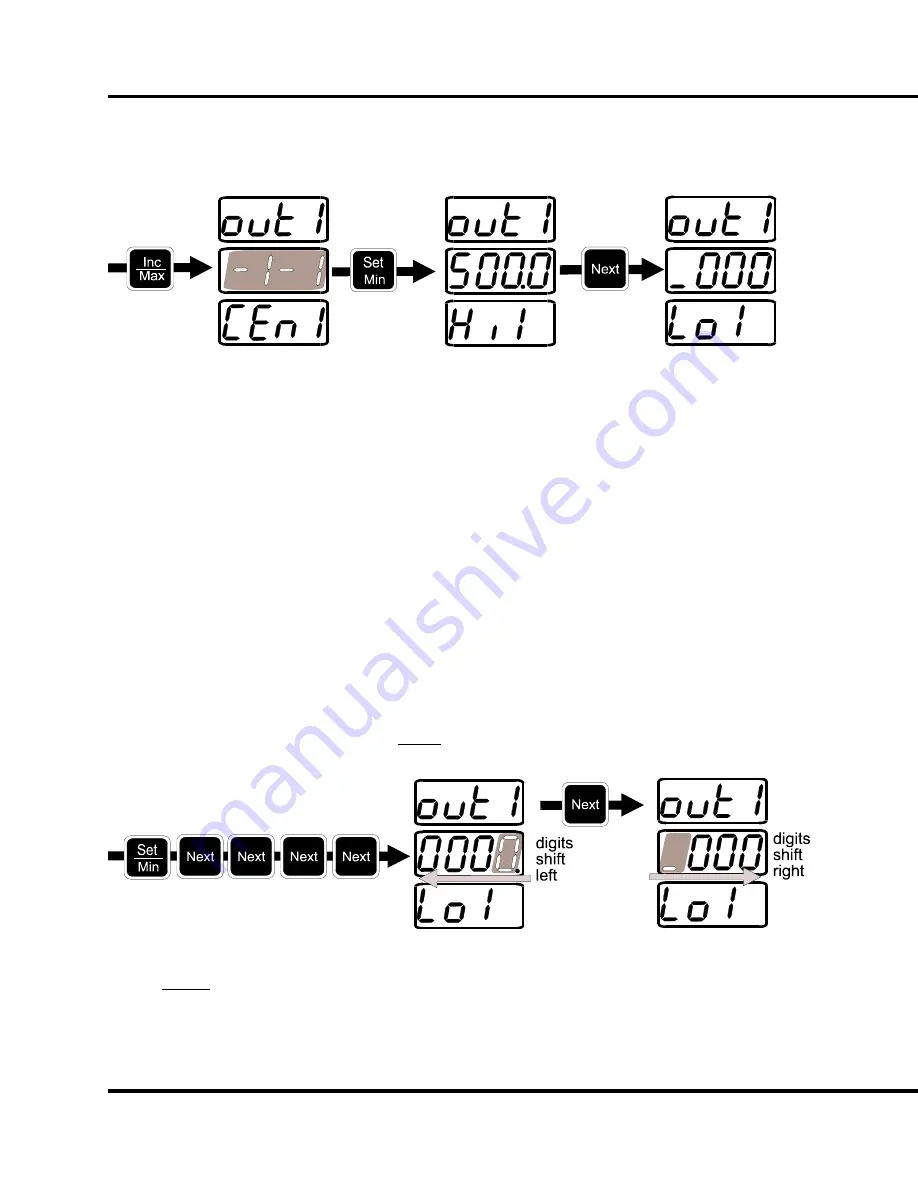
Changing the HI value is done in the same manner as changing the primary for
PT or CT. First the digits, then the decimal point, then the multipliers
(Kilo/Mega), and finally confirm the new setting.
After pressing Set to confirm the new setting, the LO1 value will be displayed.
To enable you to set either a negative or positive value for LO1 there is a “sign
dash”. If the bottom segment is displayed it means the value is positive. The
middle segment means the value is negative. The sign dash is changed with the
Inc button, just like the other parts of the value. The value still has four digits of
precision, but now one of them is “hidden”. When the third digit is blinking, press
Next and the digits will shift left revealing the fourth digit. Now the sign dash is
hidden and the fourth digit is blinking. Another press of Next will make the digits
shift back right and the sign dash will be visible and blinking.
This shift will also occur when setting the decimal point. When the decimal point
is with the first, second or third digit the fourth digit will not be visible. When the
decimal point is with the fourth digit the sign dash will not be visible.
The rest of the procedure for changing LO1 is identical to the procedure for HI1.
After reaching the confirm mode of LO1, pressing Set will save all values for
Out1 and move you to Out2. None of your changes will be saved until you reach
this point. If you only wish to change the HI value, you still must go through the
LO steps to save your changes.
OUT2: The only difference between Out1 (watts) and Out2 (VARs) is that there
is no sign dash for LO2. Instead, after setting the multiplier for HI2 or LO2, the
Lead/Lag lights on the bottom display will start blinking. Both the HI2 and LO2
values can be set as either Lead or Lag. All other steps are the same as Out1.


