


4
A
12PCS
5
2PCS
6
2PCS
5
B
12PCS
C
4PCS
7
2PCS
8
2PCS
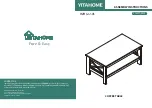
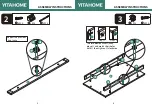
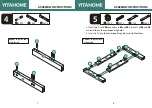
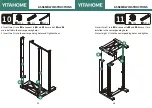
ASSEMBLY INSTRUCTIONS
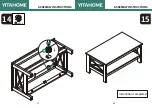
ASSEMBLY INSTRUCTIONS
A
A
A
A
6
6
7
5
5
8
A
A
A
A
B
B
B
B
C
C
1
2
3
4
5
6
7
8
9
10
11
12
13
14
15
16
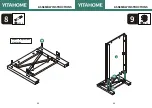
1.Insert two
Ⓒ
into
❽
to connect to
❺
and
❻
. Ensure Ⓐ of
❺
and
❻
are installed in the corresponding holes.
2.Insert six
Ⓑ
into the corresponding holes and tighten them.
Repeat the previous
step twice
Repeat the previous
step twice


