background image


2


Contents: 

Safety and Regulatory Information 

Basic Introduction 

1. Overview 

2. Accessory 

2.1 Charging by AC adapter 

2.2 Charging by Car Charger 

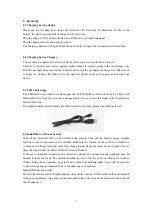
2.3 USB Cable usage 

2.4 Install the Car Mount System 

 Main function introduction 

1. Starting up 

2. Power saving 

3. Main Functions 

3.1 Navigation 

3.2 Media 

3.2.1 Music 

3.2.2 Photo 

3.2.3 Ebook 


Federal Communications Commission (FCC) Statement 

You are cautioned that changes or modifications not expressly approved by the part responsible for compliance 
could void the user's authority to operate the equipment .

 
FCC- Class B 
This equipment has been tested and found to comply with the limits for a Class B digital device, pursuant to part 15

of the FCC Rules. These limits are designed to provide reasonable protection against harmful interference in a communications. 
However, there is no guarantee that interference will not occur in particul ar installation. If this equipment does cause harmful

interference to radio or television reception, which can be determined by turning the equipment off and on, the user is

encouraged to try to correct the interference by one or more of the  following measures: 

- Reorient or relocate the receiving antenna.
- Increase the separation between the equipment and receiver.
- Connect the equipment into an outlet on a circuit different from that to which the receiver is connected.
- Consult the dealer or an experienced radio/TV technician for help.

3.2.4 Video 

3.3 Bluetooth 

3.3.1 Phone keypad 

3.3.2 Call Record 

3.3.3 Pair 

3.3.4 Dun Setting 

3.3.5 Attribute 

3.3.6 Pair Devices 

3.3.7 IE Explorer 

3.4 System setting 

3.4.1 Backlight 

3.4.2 System Info 

3.4.3 Language 

3.4.4 Power 

3.4.5 Volume 

3.4.6 Date Time 

Summary of Contents for G79C001

Page 1: ...1 User Manual YF INTERNATIONAL LIMITED...

Page 2: ...asonable protection against harmful interference in a communications However there is no guarantee that interference will not occur in particular installation If this equipment does cause harmful inte...

Page 3: ...ll traffic signs and local regulations along the roads GPS satellite signals cannot pass through solid materials except glass When you are inside a tunnel or building GPS position is not available A m...

Page 4: ...view A Power Switch B Light Sensor Optional C MIC D SD card E Charger Jack F Earphone Jack G USB Connector H Charger Indicator Light I Speaker J Cradle Connector K Reset Key L Charger Jack M USB Conne...

Page 5: ...ive Sync or as a mass storage media You can select the mode in the System Sys Info USB menu For upgrade and more information about Microsoft Active Sync please visit Microsoft web 2 4 Install the Car...

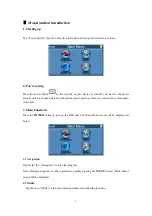
Page 6: ...nd state and the system stops operation Once you turn on the system again it resumes 3 Main Functions Press the POWER button to turn on the GPS unit The Main Menu screen will be displayed as below 3 1...

Page 7: ...ace 2 Double tap your desired file and enter into the following interface A return to the Media menu B volume control C return to previous menu D next E previous F stop G speed bar H pause play 3 2 2...

Page 8: ...ous menu D current picture name E Zoom in F Zoom out G full screen H rotate Tips Tap FULL SCREEN button it will display in full screen size When playing in full screen double press the screen again it...

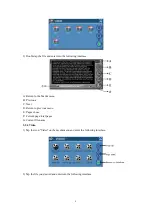
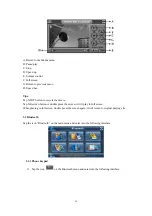
Page 9: ...o the Media menu B Previous C Next D Return to previous menu E Pages chose F Current page total pages G Current file name 3 2 4 Video 1 Tap the icon Video on the media menu and enter the following int...

Page 10: ...vie Tap full screen button or double press the screen it will play in full screen When playing in full screen double press the screen again it will return to original playing size 3 3 Bluetooth Tap th...

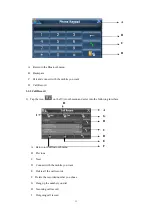
Page 11: ...p the icon on the Bluetooth menu and enter into the following interface A Return to the Bluetooth menu B Previous C Next D Connect with the mobile you want E Delete all the call records F Delete the r...

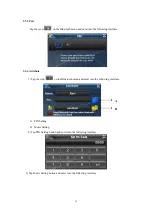
Page 12: ...owing interface 3 3 4 Attribute 1 Tap the icon on the Bluetooth menu and enter into the following interface A PIN Setting B Music Setting 2 Tap PIN Setting button and enter into the following interfac...

Page 13: ...e icon on the Bluetooth menu and enter into the following interface A Return to the Bluetooth menu B Next C Delete all the Devices information D Disconnect the Devices you chose E Connect the Devices...

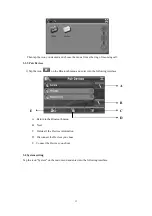
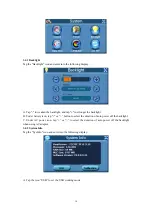
Page 14: ...e backlight B Under battery icon tap or button to select the duration of auto power off the backlight C Under AC power icon tap or to select the duration of auto power off the backlight when using AC...

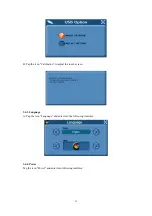
Page 15: ...15 B Tap the icon Calibration to adjust the touch screen 3 4 3 Language A Tap the icon Language and enter into the following interface 3 4 4 Power Tap the icon Power and enter into following interface...

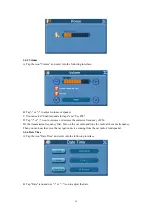
Page 16: ...on to increase or decrease the emissive frequency of FM Fix the transmission frequency first Turn on the car radio and tune the radio at the same frequency Then you can hear the voice the navigation d...

Page 17: ...on and use or icon to adjust the time C Tap Time Zone icon and use or icon to adjust the time zone This document is for guidance only and does not form part of any contract and may be subject to chang...

Reviews: