background image

SMARTBENCH V1.0


Unit 1 Westfield Court | Barns Ground | Clevedon | Bristol | BS21 6FQ | UK 

Tel No: +44 1275 390721 | Email[email protected] 

18


Set Z datum (start point for the job) 

Once the X/Y datum is defined, the tip of the router cutter needs to be registered relative 
to the material. This is referred to as setting the Z datum, and should be done near the X/Y 
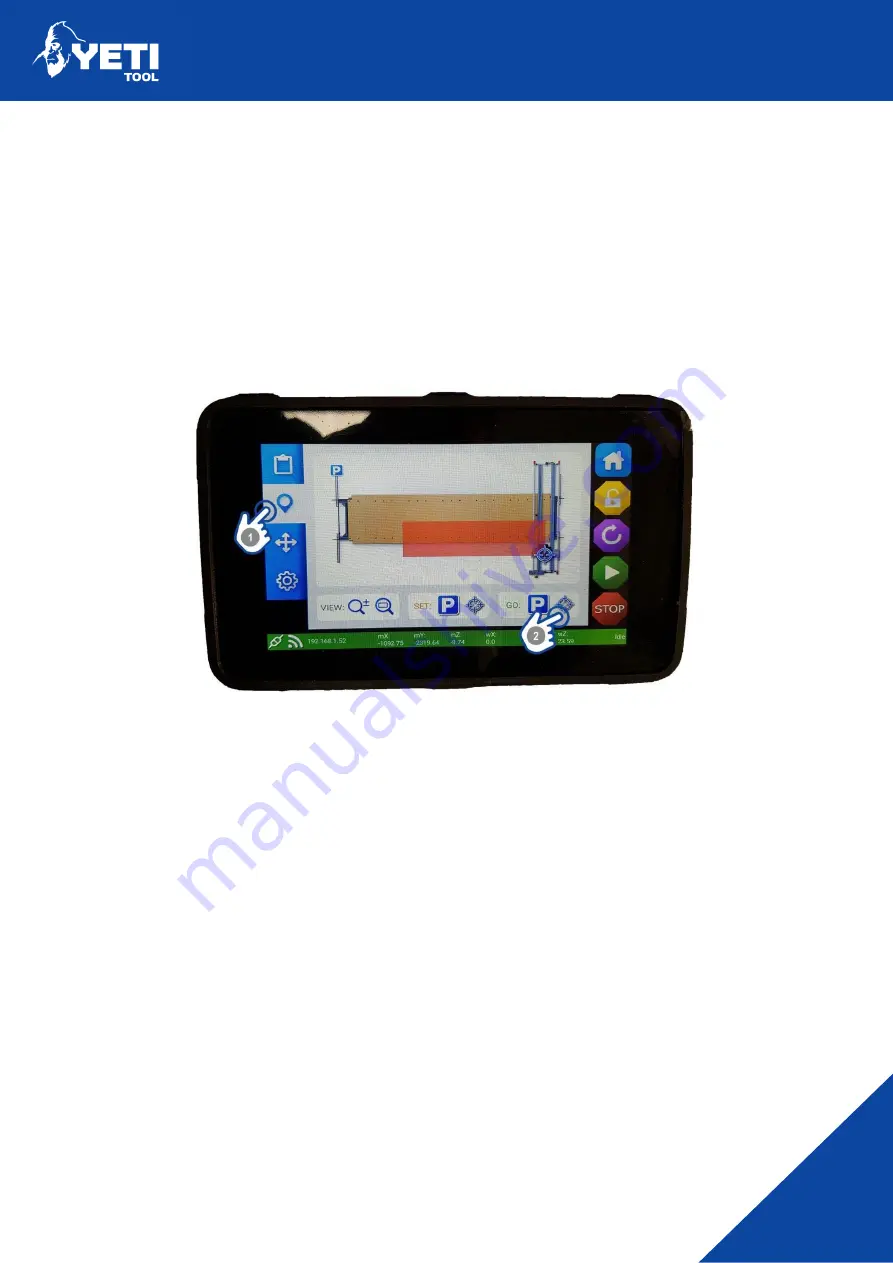
datum. Start by going to the X/Y datum: 

  Go to the Map Screen (1) 

  Press 

‘Go to X/Y Datum’ (2) to place the Z Head at the X/Y datum 


Summary of Contents for SMARTBENCH

Page 1: ...Quick Start Guide v1 2...

Page 2: ...wyouget on wearealwayskeento receive feedback and follow what SmartBench creates What s in thebox Start by getting familiar with SmartBench s key components Checkthecontents If any oftheaboveitemsare...

Page 3: ...TBENCHV1 0 MULTISTATION SAS Tel No 33299163535 Email multistation multistation com 2 Key components Figure 1 Y Bench Figure2 ZHead Figure 3 LegSet x2 Figure 4 Console Figure5 XBeamUpper Figure6 XBeamL...

Page 4: ...the X Beam Lower 1 Identify the home end of the Y Bench Figure1 page2 bylookingfortheHomeIcon 2 Elevate the home end of the Y Bench 3 Identifythehomefaceofthe XBeam Lower Figure6 page2 bylookingforthe...

Page 5: ...2 LifttheY Bench to accept the location pins of the Leg Set 2 SlidethelegclamppinsintotheslotsintheY Bench endplate 3 PushtheclamphandlesdownflattotheYBench end plate to tighten 4 AtthisstageyourSmart...

Page 6: ...the XBeamLower Again ensureall3HomeIcons are visible fromthe same side 3 Slide the X Beam Upper down until the rollers rest on the YBench 4 The quickrelease handle can now be rotated clockwiseandthepu...

Page 7: ...it Beam Upper ensuring the orientation as shown 2 thecableconnectorlatchplatetothe ZHead carriage plate as shown 3 Secure inplace usingthethumbscrew Ensurethe Con cable is tucked into the recess on th...

Page 8: ...e Console into the locating slots in the E Stop endof theX BeamUpper 2 Plug the Console cable into the connector on theright handsideoftheXBeam Upper Fit the powercable 1 The mains powercableconnects...

Page 9: ...s to enable auto extraction but theextractormustnotdrawmorethan10amps Iftheextractordrawsmorethan10 amps theextractormustbepoweredfromaseparatepoweroutletandoperated manually 1 Attachtheextractionhose...

Page 10: ...com 9 Check cable connections Check that all cables are connected correctly 1 Z Head Signal 2 Z Head Power 3 X Beam 4 Extraction power if using the auto extraction system 5 Console 6 Mains Power Figu...

Page 11: ...UK Tel No 44 1275 390721 Email support yetitool com 10 Turning onSmartBench Assumingtheaboveinstructionshavebeenfollowedcorrectly SmartBenchcannowbe powered on by releasing the Emergency stop button...

Page 12: ...fer via your WiFi network 1 Location Important Leave location set as GB 2 Insert your Networkname Touch on the network name box Clearthe text Network name usingthe on the pop up keyboard Once the Netw...

Page 13: ...1 6FQ UK Tel No 44 1275 390721 Email support yetitool com 12 Closethe keyboard usingthe button in the lower right corner Press the connectbutton Please note the system will then automatically reboot T...

Page 14: ...s Additional functionality to improve our customers user experience Virtual jig from Q3 2019 Cutting apps from Q4 2019 You ll find the software update button in the Settings Developer screen PresstheG...

Page 15: ...nd Clevedon Bristol BS21 6FQ UK Tel No 44 1275 390721 Email support yetitool com 14 Home SmartBench From the Lobby screen press to go to CAD CAM operation Press the home button The home button will ap...

Page 16: ...ss the file explorer 2 Choose your file 1 Accept your file choice 2 For full details on file transfer loading go to the EasyCut user manual Unit 1 Westfield Court Barns Ground Clevedon Bristol BS21 6F...

Page 17: ...Email support yetitool com 16 Set X Y datum start point for the job TheX Ydatumreferstothepointatwhichthejobwillstart Thisissetbymovingthe cutter to the intended point and telling EasyCut when you are...

Page 18: ...44 1275 390721 Email support yetitool com 17 Now check that your job location fits within SmartBench s bounds Go to Map screen 1 MakesuretheX YDatum 2 isintherightpositionandyourjobdoesnotreach beyond...

Page 19: ...18 Set Z datum start point for the job OncetheX Ydatumisdefined thetipoftheroutercutterneedstoberegisteredrelative to the material This is referred to as setting the Z datum and should be done near th...

Page 20: ...e the Z probe plate directly below the cutter tip Makesurethebackoftheprobeplateliesflatonthesurfaceyouaretrying to probe The probe plate should be silver side up If the tip of the cutter isn t close...

Page 21: ...21 6FQ UK Tel No 44 1275 390721 Email support yetitool com 20 Run job To run your job press the play button 1 Confirm you wish to run your file by pressing the GO button 1 FormoredetailsonEasyCut plea...

Page 22: ...d Court Barns Ground Clevedon Bristol BS21 6FQ UK Tel No 44 1275 390721 Email support yetitool com 21 Support If you require any support please visit our website and raise a support ticket www yetitoo...

Reviews: