


Fanvil IP Phone Configuration Guides
12/13
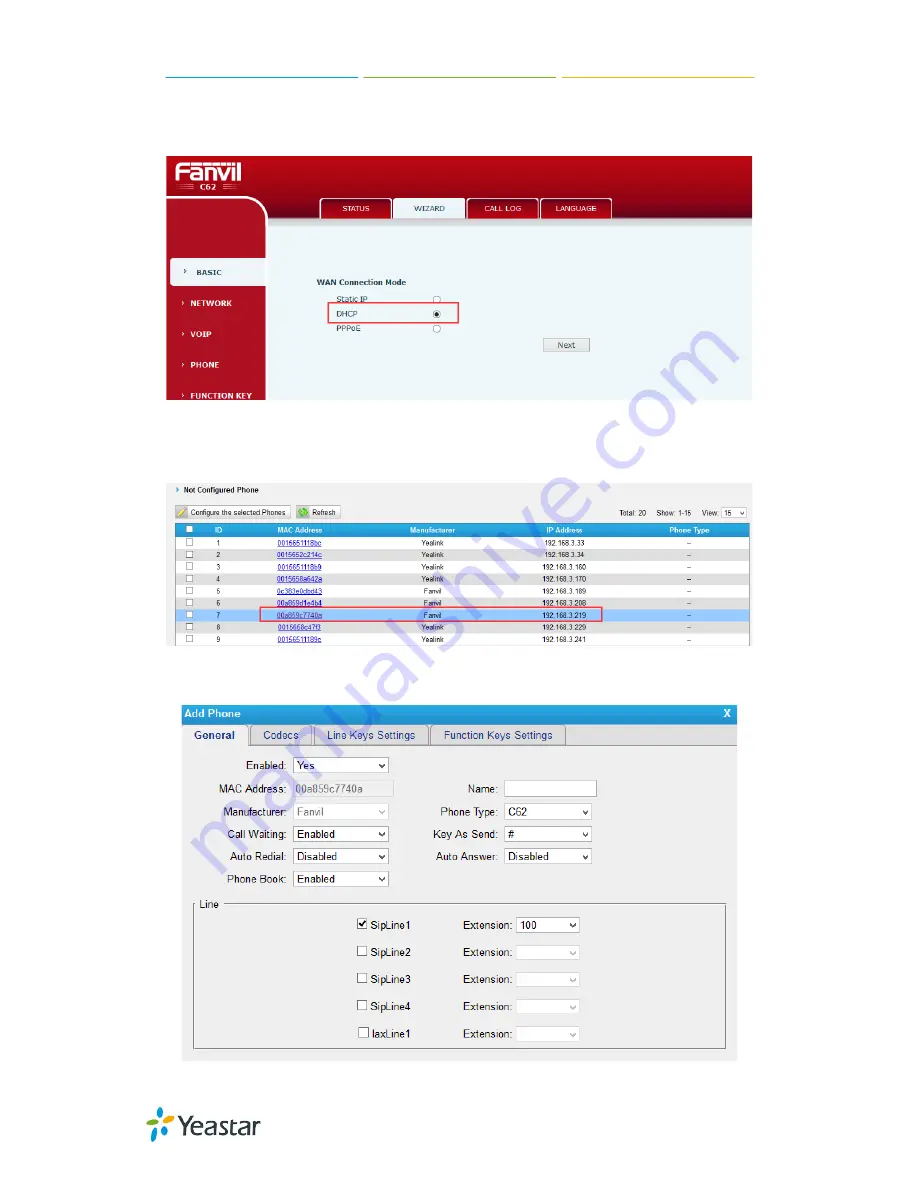
Step3.
Set your Fanvil phone as one DHCP client. Go to “
BASIC->WIZARD
” to
enable DHCP.
Step4.
Login MyPBX, go to “
PBX->Extensions->Phone Provisioning
”, select your
Fanvil phone from “Not configured Phone”.
Step5
. Assign extensions to the phone, and you can also configure the Memory keys
and Line keys.