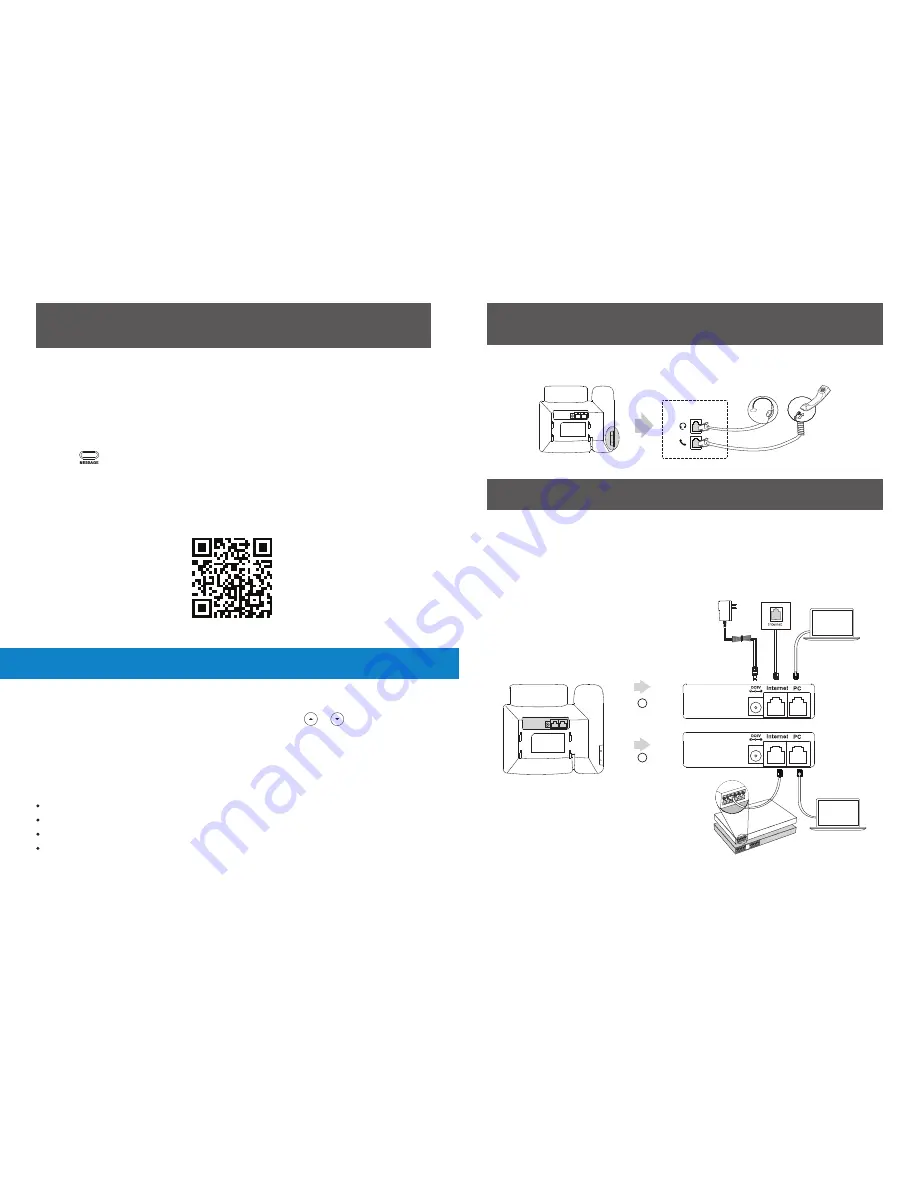
2. Connect the handset and optional headset, as shown below:
3. Connect the network and power, as shown below :
The headset should be purchased separately.
Note:
You have two options for network and power connections. Your system
administrator will advise you which one to use.
The hookswitch tab has a lip which allows the handset to stay on-hook
when the IP phone is mounted vertically.
Note:
AC Power Option
A
B
PC Connection
(Optional)
Power Adapter
(DC 5V)
PoE (Power over
Ethernet) Option
PC Connection
(Optional)
IEEE 802.3af compliant
PoE Hub/Switch
PC
PC
Call History
1. Press the
History
soft key when the phone is idle, press or to scroll through
the list.
Select
Detail
to view detailed information about the entry.
2. Select an entry from the list, you can do the following:
• Press the
Send
soft key to call the entry.
• Press the
Delete
soft key to delete the entry from the list.
Customising Your Phone
If you press the
Option
soft key, you can also do the following:
Select
Add to Contact
to add the entry to the local directory.
Select
Add to Blacklist
to add the entry to the blacklist.
Select
Delete All
to delete all entries from the list.
You can split the conference call into two individual calls by pressing the
Split
soft key.
Note:
Message waiting indicator on the idle screen indicates that one or more voice
messages are waiting at the message centre. The power indicator LED slowly flashes
red and the
MESSAGE
key LED lights up.
Voice Message
To listen to voice messages:
1. Press or the
Connect
soft key.
2. Follow the voice prompts to listen to your voice messages.
For other advanced call features, please view supported calling features here
www.nology.co.za/telkom-calling-features
or scan the below QR code:
9
2


