Administrator’s Guide for SIP-T2 Series/T19(P) E2/T4 Series/CP860 IP Phones
210
Parameters
Permitted Values
Default
Description:
Deletes all custom logo files.
Example:
lcd_logo.delete = http://localhost/all
Note: It is not applicable to SIP VP-T49G/SIP-T48G/T46G/T29G IP phones.
Web User Interface:
None
Phone User Interface:
None
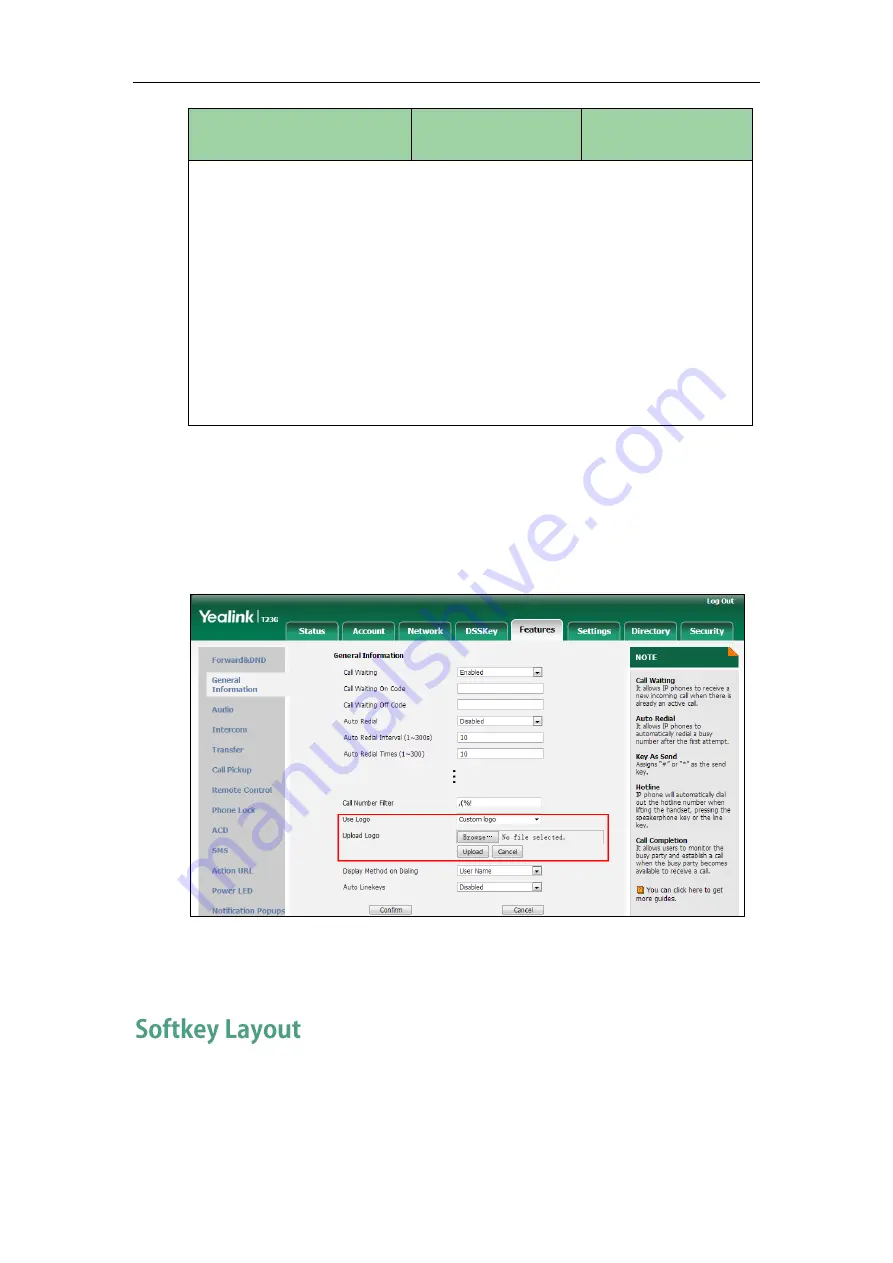
To configure an image logo via web user interface:
1.
Click on Features->General Information.
2.
Select Custom logo from the pull-down list of Use Logo.
3.
Click Browse to select the logo file from your local system.
4.
Click Upload to upload the file.
5.
Click Confirm to accept the change.
The image logo screen and the idle screen are displayed alternately.
Softkey layout is used to customize the soft keys at the bottom of the LCD screen to best
meet users’ requirements. In addition to specifying which soft keys to display, you can
determine their display order. It can be configured based on call states.
Summary of Contents for SIP-T2 Series
Page 1: ......
Page 14: ...Administrator s Guide for SIP T2 Series T19 P E2 T4 Series CP860 IP Phones xiv...
Page 45: ...Getting Started 23 For SIP T42G T41P T40P Desk Mount Method Wall Mount Method Optional...
Page 47: ...Getting Started 25 For SIP T23P T23G Desk Mount Method Wall Mount Method Optional...
Page 122: ...Administrator s Guide for SIP T2 Series T19 P E2 T4 Series CP860 IP Phones 100...
Page 504: ...Administrator s Guide for SIP T2 Series T19 P E2 T4 Series CP860 IP Phones 482...
Page 758: ...Administrator s Guide for SIP T2 Series T19 P E2 T4 Series CP860 IP Phones 736...
Page 1005: ...Appendix 983...


