background image

28 

4. Operating procedures


Operating method


of GB210A/GB210B


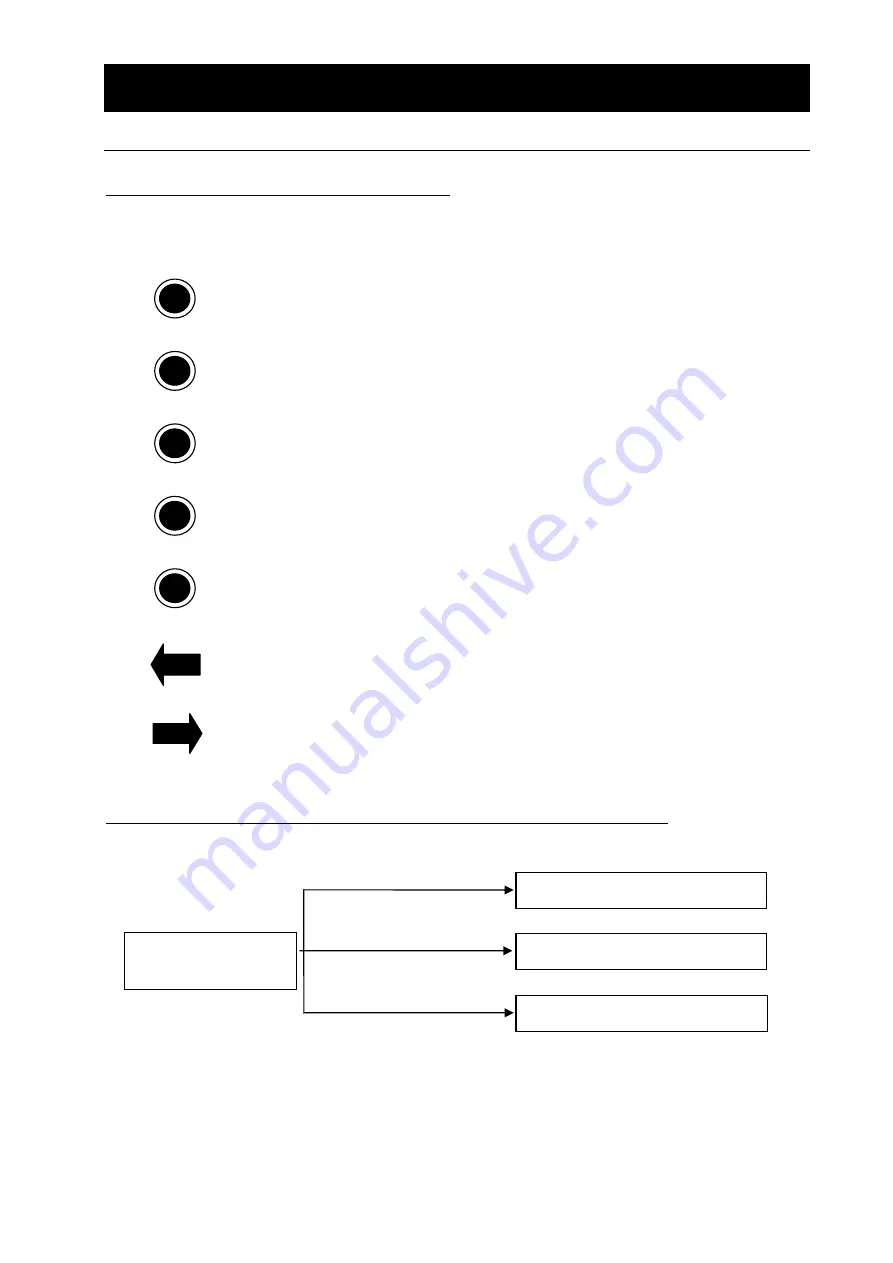
KEY PANEL Description of indication lamps 

You can confirm the operating statuses of switches one the KEY PANEL by checking whether a 
specific lamp is on or off. 
Each lamp will be turned on at the upper right corner on the KEY PANEL. 


Lamp on: Indicates that the spray nozzle is attached. 
Lamp blink: Indicates that a spray nozzle is not attached. 


You can control temperature by setting a temperature on the outlet side 
temperature controller while the lamp is on. 

The lamp is on only when GB210A specifications is used. 


You can control temperature by setting a temperature on the inlet side 
temperature controller while the lamp is on. 

The lamp is on only when GB210A specifications is used. 


When the lamp is on, the blower is in operation. 


When the lamp is on, the blower is in operation. 


When the lamp is on, the liquid sending pump is operating in the normal 
direction. 


When the lamp is on, the liquid sending pump is operating in the normal 
direction. 


When you want to stop processing of a sample or the nozzle is clogged 

Stop sending liquid with the following operations in “Operation method of GB210B". 


If you want to process another sample, collect contents in the product container, clean it following 
the maintenance procedures (P33 and following pages “6. Maintenance method”), and then operate 
the unit with another sample. 


PUMP 

REV 

FWD 

PUMP 

Heate

Blowe


Outlet 

Nozzle 

Granulation procedures

6

)~(

9

Stop processing of 

samples 

Granulation procedures

6

)~(

9

Spray drying operation

8

)~(

12

Granulation operation

Drying of moist powder

Spray drying operation 

Summary of Contents for PULVIS MINI SPRAY GB210A

Page 1: ...o Scientific Co Ltd To use this unit properly read this Instruction Manual thoroughly before using this unit Keep this instruction manual around this unit for referring at anytime WARNING Carefully read and thoroughly understand the important warning items described in this manual before using this unit Yamato Scientific America Inc ...

Page 2: ...thod under Appropriate Condition 30 Drying Method under Appropriate Condition 31 6 Maintenance Method 33 Daily Inspection and Maintenance 33 7 Long storage and disposal 35 When not using this unit for long term When disposing 35 Matters to consider when disposing of the unit 35 8 When a trouble occurs 36 Safety unit and error indications 36 Confirmation of GB210A manual and language selection disp...

Page 3: ...require hospitalization or outpatient visits for a long time Note 2 Minor injury means a wound or an electrical shock that does not require hospitalization or outpatient visits for a long time Note 3 Property damage means damage to facilities devices and buildings or other properties Meanings of pictograms This pictogram indicates a matter that encourages the user to adhere to warning caution incl...

Page 4: ... Hazard of explosion Caution General cautions Electrical shock Burning Caution for no liquid heating Caution for water leak For water only Poisonous material Prohibitions General bans Fire ban Do not disassemble Do not touch Compulsions General compulsions Connect ground wire Install levelly Pull out the power plug Regular inspection ...

Page 5: ...ng of this unit is dangerous for non specified service person never repair the unit by the customer himself Do not use the power cord if it is bundled or tangled Do not use the power cord if it is bundled or tangled If it is used in this manner it can overheat and fire may be caused Do not damage power cord Do not damage power cord by bending pulling or twisting forcedly It may cause the fire or e...

Page 6: ... recovery from a power failure Do not perform unattended operation during activating the unit Do not perform unattended operation during activating the unit Since the unit is in idling status and the nozzle is blocked of after the operation using sample the temperature around outlet is increased and the remaining sample is flown from the sample tube disconnected from the unit and this failure may ...

Page 7: ...ent of the user 2 Pay attention to the color of each core wire when connecting the power cord Core Wire Color In house Wiring Black Voltage Side White Voltage Side Be sure to check that the breaker on the power source equipment side is turned OFF when connecting power cord without fail Note that the ADL311 does not attach the power plug as standard component Select the appropriate power plug and t...

Page 8: ...ult Refer to page 56 15 List of Dangerous Substances 5 Do not use explosive or flammable substances Never use explosive substances flammable substances and substances that include explosive or flammable ingredients in this unit Explosion or fire may occur Refer to page 56 15 List of Dangerous Substances GB210A supports organic solvents by connecting it to the optional GAS410 Carefully read the ope...

Page 9: ...device s uses the same power line of this unit If the phenomena might be found change the power line of this unit to the other power line For connecting of the device to the power source ask the dealer that you purchased this unit from or an electrical contractor for safe 9 Handling of power code Do not entangle the power cord This will cause overheating and possibly a fire Do not bend or twist th...

Page 10: ... a unit with a heater and its total current exceeds 2A Temperature output terminal Temperature output signals at the outlet the inlet during spray drying GB210A and the inlet during granulation GB210B are of 4 20mA for the measured temperature range of 40 240 Current output of 4 20mA Measured temperature of 40 240 Conversion formula Current output I mA 0 08 x measured temperature T 10 Measured tem...

Page 11: ...tage For blind plate for recorder optional Blower inside the door Suction hose Interim pipe For GAS410 optional ELB with over current protector Power cord Exhaust port Cap Fuse for service outlet For connecting GAS410 Optional Temperature output terminal Connector for GAS410 optional Service outlet AC100V 2A Cooling water nozzle port O D φ10 5 Pressurized air inlet O D φ7 Sensor BOX Mag mixer sett...

Page 12: ...ecting container Suction hose Service outlet AC100V 2A Pressurized air inlet O D φ7 ELB with over current protector Power cord Exhaust port Temperature output terminal For GAS410 optional Connector for GAS410 optional For connecting GAS410 Optional Fuse for service outlet Cooling water nozzle port O D φ10 5 Cap Blower inside the door For blind plate for recorder optional Sensor BOX Container pedes...

Page 13: ... specifications of the Mini Spray GB210A Setting and display of outlet temperature This is used to display an outlet temperature This is used to display and make settings in the GB210A specifications Display lamp This is used to indicate the specification with which the suction filter installation status complies GRANULE on GB210B specification Mini Bed specification SPRAY DRY on GB210A specificat...

Page 14: ...s unit is an earthed 3 core captire cable VCT that integrates an earth wire and you must earth the green wire 電圧側 黒 電圧側 白 接地極 屋内配線 機器 緑 3 Connection of the exhaust duct GB210A GB210B In an environment where hot air or fine particles from the blower are of concern connect the included exhaust duct to the exhaust port and use a draft chamber to exhaust them to outside 4 Adjusting the sensor BOX posi...

Page 15: ...onnect a separate cooling water circulating unit such as CF300 or to a tap water faucet to allow cooking water circulating Installation procedures of GB210B GB210 main body GF200 mini bed 1 Remove four screws open the right side door and check or switch the suction port connection point on the main body Make sure that the GRANULE lamp comes ON when you turn the POWER switch ON 2 Unpack the mini be...

Page 16: ... O ring P16 Groove on bottom surface of interim pipe with O ring P135 Upper inside of interim pipe with O ring P30 1 Installing the interim pipe 3 Inserting the nozzle 2 Installing the pipe Insert the pipe into the interim pipe and twist it to the internal thread until it completely stops Take care for top and bottom directions 4 Installing the filter chamber Insert the nozzle from the insert hole...

Page 17: ...issing parts 3 Install the distributor and aluminum honeycomb assembly onto the top of the unit install using three M6 x 20 hex bolts spring washers flat washers each O ring P145 O ring P135 Install into the groove on the bottom surface Hex bolts at three positions Aluminum honeycomb installed from the top of the distributor O ring P16 Install into the groove on the top of the distributor Exploded...

Page 18: ...age the stage with UP of the lift switch while holding the driving chamber with hand Stop moving the stage once when the upper part of the drying layer chamber is close to the flange of the distributor and then keep pushing the stage while turning the UP switch ON and OFF until the stage is stopped 7 Install the outlet temperature sensor into the pipe at the glass container connecting port and ins...

Page 19: ... Hose clips at two positions Connecting ferrule D 1 Connecting the cyclone and the glass chamber Power clamp 40A Packing 40A 4 Connecting the cyclone and the product collecting container Product collecting container Container holding band 3 Connecting the cyclone and the connecting ferrule Power clamp 50A Packing 50A O ring P100 Put tightly inside the cover ...

Page 20: ...anel of the main unit ON Temperature controllers indication lamps and the key panel will be displayed 3 Check that the specifications correct for the application of this product are set on the display lamp To change the specifications follow the installation procedures previously described P 13 and P 15 to change the settings of the unit ...

Page 21: ...vice for inlet temperature and the lower temperature controller as the display for outlet temperature SWITCHING is not used when the mini bed is used 2 Preliminary heating and setting of samples are performed here 2 1 Install mini bed attachments following the above procedures Adjust the spray nozzle so that its tip will protrude below by about 30mm from the end of the pipe Set spray pressure to 0...

Page 22: ... P 14 above 2 8 Setting the liquid sending tube Set the liquid sending tube as shown in the left diagram and then secure the tube which is made flat with the pump bracket with a knurled screw When any sample is not sprayed any more which may indicate clogging of the spray nozzle orifice push the plunger at the upper part of the nozzle P33 Cleaning After Using Exploded view of the spray nozzle The ...

Page 23: ...sive hydrophilic materials MC Methyl Cellulose This has a strong binding force and is suitable to those used for granules coarser PVA Polyvinyl alcohol This is superior in granulation efficiency but has some shortcomings in degradation of granulated substances PVP Polyvinylpyrrolidone Those with a higher molecular weight have a strong binding force and are appropriate for hydrophilic materials 3 F...

Page 24: ... numeric keypad Enter numeric values and press ENT to determine the entered time Time can be set in the range of 1 600 seconds and when you enter a numeric value outside this range and press ENT it will be changed to the upper or lower limit automatically c Start automatic operation of the pump using the PUMP AUTO switch d To stop automatic operation press the PUMP AUTO switch and then the ESC swi...

Page 25: ...spray pressure to 0 To avoid a malfunction of the unit do not turn the blower OFF while the outlet temperature is 45 or more 7 Using the pulse jet switch remove foreign objects off the filter 8 Lower the stage with the lift DOWN switch and then turn the POWER switch OFF Take out the flow layer chamber and collect the granulated samples 9 Wash the containers according to the maintenance method P33 ...

Page 26: ...s started and resume increasing when water content in the sample become less Drying finishes when flow status of sample improves and increase of outlet temperature almost saturates Follow procedures in 6 8 for granulation operation to stop operation and take out the sample out of the flow layer chamber 4 Wash the containers the spray nozzle and filters according to P33 and following pages 6 Mainte...

Page 27: ...temperature controller as the same device for outlet temperature The temperature controller at the upper left part is not used You select temperature control for inlet or outlet temperature using SWITCHING When you want to control temperature by the outlet temperature select inlet temperature at the start of operation switch to outlet temperature once the temperature has stabilized Example Select ...

Page 28: ...pump FWD switch ON and send distilled water Example Set the spray pressure to 0 1MPa when the outlet temperature has risen to around 80 Adjust liquid sending speed so that the outlet temperature will be slightly lower than about 75 6 Readjust dry air amount spray pressure and liquid sending speed so that the inlet and the outlet temperature will be stable at the temperatures you want Example Adjus...

Page 29: ...g has finished after about 15minutes change the specimen to distilled water 9 Turn the heater OFF wait until the outlet temperature drops to 45 or less and turn the blower OFF To avoid a malfunction do not allow the blower operation stopping with the outlet temperature at 45 or over 10 Turn the power switch OFF 11 Remove the container holding band and take out the product collecting container When...

Page 30: ...amp is on only when GB210A specifications is used When the lamp is on the blower is in operation When the lamp is on the blower is in operation When the lamp is on the liquid sending pump is operating in the normal direction When the lamp is on the liquid sending pump is operating in the normal direction When you want to stop processing of a sample or the nozzle is clogged Stop sending liquid with...

Page 31: ...rself since it is dangerous and not recommended 3 Do not touch the part with high temperature The chamber cyclone and peripheral part become high temperature during and just after operation Do not touch these parts for there may be caused heat injury Caution 1 Do not put anything on this unit Do not put anything on this unit It will cause injury if fall 2 During a thunder storm During a thundersto...

Page 32: ...le that is to reduce the difference between the temperature around inlet and that around outlet When the reason is in the property of the sample itself adjust the sample by adding the special additive etc 5 In the case that the hygroscopicity is high the product may become the moist powder in the container Change the drying condition following the method in 4 or if required heat up the container f...

Page 33: ...he plunger of the upper nozzle P42 Cleaning After Using spray nozzle exploded drawing The needle pushes out the clogging of the orifice 10 If the sample is not fed from the feeding pump the following causes may be considered the sample tube is crushed at the roller of the pump the inner wall of the tube is adhered tightly without restoration or the inner of the nozzle is blocked Remove the cause a...

Page 34: ...r of the cyclone the dried powder may be stocked onto the lower of the cyclone without falling into the container for product Therefore pay special attention to the unit with the container for product be mounted 2 When the specimen accumulated on the nozzle tip in an ice pillar like form clean it off using the pulse jet switch on the touch panel 3 Since the capacity of the container for product is...

Page 35: ...ter completing the operation remove the attachments following the process Preparations on P 12 in reverse order 2 Clean the portion of attachment to which the powder is adhered 3 Flow the distilled water into the sample tube by pressing the pump switch and remove the contaminant attached to the inner of the part 4 Remove the spray air tube and sample tube from the spray nozzle and disassemble the ...

Page 36: ...ter after being immersed into the solvent that hot water approx 40 Celsius degree and neutral detergent are mixed at a rate of 5 95 one whole day and night then rinse it with water and air dry it 4 When assembling reversely execute the above procedure Turn the soft surface of the filter to windward when installing the filter Suction port filter A stainless steel mesh plate is used at the suction p...

Page 37: ...you to disassemble this unit as possible and recycle the reusable parts considering to the environmental protection The feature components of this unit and materials used are listed below Component Name Material Parts of Main Unit Casing Bonderizing steel plate baked with melamine resin coating Stainless steel Insulating material Ceramic Felton Specimen bed ceiling plate pipings Stainless steel Pr...

Page 38: ... the displayed inlet temperature is at 230 or over Malfunction of the blower Replacement of the thermocouple sensor Lower the set temperature or adjust air amount Replacement of the blower When the measured temperature exceeds the set upper limit upper limit of inlet temperature 230 upper limit of outlet temperature 110 Over Heat will appear the heater output will stop and when that status continu...

Page 39: ...37 8 When a trouble occurs Confirmation of GB210A manual and language selection display ...

Page 40: ...38 8 When a trouble occurs Confirmation of GB210A manual and language selection display ...

Page 41: ...39 8 When a trouble occurs Confirmation of GB210B manual and language selection display ...

Page 42: ...40 8 When a trouble occurs Confirmation of GB210B manual and language selection display ...

Page 43: ...or z Activated the protection circuit without turning on the blower switch z Heater disconnection z Heater switch failure z Heater circuit failure and wiring failure z Connect correctly z Solve the problem and turn ON the switch z Turn ON the blower and then turn ON the heater switch z Replace the part z Replace the touch panel or sequencer z Maintain the part or replace the thermo regulator Feedi...

Page 44: ...n port connection is switched z Limit switch failure z Limit switch imperfect adjustment z Imperfect circuit and wiring z Replace the limit switch z Adjust so that the limit switch touches the suction filter case z Repair the defective point Lift switch Pressing the lift switch will not move the stage z Lift switch failure z Imperfect circuit and wiring z Motor failure z Replace the lift switch z ...

Page 45: ...and other information and send it to our customer service center by Facsimile 03 3231 6523 Then store it securely Warranty period is one full year from the date of purchase Repair service for free is available according to the conditions written on the warranty card For repairs after the warranty period consult your dealer one of our sales offices or our customer service center Paid repair service...

Page 46: ...pe solenoid valve Temperature adjustment range INLET 0 220 OUTLET 0 60 Temperature adjustment accuracy 1 Temperature display Digital display of the temperature around Inlet Outlet metal sheathed thermocouple element K Adjusting range for drying air 0 0 7m3 min Power supply 1 AC200V single phase 16A AC220V 17A AC240V 18A External dimensions 2 W D H 760 420 1350 Weight Approx 110kg Specimen tube Sil...

Page 47: ...er mechanism of GB210 is used Weight Approx 13 Mini bed attachment GF200 Parts list Flow layer chamber Interim pipe O ring on P16 and P135 included Butterfly nut M6 Flat washer M6 Hex bolt M6 30 Spring washer M6 Cap silicon Hose φ38 1 φ41 7 800L silicon Hose clip O ring P145 Pipe Filter O ring P30 included Filter chamber Flange Packing C t5mm Silicon Spray nozzle Filter retainer nut Polyvinyl alco...

Page 48: ...r holding band Packing 40A 50A Power clamp 40A 50A Cap Connecting ferrule D PFA wave shaped tube 1 1 2 3 feet long for connecting the cyclone Hose clip Distributor O rings P16 P135 included Hex bolt M6 x 20 Flat washer M6 Spring washer M6 Aluminum honeycomb Pipe Spray nozzle Round single ended wrench Polyethylene tank for 100g of 5 sodium chloride solution Warranty card 1set 1set 1 1 1each 1each 1...

Page 49: ...V Female pin Spray Inlet temp current output Attached cable 300mm Attached cable SDA Brown SDB Red RDA Orange RDB Yellow SG Green CSA Black CSB White Attached cable Attached cable Attached cable Outlet temp current output Granulation Inlet temp current output Female pin Female pin Female pin Output block ...

Page 50: ...lve Flow layer chamber Pressure meter Filter chamber Stirring blade Nozzle Stirring motor Filter Inlet temperature sensor Liquid sending pump Outlet temperature sensor Blower Blind Interim pipe Suction port suction filter Solenoid valve Nozzle cooling connection port For connecting optional unit GAS410 Connecting pressurized air Specimen Binder Air intake ...

Page 51: ...Liquid sending pump Suction port suction filter Blower Nozzle cooling connection port Solenoid valve A Drying chamber 3 way solenoid valve B Cap Needle valve C Distributor Pressure meter D Cyclone Stirring motor Not used E Product collecting container Inlet temperature sensor For connecting optional unit GAS410 Connecting pressurized air Specimen Air intake ...

Page 52: ...container for product Time after the sample is sprayed with the nozzle till it is fed into this container does not take 0 5 seconds Moreover since the sample powder is always surrounded with the solvent vapor moisture vapor the temperature does not rise extremely around the particle due to the vaporization heat Therefore in case of the heat sensitive material such as an enzyme disintegration can b...

Page 53: ...atsushita LT00029636 Packing C AD311S_40910 Neoprene Yamato Scientific LT00027737 Packing D AD311S_40900 Neoprene Yamato Scientific LT00027734 Packing E AD311S_40990 Neoprene Yamato Scientific LT00027740 Filter AD311S_40540 PET Yamato Scientific LT00027739 Heat resistant hose GS type 38 42 L600 TigersPolymer LT00029643 Heat resistant flexible hose MD25 φ50 380L Totaku 3040186013 Pressure meter DU ...

Page 54: ...id NMB 4180126001 Teflon flexible tube φ6 35 φ4 35 200 Yamato Scientific 3040000015 Micro switch SS 01GL2 Nozzle por Omron A0020084 Teflon tube φ8 φ6 L1000 Yamato Scientific 3040146003 PLC connection cable GT10 C10 R4 8P Mitsubishi LT00027716 Touch panel GT1030 LBDW 4 5 inches Mitsubishi LT00028125 PLC IN24 OUT16 FX1N 40MR Mitsubishi LT00028131 Output block FX1N 2EYT BD Mitsubishi LT00027717 Tempe...

Page 55: ... Scientific LT00024524 Packing B GF300_40150 Silicon Yamato Scientific LT00024523 Micro pore plate GF200_40160 SUS304 Yamato Scientific LT00028128 Cap GF300_40100 Silicon Yamato Scientific LT00027544 Flow layer chamber GF200_30070 Ultra hard glass Yamato Scientific LT00028129 Clean out needle additional machining diagram GF200 40000 14293 6 1 16 SS Secondary machining SSJ LT00028432 Packing CP 404...

Page 56: ...Scientific F0020073 Cap GF300 40100 silicon Yamato Scientific LT00027544 Connection ferrule D GF300 40080 Yamato Scientific LT00027543 PFA corrugated tube 1 1 2 3feet 915mm Iida rubber LT00027545 Hose clip JCS Win 2A φ35 50 Iida rubber LT00027550 Packing 40A silicon OSAME F0220141 Packing 50A silicon OSAME F0220143 Power clamp 40A OSAME R0100009 Power clamp 50A OSAME R0100012 Product collecting co...

Page 57: ...ther chlorates Potassium perchlorate sodium perchlorate ammonium perchlorate and other perchlorates Potassium peroxide sodium peroxide barium peroxide and other inorganic peroxides Potassium nitrate sodium nitrate ammonium nitrate and other nitrates Sodium chlorite and other chlorites Oxidizing substances Calcium hypochlorite and other hypochlorites Ethyl ether gasoline acetaldehyde propylene chlo...

Page 58: ...tempt to perform matters prohibited in this operation instruction Otherwise an unexpected accident may result Notice Descriptions in this operating instruction are subject to change without notice We will replace a manual with a missing page or paging disorder Instruction Manual PULVIS MINI SPRAY PULVIS MINI BED GB210A GB210B Second edition July 27 2009 Yamato Scientific America Inc 925 Walsh Aven...

Reviews: