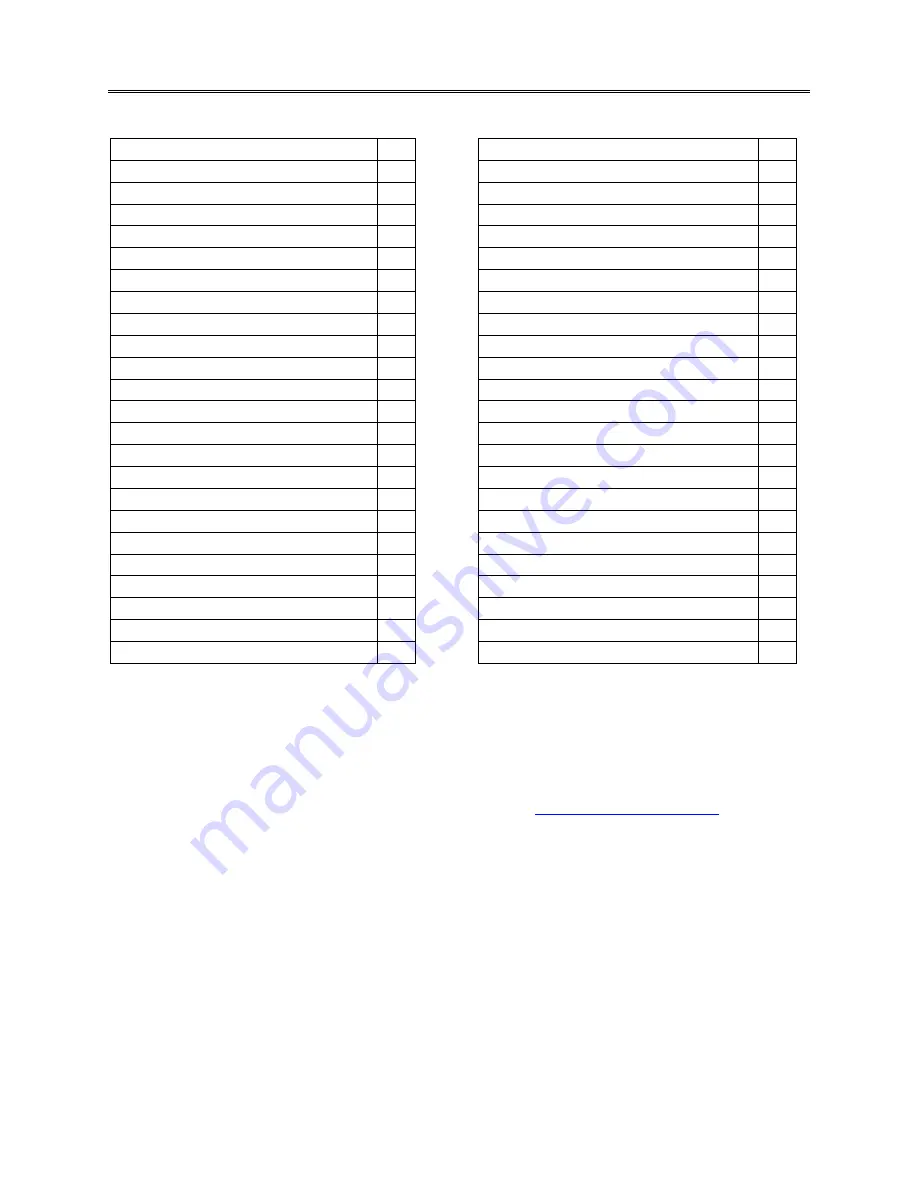
background image


CONTENTS


Main Features 

2   

Time Lapse Video 

13   

Buttons and Camera Body 

3   

Time Stamp on Video 

13   

Installing Battery


4   

Image Resolution Settings 

13   

Installing MicroSD card


4   

Continuous Shot Settings 

13   

Waterproof Housing


5   

FOLDER 

– System Settings 

13   

Mounting your Camera


6   

Language Setting 

13   

Remote control 


6   

Date and Time Settings 

14   

Screen - Information and Icons 

7   

Image Flip 

14   

Main Menu - Navigation 

7   

Display Frequency Setting 

14   

Main Menu - Folders 

7   

Auto Power Off 

14   

Video Recording 

– How to 

8   

Auto Screen Off 

15   

Image Capture 

– How to 

8   

Volume 

15   

FOLDER

 - Video Playback 

9   

Format and Reset 

15   

FOLDER

 - Image Viewing 

10   

Memory Info 

15   

Deleting Files 

10   

Camera Version 

15   

FOLDER


– Video Settings 

11   

Firmware Update 

16   

Normal Recording 

11   

Connecting to PC 

16   

Motion Detection 

11   

Connecting to Television 

17   

Set Auto Recording Start Time 

11   

Battery Charging 

18   

Auto Record in Vehicle 

12   

Battery Information 

18   

Loop Record 

12   

Camera Specifications 

19   

Video resolution settings 

12   

Troubleshooting    (Link) 

15   

Video Sound Record Content 

12   

Parts Listing 

20   


IMPORTANT!

      Never  risk  your  life  or  the  lives  of  others  when  making  a  video.  Accidents  will 

happen so be prepared by becoming familiar with your Yamaha camera before using it. Do not try to 
adjust  camera  settings  while  riding  your  bike  under  any  circumstances.  Please  read  this  manual 
before mounting and using your camera.   

Save this Users Manual 


For support and firmware updates visit:   

www.ymap.motao.com


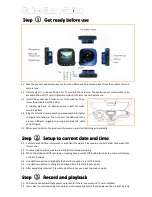
Inspect Your Camera:

 The camera shall be inspected upon receipt and checked for any missing 

parts per 

Complete Parts Listing page 20 (

Rear Cover

)


Repairs: 

All camera repairs shall be made by authorized personnel only and in conformance with the     

ma

nufacturer’s recommendations or the warranty will be void..     

Warranty: 

This Camera is covered by a limited 

month warranty effective receipt date 


For further warranty information visit 

www.ymap.motao.com


Page 1


Summary of Contents for YMA-CV03Y-00

Page 1: ...Full HD Waterproof Motorcycle Watercraft Action Camera ...

Page 2: ...g 18 Auto Record in Vehicle 12 Battery Information 18 Loop Record 12 Camera Specifications 19 Video resolution settings 12 Troubleshooting Link 15 Video Sound Record Content 12 Parts Listing 20 IMPORTANT Never risk your life or the lives of others when making a video Accidents will happen so be prepared by becoming familiar with your Yamaha camera before using it Do not try to adjust camera settin...

Page 3: ...pture mode Video resolution Settings 16 9 Full HD 1920 x 1080P 30FPS 4 3 Full HD 1440 x 1080P 30FPS 16 9 HD 1280 x 720P 60FPS 16 9 HD 1280 x 720P 30FPS 4 3 WVGA 848 x 480 60FPS Picture resolution Settings 4000 x 3000 12MP 3200 x 2400 8MP 2592 x 1944 5MP Video Picture playback Support 1GB 32GB High speed Micro SD memory card 8 GB RiData Class 10 MicroSD card Included only in Yamaha 2013 promotion p...

Page 4: ...ndicator red Power charge Indicator green 3 Microphone no Icon 4 Tripod screw hole 5 Audio output 6 TF card slot 7 REC Confirm button 8 UP Zoom 9 Menu button 10 Down Zoom Remote Pair 11 Power ON Picture Capture 12 USB Port 13 HDMI Port 14 TFT LCD 15 Speaker Page 3 ...

Page 5: ...es not have built in memory A Micro SD card is required and a class 10 8GB to 32GB is recommended Install a Micro SD card according to graphic After installing the SD card power on the camera and an SD card icon will appear in the top right corner of the screen this indicates SD card is correctly installed If no icon is displayed then an SD card is not installed or the card is invalid Page 4 ...

Page 6: ...k mechanism away from the rear cover 3 Close the Cover Per graphic to the right First close the clasp B and then press inwards the latch A to lock tight Two button operation only when camera is Inside the waterproof housing Note The waterproof housing is certified at a maximum depth of 30 Meters 99 feet Should an area of condensation form on the inside the waterproof housing this will not cause a ...

Page 7: ... remain tethered to the bike Make sure the tether does not connect to or near moving parts of the motorcycle Remote Controller START VIDEO RECORD Remote to start video record only when Camera is Powered ON Remote will not start record if camera power button is OFF STOP VIDEO RECORD Remote to stop video record only will not power OFF camera This allows multiple recording starts and stops PAIRING A ...

Page 8: ...s and is where settings are changed for the feature you need The Icons shown link as follows Navigation Scrolling is the use the or buttons on the button bar Navigating the menus and making settings in this camera will require scrolling When in a menu the active folder s Icon will be highlighted with an orange border around it Additionally the Video and Image folders will also tally the number of ...

Page 9: ... on to take a picture While in image capture mode a white camera icon will be on the screen When a picture is taken the icon will flash red then go back to white 3 When camera Icon is white zoom is possible by pressing the or Scroll buttons Camera Screen IMPORTANT Each video and image file is recorded with a default name the camera recognizes Do not rename images on the Micro SD card as the image ...

Page 10: ... Main Menu Screen 2 Press REC button to enter the folder Video clip thumbnails will display as per example Thumbnail screen The active thumbnail will be highlighted with an orange border 3 Press Scroll buttons to cycle through and Stop at the video clip you want to play Thumbnail Selection Screen 4 At the highlighted thumbnail Press REC to confirm and the video will fill the screen immediately pre...

Page 11: ...r press button To return to thumbnail view Press MENU and MENU again to return to Main Menu Deleting Files Press and hold MENU button while browsing images or when an image has been selected The Delete Option Menu will display on the screen Use Scroll buttons to choose what you want Settings No cancel current operation and quit Yes confirm current operation and delete the single image ALL confirm ...

Page 12: ...set before it can start movement detection again at each additional restart The default video record time is 1 minute if the movement was less than 30 seconds The camera will not stop recording video if movement is constant the camera will record until battery runs out or memory is full and no longer has space Time REC Sets a time to start recording video automatically For This feature you must fi...

Page 13: ...ghter power cords will not work with this camera Motao No CV340 is a special order accessory Loop Record The camera will delete the earliest video clip for newest video clip if memory is not enough Select the Loop Setting and press REC button to enter the time setting OFF Loop record is not activated 1 Minute 1 minute per video clip 5 Minutes 5 minutes per video clip Note Loop record only availabl...

Page 14: ... image resolution here Select the size image you need Three resolution settings 4000 x 3000 12MP 3200 x 2400 8MP 2592 x 1944 5MP Continuous Shot Press MENU to enter the main menu use Scroll button to select Continuous shot menu press REC to confirm and when in the menu choose the quantity of shots System Setting Press MENU to enter the main menu Press or button to System Setting icon hammer and wr...

Page 15: ...unction when you need to install the camera at upside down position to make right video recorded The recorded image will flip 180 Display Frequency Please choose the correct frequency according to your country or area picture would flash if incorrect frequency set Auto Power OFF If you want the camera power off automatically after some time then activate this function and set a power off time Came...

Page 16: ... be erased if you use this function Data from a formatted memory card CAN NOT be recovered Memory Info This function shows the installed MicroSD Card memory status Free Amount of memory remaining on the card and Used The amount of memory no longer available Reset The system will reset to default factory settings Important Note If you have made a FRIMWARE update you must use this feature to reset t...

Page 17: ...tion camera will reboot automatically with a black screen when update has completed If the firmware update or SD card failed the screen will prompt FAIL Connect with Computer Connect the camera with computer via USB cable available for data transfer power charge and firmware update Power on the camera after connect it with the computer by USB cable and the screen will display USB connected like gr...

Page 18: ... TV is 1080P resolution when playing back video clip real time output display is 480i only 2 5mm RCA cable connect with TV output This cable is not included in standard accessories Start playing back video clip or browse pictures a Turn the TV to AV or HDMI input channel power on the camera b Press MENU button to enter main menu press and to select video or picture folder press REC button to enter...

Page 19: ... plugs into the cameras mini USB port Charging and Battery Tips 1 Avoid completely draining of power before recharging 2 To extend battery life battery should be fully charged before it is used for the first time 3 When storing the camera for a long period please remove the battery and store it separately Charging Specifics Full charge time Standby time Video Record Time 3 5 Hours in Power ON stat...

Page 20: ...inuous Capture YES Self Timer YES Zoom Focus YES Time Stamp YES Image Flip YES 180 0 Upright Video Quality Option YES Support Record Under Screen Off YES File Protection While Low Power YES Record Spec Item Spec Remark Auto Power OFF Option YES 5 10 20 Minutes Video Record Optional FULL HD 1920 x 1080 30FS FULL HD 1440 x 1080 30FS FULL HD 1280 x 720 60FS FULL HD 1280 x 720 30FS QVGA 848 x 480 60 F...

Page 21: ...Parts Listing Page 20 ...

Reviews: