background image


INSTRUMENT AND CONTROL FUNCTIONS


4-16


2

3

4

5

6

7

8

9

holder, since the helmet may hit
objects, causing loss of control
and possibly an accident.


[EWA10161]


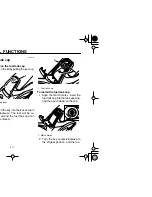
To release the helmet from the hel-
met holder


Open the seat, remove the helmet
holding cable from the helmet holder
and the helmet, and then close the
seat.


EAU44993


Storage compartments 


Front storage compartments A and 
B


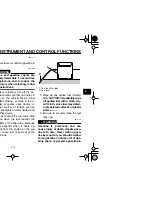
To open a front storage compartment,
slide the lever up, and then pull on the
lever. 


WARNING! Do not store heavy

items in these compartments.


[EWA14861]


To close the front storage compart-
ments, push the lid into the original po-
sition.


1. Storage compartment opening lever
2. Front storage compartment A

1

2


1. Storage compartment opening lever
2. Front storage compartment B

1. Storage compartment lid

1

2

1

Summary of Contents for Tmix XP500Y

Page 1: ...OWNER S MANUAL 4B5 28199 10 XP500Y Read this manual carefully before operating this vehicle ...

Page 2: ...EAU10042 g this vehicle This manual should stay with this vehicle if it is sold ...

Page 3: ...mance or economy of operation of the mportant that you and your Yamaha dealer pay close attention to the rec g instructions contained within this manual uct design and quality Therefore while this manual contains the most cur printing there may be minor discrepancies between your scooter and this manual please consult a Yamaha dealer EWA12581 OUR MOTORCYCLE RIDING TIPS booklet carefully and comple...

Page 4: ...t you to potential personal injury safety messages that follow this symbol to avoid possible injury ates a hazardous situation which if not avoided could result in njury es special precautions that must be taken to avoid damage to the roperty information to make procedures easier or clearer ...

Page 5: ...XP500Y OWNER S MANUAL amaha Motor Corporation U S A 1st edition March 2008 All rights reserved printing or unauthorized use ut the written permission of ha Motor Corporation U S A s expressly prohibited Printed in Japan P N LIT 11626 22 08 ...

Page 6: ...ed 7 19 Checking the throttle cable free play 7 19 Valve clearance 7 19 Tires 7 20 Cast wheels 7 21 Front and rear brake lever free play 7 22 Adjusting the rear brake lock lever cable 7 22 Checking the front and rear brake pads 7 23 Checking the brake fluid level 7 24 Changing the brake fluid 7 25 Checking and lubricating the throttle grip and cable 7 25 Lubricating the front and rear brake levers...

Page 7: ...TABLE OF CONTENTS ...

Page 8: ...1 1 LABELS EAU10382 hicle They contain important information for safe and proper operation of ehicle If a label becomes difficult to read or comes off a replacement label 4 9 2 5 6 3 7 8 ...

Page 9: ...LOCATION OF IMPORTANT LABELS 1 2 1 2 3 4 5 6 7 8 9 4B5 21686 00 WARNING AVERTISSEMENT 3LD 24877 A0 7 8 9 ...

Page 10: ...LABELS 1 3 2 ...

Page 11: ...LOCATION OF IMPORTANT LABELS 1 4 1 2 3 4 5 6 7 8 9 ...

Page 12: ...es for scooter accidents to ccur Ride where other motorists can ee you Avoid riding in another motorist s blind spot Many accidents involve inexperi enced operators In fact many op erators who have been involved in accidents do not even have a cur rent driver s license Make sure that you are qualified and that you only lend your scooter to other qualified opera tors Know your skills and limits Sta...

Page 13: ...n Monoxide Poisoning gine exhaust contains carbon monoxide a deadly gas Breathing car bon monoxide can cause headaches dizziness drowsiness nausea confu sion and eventually death Carbon Monoxide is a colorless odor less tasteless gas which may be present even if you do not see or smell any engine exhaust Deadly levels of carbon monoxide can collect rapidly and you can quickly be overcome and unabl...

Page 14: ...be attached to idecar Genuine Yamaha Accessories Choosing accessories for your vehicle is an important decision Genuine Yamaha accessories which are avail able only from a Yamaha dealer have been designed tested and approved by Yamaha for use on your vehicle Many companies with no connection to Yamaha manufacture parts and acces sories or offer other modifications for Yamaha vehicles Yamaha is not...

Page 15: ...its the free dom of movement of the opera or and may limit control ability herefore such accessories are not recommended e caution when adding electri accessories If electrical acces ries exceed the capacity of the ooter s electrical system an ectric failure could result which uld cause a dangerous loss of hts or engine power Aftermarket Tires and Rims The tires and rims that came with your scoote...

Page 16: ...2 5 d ankle so they do not flap and right colored jacket not carry too much luggage on scooter An overloaded scoot s unstable ...

Page 17: ...3 1 2 3 4 5 6 7 8 9 DESCRIPTION EAU10410 3 5 10 9 8 7 6 11 1 4 2 9 Engine oil drain bolt page 7 12 10 Engine oil level check window page 7 12 11 Oil filter cartridge page 7 12 ...

Page 18: ...3 2 EAU10420 2 6 5 7 3 4 ...

Page 19: ...3 4 5 6 7 8 9 EAU10430 5 4 7 8 9 12 10 6 11 9 Front brake lever page 4 9 10 Throttle grip page 7 19 11 Front storage compartment B page 4 16 12 Main switch steering lock page 4 1 13 Front storage compartment A page 4 16 ...

Page 20: ...l systems will ched off which may result in control or an accident EAU10681 ering is locked and all electrical s are off The key can be re the steering n the handlebars all the way to left sh the key in from the OFF po on and then turn it to LOCK le still pushing it move the key To unlock the steering Push the key in and then turn it to OFF while still pushing it ...

Page 21: ...checked by turning the key to the warning light does not come a few seconds then go off have aha dealer check the electrical arning light will come on when is turned to ON and the start s pushed but this does not indi malfunction EAU11601 Speedometer The speedometer shows the riding speed When the key is turned to ON the speedometer needle will sweep once across the speed range and then return to ...

Page 22: ... turned to ON the coolant temperature gauge needle will sweep once across the temperature range and then return to C in order to test the electrical circuit The coolant tempera ture varies with changes in the weather and engine load If the needle reaches or enters the red zone stop the vehicle and let the engine cool See page 7 35 1 Coolant temperature gauge 2 Red zone 1 2 ...

Page 23: ...s to the unction display Changing s while riding can distract the or and increase the risk of an nt The multi function display is equipped with the following a tachometer which shows engine speed ometer ometer red zone t replacement indicator V BELT meter tripmeters 1 2 3 1 Clock 2 Oil change indicator OIL 1 RESET button 2 SELECT button 1 2 1 2 ...

Page 24: ...bove he clock sh the SELECT button and ESET button together for at st two seconds en the hour digits start flashing sh the RESET button to set the urs sh the SELECT button and minute digits will start flashing sh the RESET button to set minutes sh the SELECT button and n release it to start the clock Odometer and tripmeter modes 1 Odometer tripmeters 1 Oil change tripmeter 1 1 ...

Page 25: ...SET but Oil change indicator OIL This indicator flashes at the initial 1000 km 600 mi then at 5000 km 3125 mi and every 5000 km 3125 mi thereafter to indicate that the engine oil should be changed After changing the engine oil reset the oil change indicator To reset the oil change indicator select it by pushing the SELECT button until OIL Trip is displayed and then push the RESET button at least 1...

Page 26: ... changed before the V belt replacement indicator V BELT flashes i e before the periodic V belt change interval has been reached the indicator V BELT must be reset after the V belt change for the next periodic V belt change to be indicated at the correct time The electrical circuit of the indicator can be checked according to the following procedure 1 Turn the key to ON and make sure that the engin...

Page 27: ...w beam EAU12460 Turn signal switch To signal a right hand turn push this switch to To signal a left hand turn push this switch to When re leased the switch returns to the center position To cancel the turn signal lights push the switch in after it has re turned to the center position mer switch signal switch switch 1 2 3 1 Engine stop switch 2 Start switch 1 2 ...

Page 28: ...with a adjusting dial To adjust the e between the front brake lever handlebar grip turn the adjust while holding the front brake le hed away from the handlebar ake sure that the appropriate setting on the adjusting dial is aligned with the mark on the front brake le ver brake lever lever position adjusting dial mark nce between brake lever and ebar grip 1 3 4 2 ...

Page 29: ...ar brake lock lever to prevent the rear wheel from moving while stopped at traffic signals railroad crossings etc To lock the rear wheel Push the rear brake lock lever to the left until it snaps into place To unlock the rear wheel Push the rear brake lock lever back to the original position TIP Be sure to check that the rear wheel does not move when the 1 Rear brake lock lever 1 ...

Page 30: ...nd turn lockwise The lock will be re sed and the fuel tank cap can removed To install the fuel tank cap 1 Align the match marks insert the fuel tank cap into the tank opening and then push down on the cap 2 Turn the key counterclockwise to the original position and then re ng lever 1 2 1 Fuel tank cap 1 Match marks 1 1 ...

Page 31: ...ot overfill the fuel tank Stop ng when the fuel reaches the ttom of the filler tube Because el expands when it heats up at from the engine or the sun n cause fuel to spill out of the el tank 3 Wipe up any spilled fuel immedi ately NOTICE Immediately wipe off spilled fuel with a clean dry soft cloth since fuel may deteri orate painted surfaces or plastic parts ECA10071 4 Be sure to securely close t...

Page 32: ...verter in the exhaust system WARNING EWA10861 The exhaust system is hot after op eration To prevent a fire hazard or burns Do not park the vehicle near possible fire hazards such as grass or other materials that easily burn Park the motorcycle in a place where pedestrians or children are not likely to touch the hot exhaust system Make sure that the exhaust sys tem has cooled down before do ing any...

Page 33: ...nto the main switch d then turn it counterclockwise OPEN push inward when turning the ld the seat up To close the seat 1 Fold the seat down and then push it down to lock it in place 2 Remove the key from the main switch if the scooter will be left un attended TIP Make sure that the seat is properly se cured before riding 1 ...

Page 34: ...holding cable is provid ed beside the owner s tool kit to secure a helmet to the helmet holder To secure a helmet to the helmet holder 1 Open the seat See page 4 14 2 Pass the helmet holding cable through the buckle on the helmet strap as shown and then hook the cable loop over the helmet holder 3 Securely close the seat WARNING Never ride with a helmet attached to the helmet backrest 2 1 1 Helmet...

Page 35: ...partment e lever up and then pull on the WARNING Do not store heavy n these compartments EWA14861 To close the front storage compart ments push the lid into the original po sition ge compartment opening lever storage compartment A 1 Storage compartment opening lever 2 Front storage compartment B 1 Storage compartment lid 1 2 1 ...

Page 36: ...arge ECA16081 E The shaded area is not a e compartment To prevent ng the seat hinges do not ny items in this area ECA16091 me helmets cannot be stored in rear storage compartment be cause of their size or shape Do not leave your scooter unat tended with the seat open WARNING EWA11241 Do not exceed the load limit of 5 kg 11 lb for the rear storage compartment Do not exceed the maximum load of 193 k...

Page 37: ...anation of tion circuit cut off system ARNING EWA10240 hicle must not be ridden with destand down or if the side cannot be properly moved up es not stay up otherwise the and could contact the ground stract the operator resulting possible loss of control a s ignition circuit cut off m has been designed to assist erator in fulfilling the respon of raising the sidestand be tarting off Therefore check...

Page 38: ...L FUNCTIONS 4 19 ...

Page 39: ...ntil checked by a Yamaha dealer The brake switch may not be working correctly The scooter should not be ridden until checked by a Yamaha dealer The sidestand switch may not be working correctly The scooter should not be ridden until checked by a Yamaha dealer If a malfunction is noted have a Yamaha dealer check the system before riding WARNING ...

Page 40: ... is in safe operating condition Always follow the inspection ribed in the Owner s Manual EWA11151 perly increases the possibility of an accident or equipment damage lem If a problem cannot be corrected by the procedures provided in amaha dealer ts ...

Page 41: ... to specified level em for leakage 7 17 ve Yamaha dealer bleed hydraulic system or wear ry reservoir commended brake fluid to specified level stem for leakage 7 22 7 23 7 24 ve Yamaha dealer bleed hydraulic system or wear ry reservoir commended brake fluid to specified level stem for leakage 7 22 7 23 7 24 ration is smooth ay Yamaha dealer adjust cable free play and lubricate cable 7 19 7 25 ...

Page 42: ...d depth 7 20 7 21 ation is smooth ing points if necessary 7 26 ation is smooth ecessary 7 26 uts bolts and screws are properly tightened gnition circuit cut off system ing correctly have Yamaha dealer check vehicle 4 18 CHECKS PAGE ...

Page 43: ...erating the ve hicle for the first time In order for the ignition circuit cut off system to enable starting the side stand must be up See page 4 19 for more information 1 Turn the key to ON and make sure that the engine stop switch is set to The following warning light indica tor light and indicators should come on for a few seconds then go off Engine trouble warning light V belt replacement indic...

Page 44: ...the rear view mirrors itch the turn signals on eck for oncoming traffic and n slowly turn the throttle grip on right in order to take off itch the turn signals off EAU16780 Acceleration and deceleration The speed can be adjusted by opening and closing the throttle To increase the speed turn the throttle grip in direction a To reduce the speed turn the throt tle grip in direction b bar 1 a b ...

Page 45: ...t for the first 1600 km 1000 mi The various parts in the engine wear and polish themselves to the correct operating clearances During this period prolonged full throt tle operation or any condition that might result in engine overheating must be avoided EAU36531 0 1000 km 0 600 mi Avoid prolonged operation above 4000 r min NOTICE After 1000 km 600 mi of operation the engine oil must be changed and...

Page 46: ... the engine and exhaust stem can become very hot k in a place where pedestri s or children are not likely to ch them and be burned not park on a slope or on soft ound otherwise the vehicle y overturn increasing the k of a fuel leak and fire not park near grass or other mmable materials which ght catch fire ...

Page 47: ...therwise engine wear may result Con Yamaha dealer for proper nance intervals EAU17302 Emission controls not only function to ensure cleaner air but are also vital to proper engine operation and maximum performance In the following periodic maintenance charts the services relat ed to emissions control are grouped separately These services require specialized data knowledge and equipment Maintenance...

Page 48: ...ND ADJUSTMENT 7 2 ...

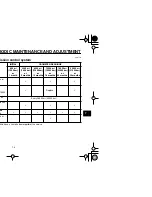
Page 49: ...Yamaha dealer perform the service INITIAL ODOMETER READINGS 600 mi 1000 km or 1 month 4000 mi 7000 km or 6 months 8000 mi 13000 km or 12 months 12000 mi 19000 km or 18 months 16000 mi 25000 km or 24 months 20000 mi 31000 km or 30 months ks or 19000 Replace ear Every 26600 mi 42000 km racks dle n dam ...

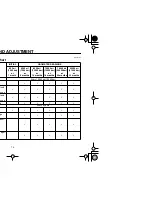
Page 50: ...GS 600 mi 1000 km or 1 month 4000 mi 7000 km or 6 months 8000 mi 13000 km or 12 months 12000 mi 19000 km or 18 months 16000 mi 25000 km or 24 months 20000 mi 31000 km or 30 months Every 12000 mi 19000 km l and essary l and essary e Every 4 years age dam oper ...

Page 51: ...s ly ly grease ace if il leak il leak and When the oil change indicator flashes e for oil INITIAL ODOMETER READINGS 600 mi 1000 km or 1 month 4000 mi 7000 km or 6 months 8000 mi 13000 km or 12 months 12000 mi 19000 km or 18 months 16000 mi 25000 km or 24 months 20000 mi 31000 km or 30 months ...

Page 52: ... 20000 km and thereafter every 12500 mi 20000 km hicle Every 3 years ge When the V belt replacement indicator flashes able W 30 play e play ous INITIAL ODOMETER READINGS 600 mi 1000 km or 1 month 4000 mi 7000 km or 6 months 8000 mi 13000 km or 12 months 12000 mi 19000 km or 18 months 16000 mi 25000 km or 24 months 20000 mi 31000 km or 30 months ...

Page 53: ...7 8 9 EAU38260 uent service if you are riding in unusually wet or dusty areas ders and calipers always change the fluid Regularly check the brake fluid ponents of the brake master cylinders and calipers and change the brake and if cracked or damaged ...

Page 54: ...k fasteners 2 Remove the upper left and right side of the panel by pulling them upward and then pull the panel downward as shown To install the panel Place the panel in the original position and then install the quick fasteners F A fastener 1 2 1 1 Panel A 1 ...

Page 55: ...the nuts and then place e rubber cover on each mirror in e original position stall panel A C ove the panel e the screws and then pull the pward To install the panel Place the panel in the original position and then install the screws Panel D To remove the panel 1 Remove panel C 2 Remove the screws and then pull the panel backward and upward w l B 2 1 1 Screw 2 Panel C 2 1 ...

Page 56: ... the panel he panel in the original position n install the screws F ove the panel e the screws and then pull the utward To install the panel Place the panel in the original position and then install the screws 1 1 Screw 1 1 ...

Page 57: ...park plug and its mating surface and then f any grime from the spark plug s ue wrench is not available when installing a spark plug a good estimate of the correct torque is 1 4 1 2 turn past finger tight However the spark plug should be tightened to the speci fied torque as soon as possible k plug gap k plug gap 7 0 8 mm 0 028 0 031 in tening torque ark plug 12 5 Nm 1 25 m kgf 9 ft lbf ...

Page 58: ...ro g with the oil level check oth the check will result in a false g it two minutes until the oil set and then check the oil level ough the check window located he bottom left side of the crank e TIP The engine oil should be between the minimum and maximum level marks 4 If the engine oil is below the mini mum level mark add sufficient oil of the recommended type to raise it to the correct level To...

Page 59: ...k the washer and O ring for mage and replace them if nec sary TIP Skip steps 6 8 if the oil filter cartridge is not being replaced 6 Remove the oil filter cartridge with an oil filter wrench ne oil drain bolt 1 1 Engine oil drain bolt 2 O ring 3 Washer 1 2 3 ...

Page 60: ...the clutch do not mix any chemical additives Do not use oils with a diesel speci fication of CD or oils of a high er quality than specified In addition do not use oils labeled ENERGY CONSERVING II or higher Make sure that no foreign mate rial enters the crankcase e wrench ening torque filter cartridge 17 Nm 1 7 m kgf 12 3 ft lbf ening torque gine oil drain bolt 43 Nm 4 3 m kgf 31 1 ft lbf 1 Recomm...

Page 61: ...eriodic maintenance and lubrica tion chart 1 Place the vehicle on a level sur face 2 Remove panel E See page 7 8 3 Place an oil pan under the chain drive case to collect the used oil 4 Remove the oil filler cap and drain bolt to drain the oil from the chain drive case 5 Install the chain drive oil drain bolt and then tighten it to the specified 1 Chain drive oil filler cap 2 Chain drive oil drain ...

Page 62: ... correct level ert the dipstick into the oil filler e and then tighten the oil filler p E ECA15010 ke sure that no foreign mate enters the chain drive case ke sure that no oil gets on the or wheel eck the chain drive case for oil kage If leakage is found check the cause 11 Install the panel mum level mark um level mark 1 2 ...

Page 63: ...rvoir cap WARNING Remove only the coolant reservoir cap Never at tempt to remove the radiator cap when the engine is hot EWA15161 NOTICE If coolant is not available use distilled water or soft tap water instead Do not use hard water or salt water since it is harmful to the engine If water has been used instead of coolant replace it with cool ant as soon as possible other mum level mark mum level m...

Page 64: ... air filter case cover by moving the screws l the air filter element out 4 Insert a new air filter element into the air filter case NOTICE Make sure that the air filter element is properly seated in the air filter case The engine should never be operated without the air filter element installed otherwise the piston s and or cylinder s may becomeexcessivelyworn ECA10481 5 Install the air filter cas...

Page 65: ...heck the cable free play and if neces ave a Yamaha dealer adjust it EAU21401 Valve clearance The valve clearance changes with use resulting in improper air fuel mixture and or engine noise To prevent this from occurring the valve clearance must be adjusted by a Yamaha dealer at the intervals specified in the periodic maintenance and lubrication chart tle cable free play 1 ...

Page 66: ...Yamaha dealer replace the tire immediately TIP The tire tread depth limits may differ from country to country Always comply ir pressure measured on cold 90 kg 0 198 lb Front 225 kPa 2 25 kgf cm2 33 psi Rear 250 kPa 2 50 kgf cm2 36 psi 193 kg 198 425 lb Front 225 kPa 2 25 kgf cm2 33 psi Rear 280 kPa 2 80 kgf cm2 41 psi mum load 3 kg 425 lb al weight of rider passenger car and accessories 1 Tire tre...

Page 67: ... should be checked for cracks bends or warpage be fore each ride If any damage is found have a Yamaha dealer re place the wheel Do not attempt even the smallest repair to the wheel A deformed or cracked wheel must be replaced The wheel should be balanced whenever either the tire or wheel has been changed or replaced An unbalanced wheel can result in poor performance adverse han dling characteristi...

Page 68: ...ci EAU33473 Adjusting the rear brake lock lever cable Rear brake lock lever cable adjustment may be required if the rear brake lock lever does not hold properly When the rear brake lock lever is not in use the rear brake lock lever cable length should measure 45 mm to 47 mm 1 77 in to 1 85 in at the rear brake caliper Periodically check the rear brake lock lever cable length and if necessary adjus...

Page 69: ...ition wear indicator while applying the If a brake pad has worn to the point that the wear indicator almost touches the brake disc have a Yamaha dealer replace the brake pads as a set EAU22493 Rear brake pads 1 Remove the rear brake caliper by removing the bolts 2 Check each rear brake pad for damage and measure the lining thickness If a brake pad is dam aged or if the lining thickness is less tha...

Page 70: ...e to check the brake pads for wear and the brake system for leakage Observe these precautions When checking the fluid level make sure that the top of the brake fluid reservoir is level Use only the recommended quality brake fluid otherwise the rubber seals may deteriorate causing leakage and poor braking perfor mance Refill with the same type of brake fluid Mixing fluids may result in a harmful ch...

Page 71: ...of the master cylinders and s as well as the brake hoses re at the intervals listed below or ver they are damaged or leak seals Replace every two ars ake hoses Replace every four ars EAU23111 Checking and lubricating the throttle grip and cable The operation of the throttle grip should be checked before each ride In addi tion the cable should be lubricated at the intervals specified in the periodi...

Page 72: ...Checking and lubricating the centerstand and sidestand The operation of the centerstand and sidestand should be checked before each ride and the pivots and met al to metal contact surfaces should be lubricated if necessary mmended lubricant cone grease ...

Page 73: ...and excessive oil leakage ck the operation ace the vehicle on a level sur ce and hold it in an upright posi n WARNING To avoid injury curely support the vehicle so ere is no danger of it falling er EWA10751 hile applying the front brake sh down hard on the handlebars veral times to check if the front k compresses and rebounds moothly NOTICE ECA10590 If any damage is found or the front fork does no...

Page 74: ... a Yamaha dealer check el bearings EAU45031 Battery The battery is located under panel B See page 7 8 This model is equipped with a sealed type MF battery which does not require any maintenance There is no need to check the electrolyte or to add distilled water To access the battery 1 Remove panel B See page 7 8 2 Remove the rubber cover shown by removing the quick fasteners 1 Quick fastener 2 Rub...

Page 75: ...in a cool dry place OTICE When removing the ttery be sure the main switch off then disconnect the nega tive lead before disconnecting the positive lead ECA16301 2 If the battery will be stored for more than two months check it at least once a month and fully charge it if necessary 3 Fully charge the battery before in stallation 4 After installation make sure that the battery leads are properly con...

Page 76: ...e to the electrical system and ssibly a fire EWA15131 use main fuse box 1 2 1 1 Headlight fuse 2 Ignition fuse 3 Backup fuse for odometer and clock 4 Radiator fan fuse 5 Fuel injection system fuse 6 Signaling system fuse 7 Spare fuse 8 Taillight fuse 7 7 7 8 1 2 3 4 5 6 ...

Page 77: ...ree from herwise the transparency of ss the luminosity of the bulb e bulb life will be adversely af Thoroughly clean off any dirt ngerprints on the headlight sing a cloth moistened with al or thinner sconnect the headlight coupler and then remove the bulb cover 2 Unhook the headlight bulb holder and then remove the burnt out bulb ot touch the glass part of the bulb 1 Headlight coupler 2 Bulb cover...

Page 78: ...dealer check its electri uit or replace the bulb EAU24252 Replacing a front turn signal light bulb 1 Remove the front turn signal light lens by removing the screw 2 Remove the burnt out bulb by pushing it in and turning it counter clockwise 1 Screw 2 Turn signal light lens 1 2 ...

Page 79: ...ht bulb r turn signal light does not come ve a Yamaha dealer check the al circuit or replace the bulb EAU24311 Replacing the license plate light bulb 1 Remove the license plate light unit by removing the screws 2 Remove the socket together with the bulb by pulling it out 1 Screw 1 ...

Page 80: ... your scooter re ny repair take it to a Yamaha whose skilled technicians have essary tools experience and ow to service the scooter prop ly genuine Yamaha replace rts Imitation parts may look like a parts but they are often inferi e a shorter service life and can expensive repair bills ARNING EWA15141 checking the fuel system do oke and make sure there are n flames or sparks in the ar uding pilot ...

Page 81: ...the ignition Have a Yamaha dealer check the vehicle ry cloth and correct the or replace the spark plugs dealer check the vehicle The engine does not start Have a Yamaha dealer check the vehicle The engine does not start Check the battery The battery is good Check the battery lead connections and charge the battery if necessary Operate the electric starter ...

Page 82: ...ssing sound has stopped press down on the cap n remove the cap arily used instead provided that it is changed to the recommended coolant The coolant level is OK The coolant level is low Check the cooling system for leakage Have a Yamaha dealer check and repair the cooling system Add coolant See TIP Start the engine If the engine overheats again have a Yamaha dealer check and repair the cooling sys...

Page 83: ...rn dirt e oil burnt onto the crankcase h a degreasing agent and a ush but never apply such prod ucts onto seals gaskets and wheel axles Always rinse the dirt and de greaser off with water Cleaning NOTICE ECA10781 Avoid using strong acidic wheel cleaners especially on spoked wheels If such products are used on hard to remove dirt do not leave the cleaner on the af fected area any longer than in str...

Page 84: ...s the corrosive action he salt ECA10791 ply a corrosion protection spray on all metal including chrome and nickel plated surfaces to prevent corrosion After cleaning 1 Dry the scooter with a chamois or an absorbing cloth 2 Use a chrome polish to shine chrome aluminum and stain less steel parts including the ex haust system Even the thermally induced discoloring of stain less steel exhaust systems ...

Page 85: ...l from deteriorating 3 Perform the following steps to pro tect the cylinders piston rings etc from corrosion a Remove the spark plug caps and the spark plugs b Pour a teaspoonful of engine oil into the spark plug bores c Install the spark plug caps onto the spark plugs and then place the spark plugs on the cylinder head so that the electrodes are grounded This will limit spark ing during the next ...

Page 86: ...AGE 8 4 ...

Page 87: ...1 56 US qt 1 30 Imp qt er er element coated paper element mmended fuel mium unleaded gasoline only ank capacity 0 L 3 96 US gal 3 30 Imp gal Fuel reserve amount 3 0 L 0 79 US gal 0 66 Imp gal Fuel injection Throttle body Manufacturer MIKUNI Type quantity ACW31 3 1 Spark plug s Manufacturer model NGK CR7E Spark plug gap 0 7 0 8 mm 0 028 0 031 in Clutch Clutch type Wet multiple disc automatic Transm...

Page 88: ...id T 4 Front suspension Type Telescopic fork Spring shock absorber type Coil spring oil damper Wheel travel 120 0 mm 4 72 in Rear suspension Type Swingarm Spring shock absorber type Coil spring gas oil damper Wheel travel 116 0 mm 4 57 in Electrical system Ignition system TCI digital Charging system AC magneto Battery Model YTZ10S Voltage capacity 12 V 8 6 Ah Headlight Bulb type Halogen bulb Bulb ...

Page 89: ...SPECIFICATIONS 9 3 2 3 4 5 6 7 8 9 p fuse 0 A ...

Page 90: ...ference when ordering a new EAU26410 Vehicle identification number The vehicle identification number is stamped into the frame TIP The vehicle identification number is used to identify your vehicle and may be used to register it with the licensing authority in your area entification number 1 Vehicle identification number 1 ...

Page 91: ...CONSUMER INFORMATION 10 2 2 3 4 5 6 7 8 9 10 ...

Page 92: ...ncorporated into any new ve e or delivery to the ultimate purchaser or while it is in use or 2 the use of has been removed or rendered inoperative by any person TITUTE TAMPERING ARE THE ACTS LISTED BELOW ystems i e modification removal etc haust system Muffler Exhaust pipe Silencer ake system Air cleaner case Air cleaner element Intake duct ...

Page 93: ... 10 EAU26632 purchased and installed on your vehicle will be required to document that with the emissions warranty The chart below is printed only as a reminder table proof of maintenance work Mileage Servicing dealer name and address Remarks ...

Page 94: ...10 5 Mileage Servicing dealer name and address Remarks ...

Page 95: ...isted y below Failures other than those resulting cts in material or workmanship which arise a result of owner abuse and or lack of proper ce are not covered by this warranty Period 6 000 km 3 750 miles or five years whichever occurs first 12 000 km 7 465 miles or five years whichever occurs first 18 000 km 11 185 miles or five years whichever occurs first 30 000 km 18 641 miles or five years whic...

Page 96: ... Cypress California 90630 When contacting Yamaha Motor Corporation U S A don t forget to include any important information such as names addresses model V I N frame number dates and receipts CHANGE OF ADDRESS The federal government requires each manufacturer of a motor vehicle to maintain a complete up to date list of all first purchasers against the possibility of a safety related defect and reca...

Page 97: ...y towing phone calls even food and lodging when you are away from home This superb coverage goes into effect when you purchase Y E S so it applies to any warranty repairs as well as covered repairs during your entire Y E S plan period Y E S coverage is honored at any authorized Yamaha dealer nationwide Y E S coverage is transferable to a new owner if you sell or trade in That can make your Yamaha ...

Page 98: ...10 9 benefits of y knowing after your maha with We ll be d ...

Page 99: ...Rear brake lock lever 4 10 Rear brake lock lever cable adjusting 7 22 Rear view mirrors 4 18 Rider backrest adjusting 4 15 S Safe riding points 2 5 Safety information 2 1 Seat 4 14 Sidestand 4 18 Spark plugs checking 7 11 Specifications 9 1 Speedometer 4 2 Starting off 6 2 Starting the engine 6 1 Start switch 4 9 Steering checking 7 28 Storage 8 3 Storage compartments 4 16 T Tail brake light 7 32 ...

Page 100: ......

Page 101: ......

Page 102: ...YAMAHA MOTOR CO LTD PRINTED IN JAPAN 2008 3 0 1 1 E ...

Reviews: