En
15
3
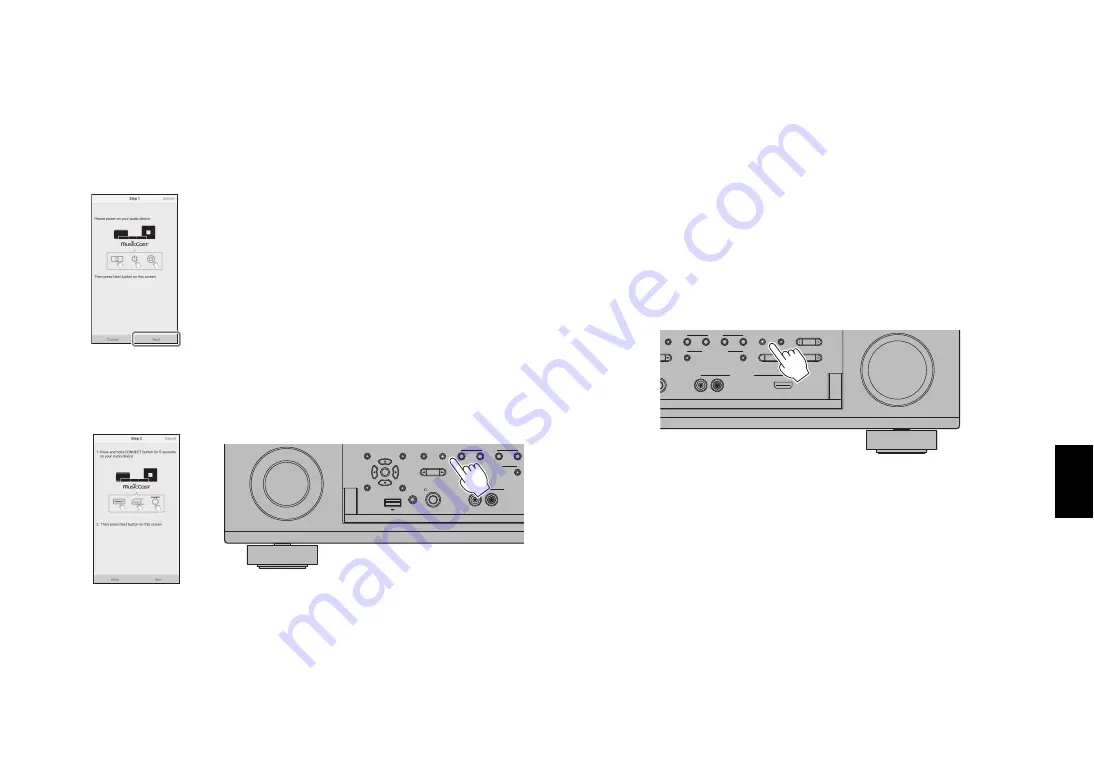
Confirm that the unit is turned on, and tap “Next”.
4
Press and hold the CONNECT button on the front
panel of the unit for 5 seconds, as instructed by
the app.
5
Follow the app’s on-screen instructions to
configure network settings.
When a connection has been established, “Completed” will be displayed
in the front display of the unit.
Network connection with the MusicCast CONTROLLER app is now complete,
and the unit has been registered as a MusicCast-enabled device.
B
Using WPS push-button
configuration
Wireless connection can be configured with one push of the WPS button on
the wireless router (access point).
1
Press and hold INFO (WPS) on the unit’s front
panel for more than 3 seconds.
“Press WPS button on Access Point” will be displayed in the front display.
2
Push the WPS button on the wireless router.
When a connection has been established, “Completed” will be displayed
in the front display.
Note
If “Not connected” is displayed, repeat the process from step 1 or try another
connection method.
OPTION
ON SCREEN
DISPLAY
RETURN
MULTI ZONE
VIDEO AUX
ZONE 2
ZONE CONTROL
YPAO MIC
PHONES
USB
SILENT CINEMA
TONE CONTROL STRAIGHT
(CONNECT)
PROGRAM
SCENE
1
2
3
4
R
L
AUDIO
ENTER
5V
1A
MULTI ZONE
VIDEO AUX
ZONE 2
ZONE CONTROL
ONES
CINEMA
STRAIGHT
(CONNECT)
RAM
SCENE
1
2
3
4
HDMI IN
R
L
AUDIO
INFO(WPS)
MEMORY
FM
AM
TUNING
PRESET
Summary of Contents for RX-V1083
Page 2: ...2 En...
Page 22: ...22 Fr...
Page 42: ...42 Zh...
Page 45: ...Zh 45...
Page 47: ...Zh 47 1 x1 HDMI x3 x1 AAA R03 UM 4 x2 AM FM YPAO CD DAB FM...
Page 48: ...48 Zh 2 10mm Check SP Wires 1 2 3 4 5 E R 9 5 1 2 5 4 2 1 3 9 E R 10 30 10 30 10mm...
Page 51: ...Zh 51 4 FM AM AM FM ANTENNA 4 RADIO 75 FM AM AM AM FM FM FM FM FM...
Page 52: ...52 Zh DAB FM DAB FM...
Page 53: ...Zh 53 5 Bluetooth NETWORK 3 NET LAN 7 Internet...
Page 63: ...63...


