Printed in Indonesia
3
4
1
2
y
5
r
t
q
w
e
u
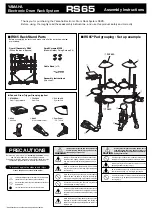
* Parts for the RS65's main structure have already been assembled before packing. After removing the unit from the box, follow
the instructions described below to complete the assembly.
A Phillips (+) screwdriver is required when attaching the DTXPRESS module. Please prepare one before starting assembly.
■
RS65 Assembly
Drum Pad
Step
3-2
Step
5
Step
4
Step
3-1
Cymbal Pad
Cymbal Holder
Left Leg Assembly
Right Leg Assembly
Module Holder Assembly
Side Arm (L) Assembly
Side Arm (R) Assembly
DTXPRESS
Holder
Clamp
Module
Holder
Drum Pad
Clamp
After removing the unit from the box, remove all cushion material.
Setting up the parts
• Loosen the bolts on the movable arms and legs, as shown in the dia-
grams below, then secure the bolts firmly once setting is complete.
Follow the setup order (
q
-
u
) in the diagrams shown below.
Caution :
Make sure the bolts marked with a " " are loosened before
setting up.
Attaching the DTXPRESS
3-1
Remove the module holder from the holder clamp, and use the
supplied screws to attach the DTXPRESS .
Make sure only the supplied screws are used. Using any other
screws may result in the unit falling off the holder or damage.
3-2
Reattach the module holder to the holder clamp.
Attaching the cymbal pads
Attach the cymbal pads to the cymbal holders and adjust their position,
then secure in place. (Please refer to the Owner's Manual that came
with the cymbal pads on attaching the cymbal pads.)
Attaching the drum pads
Attach drum pads to the hexagonal rod cylinder and adjust their posi-
tion, the secure in place.
The hi-hat drum pad clamp can
also be attached to this arm.
Make sure all bolts on clamps, pads, etc., are firmly tightened.
Loose or over-tightened bolts may result in the part falling off and/or dam-
age. Please use caution.
After assembly is complete, setup the kick pad, hi-hat control pedal, etc., and
connect the cables. Use the supplied cable bands to secure the cables to the
frame pipes to keep cables out of the way during performance.
If the rack is moved even after setup is complete, make sure the bolts are
loosened before moving the rack.
$
Caution
Caution
^


