


7-15
1
2
3
4
5
6
7
8
9
10
11
Do not ride in areas posted “no trespassing”.
Do not ride on private property without getting per-
mission.
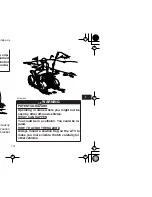
Select a large, flat area off-road to become familiar
with your ATV. Make sure that this area is free of
obstacles and other riders. You should practice
control of the throttle, brakes, and turning tech-
niques in this area before trying more difficult ter-
rain. Always avoid riding on paved surfaces: the
ATV is designed for off-road use only, and han-
dling maneuvers are more difficult to perform on
pavement.
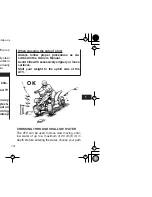
Set the parking brake and follow the instruction on
page 6-1 to start the engine. Once it has warmed
up you are ready to begin riding your ATV. Re-
member that the engine and exhaust pipe will be
hot when riding and afterwards; do not allow skin
or clothing to come in contact with these compo-
nents.
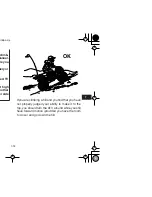
With the engine idling, shift the transmission into
the drive position and then release the parking
brake. Apply the throttle slowly and smoothly. The
centrifugal clutch will engage and you will start to
accelerate. If the throttle is applied too abruptly, the
front wheels may lift off the ground, resulting in a
loss of directional control. Avoid higher speeds un-
til you are thoroughly familiar with the operation of
your ATV.
When slowing down or stopping, release the throt-
tle and apply the brakes smoothly and evenly. Im-
proper use of the brakes can cause the tires to lose
traction, reducing control and increasing the possi-
bility of an accident.
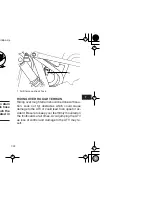
TURNING YOUR ATV
To achieve maximum traction while riding off-road,
the two rear wheels are mounted solidly on one
axle and turn together at the same speed. There-
fore, unless the wheel on the inside of the turn is al-
lowed to slip or lose some traction, the ATV will
resist turning. A special turning technique must be
used to allow the ATV to make turns quickly and
easily. It is essential that this skill be learned first at
Summary of Contents for RAPTOR YFM50RW
Page 2: ......
Page 9: ... 9 2 10 1 11 1 11 1 11 3 11 3 11 5 11 7 ...
Page 17: ...2 1 1 2 3 4 5 6 7 8 9 10 11 RNING AND SPECIFICATION LABELS ...
Page 22: ...3 2 slightly from the figures shown in this manual 4 ...
Page 36: ...4 14 esult in ...
Page 43: ...5 7 1 2 3 4 5 6 7 8 9 10 11 re prop ches are distilled ...
Page 52: ...7 1 DING YOUR ATV ...
Page 93: ...8 15 1 2 3 4 5 6 7 8 9 10 11 ving the 1 Panel 2 Bolt 1 2 2 ...
Page 110: ...8 32 e stand s arrow n of the wheel Front 1 Arrow mark 1 ...
Page 112: ...8 34 ng or ere in l sys mes or s from ...
Page 120: ...10 4 ...
Page 122: ...11 2 o identi n the il abel in e need ha deal 1 Model label 1 ...
Page 124: ...11 4 MILEAGE SERVICING DEALER NAME AND ADDRESS REMARKS ...
Page 129: ...11 9 1 2 3 4 5 6 7 8 9 10 11 ...


