background image

PSR-SX600 Owner’s Manual

69

Son

g

s – Pl

a

y

in

g

P

rac

ti

ci

ng and

 R

eco

rd

in

g Son

g

s –

3

4

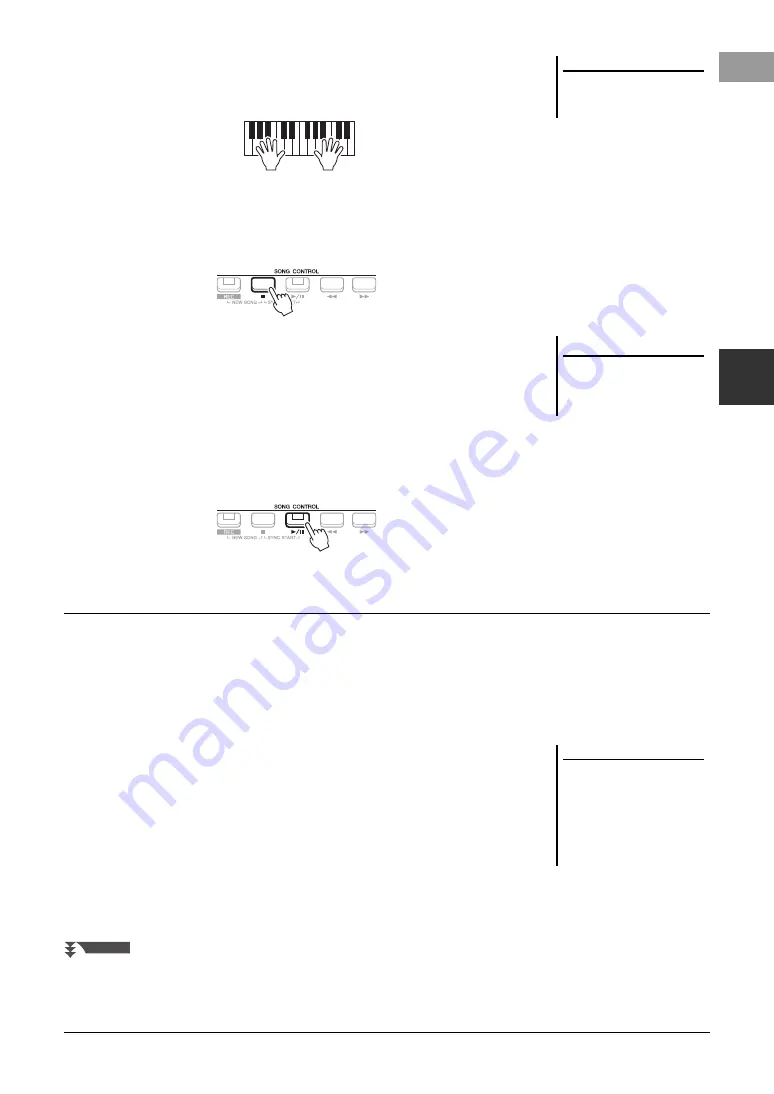
Start recording.

You can start recording by playing the keyboard, starting a Style, playing a 
Multi Pad or pressing the SONG CONTROL [

F

/

K

] (PLAY/PAUSE) button.

5

After you finish your performance, press the [

J

] (STOP) or 

[REC] button to stop recording.

A message may appear prompting you to save the recorded data. Press the 
[EXIT] button to close the message.

6

Save the recorded performance as a Song.

5-1

Press the [SONG FUNCTION] button to call up the Song Function Menu 
display, and then press one of the [1 



] (Select) buttons to call up the 

Song Selection display.

5-2

Save the recorded data as a file by following the instructions on page 26.

7

Press the [

F

/

K

] (PLAY/PAUSE) button to play back the recorded 

performance.

You can create a Song consisting of 16 channels by recording your performance to each part one-by-one over a different 
channel number. In recording a piano piece, for example, you can record the right-hand part as channel 1 then record the 
left-hand part as channel 2, allowing you to create a complete piece which may be difficult to play live with both hands 
together. To record a performance with Style playback, for example, record the Style playback as channels 9 – 16, and 
then record melodies as channel 1 while listening to the already recorded Style playback. In this way, you can create an 
entire Song which would otherwise be difficult, or even impossible, to play live.

1

Before recording, make the necessary settings, such as Voice/
Style selection.

2

Press the SONG CONTROL [REC] button and the [

J

] (STOP) 

button simultaneously.

A blank Song for recording is automatically set, and the Song name on the Main 
display (page 18) is set to “NewSong.”

3

While holding down the [REC] button, press the appropriate [1 



] – [8 



] buttons to set the desired channels to “Rec.”

NOTE

You can use the metronome (page 38) 
while recording; however, the metro-
nome sound will not be recorded.

NOTICE

The recorded Song will be lost if 
you change to another Song or 
you turn the power off without 
carrying out the Save operation.

Recording each part individually (Multi Track Recording)

NOTE

Each part of a MIDI song can be 
recorded with a different channel num-
ber (Ch. 1 – Ch. 16). Because of this 
format, the performance information of 
each part remains separate and is not 
mixed — even though all parts will be 
saved as one track. This channel num-
ber is referred to as “MIDI Channel.”

NEXT PAGE

Summary of Contents for PSR-SX600

Page 1: ...tiles y avanzadas funciones del instrumento Recomendamos guardar el manual en un lugar seguro y accesible para futuras consultas Antes de utilizar el instrumento lea las PRECAUCIONES en las páginas 5 y 6 Digital Workstation Clavier Arrangeur Professionnel Estación de Trabajo Digital Owner s Manual Mode d emploi Manual de instrucciones Thank you for purchasing this Yamaha Digital Workstation This i...

Page 2: ...2 PSR SX600 Owner s Manual ...

Page 3: ...OFF and ON please try to elimi nate the problem by using one of the following measures Relocate either this product or the device that is being affected by the interference Utilize power outlets that are on different branch circuit breaker or fuse circuits or install AC line filter s In the case of radio or TV interference relocate reorient the antenna If the antenna lead in is 300 ohm ribbon lead...

Page 4: ... power cord from being walked on or pinched particularly at plugs convenience receptacles and the point where they exit from the apparatus 11 Only use attachments accessories specified by the manufacturer 12 Use only with the cart stand tri pod bracket or table specified by the manufacturer or sold with the apparatus When a cart is used use caution when moving the cart apparatus combination to avo...

Page 5: ...can result in damage to the instrument or overheating Use only the supplied power chord plug Check the electric plug periodically and remove any dirt or dust which may have accumulated on it This instrument contains no user serviceable parts Do not open the instrument or attempt to disassemble or modify the internal components in any way If it should appear to be malfunctioning discontinue use imm...

Page 6: ...ou experience any hearing loss or ringing in the ears consult a physician Always turn the power off when the instrument is not in use Even when the Standby On switch is in standby status display is off electricity is still flowing to the instrument at the minimum level When you are not using the instrument for a long time make sure you unplug the power cord from the wall AC outlet NOTICE To avoid ...

Page 7: ...as well as MIDI related information Computer related Operations Includes instructions on connecting this instrument to a computer and operations related to transmitting receiving MIDI data Smart Device Connection Manual only in English French German Spanish Portuguese Chinese and Indonesian Explains how to connect the instrument to smart devices such as smartphone or tablet etc MIDI Basics only in...

Page 8: ... enhanced format of SFF which features improved note transposition for guitar tracks Information About copyrights Copying of the commercially available musical data including but not limited to MIDI data and or audio data is strictly prohibited except for your personal use This product incorporates and bundles contents in which Yamaha owns copyrights or with respect to which Yamaha has license to ...

Page 9: ...tor 59 3 Songs Playing Practicing and Recording Songs 61 Playback of Songs 61 Displaying Music Notation Score 63 Displaying Lyrics Text 64 Turning Each Channel of the Song On Off 65 One handed Practice with the Guide Function 65 Repeat Playback 66 Recording Your Performance 68 4 USB Audio Player Recorder Recording and Playing Audio Files 72 Playing Back Audio Files 72 Recording Your Performance as...

Page 10: ...icrophone to the MIC INPUT jack the instrument outputs your vocals through the built in speakers and you can record your own performance with high sound quality Moreover since song lyrics or music scores can be shown on the display you can also enjoy singing along with your keyboard performance or along with Song playback DSP Digital Signal Processor features built into the PSR SX600 provide high ...

Page 11: ... intuitively control your performance in real time For example you can use the knobs to control the brightness cutoff frequency of the sound being played or to correct the tone or timbre of the sound with EQ letting you easily add variations to the sound without interrupting your performance You can also control your performance easily by using the two wheels PITCH BEND and MODULATION The PITCH BE...

Page 12: ...age 48 For selecting a Style category 8 SONG CONTROL buttons Page 62 For controlling Song playback 9 STYLE CONTROL buttons Page 50 For controlling Style playback SONG FUNCTION button Pages 24 61 Calls up the Song Function Menu display for selecting Songs etc USB AUDIO PLAYER button Page 72 Calls up the display for playing back audio files and record ing your performance in audio format PLAYLIST bu...

Page 13: ...PART SELECT buttons Page 37 For selecting a keyboard part H PART ON OFF buttons Page 37 For turning the keyboard part on or off I MIC SETTING button Page 77 Calls up the display from which you can make settings for the microphone J VOICE EFFECT buttons Page 43 For applying various effects to the keyboard performance K UPPER OCTAVE buttons Page 39 For applying the pitch of the keyboard in octave st...

Page 14: ...y accessible If some trouble or malfunction occurs immedi ately turn the power off and disconnect the plug from the outlet NOTE Follow this procedure in reverse order when disconnecting the AC adaptor w q e DC IN jack page 94 AC adaptor AC Outlet Power cord The shape of the plug and outlet differs depending on your area Turning the Power On Off 2 NOTICE Do not press the foot pedal or move the PITC...

Page 15: ...dby On switch If you want to turn off the power press the Standby On switch after recording editing or after the message has disap peared If you need to force quit the instrument hold down the Standby On switch for longer than three seconds Note that the force quit operation might cause data loss and damage to the instrument Setting the Auto Power Off function NOTICE The data which is not saved to...

Page 16: ...the display for messages 1 Press the MENU button to call up the operation display 2 Use the TAB F button to call up Menu2 3 Use the Cursor buttons E F to select System and then press the ENTER button Using the Headphones CAUTION Do not listen with the headphones at high volume for long periods of time Doing so may cause hearing loss Standard stereo phone plug Changing the Display Language 5 2 3 ...

Page 17: ...ENU and MEMORY buttons simultaneously to call up the Demo display 2 Use the Cursor buttons to select a specific Demo and then press the ENTER button Use the Cursor button F to select Overview and then press the ENTER button to play back the overview Demo continuously calling up the various displays in sequence The sub menus are shown on the display Use the Cursor buttons to select the desired sub ...

Page 18: ...and related information Displays the currently selected Style name time signature and tempo page 48 When the ACMP button is set to on the chord specified in the chord section of the keyboard will be displayed 4 Multi Pad Bank name Displays the names of the selected Multi Pad Bank page 80 5 Audio file information Displays information for the selected audio file in the connected USB flash drive page...

Page 19: ...e currently selected Registration Memory Bank name and Registration Memory number page 86 Registration Sequence Appears when the Registration Sequence is active For instructions on programming the sequence refer to the Reference Manual on the website Chapter 7 Instruction conventions in this manual Throughout this manual instructions with multiple steps are given in convenient shorthand with arrow...

Page 20: ... to move the cursor up down left and right to the desired item To actually select the item press the ENTER button Display based Controls Cursor buttons E F see below YES NO buttons page 21 TAB E F buttons page 22 Data dial page 21 1 8 buttons page 22 EXIT button page 22 DIRECT ACCESS button page 23 ENTER button see below Cursor buttons E F Move the cursor to the desired item by using these Cursor ...

Page 21: ...age 84 rotate the Data dial to move the cursor and then press the ENTER button to actually select the file These buttons are used to adjust the value or select Yes or No in the message shown in the display etc To reset the desired value to its default press these buttons simultaneously Data dial Rotate the Data dial to adjust the selected parameter Select the desired parameter with the appropriate...

Page 22: ...8 are described as and those below the numbers are described as throughout this manual To reset the desired value to its default press the buttons and the buttons simultaneously TAB E F buttons EXIT button 1 8 buttons For menus that appear in this section of the display use the 1 8 buttons For menus that appear in this sec tion of the display use the 1 8 buttons For list menus that appear use the ...

Page 23: ... the appropriate button 2 Press the button or move the knob wheel or connected pedal corresponding to the desired setting display to instantly call up that display For example pressing the METRONOME button calls up the display in which the time signature volume and sound of the metronome can be set A message information or confirmation dialog sometimes appears on the screen to facilitate operation...

Page 24: ...d or edited content files are saved Installed Expansion Voices or Styles are also saved here in the Expansion folder USB Location where content files on USB flash drive are saved This appears only when a USB flash drive is connected to the USB TO DEVICE terminal 2 Selectable data files The files that can be selected on this display are shown If more than 10 files exist pressing the 1 or 2 button e...

Page 25: ...ders This display shows the Voices in a folder Pressing 8 button calls up the next higher level folder The next highest level in this case folder is shown Each folder shown in this display contains appropriately categorized Voices File Management NOTE Before using a USB flash drive be sure to read Connecting USB Devices on page 95 Restrictions for protected Songs Preset Songs and most commercially...

Page 26: ...alled up 4 Enter the file name page 31 Even if you skip this step you can rename the file at any time after saving it page 28 5 Press the 8 OK button to actually save the file If the file name already exists a message appears asking you if you want to overwrite or not If not press one of the 6 No buttons and enter another name The saved file will be automatically located at the appropriate positio...

Page 27: ...king you if you want to overwrite or not If not press one of the 6 No buttons and enter another name The created folder will be automatically located at the appropriate position among the folders in alphabetical order Creating a New Folder NOTE A new folder cannot be made in the Preset tab or the Expansion folder page 47 in the User tab NOTE The maximum number of files folders which can be saved i...

Page 28: ...K button to confirm the file folder selection The Character Entry window is called up 6 Enter the name of the selected file or folder page 31 If the file folder name already exists a message appears asking you if you want to overwrite or not If not press one of the 6 No buttons and enter another name The renamed file folder appears on the display at the appropriate position among the files in alph...

Page 29: ...the current display including the other pages To cancel the selection press the 8 All Off button again 5 Press the 7 OK button to confirm the file folder selection 6 Select the destination tab User or USB to paste the file folder by using the TAB E F buttons If necessary select the destination folder by using the Cursor buttons E F and then press the ENTER button 7 Press the 4 Paste button to past...

Page 30: ...n press the ENTER button Pressing the ENTER button selects highlights the file folder To cancel the selection press the ENTER button again Press the 8 All button to select all files folders indicated on the current display including the other pages To cancel the selection press the 8 All Off button again 5 Press the 7 OK button to confirm the file folder selection 6 Follow the on display instructi...

Page 31: ...nter the selected character move the cursor or press another character input button Alternately you can wait for a short time and the character will be entered automatically For more information on entering characters refer to Other character entry operations on the page 32 4 Press the 8 OK button to actually enter the new name and return to the previous display Entering Characters 2 1 4 3 NOTE Wh...

Page 32: ... 8 OK button to apply the selected icon While holding the right most key C6 on the keyboard turn the power on This resets the settings of the entire instrument referred to as the System Setup parameters to their factory default settings Refer to the Parameter Chart in the Data List on the website for details about which parameters belong to System Setup You can also reset specified settings to the...

Page 33: ...tions When the operation is completed the instrument will be restarted automatically Data Backup NOTE Before using a USB flash drive be sure to read Connecting USB Devices on page 95 NOTE You can also back up files in the User drive such as Voice Song Style Multi Pad and Registration Memory by copying them individually to a USB flash drive as desired For instructions refer to page 29 NOTE You can ...

Page 34: ...isplay various guitar Voices 2 Move the cursor to the desired Voice by using the Cursor buttons E F and then press the ENTER button You can call up the other pages by pressing the buttons 1 7 that correspond to the page numbers P1 P2 or by pressing the same VOICE category selection button repeatedly Pressing the 8 button calls up other VOICE categories folders Playing Voices NOTE For a list of pre...

Page 35: ...e sounds from the keyboard For information about what sound is assigned to each key refer to the Drum SFX Kit List in the Data List on the website SFX Various special effect sounds and percussion sounds are assigned to individual keys letting you play the sounds from the keyboard For information about what sound is assigned to each key refer to the Drum SFX Kit List in the Data List on the website...

Page 36: ...dal for a saxophone Voice can produce breath noises or key noises while doing the same for a guitar Voice can produce fret noises or body tapping sounds You can effectively intersperse these into the notes as you play To assign the function of articulation to the pedal call up the display via the following operations MENU TAB E Menu1 Cursor buttons E F Controller ENTER TAB E Foot Pedal For details...

Page 37: ...ivides the keyboard into the left hand and right hand sections is referred to as the Split Point 1 Turn on the PART SELECT button corresponding to the part you want to use 2 Select the Voice for the selected part For instructions on selecting Voices refer to page 34 3 If necessary repeat steps 1 and 2 on page 34 to select the Voice for the other part 4 Turn on the PART ON OFF button corresponding ...

Page 38: ... keys are released Non decaying Voices such as strings are held continuously while decay type Voices such as piano decay more slowly as if the sustain pedal has been pressed This function is convenient when used along with Style playback since the sound of the chord matching Style playback is maintained To stop the LEFT part Voice which is sounding stop Style or Song playback or turn the LEFT HOLD...

Page 39: ...ia MENU TAB F Menu2 Cursor buttons E F Master Tune Scale Tune ENTER The pitch can be shifted up or down between 414 8Hz and 466 8Hz in approximately 0 2 Hz increments For details refer to the Reference Manual on the website Changing the Pitch of the Keyboard Adjusting the Pitch in Semitones Transpose NOTE The Transpose functions do not affect the Drum Kit or SFX Kit Voices Adjusting the Pitch in O...

Page 40: ...part MENU TAB E Menu1 Cursor buttons E F Controller ENTER TAB F Setting Cursor buttons 2 Modulation Wheel Setting this allows you to not only control the vibrato effect but also a variety of other effects For more information refer to the Reference Manual on the website Using the Wheels Using the Pitch Bend Wheel NOTE The effects produced by using the PITCH BEND wheel may not be applied to the LEF...

Page 41: ...form the following operations 1 Call up the Live Control display MENU TAB E Menu1 Cursor buttons E F Live Control ENTER 2 Use the Cursor buttons to select the desired Knob Assign Type to change 3 Use the Cursor buttons E F to select the desired Knob to change and then press the ENTER button to call up the Assign pop up display Using the LIVE CONTROL Knobs 1 Assign Type 1 2 Assign Type 2 3 Assign T...

Page 42: ...e knob may not work prop erly even if you rotate it NOTE Using the 4 8 Reset buttons resets the selected function s parameter value to the default while using the 8 Reset Value but tons reset all assignable functions parameter values ASSIGN TYPE Knob 1 Knob 2 1 Filter Reverb Filter Adjusts the cutoff frequency of the filter and the resonance for the RIGHT 1 and 2 parts to change the timbre or tone...

Page 43: ...are playing in a concert hall as well as other dynamic enhancements Performance effects such as harmony duet trio etc echo tremolo and trill can be applied to notes played 1 Turn the HARMONY ARPEGGIO button on 2 Select the desired Harmony or Echo type 2 1 Call up the operation display MENU TAB E Menu1 Cursor buttons E F Harmony Arpeggio ENTER 2 2 Use the 1 3 buttons to select Harmony or Echo 2 3 U...

Page 44: ... Echo Category Echo Tremolo Trill The Echo Tremolo or Trill effect is applied to the note played in the right hand section of the keyboard in time with the currently set tempo regardless of the ACMP and the LEFT part on off status Keep in mind that Trill works when you hold down two notes on the keyboard simultaneously or the last two notes if more than two notes are held and it plays those notes ...

Page 45: ...peggios NOTE When you select another Voice the Harmony Echo Arpeggio type is auto matically set to the default which is memorized as the Voice Set NOTE You can set the Arpeggio volume and select the part for playing the Arpeggio in the display called up via one of the 7 Detail buttons For informa tion refer to the Reference Manual on the website NOTE Arpeggio playback can be continued even after t...

Page 46: ...posely designed without Touch Response in order to emulate the true characteristics of the actual instrument for example con ventional organs which have no touch response 3 2 Touch Response is applied to the checkmarked parts 1 2 Touch Determines how the sound responds to your playing strength The following Touch types are available Normal Standard Touch Response Soft1 Produces high volume with mo...

Page 47: ...ftware and its manuals access the Yamaha Downloads website https download yamaha com Adding New Contents Expansion Packs Advanced Features Refer to the Reference Manual on the website Chapter 1 Selecting GM XG or other Voices Voice Selection display 8 Harmony Arpeggio settings MENU Menu1 Harmony Arpeggio Pitch related settings Fine tuning the pitch of the entire instrument MENU Menu2 Master Tune S...

Page 48: ...e numbers P1 P2 or by pressing the same STYLE category selection button several times 3 Press the ACMP button to turn on the Auto Accompaniment The specific left hand section of the keyboard page 57 becomes the chord section and chords played in this section are automatically detected and used as a basis for fully automatic accompaniment with the selected Style Playing a Style with the Auto Accomp...

Page 49: ...ance simply by changing the root key Keep in mind however that you cannot specify the chord type such as major and minor when using the DJ The Multi Pad page 80 data in the DJ Phrase folder are specially created for these Styles You can call up the suitable Multi Pads by using the One Touch Setting function page 55 NOTE For information on chords and Chord Fingering types refer to page 52 The chord...

Page 50: ...ifferent Intro sections to add an introduction before starting Style playback After pressing one of the INTRO I III buttons start playback of the Style When the Intro finishes playing Style playback automatically shifts to the Main section ENDING rit I III buttons The instrument features three different Ending sections to add an ending before stopping Style playback When you press one of the ENDIN...

Page 51: ...sted via the RESET TAP TEMPO button RESET TAP TEMPO button When Style and MIDI Song are stopped tapping the RESET TAP TEMPO button four times for a 4 4 time signature starts playback of the rhythm part of the Style at the tempo you tapped During playback of a MIDI Song you can change the tempo by tapping the RESET TAP TEMPO button twice at the desired tempo During playback of a Style you can rewin...

Page 52: ...ypes By default the Chord Fingering type is set to Multi Finger AI Full Keyboard This lets you play just about anything anywhere on the keyboard using both hands like conventional playing of a piano and still have appropriate accompaniment You don t have to worry about specifying the chords Depending on the song arrangement AI Full Keyboard may not always produce appropriate accompaniment For othe...

Page 53: ... Pedal Function buttons to call up the display for pedal settings and then select Unison For details refer to the Reference Manual on the website Chapter 9 2 3 Unison Type Determines the Unison type All Parts Suitable for a one hand performance In this type all the accompaniment parts follow your performance This is recommended when playing unison phrases with only one hand Split Suitable for a bo...

Page 54: ...he CHANNEL ON OFF button repeatedly if necessary to call up the Channel On Off Style display which contains the desired channel If the Channel On Off Style display is not shown press the CHANNEL ON OFF button again 2 Use the 1 8 buttons to turn the parts on or off To play only one part by itself hold down the appropriate button for the channel to set the channel to Solo To cancel Solo simply press...

Page 55: ... Set ting refer to the OTS section of Parameter Chart in the Data List on the website Confirming the One Touch Setting contents In the Style Selection display press the 6 OTS Info button when File is shown at the bottom right corner of the display to call up the Information window that shows what Voices are assigned to the ONE TOUCH SETTING 1 4 buttons for the current Style NOTE If a Voice part na...

Page 56: ...e you can adjust the volume balance between the sound input from the MIC INPUT jack page 77 sound input from the AUX IN jack page 100 USB sound via USB cable page 97 WLAN sound via USB wireless LAN adaptor page 99 and all keyboard parts KBD 3 Press the EXIT button to close the Balance display Adjusting the Volume Balance Among the Parts 2 NOTE You can also control the volume bal ance between the p...

Page 57: ...nd LOWER section Split Point Style LEFT Voice section Right hand UPPER section Split Point Left RIGHT 1 2 Voices section 4 5 Split Point Style Sets the Split Point Style Press the 4 button or press the desired key on the keyboard while holding the 5 KBD button to specify the Split Point 6 7 Split Point Left Sets the Split Point Left Press the 6 button or press the desired key on the keyboard while...

Page 58: ...an specify the chord type as you play the melody When the Manual Bass function is On the Voice for the Bass part of the current Style is muted and assigned to the left hand LOWER section To turn this func tion on off use the 1 buttons The Chord Fingering setting page 52 will be set to a specific type Fin gered automatically in which case you should press three or more notes simultaneously for spec...

Page 59: ...reset Style consist of a preset Drum Kit and each drum sound is assigned to a separate note You may want to change the sounds and the note assignments or make more detailed settings such as volume balance effect etc By using the Drum Setup function of the Style Creator you can edit the Rhythm part of a Style and save it as an original Style For details refer to the Reference Manual on the website ...

Page 60: ... original One Touch Settings MEMORY ONE TOUCH SETTING 1 4 Creating editing Styles Style Creator MENU Menu2 Style Creator ENTER Realtime Recording Basic Style Assembly Assembly Editing the rhythmic feel Groove Editing data for each channel Channel Making Style File Format settings Parameter Editing the rhythm part of a Style Drum Setup Basic 3 Rhy Clear Ch Delete Drum Setup ...

Page 61: ...ess one of the 1 Select buttons in the Song Function Menu to call up the Song Selection display NOTE For instructions on playback and recording of audio files refer to page 72 MIDI song A MIDI Song is comprised of your keyboard performance information and is not a recording of the actual sound itself The performance information refers to which keys are played at what timing and at what strength ju...

Page 62: ...k Pressing it again resumes Song playback from the current position Rewind Fast Forward Press the G REW or H FF button during playback or while the Song is stopped Pressing either of them once moves back forward one measure Holding either of them scrolls backward forward continuously NOTE You can transpose the Song playback page 39 Queuing the next Song for playback While a Song is playing back yo...

Page 63: ...g through the score indicating the current position You can change the displayed notation style by using the 1 8 buttons For details refer to the Reference Manual on the website NOTE Phrase Mark is a pre programmed marker in certain Song data which indicates a specific location in the Song To change the units used in rewinding fast forwarding the Song from Bar to Phrase Mark press one of the 3 4 b...

Page 64: ...cs data the lyrics are shown on the Lyrics display You can look through the entire lyrics by using the TAB E F buttons when Song playback is stopped When playback is started the color of the lyrics changes indicating the current position To view the text file on the Text display press one of the 5 6 Text File buttons to call up the File Selection display and select the desired file created on your...

Page 65: ... notes correctly In the Score display you can see the note to play and the current position 1 Select a Song and call up the Score display page 63 2 Press the SONG FUNCTION button to call up the Song Function Menu display 3 Use the 6 Guide buttons to turn the Guide function on 4 Press the CHANNEL ON OFF button several times to call up the Channel On Off Song display 5 Press the 1 button to turn Cha...

Page 66: ...method of repeat playback Off Plays through the selected Song and then stops Single Plays through the selected Song repeatedly All Continues playback through all the Songs in the specified folder repeatedly Random Continues playback at random through all the Songs in the specified folder repeatedly NOTE Press the EXIT button to close the Channel On Off Song display in order to see the ball bounce ...

Page 67: ...t A and pressing the F K PLAY PAUSE button lets you start from that point After you ve finished practicing press one of the 7 A B buttons to turn off Repeat playback Specifying a Range of Measures and Playing them Back Repeatedly A B Repeat 4 NOTE Specifying only Point A results in repeat playback between Point A and the end of the Song NOTE When you want to repeat from the top of the Song to a sp...

Page 68: ...ecord a particular part separately right hand left hand or Style playback Multi Track Recording page 69 You can record data to each part one by one over a different channel number to create a single multi part Song The channel part assignments can be freely changed Audio recording With this method recorded performances are saved to a USB flash drive as Audio files WAV format 44 1kHz 16 bit stereo ...

Page 69: ...to play live with both hands together To record a performance with Style playback for example record the Style playback as channels 9 16 and then record melodies as channel 1 while listening to the already recorded Style playback In this way you can create an entire Song which would otherwise be difficult or even impossible to play live 1 Before recording make the necessary settings such as Voice ...

Page 70: ...se the message 7 Press the F K PLAY PAUSE button to play back the recorded performance 8 Record your performance to another channel by repeating steps 3 to 6 above 9 Save the recorded performance as a Song 9 1 Press the SONG FUNCTION button to call up the Song Function Menu display and then press the 1 Select button to call up the Song Selection display 9 2 Save the recorded data as a file by foll...

Page 71: ...the Auto Accompaniment features with Song Playback ACMP STYLE CONTROL SYNC START SONG CONTROL J F K STYLE CONTROL START STOP Song Playback related parameters MENU Menu1 Song Setting ENTER Keyboard and vocal practice using the Guide function TAB F Setting Cursor buttons 1 Guide Mode Editing Songs Song Creator MENU Menu2 Song Creator ENTER Selecting the setup parameters recorded to the top position ...

Page 72: ...1 Connect the USB flash drive containing the audio files to the USB TO DEVICE terminal 2 Press the USB AUDIO PLAYER button to call up the USB Audio Player display 3 Press one of the 1 Select Save buttons to call up the Audio File Selection display NOTE For instructions on playback and recording of MIDI files refer to page 61 If you want to record various parts separately or edit the data after rec...

Page 73: ...take a slightly longer time to load than other files 5 Viewing Audio file information Pressing the 6 Info button calls up the Information window from which you can view the file name sample rate etc of the selected file NOTE Make sure that File is shown at the bottom right corner of the display page 24 To close the window use the 7 8 OK buttons NOTE Make sure that File is shown at the bottom right...

Page 74: ...le and then stops Single Plays through the selected file repeatedly All Continues playback through all the files in the current folder repeatedly Random Randomly and repeatedly plays back all files in the current folder Adjusting the volume of audio playback To adjust the volume press the 8 Setting buttons to call up the pop up display for audio settings and then use the 5 Audio Volume buttons Pla...

Page 75: ...t another audio file this setting will be restored to the default value You can record your performance as an audio file WAV format 44 1 kHz sample rate 16 bit resolution stereo directly to a USB flash drive Sounds that can be recorded Sounds that are generated via all the keyboard parts LEFT RIGHT 1 2 Song parts Style parts and Multi Pad page 80 parts Sounds of a vocal part that are input via the...

Page 76: ...se the 1 Select Save buttons NOTE You can use the metronome page 38 while recording however the metro nome sound will not be recorded Recordable time NOTICE Never attempt to disconnect the USB flash drive or turn the power off during recording Doing so may corrupt the USB flash drive data or the recording data Elapsed recording time NOTE The recording operation continues even if you close the USB ...

Page 77: ...tone or timbre of the sound by using EQ 1 Before turning on the power of the instrument set the MASTER VOLUME dial to the minimum position 2 Connect the microphone to the MIC INPUT jack on rear panel and then turn on the power of the instrument and set the MASTER VOLUME dial to the former position 3 Call up the Mic Setting display MIC SETTING TAB E Mixer Connecting a Microphone NOTE To avoid damag...

Page 78: ... or Chorus while singing into the microphone The higher the depth value the deeper the effect becomes 6 5 Adjust the Input Level while checking the INPUT LEVEL INDICATOR on the left of the display Make sure to adjust the Input Level so that the indicator lights in green or yellow Also make sure that the indicator does not light in red since this indicates that the input level is too high Disconnec...

Page 79: ...pter 5 Select Insertion Effect from Various Types DSP Digital Signal Processor features built into the instrument provide high quality effect types including Echo and Delay You can also apply the DSP effects only to a specified target To apply the DSP effects only to a vocal part for example press the 8 buttons to select the part and the effect types For details refer to the Reference Manual on th...

Page 80: ...the Multi Pad Bank Selection display 2 Move the cursor to the desired bank by using the Cursor buttons E F and then press the ENTER button You can call up other pages by using the 1 7 buttons that correspond to P1 P2 in the display or by pressing the MULTI PAD CONTROL SELECT button repeatedly Press the 8 button to call up the next higher level folder to which the Multi Pads are categorized 3 Press...

Page 81: ...ng back pressing the Multi Pad button starts playback at the top of the next measure When the Style or Song is stopped pressing the Multi Pad button starts playback immediately While the Style or Song is playing back pressing the STYLE CONTROL START STOP or SONG J STOP button also stops playback of the Multi Pad s While both the Style and Song is playing back pressing the SONG J STOP button stops ...

Page 82: ...5 Move the cursor to the desired audio file by using the Cursor buttons E F and then press the ENTER button Creating a Multi Pad with Audio Files WAV Audio Link Multi Pad NOTE Audio Link Multi Pads can neither be created nor played back during play back recording standby or recording of audio files NOTE Audio files WAV cannot be saved to the User drive NOTE Before using a USB flash drive be sure t...

Page 83: ...e audio file is assigned by selecting them in the User or USB tab of the Multi Pad Bank Selection display Although you can play them via the same operations in page 80 note the following limitations Make sure to connect the USB flash drive including the corresponding Audio Files WAV Automatic repeat playback is not available Only one Pad can be played back at once Chord Match cannot be applied To ...

Page 84: ...ts A Playlist contains links to call up Registration Memory Bank files for each piece you play Each link to the Registration Memory is called a Record and you can collectively store the Playlist Records as a single Playlist file Each Playlist Record can directly recall a specified Registration Memory number in the selected Registration Memory Bank file By using the Playlist you can select only the...

Page 85: ... wish to memorize the panel setup The memorized button becomes red which indicates the number button contains data and its number is selected 5 Register various panel setups to other buttons by repeating steps 1 4 The registered panel setups can be recalled by simply pressing the desired number button Registering Your Panel Setups 3 NOTE You can also use the Data dial to select and the NO YES butt...

Page 86: ...ANK and buttons simultaneously to call up the Registration Bank Selection Display 2 Press the 6 Save button to save the Bank file For instructions on saving refer to page 26 Saving the Registration Memory as a Bank file Bank 01 Bank 02 Bank 03 Bank 04 2 NOTE If the Save is not shown at the bottom of the display press the 8 button page 24 ...

Page 87: ...ted into the USB TO DEVICE terminal Before using a USB flash drive be sure to read Connecting USB Devices on page 95 NOTE Turning the FREEZE button on can disable recall of specific item s For instructions refer to the Reference Manual on the website Confirming the Registration Memory Information In the Registration Bank Selection display press the 6 Info button to call up the Information window s...

Page 88: ...If you want to create a new Playlist press the 8 buttons to call up the pop up display Then press the 3 4 Create New Playlist buttons 3 Add a Record to the Playlist To add a Record via the Registration Bank Selection display 3 1 Press the 1 List buttons to call up the Registration Bank Selection display 3 2 Select the desired Bank file to register as a Playlist Record by using the Cursor buttons E...

Page 89: ...ottom of the display If it is not shown on the display press the 8 File button to call it up 5 4 Press the 6 Save button The Character Entry window is called up 5 5 Enter the file name page 31 Even if you skip this step you can rename the file at any time after saving it page 28 5 6 Press the 8 OK button to actually save the file If the file name already exists a message appears asking you if you ...

Page 90: ...he desired Record to delete by using the Cursor buttons 2 Press the 3 Delete buttons A confirmation message appears If you want to cancel the operation press the 6 No buttons here 3 Press the 7 Yes buttons to delete the Record 4 Press the 8 Option buttons to call up the pop up display and then press the 7 Select Save buttons to save the edited Playlist For instructions on how to save refer to step...

Page 91: ...n message appears 3 Press the 7 Yes buttons to add the Records All Records in the selected Playlist file are added at the bottom of the current Playlist If you want to cancel the operation press the 6 No buttons here 4 Press the EXIT buttons to call up the Playlist display 5 Press the 8 Option buttons to call up the pop up display and then press the 7 Select Save buttons to save the edited Playlis...

Page 92: ...all up the Mixer display 2 Press the MIXER button repeatedly to call up the Mixer display for the relevant parts The part name is indicated at the top of the display Basic Procedure 3 NOTE When the UD WL01 USB Wireless LAN adaptor sold separately page 99 is connected to the instrument WLAN appears in the External page Rhythm 1 2 Bass Chord 1 2 Pad Phrase 1 2 Song channels 1 8 Style Song1 8 Song ch...

Page 93: ...ings AUX In USB WLAN are maintained even when you turn off the power To save the Panel display settings and the microphone settings in the Exter nal display Register them to Registration Memory page 85 To save the Style display settings Save them as Style data If you want to recall the settings for future use select the Style file saved here 1 Call up the operation display MENU TAB F Menu2 Cursor ...

Page 94: ...k Page 77 For connecting a microphone 4 AUX IN jack Page 100 For connecting an audio player 5 PHONES jack Page 16 For connecting headphones 6 OUTPUT L L R R jacks Page 100 For connecting to external powered speaker systems 7 FOOT PEDAL 1 2 jacks Page 102 For connecting a separately sold foot controller or footswitch 8 DC IN jack Page 14 For connecting the AC adaptor page 111 CAUTION Before connect...

Page 95: ...nnecting a USB device to the USB TO DEVICE terminal make sure that the connector on the device is appropriate and that it is connected in the proper direction NOTICE Avoid connecting or disconnecting the USB device while executing playback recording and file management operations such as Save Copy Delete and Format or when accessing the USB device Fail ure to observe this may result in freezing of...

Page 96: ...Format operation You can access files which are saved in the USB flash drive with the following operation Select the desired category by using the Cursor E F buttons from TAB F USB on the File Selection displays page 24 and then press the ENTER button Formatting a USB Flash Drive NOTICE The format operation deletes any previously existing data Make sure that the USB flash drive you are formatting ...

Page 97: ...audio data can be played back on the computer or smart device Connecting to a Computer USB TO HOST terminal NOTICE Use an AB type USB cable of less than 3 meters USB 3 0 cables cannot be used NOTE When using a USB cable to connect the instrument to your computer make the connection directly without passing through a USB hub The instrument will begin transmis sion a short time after the USB con nec...

Page 98: ...well as the sound played on the instrument by using the connected computer or smart device set this to On If you intend to record only the sound played on the instrument by using the computer or smart device set this to Off The setting can be made via MENU Utility Config1 Audio Loopback Turning Audio Loopback On Off NOTE With Audio Recording page 75 the Audio Input Sound from the external device i...

Page 99: ...ith the instrument Rec n Share This lets you both record your performances and share performance data Chord Tracker This app helps you practice and perform songs by analyzing the audio file stored in your smart device and automatically displaying the chord symbols for you For information about compatible smart devices and application tools access the following page https www yamaha com 2 kbdapps C...

Page 100: ...OTE The volume of the Audio Input Sound can be adjusted from the external device You can adjust the volume balance among the sounds of the instrument and the Audio Input Sound in the Balance display page 56 You can set whether Audio Input Sound from the external device is output to a computer or a smart device or not along with the perfor mance played on the instrument For details refer to Turning...

Page 101: ...instrument and then to the external device When turning off the power first turn off the power to the external device and then to the instrument Since this instrument s power may automatically be turned off due to the Auto Power Off function page 15 turn off the power to the external device or disable Auto Power Off when you do not intend to operate the instrument NOTICE Do not route the output fr...

Page 102: ...function assignments to the pedals as desired For information on functions that can be assigned to the pedals refer to the Reference Manual on the website Example Controlling Song Start Stop by footswitch Connect a footswitch FC4A or FC5 to one of the FOOT PEDAL jacks To assign the function to the connected pedal press the 1 Song Play Pause button in the operation display MENU TAB E Menu1 Cursor b...

Page 103: ...s for specific functions Also included are advanced Creator features such as for Styles Songs and Multi Pads 1 Call up the operation display MENU TAB E F Menu1 2 2 Move the cursor to the desired page by using the Cursor buttons E F and then press the ENTER button For information on what you can do on each page refer to the Function List on page 104 3 Use the TAB E F buttons to call up the desired ...

Page 104: ...ng Style channels one by one Chapter 2 Song Creator For creating a Song by editing the recorded Song or by entering events one by one Chapter 3 Multi Pad Creator For creating a Multi Pad by editing an existing preset Multi Pad or by recording a new one Chapter 5 Chord Tutor Determines the Chord Tutor Function With this function shown in the display you can see which notes to press for specifying t...

Page 105: ...rd Fingering Split Point SYNC STOP Style Setting START STOP STYLE STYLE category selection buttons SONG CONTROL H FF Menu Song Setting G RW F K PLAY PAUSE J STOP REC SONG FUNCTION Song Selection display RESET TAP TEMPO Menu Metronome Setting TEMPO Style Setting METRONOME Metronome Setting FADE IN OUT Utility Config1 Fade In Out TRANSPOSE Menu Controller Setting Touch Response UPPER OCTAVE Menu Voi...

Page 106: ...on buttons Menu Voice Setting VOICE EFFECT HARMONY ARPEGGIO Menu Harmony Arpeggio DSP Mixer Effect PLAYLIST Playlist ONE TOUCH SETTING 1 2 3 4 OTS Information REGISTRATION MEMORY REGIST BANK Menu Regist Sequence Freeze Registration Sequence FREEZE Freeze MEMORY Registration Sequence 1 2 3 4 Regist Information Regist Information 1 4 5 6 7 8 Regist Information 5 8 FOOT PEDAL 1 2 Menu Controller Foot...

Page 107: ...dial All keyboard parts are set to off Use the PART ON OFF RIGHT 1 RIGHT 2 LEFT button to turn it on The volume of the individual parts may be set too low Raise the volume in the Balance display page 56 Make sure the desired channel is set to On pages 54 65 Headphones are connected disabling the speaker output Unplug the headphones Make sure that the Speaker setting is set to On MENU Menu2 Utility...

Page 108: ...iment function is turned on press the ACMP button Make sure to play keys in the chord section of the keyboard page 57 58 Styles in a USB flash drive cannot be selected If the size of the Style data is large about 120 KB or greater the Style cannot be selected because the data is too large to be han dled by the instrument Song Songs cannot be selected This may be because the language settings have ...

Page 109: ...nt than expected when changing a rhythm Voice Drum kit etc of the Style or Song from the Mixer When changing the rhythm percussion Voices Drum kits etc of the Style and Song from the VOICE parameter the detailed settings related to the drum voice are reset and in some cases you may be unable to restore the original sound In the case of Song playback you can restore the original sound by returning ...

Page 110: ...r Master Compressor 5 Preset 30 User Master EQ 5 Preset 30 User Part EQ 27 Parts Mic Effects Noise Gate x 1 Compressor x 1 3 Band EQ x 1 Style Preset Number of Styles 415 Featured Styles FreePlay 1 Pro 372 DJ 10 Session 32 Fingering Single Finger Fingered Fingered On Bass Multi Finger AI Fingered Full Keyboard AI Full Keyboard Smart Chord Style Control INTRO x 3 MAIN VARIATION x 4 FILL x 4 BREAK E...

Page 111: ...ect Access Yes Text Display Function Yes Storage and Connectivity Storage Internal Memory Yes approx 20 MB max External Drives USB flash drive Connectivity DC IN 16 V Headphones Standard stereo phone jack Microphone Standard mono phone jack AUX IN Stereo mini jack OUTPUT L L R R FOOT PEDAL 1 Sustain 2 Unison Function Assignable USB TO DEVICE Yes USB TO HOST Yes Amplifiers Speakers Amplifiers 15 W ...

Page 112: ...Access Chart 105 Display 18 Drum Setup 59 DSP Digital Signal Processor 43 79 E Echo 43 Effect 43 93 Ending section 50 EQ 93 EXIT 22 Expansion Pack 47 External 92 F Factory Reset 32 Fade In Out 51 63 Fast Forward 62 File Management 25 File Selection Display 24 Fill in section 51 Filter 93 Fingering Type 52 Folder 27 Foot Pedal 102 104 Format 8 Format USB Flash Drive 96 Freeze 87 104 Function 103 Fu...

Page 113: ...ile 26 Scale Tune 39 47 104 Score 63 Section Style 51 SFF SFF GE 8 Smart Device Connection Manual 7 Song 18 61 Song Creator 71 104 Song Setting 104 Specifications 110 Split Point 57 104 START STOP 50 Style 18 48 Style Creator 59 104 Style File Format SFF 8 Style Setting 104 Super Articulation Voices 35 Synchro Start 49 50 62 81 Synchro Stop 50 System 104 T TAB E F buttons 22 Talk 79 Tempo 19 51 63...

Page 114: ...Memo ...

Page 115: ...nt inapproprié des déchets Pour plus d informations à propos de la collecte et du recyclage des déchets d équipements électriques et électroniques veuillez contacter votre municipalité votre service de traitement des déchets ou le point de vente où vous avez acheté les produits Pour les professionnels dans l Union européenne Si vous souhaitez vous débarrasser des déchets d équipements électriques ...

Page 116: ... USE DATA OR PROFITS OR BUSINESS INTERRUPTION HOWEVER CAUSED AND ON ANY THEORY OF LIABILITY WHETHER IN CONTRACT STRICT LIABILITY OR TORT INCLUDING NEGLIGENCE OR OTHERWISE ARISING IN ANY WAY OUT OF THE USE OF THIS SOFTWARE EVEN IF ADVISED OF THE POSSIBILITY OF SUCH DAMAGE COPYRIGHT AND PERMISSION NOTICE ICU 58 and later Copyright 1991 2016 Unicode Inc All rights reserved Distributed under the Terms...

Page 117: ......

Page 118: ...uments will cause this warranty to be void This warranty covers only the Original Owner and is not transferable In Order to Obtain Warranty Service Warranty service will only be provided for defective products within the Warranted Area Contact your local authorized Yamaha dealer who will advise you of the procedures to be followed If this is not successful contact Yamaha at the address telephone n...

Page 119: ...al of Yamaha Music Europe GmbH Tyskland Generatorvej 8C ST TH 2860 Søborg Denmark Tel 45 44 92 49 00 FINLAND F Musiikki Oy Antaksentie 4 FI 01510 Vantaa Finland Tel 358 0 96185111 NORWAY Yamaha Music Europe GmbH Germany Norwegian Branch Grini Næringspark 1 1332 Østerås Norway Tel 47 6716 7800 ICELAND Hljodfaerahusid Ehf Sidumula 20 IS 108 Reykjavik Iceland Tel 354 525 5050 CYPRUS Nakas Music Cypru...

Page 120: ...Yamaha Global Site https www yamaha com Yamaha Downloads https download yamaha com VDF5000 Manual Development Group 2020 Yamaha Corporation Published 07 2020 POTY A0 ...

Reviews: