background image

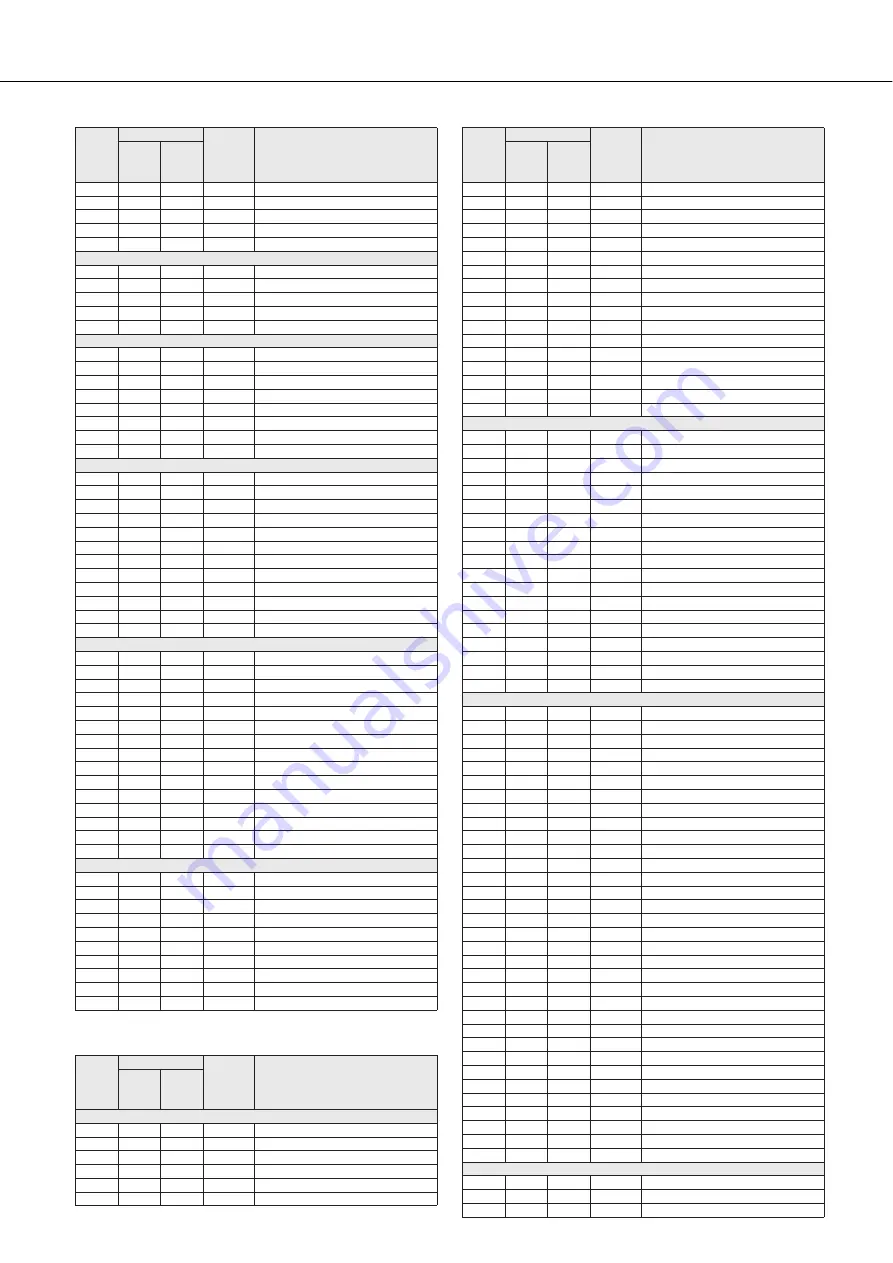
Voice List

108

PSR-I425  Owner’s Manual

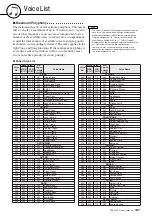
XGlite Voice/XGlite Optional Voice* List

099

000

115

082

Analogon

100

000

119

082

Fargo

101

000

112

099

Star Dust

102

000

112

086

Voice Lead

103

000

112

101

Brightness

SYNTH PAD

104

000

112

092

Xenon Pad

105

000

112

095

Equinox

106

000

112

089

Fantasia

107

000

113

090

Dark Moon

108

000

113

101

Bell Pad

PERCUSSION

109

000

112

012

Vibraphone

110

000

112

013

Marimba

111

000

112

014

Xylophone

112

000

112

115

Steel Drums

113

000

112

009

Celesta

114

000

112

011

Music Box

115

000

112

015

Tubular Bells

116

000

112

048

Timpani

DRUM KITS

117

127

000

001

Standard Kit 1

118

127

000

002

Standard Kit 2

119

127

000

009

Room Kit

120

127

000

017

Rock Kit

121

127

000

025

Electronic Kit

122

127

000

026

Analog Kit

123

127

000

113

Dance Kit

124

127

000

033

Jazz Kit

125

127

000

041

Brush Kit

126

127

000

049

Symphony Kit

127

126

000

001

SFX Kit 1

128

126

000

002

SFX Kit 2

ARPEGGIO

129

126

000

116

Teen Tal C

130

126

000

116

Teen Tal F

131

126

000

116

Teen Tal A

132

126

000

116

Dadra D

133

126

000

116

Dadra E

134

126

000

116

Dadra G

135

000

112

081

Synth Sequence

136

000

096

082

Chord Sequence

137

000

000

081

Square Pulse 

138

000

113

063

Trance

139

000

114

063

Synth Echo

140

000

112

001

Piano Arpeggio

141

000

117

028

Guitar Chord

142

000

112

025

Guitar Arpeggio

143

127

000

002

Massive Percussion

INDIAN

144

000

113

021

Harmonium 1 (Single Reed)

145

000

114

021

Harmonium 2 (Double Reed)

146

000

115

021

Harmonium 3 (Triple Reed)

147

000

117

074

Bansuri

148

000

112

105

Sitar 1

149

000

113

105

Sitar 2

150

000

115

105

Sarod

151

000

114

105

Tanpura

152

126

000

116

Tabla Kit

153

126

000

115

Indian Kit 

Voice 

No.

Bank Select

MIDI

Program 

Change#

 (1–128)

Voice Name

MSB

(0–127)

LSB

(0–127)

PIANO

154

000

000

001

Grand Piano

155

000

001

001

Grand Piano KSP

156

000

040

001

Piano Strings

157

000

041

001

Dream

158

000

000

002

Bright Piano

159

000

001

002

Bright Piano KSP

Voice 

No.

Bank Select

MIDI

Program 

Change#

 (1–128)

Voice Name

MSB

(0–127)

LSB

(0–127)

160

000

000

003

Electric Grand Piano

161

000

001

003

Electric Grand Piano KSP

162

000

032

003

Detuned CP80

163

000

000

004

Honky-tonk Piano

164

000

001

004

Honky-tonk Piano KSP

165

000

000

005

Electric Piano 1

166

000

001

005

Electric Piano 1 KSP

167

000

032

005

Chorus Electric Piano 1

168

000

000

006

Electric Piano 2

169

000

001

006

Electric Piano 2 KSP

*170

000

032

006

Chorus Electric Piano 2

171

000

041

006

DX + Analog Electric Piano

172

000

000

007

Harpsichord

173

000

001

007

Harpsichord KSP

174

000

035

007

Harpsichord 2

175

000

000

008

Clavi

176

000

001

008

Clavi KSP

CHROMATIC

177

000

000

009

Celesta

178

000

000

010

Glockenspiel

179

000

000

011

Music Box

180

000

064

011

Orgel

181

000

000

012

Vibraphone

182

000

001

012

Vibraphone KSP

183

000

000

013

Marimba

184

000

001

013

Marimba KSP

185

000

064

013

Sine Marimba

186

000

097

013

Balimba

187

000

098

013

Log Drums

188

000

000

014

Xylophone

189

000

000

015

Tubular Bells

190

000

096

015

Church Bells

191

000

097

015

Carillon

192

000

000

016

Dulcimer

193

000

035

016

Dulcimer 2

194

000

096

016

Cimbalom

195

000

097

016

Santur

ORGAN

196

000

000

017

Drawbar Organ

197

000

032

017

Detuned Drawbar Organ

198

000

033

017

60’s Drawbar Organ 1

199

000

034

017

60’s Drawbar Organ 2

200

000

035

017

70’s Drawbar Organ 1

201

000

037

017

60’s Drawbar Organ 3

202

000

040

017

16+2'2/3

203

000

064

017

Organ Bass

204

000

065

017

70’s Drawbar Organ 2

205

000

066

017

Cheezy Organ

206

000

067

017

Drawbar Organ 2

207

000

000

018

Percussive Organ

208

000

024

018

70’s Percussive Organ

209

000

032

018

Detuned Percussive Organ

210

000

033

018

Light Organ

211

000

037

018

Percussive Organ 2

212

000

000

019

Rock Organ

213

000

064

019

Rotary Organ

214

000

065

019

Slow Rotary

215

000

066

019

Fast Rotary

216

000

000

020

Church Organ

217

000

032

020

Church Organ 3

218

000

035

020

Church Organ 2

219

000

040

020

Notre Dame

220

000

064

020

Organ Flute

221

000

065

020

Tremolo Organ Flute

222

000

000

021

Reed Organ

223

000

040

021

Puff Organ

224

000

000

022

Accordion

225

000

000

023

Harmonica

226

000

032

023

Harmonica 2

227

000

000

024

Tango Accordion

228

000

064

024

Tango Accordion 2

GUITAR

229

000

000

025

Nylon Guitar

230

000

043

025

Velocity Guitar Harmonics

231

000

096

025

Ukulele

Voice 

No.

Bank Select

MIDI

Program 

Change#

 (1–128)

Voice Name

MSB

(0–127)

LSB

(0–127)

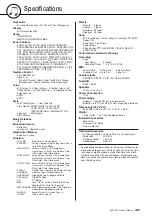
Summary of Contents for PortaTone PSR-I425

Page 1: ...Owner s Manual EN ...

Page 2: ...2 PSR I425 Owner s Manual ...

Page 3: ...koko laitetta verkosta standby Entsorgung leerer Batterien nur innerhalb Deutschlands Leisten Sie einen Beitrag zum Umweltschutz Verbrauchte Batterien oder Akkumulatoren dürfen nicht in den Hausmüll Sie können bei einer Sammelstelle für Altbatterien bzw Sondermüll abgegeben wer den Informieren Sie sich bei Ihrer Kommune battery The serial number of this product may be found on the bottom of the un...

Page 4: ...d Yamaha service personnel CAUTION Always follow the basic precautions listed below to avoid the possibility of physical injury to you or others or damage to the instrument or other property These precautions include but are not limited to the following When removing the electric plug from the instrument or an outlet always hold the plug itself and not the cord Unplug the AC power adaptor when not...

Page 5: ...or the panel or keyboard Do not rest your weight on or place heavy objects on the instrument and do not use excessive force on the buttons switches or connectors Do not use the instrument device or headphones for a long period of time at a high or uncomfortable volume level since this can cause permanent hearing loss If you experience any hearing loss or ringing in the ears consult a physician Sav...

Page 6: ...standard which ensures that any GM compatible music data can be accurately played by any GM compatible tone generator regardless of manufacturer The GM mark is affixed to all software and hardware products that support GM System Level XGlite As its name implies XGlite is a simplified version of Yamaha s high quality XG tone generation format Naturally you can play back any XG song data using an XG...

Page 7: ...ge of its various features Make sure to keep this manual in a safe and handy place even after you finish reading and refer to it often when you need to better understand an operation or function The PSR I425 package includes the following items Please check that you have them all Music rest Accessory CD ROM Owner s Manual Included Accessories Music Rest Insert the music rest into the slots as show...

Page 8: ...roduce a perfect performance every time even if you play wrong notes All you have to do is play on the keyboard alternately on the left and right hand ranges of the keyboard for example and you ll sound like a pro as long as you play in time with the music Play a Variety of Instrument Voices Page 28 The instrument voice that sounds when you play the keyboard can be changed to violin flute harp or ...

Page 9: ...tion and Displays 57 Basic Operation 57 Display Items 59 Reference Adding Effects 60 Harmony 60 Adding Reverb 61 Adding Chorus 62 Handy Performance Features 63 The Metronome 63 Setting the Number of Beats per Measure and the Length of Each Beat 64 Adjusting the Metronome Volume 64 Tap Start 65 Touch Response Sensitivity 65 Pitch Bend 66 Pitch Controls 66 Controlling Arpeggio Volume with Keyboard D...

Page 10: ...equivalent recom mended by Yamaha only The use of other adaptors may result in irreparable damage to both the adaptor and the instrument WARNING Unplug the AC Power Adaptor when not using the instrument or during electrical storms CAUTION Adaptor AC outlet Connecting the AC power adaptor automatically supplies power from the adaptor and overrides battery power even when batteries are installed NOT...

Page 11: ...s on flash memory all instrument settings are restored to the initial factory defaults when the power is turned on Connecting Headphones PHONES OUTPUT Jack Connecting a Footswitch SUSTAIN Jack Avoid listening with the headphones at high volume for long peri ods of time doing so may not only result in ear fatigue it may be damaging to your hearing WARNING To prevent damage to the speakers set the v...

Page 12: ...age 23 2 FUNCTION button page 82 3 MUSIC DATABASE button page 49 4 METRONOME ON OFF button page 63 5 PORTABLE GRAND button page 31 6 Dial pages 58 82 7 CATEGORY and buttons pages 58 82 8 SONG button page 39 9 EASY SONG ARRANGER button page 50 0 STYLE button page 33 1 VOICE button page 28 2 Number buttons 0 9 and buttons pages 58 82 3 ASSIGN button page 18 4 A and B knobs page 21 5 REPEAT LEARN ACM...

Page 13: ...71 0 START STOP button pages 33 40 58 1 TEMPO TAP button page 27 2 REGIST MEMORY MEMORY BANK 1 2 buttons page 80 3 SONG MEMORY REC 1 5 A buttons page 52 4 PITCH BEND wheel page 66 5 Drum Kit icons page 32 6 USB terminal pages 11 86 7 SUSTAIN jack page 11 8 PHONES OUTPUT jack page 11 9 DC IN 12V jack page 10 Rear Panel 2 3 6 7 8 9 0 1 2 5 6 7 8 9 Voice Category List page 107 Rear Panel Music Databa...

Page 14: ...When you select a voice number between 129 and 143 the arpeggio function will automatically be engaged so you can start playing arpeggios immediately The arpeggio function will automati cally be turned off when you select any other voice If you want to use voices 129 143 for normal performance without the arpeggio function press the ARPEGGIO ON OFF button to turn the arpeggio function off after se...

Page 15: ...he num ber of notes you play and the area of the keyboard you play in You can save the instrument s settings at this point and then recall them at any time you want to repeat your performance page 80 You can also record your performance page 52 The arpeggio function applies only to the main and dual voices and does not affect split voices The arpeggio function cannot be used at the same time as th...

Page 16: ...y select a voice with a single button press 2 After turning the arpeggio function on select an arpeggio type steps 1 and 2 on the preceding page For this example select 02 DownOct1 That completes preparation to use the arpeggio function 3 Select the style you want to play along with the arpeggio function A style is an automatic accompaniment pattern Press the STYLE button and the name of the curre...

Page 17: ...ngly each time you play a new left hand chord Of course you can also change your right hand fingering to produce interesting changes If you re not comfortable with right hand playing yet you could use the performance assistant technology feature described on page 23 When the performance assistant feature is on playing any right hand key will always produce musically appropriate notes Whenever you ...

Page 18: ...quentially select the five effect combinations provided z x c v b z etc The currently selected combination is shown in the display z c affect the main and dual voices only Split voices will not be affected Styles and songs will also not be affected v b affect styles only Assigning Effects to the Knobs 001 001 GrandPno The assignable knob effects are pre programmed in the pairs listed above It is n...

Page 19: ...refore the brightness of the sound Knob B adjusts the amount of resonance applied at the filter s cutoff fre quency Increasing the resonance emphasizes the frequencies at the cutoff frequency and thus strengthens the perceived effect of the filter x Effect Reverb reproduces the acoustic ambience of a concert hall or club while chorus produces a layered multi instrument effect Knob A adjusts the de...

Page 20: ...justs release time the amount of time it takes for the sound to decay to silence after a key is released v Style Filter In this case the knobs apply the filter effect to the style being played Knob A and Knob B have the same functions as for z Filter described on the pre ceding page b Style Tempo Knob A adjusts the tempo of the style and arpeggios Rotating the knob clockwise increases the tempo wh...

Page 21: ...reLd Square wave Lead 2 Press the ASSIGN button as many times as necessary to select z FILTER z will appear in the display Knob A can now be used to adjust the filter cutoff frequency and Knob B can be used to adjust the resonance 3 Rotate Knob B to its maximum setting all the way to the right Rotating the knob to the right while the volume is set to a high level can result in distortion If this o...

Page 22: ...e new effect has been selected Number Effect Try This z FILTER Select a synth type lead or pad voice page 107 Turn Knob B all the way up and operate Knob A while playing for some spacey floating 1980 s effects x EFFECT Select a voice that sounds as though it already has reverb and chorus effects applied and turn Knob A and Knob B all the way down to hear the direct sound of the voice You can then ...

Page 23: ...using performance assistant technology to help you play 1 Press the PERFORMANCE ASSISTANT ON OFF button This turns on the performance assistant technology feature The P A T icon and PERFORMANCE ASSISTANT will be dis played 2 Select a song Press the SONG button and the song number and name will be dis played You can use the dial or other selection controls to select a differ ent song For this examp...

Page 24: ... E G C E G C E Performance assistant technology will make sure that the notes will come out as if they were played according to the score on the right Keep playing and performance assistant technology will continue to correct the notes that you play You can stop song playback at any time by pressing the START STOP button What is a Song Of course you know the normal meaning of the word but for this...

Page 25: ...e you get a feel for it try playing chords with your left hand and a melody with your right or any other combination To use the performance assistant technology feature it is necessary to play a song that includes chord data or a style with auto accompaniment on If a song includes the required data the chords are shown on the right side of the display page 59 You will get even better results if yo...

Page 26: ...inth measure Play the keys shown in the illustration Keep playing F A and C with your left hand and the correct notes will sound as the song proceeds When you get used to playing the left hand part refer to The Easy Way to Play Piano on page 23 and try adding the right hand part 3 Press the PERFORMANCE ASSISTANT ON OFF button to turn the performance assistant technology feature off The complete sc...

Page 27: ...display will appear and you can use the dial the and buttons or the 0 to 9 number buttons to set to tempo to anywhere from 011 and 280 quarter note beats per minute You can return to the original tempo by simultaneously pressing the and buttons About the Beat Display The arrow marks in the beat display flash in time with the rhythm of the song or style Change the Song Tempo Current tempo value 090...

Page 28: ...on The voice number and name will be displayed 2 Select the voice you want to play While watching the displayed voice name rotate the dial The available voices will be selected and displayed in sequence The voice selected here becomes the main voice For this example select the 092 Flute voice 3 Play the keyboard Try selecting and playing a variety of voices Select and Play a Voice MAIN 001 GrandPn...

Page 29: ... a second D VOICE appears in the display for a few seconds then the currently selected dual voice will be displayed 3 Select the desired dual voice Watch the displayed dual voice and rotate the dial until the voice you want to use is selected The voice selected here becomes the dual voice For this example try selecting the 109 Vibraphone voice Play Two Voices Simultaneously DUAL The dual voice fea...

Page 30: ...n will appear in the display The cur rently selected split voice will sound to the left of the keyboard split point 2 Press and hold the SPLIT ON OFF button for longer than a second S VOICE appears in the display for a few seconds then the currently selected split voice will be displayed Two voices will sound at the same time Play Different Voices with the Left and Right Hands SPLIT Main voice and...

Page 31: ...y selecting the 033 Folk Guitar voice 4 Play the keyboard Try selecting and playing a range of split voices When you just want to play piano all you have to do is press one convenient button Press the PORTABLE GRAND button The 001 Grand Piano voice will be selected 033 Folk Gtr Play the Grand Piano Voice When you press the PORTA BLE GRAND button all settings other than touch sensitivity are turned...

Page 32: ...2 Tabla Kit 120 Rock Kit 125 Brush Kit 153 Indian Kit 121 Electronic Kit 126 Symphony Kit Select and Play the Drum Kit 117 Std Kit1 Example 117 Standard Kit 1 R i d e C y m b a l 1 T a m b o u r i n e C o w b e l l V i b r a s l a p B o n g o L H i H a t O p e n C r a s h C y m b a l 1 H a n d C l a p H i H a t C l o s e d H i H a t P e d a l O p e n R i m S h o t S i d e S t i c k C a s t a n e t...

Page 33: ...ed using percussion instruments only 1 Press the STYLE button The style number and name will appear in the display 2 Select a style Use the dial to select the style you want to use A list of all the available styles is provided on page 114 3 Press the START STOP button The style rhythm will start playing Press the START STOP button a second time when you want to stop playback Select a Style Rhythm...

Page 34: ...the sync start function on When sync start is on the bass and chord accompaniment included in a style will start playing as soon as you play a note to left of the keyboard split point Press the button a second time to turn the sync start function off When automatic accompaniment is on The area of the keyboard to the left of the split point 54 F 2 becomes the auto accompaniment range and is used on...

Page 35: ... the left hand notes you play 5 Play a variety of left hand chords while playing a melody with your right hand 6 Press the START STOP button to stop style playback when you re done You can switch style sections to add variety to the accompaniment Refer to Pattern Variation Sections on page 70 Try this Scores for some chord progressions are provided on page 36 These examples should help you get a f...

Page 36: ... On these pages we ll introduce three easy to use chord progressions Be sure to try them out with the instrument s accompaniment styles The style will respond to the chord progression you play effectively creating a complete song Playing the Chord Progressions Play the scores with the left hand Before playing the scores follow steps 1 through 3 of Play Along with a Style on page 34 The scores prov...

Page 37: ...f the chords Bossa nova with jazz style chords This progression includes jazzy two five II V changes Try playing it through several times When you re ready to stop playing press the INTRO ENDING rit button Recommended Style 155 Piano Boogie Recommended Style 103 Bossa Nova F G F C C C Press the INTRO ENDING rit button Press the INTRO ENDING rit button G7 E7 Dm CM7 Am A7 FM7 Bm7 5 Press the INTRO E...

Page 38: ...range of the keyboard Playing Auto accompaniment Chords C Db Eb F G Bb Db Eb F D E F G A B C D E F Split point default 54 F 2 Root notes and the corresponding keys Accompaniment range To play a major chord Press the root note of the chord C Cm C7 Cm7 To play a minor chord Press the root note together with the nearest black key to the left of it To play a seventh chord Press the root note together ...

Page 39: ...e 30 songs provided 1 Press the SONG button The song number and name will be displayed You can use the dial to select a different song 2 Select a song Select a song after referring to the preset song category list on page 41 Use the dial to select the song you want to listen to Listen Lesson Record Song Select and Listen to a Song 011 Nocturne The currently selected song and number are displayed Y...

Page 40: ... 89 91 Using the DEMO button Press the DEMO button to play Songs 001 008 in sequence Playback will continue repeatedly starting again from the first Song 001 You can select a song by using the and buttons after pressing the DEMO button You can stop playback at any time by pressing the DEMO button Song start Song Fast Forward Fast Reverse and Pause PAUSE Press the pause but ton to pause playback RE...

Page 41: ...n compositions 5 Sweet TenorSax Demo 6 Cool RotorOrgan Demo 7 Cool Galaxy Electric Piano Demo 8 ModernHarp Sweet Soprano Demo Function Demo 9 Hallelujah Chorus Use these songs to experience some of the instrument s advanced features song number 9 for the easy song arranger and songs 10 and 11 for the performance assistant technology feature 10 Ave Maria 11 Nocturne op 9 2 Piano Solo 12 For Elise T...

Page 42: ...ocesses flow for using the preset songs user songs and exter nal song files from storage to playback Types of Songs Transfer page 90 Record page 52 Your own performance PSR I425 Song Storage loca tions Preset Songs 001 030 User Songs 031 035 Flash Memory 036 134 The 30 songs built into the instru ment Stored in the inter nal flash memory Save to internal flash memory Cur rently available Play Exte...

Page 43: ...ory The practice methods Lesson 1 Learn to play the correct notes Lesson 2 Learn to play the correct notes with the correct timing Lesson 3 Learn to play the correct notes at the correct timing along with the song In this lesson try playing the correct notes Play the note shown in the display The song will wait until you play the right note 1 Select a song for your lesson Press the SONG button and...

Page 44: ...son 1 Press the LESSON START button to select Lesson 1 Each time the LESSON START button is pressed the lesson modes are selected in sequence Lesson 1 Lesson 2 Lesson 3 Off Lesson 1 The currently selected mode is shown in the display Right Left BothHand Right hand lesson Left hand lesson Both hands lesson r1 Waiting r2 YourTemp r3 MinusOne 012 ForElise Lesson 1 Lesson 2 Lesson 3 Song Lesson off St...

Page 45: ...to Lesson 2 See How You ve Done After the evaluation display has appeared the lesson will start again from the beginning r1 007 Waiting Left hand part Right hand part In the case of a right hand lesson In this case r1 indicate that right hand lesson 1 has been selected Excellent Very Good Good OK When the lesson song has played all the way through your performance will be evaluated in 4 levels OK ...

Page 46: ... Lesson 2 Lesson 3 Off Les son 1 Play the note shown in the display Try to play the notes at the correct timing As you learn to play the right notes at the right timing the tempo will increase until eventually you ll be playing at the song s original tempo 3 Stop the Lesson mode You can stop the Lesson mode at any time by pressing the START STOP button Once you ve mastered Lesson 2 move on to Less...

Page 47: ...3 Each time the LESSON START button is pressed the lesson modes are selected in sequence Lesson 1 Lesson 2 Lesson 3 Off Les son 1 Play the note shown in the display 3 Stop the Lesson mode You can stop the Lesson mode at any time by pressing the START STOP button Lesson 3 Minus One r3 MinusOne In this case r3 indicate that right hand lesson 3 has been selected Start the lesson Song playback will be...

Page 48: ...Playback will continue up to the point at which you pressed the REPEAT LEARN button and then jump back four measures and begin again after a count in This process will repeat so all you have to do is press the REPEAT LEARN button when you make a mistake in order to repeat practice of that section until you get it right Practice Makes Perfect Repeat and Learn You can change the number of measures t...

Page 49: ...Music Database name will appear in the display 2 Select a Music Database Referring to the list on the panel or Music Database List on page 116 of the manual use the dial to select a music database Select one that matches the image of the song you intend to play For this example select the 124 DayOfW R 3 Play the chords with your left hand and melody with your right The jazz style will start playin...

Page 50: ...orus in the preset songs lets you experience the Easy Song Arranger Playing it Press the SONG button then select a 009 Hallelujah Chorus by using the dial Press the START STOP button to play it As the song progresses you will see only the style changes while the song remains the same Keep in mind that you can enjoy using Easy Song Arranger with other songs as well any songs that include chord data...

Page 51: ... dial to select a different voice 7 Change the song s melody voice Press and hold the VOICE button for longer than a second After SONG MELODY VOICE appears on the display the voice you selected in step 6 becomes the song s melody voice When playing song numbers 010 011 and 020 to 030 while using the Easy Song Arranger melody tracks will be automati cally muted and no melody will sound In order to ...

Page 52: ...approximately 5 500 chord changes can be recorded if you record only to the style track NOTE Track Configuration The Difference Between MELODY R and MELODY L Songs are a combination of a melody and an auto accom paniment style Normally melody refers to the right hand part but in this instrument melody parts are provided for both the right and left hands MELODY R is the melody part played by the ri...

Page 53: ...iment cannot be turned on or off while recording is in progress Style accompaniment is auto matically turned on when you select the style track A for recording Style accompaniment cannot turned on or off while recording is in progress If you use a split voice for recording notes played to the left of the split point will not be recorded NOTE If you record to a track that contains previously record...

Page 54: ...utton to start playback To Record Other Tracks Repeat steps 2 through 4 to record any of the remaining tracks By selecting an unrecorded track SONG MEMORY buttons 1 5 A you can record the new track while listening to previously recorded tracks the playback tracks will appear in the display You can also mute previously recorded tracks the muted tracks will not appear in the display while recording ...

Page 55: ...want to clear 2 Press and hold the SONG MEMORY track button 1 5 A corresponding to the track you want to clear for longer than a second A confirmation message will appear on the display 3 Press the button A confirmation message will appear on the display You can cancel the clear operation by pressing the button 4 Press the button to clear the track The clear in progress message will appear briefly...

Page 56: ...DBY ON switch while holding the highest white key on the keyboard The backed up data will be erased and the default values restored Flash Clear To clear song data and style files that have been transferred to the internal flash memory from a computer turn the power on by pressing the STANDBY ON switch while simultaneously holding the highest white key on the keyboard and the three highest black ke...

Page 57: ...ugged into the PHONES jack Rotate counter clockwise to decrease the volume Rotate clockwise to increase the volume 3 Start a function 2 Select an item or value 1 Select a basic function The Press Hold Symbol The symbol that appears next to some buttons indicates that the button can be pressed and held for longer than a second to call up a related function This provides conve nient direct access to...

Page 58: ...nter a song number or parameter value Hundreds or tens digits that are 0 can be omitted see below Decrease Increase Press briefly to decrement Press briefly to increment Press number buttons 0 0 3 Example Song number 003 can be entered in three ways 0 0 3 0 3 003 will appear on the dis play after a brief delay 3 003 will appear on the dis play after a brief delay CATEGORY and buttons When selectin...

Page 59: ...son function is in use or the notes of chords you specify when the Dictionary function is in use At other times the notes you play on the keyboard are displayed Notation Any notes occurring below or above the staff are indi cated by 8va in the notation For a few specific chords not all notes may be shown in the notation section of the display This is due to space limitations in the display NOTE In...

Page 60: ...he keyboard with the harmony function The effect and operation of each Har mony Type is different refer to the below sec tion How to sound each Harmony Type as well as the Effect Type List for details Harmony When harmony is on the harmony icon will appear in the display 02 Trio HarmType The currently selected harmony type Hold for longer than a second The harmony notes can be added only to the Ma...

Page 61: ...em Reverb appears in the display for a few sec onds and the currently selected reverb type will be displayed 3 Use the dial to select a reverb type You can check how the selected reverb type sounds by playing on the keyboard Refer to the Effect Type List on page 119 for information about the available reverb types Adjusting the Reverb Send Level You can individually adjust the amount of reverb tha...

Page 62: ... to select the Chorus Type item Chorus appears in the display for a few sec onds and the currently selected chorus type will be displayed 3 Use the dial to select a chorus type You can check how the selected chorus type sounds by playing on the keyboard Refer to the Effect Type List on page 119 for information about the available chorus types Adjusting the Chorus Send Level You can individually ad...

Page 63: ...u Start the metronome Turn the metronome on and start it by pressing the METRONOME ON OFF button To stop the metronome press the METRO NOME ON OFF button again Adjusting the Metronome Tempo 1 Press the TEMPO TAP button to call up the tempo setting 2 Use the dial to select a tempo from 11 to 280 The Metronome 001 1 GrandPno 1 Indicates the beat number in the measure 090 Tempo Current Tempo setting ...

Page 64: ...to select the beat length function TimesigD The currently selected beat length will be dis played 4 Use the dial to select the beat length Select the required length for each beat 2 4 8 or 16 half note quarter note eighth note or 16th note Select 8 for this example 1 Press the FUNCTON button 2 Use the CATEGORY and but tons to select the Metronome Volume item 3 Use the dial to set the metronome vol...

Page 65: ...appear in the dis play when touch response is on page 59 2 Press and hold the TOUCH ON OFF button for longer than a second so that the Touch Sensitivity item appears TouchSns appears in the display for a few seconds and the currently selected touch sensi tivity will be displayed 3 Use the dial in response to keyboard dynamics to select a touch sensitivity setting between 1 and 3 Higher values prod...

Page 66: ...1 octave in semitone increments 1 Press the FUNCTION button 2 Use the CATEGORY and but tons to select the Transpose item 3 Use the dial to set the transpose value between 12 and 12 as required Small Pitch Changes Tuning The overall tuning of the instrument can by shifted up or down by a maximum of 100 cents in 1 cent increments 100 cents 1 semitone 1 Press the FUNCTION button 2 Use the CATEGORY an...

Page 67: ... ARP Velo ARP Velo will be shown in the display for a few seconds then the currently selected arpeg gio velocity setting will appear 3 Use the dial to select 2 Thru When 1 Original is selected the arpeggio vol ume is the same regardless of changes in key board velocity Controlling Arpeggio Volume with Keyboard Dynamics f r 1 Original The currently selected arpeggio velocity ARP Velo ...

Page 68: ... 2 on page 28 2 Select and play back any song steps 1 to 3 on page 39 3 Play the keyboard and remember the sound of the voice If you have stopped playback at some point during this procedure press the START STOP button to start playback again 4 Use the dial to change songs then play the keyboard and listen to the voice You should hear a different keyboard voice than you played in step 3 Press the ...

Page 69: ...ently selected function will appear in the display 2 Press the CATEGORY and but tons as many times as necessary to select the master EQ type function MasterEQ MasterEQ will be shown in the display for a few seconds then the currently selected EQ type will appear 3 Use the dial to select the desired Master EQ setting Five settings are available 1 5 Settings 1 and 2 are best for listening via the in...

Page 70: ...n is pressed There are two variations on the basic pattern A and B and the Style playback sound changes harmonically based on the chords you play with your left hand Fill in section This is automatically added before changing to section A or B ENDING section This is used for the ending of the Song When the ending is finished the auto accompaniment stops automatically The length of the ending in me...

Page 71: ... the ending section When the ending is finished the auto accompa niment stops automatically You can have the ending gradually slow down ritardando by pressing the INTRO ENDING rit button again while the ending is playing back MAIN A The name of the selected section MAIN A or MAIN B will be displayed INTRO A Accompaniment range Split point FILL A B Synchro Stop When this function is selected the ac...

Page 72: ...utton 2 Press and hold the ACMP ON OFF for longer than a second so that the Split point item appears 3 Use the dial to set the split point to any key from 000 through 127 Adjusting the Style Volume f r 100 StyleVol Setting the Split Point 054 SplitPnt Hold for longer than a second Split point Split point 54 F 2 Main voice Split voice When you change the split point the auto accompaniment split poi...

Page 73: ...ile the style is stopped and still hear the accompaniment chords This is Stop Accompaniment and any of the chord fingerings recognized by the instrument can be used page 38 Press the STYLE button to engage the style function then press the ACMP ON OFF button to turn the auto accompani ment on Play a Style with Chords but No Rhythm Stop Accompaniment 104 PopBossa Appears when auto accompaniment is ...

Page 74: ...scribed below loads a style file that has already been transferred from a computer to the instrument into style number 163 1 Press the FUNCTION button The currently selected function will appear in the display 2 Press the CATEGORY and but tons as many times as necessary to select the style file load function Sff Load After about 2 seconds the name of a loadable style file will appear in the displa...

Page 75: ...ange the order of the notes to create different inversions Successive chords in a chord progression can be smoothly connected for example by choosing the appropriate inversions or chord voicings Reading Chord Names Chord names tell you just about everything you need to know about a chord other than the inversion voicing The chord name tells you what the root of the chord is whether it is a major m...

Page 76: ...ted ninth 7 b9 1 b2 3 5 b7 C7 b9 Seventh add flatted thirteenth 7 b13 1 3 5 b6 b7 C7 b13 Seventh ninth 7 9 1 2 3 5 b7 C7 9 Seventh add sharp eleventh 7 11 1 2 3 4 5 b7 or 1 2 3 4 5 b7 C7 11 Seventh add thirteenth 7 13 1 3 5 6 b7 C7 13 Seventh sharp ninth 7 9 1 2 3 5 b7 C7 9 Seventh flatted fifth 7b5 1 3 b5 b7 C7b5 Seventh augmented 7aug 1 3 5 b7 C7aug Seventh suspended fourth 7sus4 1 4 5 b7 C7sus4...

Page 77: ...und The notes you should play for the specified chord root note and chord type are shown in the display both as notation and in the keyboard diagram To call up possible inversions of the chord press the buttons 4 Try playing a chord in the auto accom paniment section of the keyboard checking the indications in the display When you ve played the chord properly a bell sound signals your success and ...

Page 78: ...the A B REPEAT button a sec ond time at the end of the section you want to repeat the B point 3 The specified A B section of the song will now play repeatedly You can stop repeat playback at any time by pressing the A B REPEAT button Song Volume f r 100 SongVol Song volume Song volume can be adjusted while a song is selected NOTE A B Repeat A B The repeat start and end points can be specified in o...

Page 79: ... the song track configuration You can change a song s melody voice to any other voice you prefer 1 Select the song and play it 2 Rotate the dial to select the voice you want to listen to after pressing the VOICE button 3 Press the VOICE button for longer than a second SONG MELODY VOICE appears in the display for a few seconds indicating that the voice selected in step 2 has replaced the song s ori...

Page 80: ...mber but tons to select a bank number from 1 to 8 4 Press the REGIST MEMORY 1 or 2 button while holding the MEMORY BANK button to store the current panel settings to the specified registration memory 8 Banks Memory 1 Up to 16 presets eight banks of two each can be memorized Memory 2 Saving to the Registration Memory 1 Bank Bank number Data cannot be saved to the registration memory during song pla...

Page 81: ...e number Auto Accompaniment ON OFF Split Point Style settings Main A B Style Volume Tempo Voice settings Main Voice setting Voice number Volume Octave Pan Reverb Send Level Attack Time Release Time Filter Cutoff Filter Resonance Chorus Send Level Dual Voice settings Dual ON OFF Voice number Volume Octave Pan Reverb Send Level Chorus Send Level Attack Time Release Time Filter Cutoff Filter Resonanc...

Page 82: ...e function s display name appears in the display 4 Use the dial the and buttons or the 0 9 number buttons to set the selected function as required The and buttons are used to make ON OFF type settings ON OFF In some cases the button will initiate execu tion of the selected function and the will cancel the selection Some function settings are stored in memory as soon as they are changed See The Bac...

Page 83: ...oice release time Main Voice Filter Cutoff M Cutoff 000 127 Sets the Main voice filter cutoff frequency Main Voice Filter Resonance M Reso 000 127 Sets the Main voice filter resonance Dual Voice D Voice 001 514 Selects the Dual voice Dual Voice Volume D Volume 000 127 Determines the volume of the Dual voice Dual Voice Octave D Octave 2 2 Determines the octave range for the Dual voice Dual Voice Pa...

Page 84: ...t synchronizes to the internal clock OFF or an external clock ON page 87 Keyboard Out KbdOut ON OFF Determines whether keyboard performance data of the instrument is transmitted ON or not OFF Style Out StyleOut ON OFF Determines whether Style data is transmitted ON via USB or not OFF during Style playback Song Out SongOut ON OFF Determines whether Song data is transmitted ON via USB or not OFF dur...

Page 85: ... sound on the instrument Unlike an acoustic instrument that puts out a reso nated note the electronic instrument puts out infor mation from the keyboard such as with what voice with which key about how strong when was it pressed and when was it released Then each piece of information is changed into a number value and sent to the tone generator Using these numbers as a basis the tone generator pla...

Page 86: ... Please observe the following precautions when connecting the instrument to a computer via a USB cable Failure to do so can cause the instrument and or the computer to hang up freeze possibly causing cor ruption or loss of data If the instrument or computer does hang up turn the power to both devices off and then on again and restart the computer Message Name Instrument Operation Panel Setting Not...

Page 87: ...nstrument are sounded by its internal tone generator system the internal tone generator is active when local control is on and inactive when local control is off External Clock ON OFF These settings determine whether the instrument is synchronized to its own internal clock OFF or to a clock signal from an external device ON Keyboard Out ON OFF These settings determine whether keyboard performance ...

Page 88: ...ation on your computer via the USB connection controlling playback stop and transport functions from the key board Remote control keys To use the remote control functions simulta neously hold down the lowest two keys on the key board C1 and C 1 and press the appropriate key shown below PC1 PC2 OFF Local OFF OFF ON External Clock ON OFF OFF Song Out OFF OFF OFF Style Out OFF OFF OFF Keyboard Out OF...

Page 89: ...luded on the Accessory CD ROM on your computer Refer to the Accessory CD ROM Installation Guide on page 92 for installation details With the Musicsoft Downloader You Can Transfer MIDI songs you have downloaded from the Internet or created on your computer from the computer to the instrument s flash memory refer to the procedure described on page 90 The procedure for transferring songs included on ...

Page 90: ... click the SongData Folder on the window Select the file you want to transfer to the instru ment and click Open 6 A copy of the selected MIDI song file will appear in the List of files stored temporarily at the top of the window The memory medium will also be displayed at the bottom of the window to specify the desti nation for the transfer Click the Electronic Musical Instruments and then Flash m...

Page 91: ...parts 1 Press the SONG button and select the song 036 residing in flash memory for which you want to set the guide track 2 Press the FUNCTION button 3 Use the CATEGORY and buttons to select the R Part or L Part item 4 Use the dial to select the channel you want to play back as the specified right or left hand part We recommend that you select channel 1 for the right hand part and channel 2 for the...

Page 92: ...ies with regard to the use of the software and documentation and can not be held responsible for the results of the use of this manual and the software This disk containing the software is not meant for use with an audio visual system CD player DVD player etc Do not attempt to use the disk on equipment other than a computer Future upgrades of application and system software and any changes in spec...

Page 93: ...h installing the driver CD ROM Contents q e w r Folder Name Application Data Name Contents q MSD_ Musicsoft Downloader This application can be used to download MIDI song data from the Internet and transfer it from the computer to the instrument s memory w DMN_FlashDemo Flash Demo Digital Music Notebook is an educational content that lets you enjoy music while learning Full motion demo software whi...

Page 94: ...least 2 MB of free space USB Driver for Windows 2000 XP Windows 2000 XP Home Edition XP Professional Digital Music Notebook Windows XP Professional Edition SP1a more Windows XP Home Edition SP1a more Windows 2000 Professional SP4 more 400MHz or higher Intel Pentium Celeron Processor family 1GHz or more is recommended 128 MB or more 256 MB or more is recommended at least 50 MB of free space 1024 x ...

Page 95: ... installation 8 When installation is complete a message indicating so appears Click Finish The driver has been installed Installing the driver on Windows 2000 1 Start the computer and use the Adminis trator account to log into Windows 2 Select My Computer Control Panel System Hardware Driver Sign ing File Signature Verification and check the radio button to the left of Ignore Install all files reg...

Page 96: ...CD ROM into your computer s CD ROM drive The start win dow will appear automatically showing software applications 2 Click Musicsoft Downloader or Digital Music Notebook 3 Click the install button for Musicsoft downloader or Digital Music Notebook Download button for Digital Music Note book and follow the on screen instruc tions to install the software For Digital Music Notebook operating instruc ...

Page 97: ... the USB cable from the instru ment and make the connection again 5 Install the driver again Windows 98 Me users see page 95 Windows 2000 users see page 95 Windows XP users see page 96 Did you install the driver page 94 Is the USB cable connected correctly Are the volume settings of the instrument playback device and application program set to the appropriate levels Have you selected an appropriat...

Page 98: ...edYamaha dealer within fourteen days with a copy of the receipt Yamaha is not responsible for replacing media dam aged by accident abuse or misapplication TO THE FULLEST EXTENT PERMITTED BY LAW YAMAHA EXPRESSLY DISCLAIMS ANY IMPLIED WARRANTIES ON THE TANGIBLE MEDIA INCLUDING THE IMPLIED WARRANTIES OF MERCHANTABILITY AND FITNESS FOR A PARTICULAR PURPOSE 5 DISCLAIMER OF WARRANTY ON SOFTWARE You expr...

Page 99: ...Pia nist have no rhythm parts so no rhythm will play The other parts will begin playing when you play a chord in the accompaniment range of the keyboard if style playback is turned on Not all of the voices seem to sound or the sound seems to be cut off The instrument is polyphonic up to a maximum of 32 notes If the Dual voice or Split voice is being used and a style or song is playing back at the ...

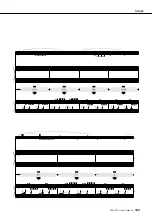
Page 100: ...R I425 Owner s Manual Scores This demo is an example of how the Easy Song Arranger can be used to change styles throughout a piece Hallelujah Chorus Song No 9 q q q q 123 Function Demo for Easy Song Arranger ...

Page 101: ...Scores PSR I425 Owner s Manual 101 ...

Page 102: ...sistant technol ogy feature If you play the Play These Notes part using the performance assistant technology feature the part will be corrected and played so that it matches the backing part Ave Maria Song No 10 q q q q 61 Function Demo for performance assistant technology Repeatedly Play the Same Key P A T Your Turn Type CHORD ...

Page 103: ...Scores PSR I425 Owner s Manual 103 ...

Page 104: ...sistant technol ogy feature If you play the Play These Notes part using the performance assistant technology feature the part will be corrected and played so that it matches the backing part Nocturne op 9 2 Song No 11 q q q q 108 Function Demo for performance assistant technology P A T You Can Even Play the Same Keys Type CHORD ...

Page 105: ...Scores PSR I425 Owner s Manual 105 ...

Page 106: ...appear in the display 7 Use the dial or the number buttons to select the Split Voice number 145 Har monium 2 8 Press the CATEGORY button twice and S Octave will appear in the dis play 9 Press the number 0 button to set the octave 0 10 Play the keyboard Set the Voice number to 129 Teen Tal C Set the split point to 83 Set the Split Voice number to 145 Harmonium 2 Set the octave range for the Split V...

Page 107: ...ON 027 000 112 022 Musette Accordion 028 000 113 022 Traditional Accordion 029 000 113 024 Bandoneon 030 000 113 023 Modern Harp 031 000 112 023 Harmonica GUITAR 032 000 112 025 Classical Guitar 033 000 112 026 Folk Guitar 034 000 112 027 Jazz Guitar 035 000 117 028 60 s Clean Guitar 036 000 113 026 12Strings Guitar 037 000 112 028 Clean Guitar 038 000 113 027 Octave Guitar 039 000 112 029 Muted G...

Page 108: ...ano KSP 162 000 032 003 Detuned CP80 163 000 000 004 Honky tonk Piano 164 000 001 004 Honky tonk Piano KSP 165 000 000 005 Electric Piano 1 166 000 001 005 Electric Piano 1 KSP 167 000 032 005 Chorus Electric Piano 1 168 000 000 006 Electric Piano 2 169 000 001 006 Electric Piano 2 KSP 170 000 032 006 Chorus Electric Piano 2 171 000 041 006 DX Analog Electric Piano 172 000 000 007 Harpsichord 173 ...

Page 109: ... 000 042 049 Tremolo Orchestra 300 000 045 049 Velocity Strings 301 000 000 050 Strings 2 302 000 003 050 Stereo Slow Strings 303 000 008 050 Legato Strings Voice No Bank Select MIDI Program Change 1 128 Voice Name MSB 0 127 LSB 0 127 304 000 040 050 Warm Strings 305 000 041 050 Kingdom 306 000 000 051 Synth Strings 1 307 000 000 052 Synth Strings 2 308 000 000 053 Choir Aahs 309 000 003 053 Stere...

Page 110: ...dle 443 000 000 112 Shanai PERCUSSIVE 444 000 000 113 Tinkle Bell Voice No Bank Select MIDI Program Change 1 128 Voice Name MSB 0 127 LSB 0 127 445 000 096 113 Bonang 446 000 097 113 Altair 447 000 098 113 Gamelan Gongs 448 000 099 113 Stereo Gamelan Gongs 449 000 100 113 Rama Cymbal 450 000 000 114 Agogo 451 000 000 115 Steel Drums 452 000 097 115 Glass Percussion 453 000 098 115 Thai Bells 454 0...

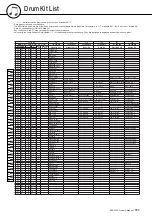
Page 111: ...Kick Short Kick Gate Kick Gate Heavy Kick Analog 49 C 2 37 C 1 Side Stick Side Stick Analog 50 D 2 38 D 1 Snare Snare Short Snare Snappy Snare Rock Snare Noisy 2 Snare Analog 51 D 2 39 D 1 Hand Clap 52 E 2 40 E 1 Snare Tight Snare Tight H Snare Tight Snappy Snare Rock Rim Snare Noisy 3 Snare Analog 2 53 F 2 41 F 1 Floor Tom L Tom Room 1 Tom Rock 1 Tom Electro 1 Tom Analog 1 54 F 2 42 F 1 1 Hi Hat ...

Page 112: ...sh 3 Tom Jazz 3 58 A 2 46 A 1 1 Hi Hat Open Hi Hat Open Analog 2 59 B 2 47 B 1 Mid Tom L Tom Analog 4 Tom Jazz 4 Tom Brush 4 Tom Jazz 4 60 C 3 48 C 2 Mid Tom H Tom Analog 5 Tom Jazz 5 Tom Brush 5 Tom Jazz 5 61 C 3 49 C 2 Crash Cymbal 1 Crash Analog Hand Cymbal 62 D 3 50 D 2 High Tom Tom Analog 6 Tom Jazz 6 Tom Brush 6 Tom Jazz 6 63 D 3 51 D 2 Ride Cymbal 1 Hand Cymbal Short 64 E 3 52 E 2 Chinese C...

Page 113: ...E 2 C Tabla ti 02 1 Mridangam din 9 Mridangam Normal 6 65 F 3 53 F 2 C Tabla ri 1 Mridangam ki 9 Mridangam Open 6 66 F 3 54 F 2 C Tabla kat 1 Mridangam ta 9 Mridangam Mute 6 67 G 3 55 G 2 C Tabla tu 1 Mridangam Chapu 9 Mridangam Slap 6 68 G 3 56 G 2 D Tabla na 2 Mridangam Lo Closed 10 Mridangam Rim 6 69 A 3 57 A 2 D Tabla tin 2 Mridangam Lo Open 10 Chimta Open 7 70 A 3 58 A 2 D Tabla Center tin 2 ...

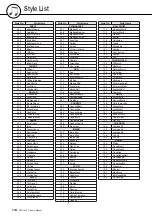
Page 114: ...074 6 8Soul 075 ModernR B 076 CrocoTwist 077 Rock Roll 078 DetroitPop2 079 BoogieWoogie 080 ComboBoogie 081 6 8Blues COUNTRY 082 Country8Beat 083 CountryPop 084 CountrySwing 085 CountryBallad 086 Country2 4 087 CowboyBoogie 088 CountryShuffle 089 Bluegrass INDIAN 090 Bolly Mix 1 091 Bolly Mix 2 092 Indian Pop 093 Bhangra 094 Boliyan 095 Goan Pop 096 Garba 097 Rajstahan 098 Qawwali 099 Bhajan 100 T...

Page 115: ...ad 19 PfChd8th 20 PfShfl 21 PfRock 22 Clavi 23 ChordUp 24 ChdDance 25 Salsa1 26 Salsa2 27 Reggae 28 Strum 29 GuitChd1 30 GuitChd2 31 GuitChd3 32 GuitArp 33 FngrPck1 34 FngrPck2 35 Samba 36 SlapBs 37 AcidBs 38 TranceBs 39 LatinBs 40 FunkyBs 41 PercArp 42 Perc1 43 Perc2 44 African 45 Tamb 46 R B 47 Funk 48 HipHop 49 Latin 50 Arabic 51 TeenTalC 52 TeenTalD 53 TeenTalE 54 TeenTalF 55 TeenTalG 56 TeenT...

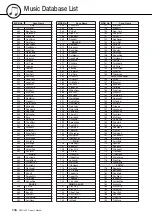
Page 116: ...088 Mn Rivr 089 My Song 090 NorwWood 091 OnMyMnd 092 OverRbow 093 Red Lady 094 ReleseMe 095 SavingLv 096 Shore Cl 097 SierraMd 098 SilverMn 099 SmokyEye 100 SndOfSil 101 SumerPlc 102 TblWater 103 WhereLov 104 WhisprSx 105 WomanLov R B 106 AmazingG 107 BoogiePf 108 Clock Rk 109 CU later 110 GreenDor 111 HappyDay 112 JohnnyB 113 MercySax 114 OldHouse 115 RisingSn 116 S Preems 117 ShookUp 118 SuperSt...

Page 117: ... 215 BrazilBr 216 CherryTp 217 DanubeWv 218 MantoStr 219 SandmnFx 220 SpainTwn 221 SundyNvr 222 TangoAc 223 Tea4Two 224 TulipWtz 225 YesSirQk TRADITIONAL 226 AlpenTri 227 AnchorAw 228 Balalaik 229 BlkSheep 230 CampRace 231 Ceilidh 232 Cielito 233 CielPari 234 Cl Polka 235 Comrades 236 DAmorCl 237 FrogSong 238 Funiculi 239 GrndClok 240 HappyPlk 241 Herzlin 242 HornPipe 243 JacknJil 244 JinglBel 245...

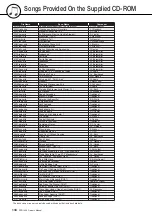
Page 118: ...Lomon mid Loch Lomond Traditional 033Bonni mid My Bonnie Traditional 034Londo mid Londonderry Air Traditional 035Banjo mid Ring de Banjo S C Foster 036Vogle mid Wenn ich ein Vöglein wär Traditional 037Lorel mid Die Lorelei F Silcher 038Funic mid Funiculi Funicula L Denza 039Turke mid Turkey in the Straw Traditional 040Campt mid Camptown Races S C Foster 041Jingl mid Jingle Bells J S Pierpont 042Mu...

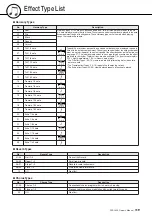
Page 119: ...ets 1 12 eighth note triplets 1 24 sixteenth note triplets The Trill effect Types 06 12 create two note trills alternating notes when two notes are held The Tremolo effect Types 13 19 repeat all held notes up to four The Echo effect Types 20 26 create delayed repeats of each note played 07 Trill 1 6 note 08 Trill 1 8 note 09 Trill 1 12 note 10 Trill 1 16 note 11 Trill 1 24 note 12 Trill 1 32 note ...

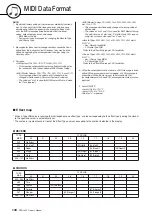
Page 120: ...hanged x x Default 3 3 Mode Messages x x Altered x Note 0 127 0 127 Number True voice 0 127 Velocity Note ON o 9nH v 1 127 o 9nH v 1 127 Note OFF x 9nH v 0 x After Key s x x Touch Ch s x x Pitch Bend o 0 24 semi o 0 24 semi 0 32 o o Bank Select 1 11 84 x 1 o 6 38 o o Data Entry 7 10 o o Control 64 o o Sustain 71 74 o o Sound Controller Change 91 93 o o Effect Depth 96 97 x 1 o RPN Inc Dec 100 101 ...

Page 121: ... Mode 3 OMNI OFF POLY Mode 4 OMNI OFF MONO x No Prog o 0 127 o 0 127 Change True System Exclusive o o Song Pos x x Common Song Sel x x Tune x x System Clock o o Real Time Commands o o Aux All Sound OFF x o 120 126 127 Reset All Cntrls x o 121 Local ON OFF x o 122 All Notes OFF x o 123 125 Mes Active Sense o o sages Reset x x ...

Page 122: ...IDI Master Tuning The default value of mm and ll are 08H and 00H respec tively Any values can be used for n and cc Reverb Type F0H 43H 1nH 4CH 02H 01H 00H mmH llH F7H mm Reverb Type MSB ll Reverb Type LSB Refer to the Effect Map page 122 for details Chorus Type F0H 43H 1nH 4CH 02H 01H 20H mmH llH F7H mm Chorus Type MSB ll Chorus Type LSB Refer to the Effect Map page 122 for details 4 When the acco...

Page 123: ...an Reverb Level Chorus Level Attack Time Release Time Filter Cutoff Filter Resonance EFFECT Reverb Type Chorus Type Master EQ Type HARMONY Harmony Type Harmony Volume ARPEGGIO Arpeggio Type Arpeggio Velocity SFF Load Style File Load PC PC Mode MIDI Local On Off External Clock Initial Send Keyboard Out Style Out Song Out METRONOME Time Signature Numerator Time Signature Denominator Metronome Volume...

Page 124: ...paniment 34 AWM 6 B Backup 56 C CD ROM 92 Channel Message 86 Chord 36 38 75 76 Chord Dictionary 77 CHORD ROOT 77 CHORD TYPE 77 Chorus 19 62 Chorus Type 62 119 Computer 86 Cutoff 19 D Default Setting 82 Delete Song Track 55 Delete User Song 55 Demo 40 Demo Cancel 84 Display 59 Drum Kit 32 Drum Kit List 111 Dual Voice 29 Dual Voice Chorus Level 83 Dual Voice Octave 83 Dual Voice Pan 83 Dual Voice Re...

Page 125: ...78 Specifications 123 Split Point 30 72 Split Voice 30 Split Voice Chorus Level 83 Split Voice Octave 83 Split Voice Pan 83 Split Voice Reverb Level 83 Split Voice Volume 83 Standard Chords 38 Style 33 37 70 Style File 74 Style List 114 Style Out 87 Style Tempo 20 Style Volume 72 Sustain Footswitch 11 Synchro Start 34 36 70 Synchro Stop 71 System Message 86 T Tempo 27 Time Denominator 64 Time Nume...

Page 126: ...126 PSR I425 Owner s Manual ...

Page 127: ... O Box 260 SF 00101 Helsinki Finland Tel 09 618511 NORWAY Norsk filial av Yamaha Scandinavia AB Grini Næringspark 1 N 1345 Østerås Norway Tel 67 16 77 70 ICELAND Skifan HF Skeifan 17 P O Box 8120 IS 128 Reykjavik Iceland Tel 525 5000 OTHER EUROPEAN COUNTRIES Yamaha Music Central Europe GmbH Siemensstraße 22 34 25462 Rellingen Germany Tel 49 4101 3030 Yamaha Corporation Asia Pacific Music Marketing...

Page 128: ...Instrument Division Yamaha Corporation 2007 Yamaha Corporation WK62010 XXXPOXXX X 01A0 Printed in China Yamaha Home Keyboards Home Page English Only http music yamaha com homekeyboard Yamaha Manual Library http www yamaha co jp manual ...
Reviews: