background image

2

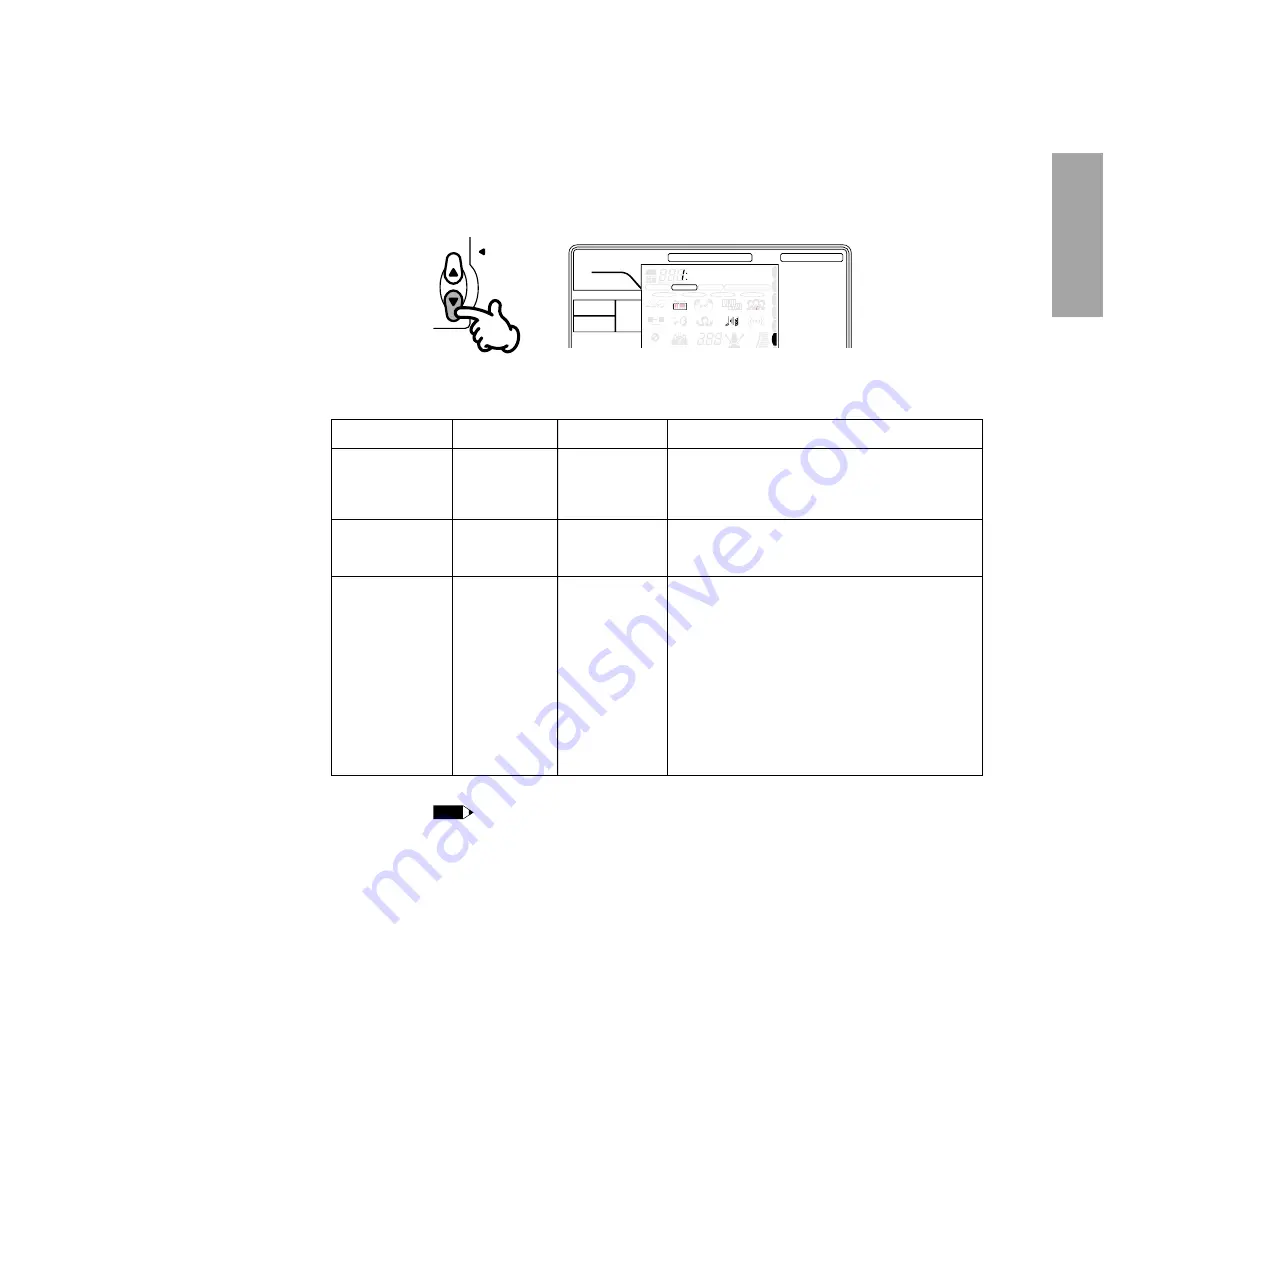
Change the Harmony/Echo type and make other  settings for the 

effect, if desired.

Use the 

MAIN MENU

buttons to select the 

HARMONY/ECHO

menu, and select the desired Sub

Menu parameter with the 

SUB MENU

buttons.  Then, use the numeric keypad or 

+/-

buttons to

change the setting.

Harmony/Echo Sub Menu

• The Harmony effect is not available in the Voice mode, nor when the Auto Accompaniment Chord Cancel function 

(page 25) is on.

• If the Voice Set function (page 19) is on, the Harmony/Echo parameters will change automatically whenever a 

different Panel Voice is selected in the Main Voice menu.

• The Harmony/Echo Type Name parameter can be directly selected by pressing and holding down the 

HARMONY/ECHO button.

• 

Reset to default settings

To reset the selected Harmony/Echo parameter to its default settings, simultaneously press the +/- buttons.

• Harmony/Echo is not available when the Full Fingering mode (page 26) is on, and will automatically be turned off 

when the Full Fingering mode is selected.

NOTE

Display Name

HarmVol

EchoSpd

Parameter Name

Type Name

Harmony Volume

Echo Speed

Range

1 - 8 (1-5: 
Harmony types; 
6-8: Echo types)

000 - 127

1 - 7

Description

This determines the type of effect for Harmony or 
Echo.  The Harmony types are (1) Duet, (2) Trio, (3) 
Block, (4) Country, and (5) Octave.  The Echo types 
are (6) Trill, (7) Tremolo, and (8) Echo.

This determines the volume of the Harmony effect, 
letting you create the optimum blend with the original 
note.

This determines the “speed” of the Echo effect, or the 
amount of time between the delayed repeats — which 
is based on note values.  The actual Echo speed 
depends on the selected tempo.

Settings:
1 — 04: 1/4 note
2 — 06: 1/4 note triplets
3 — 08: 1/8 note
4 — 12: 1/8 note triplets
5 — 16: 1/16 note
6 — 24: 1/16 note triplets
7 — 32: 1/32 note

NAME / SUB  MENU

MAIN MENU

MAIN VOICE

DUAL VOICE

SPLIT VOICE

STYLE

SONG

HARMONY/ECHO

MIDI

MODE

ONE TOUCH SETTING

KEYBOARD

SONG

EFFECT

STYLE

EASY CHORD

MEMORY

FINGERING

SPLIT

TOUCH

HARMONY

GUIDE

TEMPO

LARGE/SMALL

MINUS ONE

REPEAT

SYNC
STOP

REVERB

7

dim

EASY  CHORD  MEM

SONG

VOICE

STYLE

CART

5aug

3

2

1

4

Duet

CHORUS

DUAL

A

B

MAIN MENU

17

Summary of Contents for PortaTone PSR-220

Page 1: ...OWNER S MANUAL BEDIENUNGSANLEITUNG MODE D EMPLOI MANUAL DE INSTRUCCIONES DEUTSCH FRANÇAIS ESPAÑOL ENGLISH ...

Page 2: ...ousehold type batteries in your area for battery disposal information Disposal Notice Should this product become damaged beyond repair or for some reason its useful life is considered to be at an end please observe all local state and federal regulations that relate to the disposal of products that contain lead batteries plastics etc If your dealer is unable to assist you please contact Yamaha dir...

Page 3: ...erb 18 Touch Response 18 Overall Controls 19 Reverb Others Sub Menu 19 Playing Auto Accompaniment The Style Mode 20 Selecting a Style and Playing an Auto Accompaniment 20 About the METRONOME Icon 21 Sync Stop Function 24 Changing the Fingering Mode 24 Fingered 25 Full 26 Single Finger 26 Changing the Accompaniment Split Point 26 One Touch Setting 27 Playing Songs Tne Song Mode 28 Selecting and Pla...

Page 4: ... important settings One Touch Setting buttons for automatically calling up an appropriate Voice along with matching effect and other settings for playing with the Style you select Each of the 100 Styles features four different One Touch Settings Touch Response function for natural expressive control over the Voices Rich luscious sounding effects including Reverb Chorus Harmony and Echo for enhanci...

Page 5: ...ent turn off the power of all related equipment including the PortaTone before connecting or disconnecting any cables When Not Using the PortaTone After use always turn off the POWER switch When not using your PortaTone for long periods be sure to remove the batteries to avoid damage through battery leakage When using the PortaTone with an AC adaptor unplug the adaptor from the electrical outlet i...

Page 6: ...its connector into the DC IN 10 12V jack on the back of your PortaTone Using Batteries Inserting Batteries Turn the instrument upside down and remove the battery compartment lid Insert six 1 5 volt size D batteries as shown in the illustration making sure that the positive and negative terminals are properly aligned and replace the lid When the Batteries Run Down When the batteries run low and the...

Page 7: ... or AUX IN jack s of the other device and the other end to the rear panel PHONES AUX OUT jack on the PortaTone SUSTAIN Jack An optional Yamaha FC4 or FC5 footswitch can be connected to the rear panel SUSTAIN jack for sustain control The footswitch functions like the damper switch on a piano press and hold to sustain the sound and release for normal decay For normal operation turn the power off bef...

Page 8: ...ANO 2 Set the Volume Initially turn the VOLUME control about a third of the way up You can adjust the control for optimum level once you start playing 3 Press the DEMO button The Demo Songs will play in sequence from Song number 01 You can also play along on the keyboard with the Songs When Demo Songs that use the internal accompaniment Styles are played back chord names are indicated in the displ...

Page 9: ... 96 6 8 BLUES 97 FUSION 98 POP BOSSA 99 SALSA 00 POP RAGGAE 3 5 NAME SUB MENU MAIN MENU PSR 220 A B CHORUS DUAL FINGERING SPLIT TOUCH HARMONY GUIDE TEMPO LARGE SMALL MINUS ONE REPEAT SYNC STOP REVERB VOLUME minMaj7sus4 dim EASY CHORD MEM SONG VOICE STYLE CART 6 5aug GrandPno 3 2 1 4 A B JAM POWER VOLUME DEMO SUB MENU MIN MAX ACCOMPANIMENT SONG KEYBOARD ONE TOUCH SETTING EASY CHORD MEMORY VOLUME RE...

Page 10: ...TAVE GTR 31 BANDONEON GUITAR BASS ENSEMBLE 52 PIZZ STR 53 CHOIR 54 CHOIR AAHS 55 CHOIR OOHS 56 SYNTH CHOIR 57 ORCH HIT 58 VIOLIN 73 SOPRANO SAX 74 ALTO SAX 75 TENOR SAX 76 BARI SAX 77 SAX CLARNET 80 ENG HORN 81 BASSOON 82 CLARINET 83 HARMONICA 84 PICCOLO 78 SAX TRB 79 OBOE 59 CELLO 60 CONTRABASS 63 MUTE TRP 62 TRUMPET 64 TROMBONE 65 TRB SECTION 66 FRENCH HORN 61 HARP BRASS 69 BRASS SAX 70 BRASS TR...

Page 11: ...INUS ONE A B REPEAT GUIDE General MIDI When a GM Voice is se icon appears CART CART Cartridge P When a Music Cartridg Style is selected this ic EASY CHORD MEMORY This section contains indications for the Easy Chord Memory function page 33 These include the current measure and beat as well as the chord name entered at the current position The chord name is also displayed when playing chords in the ...

Page 12: ...tion of the panel turns the corresponding function on off The display indication appears or disappears accordingly REVERB CHORUS HARMONY DUAL General MIDI When a GM Voice is selected this icon appears CART CART Cartridge PSR 230 only When a Music Cartridge Song or Style is selected this icon appears e related page 23 and button turns that L button switches sizes Large and he playback The metronome...

Page 13: ...the display indicating that the Voice mode and Main Voice menu are selected You can quickly select the first parameter in the Main Voice menu Main Voice Volume by pressing and holding the VOICE button Selecting MAIN VOICE or DUAL VOICE SPLIT VOICE with the Main Menu buttons does not change the selected mode the Style or Song mode is still active but the appropriate Voice menu is called up 2 Select...

Page 14: ...ou can change the Voice settings if you wish by using the Sub Menu First select the desired Sub Menu parameter with the SUB MENU buttons Then use the numeric keypad or buttons to change the setting Main Voice Sub Menu Display Name M Volume M Octave M Pan M RevLvl GMvoice Parameter Name Main Voice Name Main Voice Volume Main Voice Octave Main Voice Pan Main Voice Reverb Level GM Voice Range 01 00 0...

Page 15: ...s the DUAL CHORUS button in the VOICE EFFECT section once or repeatedly until the Dual Voice icon appears in the display When you play the keyboard both the currently selected Main and Dual Voices will be heard DUAL CHORUS button DUAL icon in display SONG CLEAR VOICE EFFECT DUAL CHORUS HARMONY ECHO REVERB DUAL NOTE B r u s h T a p B r u s h S l a p C a s t a n e t S t i c k s O p e n R i m S h o t...

Page 16: ...from 001 129 To change between Panel and GM Voices use the GM Voice parameter below This determines the volume of the Dual Voice relative to the Main Voice s volume letting you create the optimum blend with the Main Voice This determines the octave range for the Dual Voice relative to the Main Voice s octave setting This determines the pan position of the Dual Voice in the stereo image To set Dual...

Page 17: ...PLIT VOICE in the display Next select the desired Sub Menu parameter with the SUB MENU buttons Then use the numeric keypad or buttons to change the setting Dual Voice and Split Voice can be used together You can have the Split Voice play in the lower section of the keyboard and play the Main and Dual Voices together in the upper NOTE NAME SUB MENU MAIN MENU MAIN VOICE DUAL VOICE SPLIT VOICE STYLE ...

Page 18: ...ices are from 01 00 and GM Voices are from 001 129 To change between Panel and GM Voices use the GM Voice parameter below This determines the volume of the Split lower Voice letting you create the optimum blend with the Main upper Voice This determines the octave range for the Split lower Voice This determines the pan position of the Split lower Voice in the stereo image This determines how much o...

Page 19: ...eatures page 20 and creates automatic harmonies for notes played in the upper section of the keyboard to match the accompaniment chords Echo produces delayed repeats of the sound for special effects Various settings for the two effects can be changed in the Sub Menus To use Harmony or Echo 1 Turn on the Harmony Echo effect Press the HARMONY ECHO button The HARMONY icon appears in the display When ...

Page 20: ...off when the Full Fingering mode is selected NOTE Display Name HarmVol EchoSpd Parameter Name Type Name Harmony Volume Echo Speed Range 1 8 1 5 Harmony types 6 8 Echo types 000 127 1 7 Description This determines the type of effect for Harmony or Echo The Harmony types are 1 Duet 2 Trio 3 Block 4 Country and 5 Octave The Echo types are 6 Trill 7 Tremolo and 8 Echo This determines the volume of the...

Page 21: ... No Effect is selected Reverb will not be applied to the Sound even when the REVERB button is pressed Touch Response The PortaTone keyboard has a Touch Response feature letting you expressively play the Voices controlling the volume by how soft or hard you strike the keys Touch Response can be turned on or off and the Touch Sensitivity the degree of Touch Response can be adjusted 1 Turn on the Tou...

Page 22: ...ermines the type of Reverb effect The Reverb types are 1 Hall 1 2 Hall 2 3 Room 1 4 Room 2 5 Plate 1 6 Plate 2 7 Delay 1 8 Delay 2 and 9 No Effect This determines the overall pitch of the instrument up or down in semitone increments This determines the overall fine pitch setting of the instrument This determines whether the Voice Set feature is on or off When Voice Set is on default selecting a Pa...

Page 23: ... Accompaniment section is 54 F 2 However this can be changed in the Style Sub Menu See page 26 Selecting a Style and Playing an Auto Accompaniment 1 Select the Style mode Press the STYLE button The STYLE indications appear in the display indicating that the Style mode and the Style menu are selected Selecting STYLE with the Main Menu buttons does not change the selected mode the Voice or Song mode...

Page 24: ...in the Auto Accompaniment section of the keyboard Using Synchro Start with an Intro pattern First press one of the section buttons MAIN AUTO FILL A B or JAM to select which pattern follows the Intro Next press the INTRO button followed by the SYNC START button The INTRO indication in the display lights and the metronome icon and the MAIN A B JAM indication flashes to indicate Synchro Start stand b...

Page 25: ... increases decreases the speed The tempo value appears in the display Tempo range is from 32 to 280 bpm in 1 bpm steps To reset the tempo to its original default setting press both TEMPO buttons simultaneously Default Tempos Each Song and Style has been given a default or standard tempo If you change the tempo you can set it back to the original default setting by pressing both TEMPO buttons simul...

Page 26: ...paniment ensemble size LARGE SMALL if you wish Press the LARGE SMALL button This switches between large ensemble and small ensemble accompaniment allowing you change the instrumental texture and dynamics of the Auto Accompaniment as you play The icon shows four people when set to LARGE and one person when set to SMALL LARGE is selected whenever the power is turned on 8 Change Set the Accompaniment...

Page 27: ...t section This automatically stops the accompaniment and sets Synchro Start to stand by The SYNC STOP icon flashes You can resume accompaniment playback of the selected section by playing the keyboard again Changing the Fingering Mode The PortaTone provides three different fingering modes for controlling the Auto Accompaniment function Fingered Full and Single Fingered To select among the three pr...

Page 28: ...is inverted the lowest note will be recognized as the root For 7th flatted 5th chords the lowest note played is recognized as the root or the flatted 7th 7th augmented and diminished 7th chords are interpreted as simple augmented and diminished For one two five chords only the root is displayed Chord Cancel function The PortaTone also has a Chord Cancel function to stop the chord accompaniment but...

Page 29: ...e Accompaniment Split Point parameter by pressing and holding either the STYLE or FINGERING button 2 Set the parameter Set this directly by pressing the desired key on the keyboard You can also use the numeric keypad or buttons to enter the key number The lowest key on the keyboard C1 is 36 while middle C C3 is 60 and the highest key B5 is 95 The default Accompaniment Split Point is F 2 54 and can...

Page 30: ...One Touch Setting press a different numbered ONE TOUCH SETTING button The following parameters and settings may be changed when selecting a One Touch Setting Main Voice all settings Dual Voice all settings Dual Chorus on off Split Voice all settings excepting Split Points 1 2 Harmony Echo on off all settings Reverb on off Accompaniment Volume Accompaniment Large Small Tempo Synchro Start set to on...

Page 31: ...own chord and section changes by using the Easy Chord Memory function See page 33 Selecting and Playing a Song 1 Select the Song mode Press the SONG button The Song mode and the Song menu are selected The SONG indications light in the display 2 Select the desired Song number Use the numeric keypad You can either enter the Song number two digits directly with the number buttons or step up and down ...

Page 32: ...n practicing a Song with the Minus One and or Guide PSR 230 only functions For example you could have the verse portion of a Song repeatedly play back while you practice with it While the Song is playing press the REPEAT PLAY button twice once to set the beginning point for the repeat and a second time to set the end point Press the REPEAT PLAY button once at the beginning of the section to be rep...

Page 33: ...GUIDE icon appears in the display indicating that the Guide function is on 4 Start playback When you press the START STOP button to begin playback the Song introduction will automatically play up to the first note s of the main section of the Song and pause until you play the next note s The notes to be played are indicated by the Guide lamps above each key red for the white keys and green for the...

Page 34: ... pad and rhythm parts each on a different channel Also the right hand and left hand parts have different channels Minus One lets you specify which channel you wish to mute for both the right hand and left hand parts With MinusChR or MinusChL selected in the Song menu select an individual channel for the Minus One right hand and left hand parts Also set the desired Minus One Part setting left hand ...

Page 35: ...ET ACCOMPANIMENT SONG Display Name MinusMod MinusChR MinusChL Parameter Name Song Name Minus One Part Minus One Right Hand Channel Minus One Left Hand Channel Range 01 20 L r L_r 01 16 01 16 Description This determines the Song to be played or edited Songs 01 16 are the Demo songs and Songs 17 20 are User Songs for use with Easy Chord Memory Music Cartridge Songs can be selected by pressing the CA...

Page 36: ...ng with them playing the melody part for example over the custom backing tracks You can record Songs in two different ways Real time and Step Real time recording lets you play the chord changes normally as the rhythm accompaniment plays back while Step recording lets you manually enter each chord at specific positions in the Song Each beat can have a different chord Generally Real time recording i...

Page 37: ...ter the Ending has played back press the EASY CHORD MEMORY REC END button Operation automatically returns to the Song mode Easy Chord Memory automatically changes to Step Record Ready mode in the following conditions When an Ending section has been recorded and the accompaniment is stopped When the memory is full A Full message appears in the display In this case you can use the Song Clear operati...

Page 38: ... and is entered at the selected measure beat 4 Stop recording Press the EASY CHORD MEMORY REC END button Operation automatically returns to the Song mode Section changes cannot be entered in Step recording You can play back the User Song within Step recording by pressing the START STOP button Song Clear The Song Clear operation lets you delete selected User Song data To clear data of a Song 1 Sele...

Page 39: ...n cause loss of data and unreliable operation Do not insert objects or cartridges other than Yamaha Music Cartridges in the cartridge slot Doing so can result in serious damage to the instrument Do not insert Music Cartridges in other instruments or devices Doing so can result in serious damage to the Cartridges Never attempt to insert or remove a Music Cartridge when the power is on Doing so may ...

Page 40: ... display if the selected Cartridge Styles have no One Touch Setting data Selecting Songs on a Music Cartridge 1 Select the Song mode Press the SONG button The Song mode and Song menu are selected 2 Select a Song from the Cartridge First press the CARTRIDGE button below the numeric keypad The Cartridge icon appears at the upper left of the display Then enter the Cartridge Song number directly with ...

Page 41: ...possible to cover all its aspects here However this short section will introduce you to some MIDI basics and help you use this powerful tool in your own system MIDI Terminals The MIDI terminals are located on the rear panel of the PortaTone MIDI IN receives MIDI data from an external device and MIDI OUT transmits MIDI data from the PortaTone which includes for example performance data when you pla...

Page 42: ... see MIDI Sub Menu below then set the Remote Channel also MIDI Sub Menu below and the MIDI Send Channel on the other keyboard to the same value Using with a Computer or Sequencer If you have a sequencer or a computer with a MIDI interface you can easily and instantly integrate the PortaTone into your system And with its GM compatibility the PortaTone is a natural for multimedia computer music appl...

Page 43: ...xternal keyboard to remotely control the PortaTone functions over the selected channel The remaining 15 channels can be used for multi timbral operation When this is set to off the PortaTone can be used as a full 16 channel multi timbral sound source The default setting is off This determines over which channel keyboard data for the Main Voice is transmitted The default setting is channel 01 This ...

Page 44: ...ingering mode Split Points 1 and 2 Auto Accompaniment Split Point Easy Chord Memory User Song All MIDI Sub Menu settings Tuning Voice Set on off Guide Lamp on off PSR 230 only Metronome on off Initialize Operation All data can be initialized and restored to the factory preset condition by simultaneously holding the buttons and turning on the power A Clr All message appears briefly in the display I...

Page 45: ...trings Guitar 2 35 0 0 34 Jazz Guitar 2 36 0 0 35 Octave Guitar 2 37 0 0 36 Clean Guitar 2 38 0 0 37 Muted Guitar 1 39 0 0 38 Overdriven Guitar 2 40 0 0 39 Distortion Guitar 2 BASS 41 0 0 40 Acoustic Bass 1 42 0 0 41 Finger Bass 1 43 0 0 42 Fretless Bass 1 44 0 0 43 Slap Bass 1 45 0 0 44 Synth Bass 2 ENSEMBLE 46 0 0 45 Strings 2 47 0 0 46 Chamber Strings 2 48 0 0 47 Synth Strings 2 49 0 0 48 Slow ...

Page 46: ...ad 8 sweep 2 Bass Synth Effects 033 0 0 32 Acoustic Bass 1 097 0 0 96 FX 1 rain 2 034 0 0 33 Electric Bass finger 1 098 0 0 97 FX 2 soundtrack 2 035 0 0 34 Electric Bass pick 1 099 0 0 98 FX 3 crystal 2 036 0 0 35 Fretless Bass 1 100 0 0 99 FX 4 atmosphere 2 037 0 0 36 Slap Bass 1 1 101 0 0 100 FX 5 brightness 2 038 0 0 37 Slap Bass 2 1 102 0 0 101 FX 6 goblins 2 039 0 0 38 Synth Bass 1 1 103 0 0 ...

Page 47: ... recognize For example when playing Single Finger chords make sure that the Single Finger mode is selected See page 26 Check that nothing is connected to the PHONES AUX OUT jack on the rear panel When a set of headphones is plugged into this jack no sound is output Make sure that the following settings are appropriate Main Voice Volume page 11 Dual Voice Volume page 13 and Split Voice Volume page ...

Page 48: ...ic Cartridge PSR 230 only 36 Music Stand 4 N numeric keypad 10 O Octave Dual Voice 13 Octave Main Voice 11 Octave Split Voice 15 One Touch Setting Song 33 One Touch Setting Style 27 P Pan Dual Voice 13 Pan Main Voice 11 Pan Split Voice 15 Percussion Kit Voice 12 PHONES AUX OUT 4 Power switch 5 R Real time recording 34 REC END Easy Chord Memory 34 Receive Channel Select 40 Receive Switch 40 Recordi...

Page 49: ...〇 1 〇 〇 〇 〇 〇 〇 〇 〇 〇 2 〇 〇 〇 1 〇 〇 〇 〇 〇 〇 〇 〇 〇 〇 〇 〇 2 〇 〇 3 Bank select MSB LSB Modulation depth Data entry MSB LSB Volume Pan Expression Sustain Sostenuto Portament control Dry send level Reverb depth RPN data increment RPN data decrement RPN LSB MSB All sound off Reset All Controllers Default Changed Default Messages Altered True voice Note on Note off Key s Ch s Basic Channel Mode Note Numb...

Page 50: ...ue is reset by a GM1 System On message MIDI Master Tuning F0H 43H 1nH 27H 30H 00H 00H mm ll cc F7H Allows the pitch of all channels to be changed simultaneously mm ll is used as the MIDI Master Tuning value and the actual tuning value is represented as follows T M x 200 256 100 Where T is the actual tuning value in cents M is decimal value represented by 1 byte using bits 0 3 of mm as the MSB and ...

Page 51: ...O REPEAT PLAY MAIN AUTO FILL A and B also MINUS ONE GUIDE PSR 230 only ENDING JAM TRACK SYNC STOP LARGE SMALL ONE TOUCH SETTING 1 4 MEASURE BEAT VOICE STYLE SONG Numeric Keypad CARTRIDGE PSR 230 only EASY CHORD MEMORY REC END DUAL CHORUS HARMONY ECHO REVERB Other Terminals Fittings Music Cartridge slot PSR 230 only DC IN 10 12V jack PHONES AUX OUT jack SUSTAIN jack MIDI IN OUT terminals Music Stan...

Page 52: ...Yamaha directly at the address provided below 2 Deliver the unit to be serviced under warranty to the retailer selling the product an authorized service center or to Yamaha with an explanation of the problem Please be prepared to provide proof purchase date sales receipt credit card copy etc when requesting service and or parts under warranty 3 Shipping and or insurance costs are the consumers res...

Reviews: