


Recording Your Performances and Creating Songs— Song Creator
93
PF-1000
D
C
3
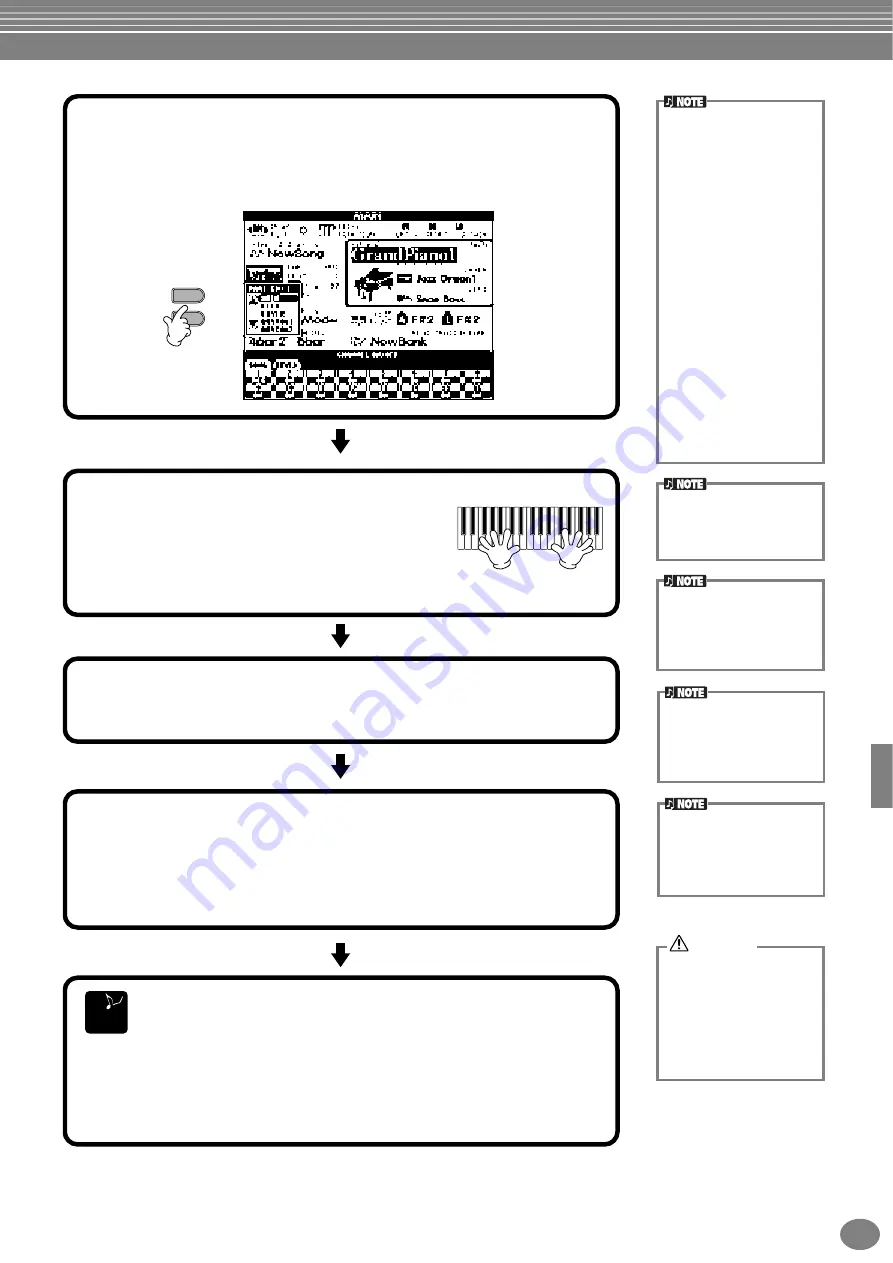
Select the part you want to assign to the channel to be recorded.
This determines which of the keyboard-played parts (Main/Layer/Left) and the
accompaniment style parts (RHYTHM 1/2, BASS, etc.) are recorded to the
recording channels selected in step #2.
For a list of the initial default assignments, see page 92.
When selecting the MIDI
part
•
Setting a single channel
to MIDI
All incoming data received
via any of the MIDI chan-
nels 1 - 16 is recorded.
When using an external
MIDI keyboard or control-
ler to record, this lets you
record without having to
set the MIDI transmit
channel on the external
device.
•
Setting several channels
to MIDI
When using an external
MIDI keyboard or control-
ler to record, this records
data only over the set
MIDI channel — meaning
the external device must
also be set to the same
channel.
A single part (with the
exception of MIDI parts) can-
not be assigned to several
channels.
4
Recording starts as soon as you play the keyboard.
You can also start recording by pressing the
SONG/STYLE CONTROL
[START/STOP]
button.
The recording can be started/stopped by pressing
the pedal if the recording punch in/out function is
set to the pedal (page 99).
5
To stop recording, press the [REC] button again.
You can also use the pedal to stop recording by releasing it, if the recording
punch in/out function has been assigned to the pedal (page 99).
To pause, press the SONG
[START/STOP]
button. To
resume recording, press the
SONG
[START/STOP]
but-
ton again.
You can also use the metro-
nome click as a guide while
recording.
The sound of the metronome
is not recorded.
6
Play back your new song.
To play back the performance you just recorded, return the song to the
beginning by using the [TOP] button and press the SONG
[START/STOP]
button.
Playback stops automatically at the end of the song, and returns to the
beginning of the song.
To record a new part, repeat steps 2 - 6 above.
You can set previously recorded parts to play back, and monitor them
while you record a new part. Continue in this way until you have a
finished song.
You can edit the recorded song data from the
SONG CREATOR (1 - 16)
displays (page 103).
Press the [6
▼
] button from the Open/Save display for Song to store
the recorded data (page 38, 44).
E
ND
Turning off the power
automatically deletes your
recorded performance. If
you wish to save the
recording, make sure to
store it to internal mem-
ory (USER drive) or floppy
disk (page 38, 44).
The settings of the recorded
parts is stored temporarily
until you execute Quick
Recording, select a song, or
turn the power off.
CAUTION


