background image

C

u

stomizing with F

u

nction Parameters

P-255 Owner’s Man

u

al

42

Werckmeister
Kirnberger

The Werckmeister and Kirn

b

erger t

u

ning systems impro

v

e the 

Meantone and Pythagorean t

u

ning systems 

b

y com

b

ining them 

in different ways. Both are 

u

niq

u

ely characterized 

b

y the way in 

which mod

u

lation can change the n

u

ances of m

u

sical composi-

tions. Often 

u

sed in the eras of Bach and Beetho

v

en, they are 

still employed today to reprod

u

ce the m

u

sic of those periods on 

the harpsichord. 

F2.1

Tuning system

• A

v

aila

b

le settings: 1 ... Eq

u

al temperament

2 ... P

u

re Major

3 ... P

u

re Minor

4 ... Pythagorean
5 ... Meantone
6 ... Werckmeister
7 ... Kirn

b

erger

• Defa

u

lt setting:

1 ... (Eq

u

al temperament)

F2.2

Base note

If you select a tuning system other than equal temperament, 
you will also need to specify the note on which it is based. 
(You can specify a base note for equal temperament, but 
this setting will have no effect. It is only relevant to other 
tuning systems.)

• A

v

aila

b

le settings: C, C

#

, D, E

b

, E, F, F

#

, G, A

b

, A, B

b

, and B

• Defa

u

lt setting: C

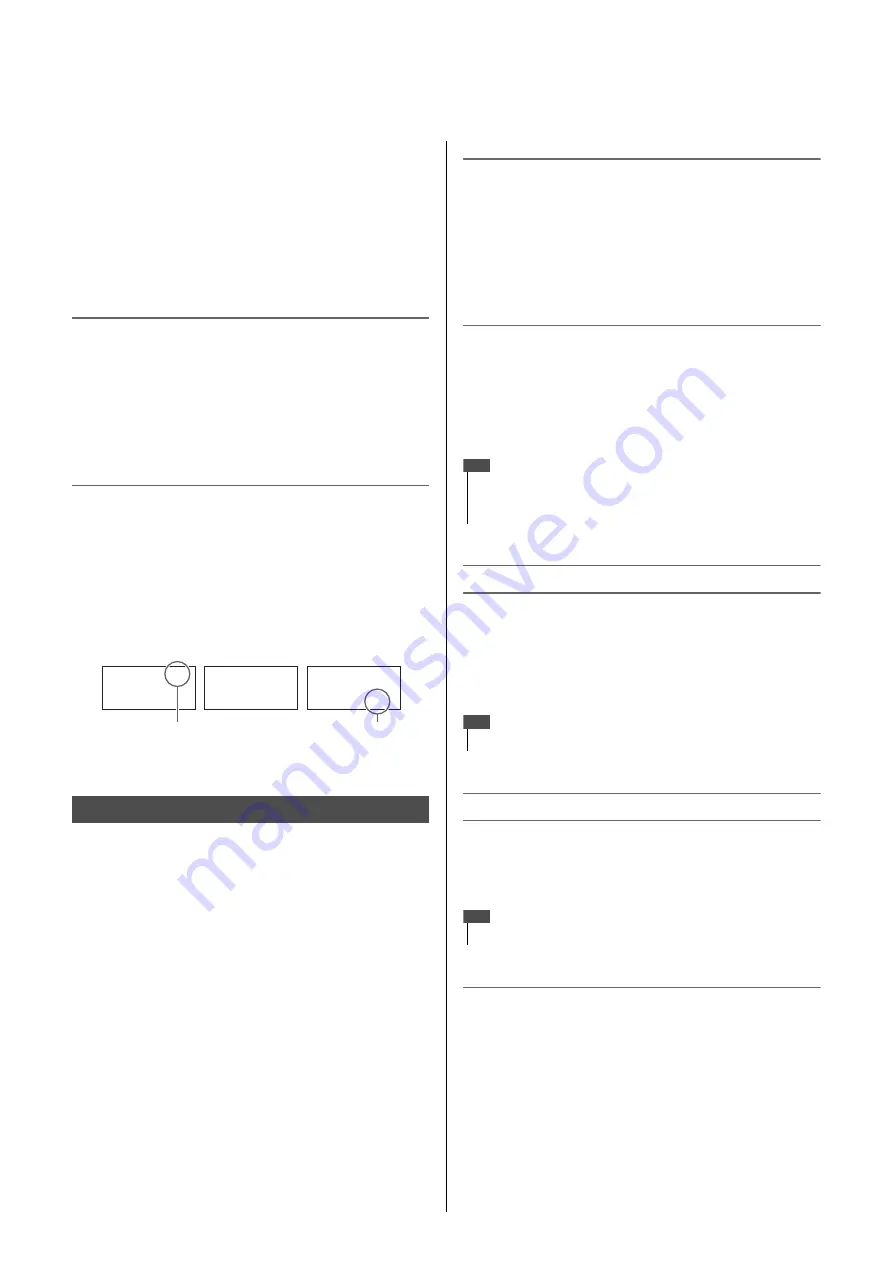
Examples of base notes as shown on display

The following parameters can be used to adjust the volume 
balance between the two selected Voices and make various 
other settings for Dual mode in order to best suit the piece 
you intend to play. Settings can be made for each combina-
tion of Voices as described below. 

1

Activate Dual mode, select the Voices you wish to 
use, and then use the [FUNCTION] button to select 
the Function parameter(s) you wish to set. 

2

Change the setting(s) using the [-/NO] and [+/YES] 
buttons. 

Shortcut:

Yo

u

 can j

u

mp directly to F

u

nction parameter 

F3.1


b

y pressing 

the [FU

N

CTIO

N

bu

tton with the Voice 

bu

ttons for the two D

u

al-

mode Voices held down. 

F3.1

Dual balance

This parameter can be used to optimize the volume balance 
between the layered Voices. For example, you could set it 
such that one Voice serves as the main sound and the other 
provides a subtle accent or a textured after-sound. 

• A

v

aila

b

le settings: 0 to 20 (The greater the 

v

al

u

e, the lo

u

der the 

v

ol

u

me of Voice 1; 10 represents an eq

u

al 

b

alance.)

• Defa

u

lt setting: Each com

b

ination of Voices has its own defa

u

lt. 

F3.2

Dual detune

Use this parameter to slightly detune the two Voices relative 
to one another in order to thicken their combined sound. 

• A

v

aila

b

le settings: -20 to 0 to 20 (The more positi

v

e the 

v

al

u

e, the 

higher the pitch of Voice 1 and the lower the pitch of Voice 
2. The more negati

v

e the 

v

al

u

e, the higher the pitch of 

Voice 2 and the lower the pitch of Voice 1.)

• Defa

u

lt setting: Each com

b

ination of Voices has its own defa

u

lt. 

F3.3

Voice 1 octave shift

F3.4

Voice 2 octave shift

These parameters are used to raise or lower the pitch of 
each of Voice 1 and Voice 2 in units of one octave. In cer-
tain cases, this can enhance the combined sound of the 
Voices. 

• A

v

aila

b

le settings: -1, 0, and 1

• Defa

u

lt setting: Each com

b

ination of Voices has its own defa

u

lt. 

F3.5

Voice 1 effect depth

F3.6

Voice 2 effect depth

Use these parameters to set the depth of the effect for each 
of Voice 1 and Voice 2. 

• A

v

aila

b

le settings: 0 to 20

• Defa

u

lt setting: Each com

b

ination of Voices has its own defa

u

lt. 

F3.7

Reset

By pressing the [+/YES] button with this Function parame-
ter shown, you can reset all of the Dual mode settings to the 
defaults for the corresponding Voice combinations. 

F3.

  Dual mode settings

F~

G

A_

Hyphen (“-”) at 
top for sharp

Hyphen (“-”) at 

b

ottom for flat

F

#

G

A

b

• The actual amount of detuning is greater for lower notes than higher notes—for 

example, ±60 cents for A-1 corresponds to ±5 cents for C7. (100 cents equal one 
semitone.)

• Refer to page 14 for details of what is meant by Voice 1 and Voice 2. 

• Refer to page 14 for details of what is meant by Voice 1 and Voice 2. 

NOTE

NOTE

NOTE

Summary of Contents for P-255

Page 1: ...e to read PRECAUTIONS on pages 4 5 Avant d utiliser l instrument lisez attentivement la section PRÉCAUTIONS D USAGE aux pages 4 et 5 Antes de utilizar el instrumento lea las PRECAUCIONES en las páginas 4 5 ES FR EN P 255 PIANO NUMÉRIQUE DIGITAL PIANO PIANO DIGITAL ENGLISH FRANÇAIS ESPAÑOL ...

Page 2: ...unction or effect works when the unit is operating as designed are not covered by the manufacturer s warranty and are therefore the owners responsibility Please study this manual carefully and consult your dealer before requesting service ENVIRONMENTAL ISSUES Yamaha strives to produce products that are both user safe and environ mentally friendly We sincerely believe that our products and the prod...

Page 3: ... 21 Convenient playback functions 23 Recording Keyboard Performances 25 Simple recording of all parts MIDI or Audio songs 25 Recording individual parts MIDI songs 27 Deleting recorded parts individually MIDI songs 28 Changing Voice s and tempo etc after recording MIDI songs 28 Using USB Flash Drives 30 Working with USB flash drives 30 Managing files on a USB flash drive 31 Copying a User Song reco...

Page 4: ...plug from the instrument or an outlet always hold the plug itself and not the cord Pulling by the cord can damage it Remove the electric plug from the outlet when the instrument is not to be used for extended periods of time or during electrical storms Do not place the instrument in an unstable position where it might accidentally fall over Before moving the instrument remove all connected cables ...

Page 5: ...ory external device such as a computer To protect against data loss through media damage we recommend that you save your important data onto two USB flash memories Information About copyrights Copying of the commercially available musical data including but not limited to MIDI data and or audio data is strictly prohibited except for your personal use This product incorporates and bundles computer ...

Page 6: ...related Operations This manual describes how to connect your digital piano and a computer MIDI Reference This manual contains the instrument s MIDI Data Format and MIDI Implemen tation Chart MIDI Basics This manual provides a description of the basic features of MIDI The digital format manuals listed above can be obtained from the Yamaha Downloads web page To do so go to the Downloads page using t...

Page 7: ...m tracks built into your P 255 is a great way to add spice to your performances and as such these automatic rhythms make playing more fun Featuring a range of different patterns from jazz popular music and the like the digital piano s rhythm tracks are sure to include what you are looking for Live Music Toolbox for performing on stage Collectively known as the Live Music Toolbox the P 255 features...

Page 8: ...rn playback of the left hand and right hand parts on or off This allows you to practice playing the parts that have been turned off o TEMPO button Pages 19 20 22 Use this button to adjust the instrument s tempo 0 METRONOME button Page 19 Use this button to turn the metronome on and off 1 RHYTHM button Page 20 Use this button to turn rhythm tracks on and off 2 Display Page 10 The display shows the ...

Page 9: ...lay back songs stored on it 2 AUX IN jack Page 34 Stereo output from another instrument or audio device can be input via this jack and output from the digital piano s speakers together with its own sound In addition it can also be output via the PHONES jacks 0 and the AUX OUT jacks 3 3 L L R and R AUX OUT jacks Page 34 Use these jacks to connect your digital piano to powered speakers and the like ...

Page 10: ...er supply at the correct voltage Be sure to unplug the power adaptor from the AC wall socket during electrical storms or if the instrument is not to be used for an extended period of time The digital piano remains charged and draws a small amount of power even when turned off Be sure therefore to unplug the power adaptor from the AC wall socket if it is not to be used for an extended period of tim...

Page 11: ...rresponding keys You can also connect either an FC3 Foot Pedal or an FC5 Foot Switch sold separately The FC3 supports half damper playing Half damper playing Your digital piano can adjust the length of sustain in response to how much the pedal is operated In spe cific terms the more the pedal is operated the longer the notes sustain If for example too much sustain is applied when you operate the p...

Page 12: ...eturn Notes played while the pedal is operated are not affected meaning that you can play a staccato melody over a sustained chord Soft pedal Located at the left of the pedal unit the soft pedal slightly lowers the volume and softens the timbre of notes played while it is being operated This effect lasts until the pedal is released Because the soft pedal has no effect on notes already playing you ...

Page 13: ...ng playback to skip to the corresponding demo song 2 Press the PLAY STOP button or the DEMO button to stop playback Selecting Voices When you press a Voice button the most recently selected Voice will be shown on the display Although your digital piano can adjust the loudness of Voices based on the strength of your playing certain Voices do not support this Touch Sensitiv ity feature Refer to the ...

Page 14: ... Electric Bass Voice while playing a melody using a different Voice with your right hand 1 Activate Split mode Press the SPLIT button and verify that it lights up By default the Wood Bass Voice will be assigned to the left side of the keyboard at this time 2 Set the split point The split point is the location at which the key board is divided To set this point press the corre sponding key with the...

Page 15: ...t the reverb type and depth Setting the reverb type Whenever you press and release the REVERB but ton the current reverb type will be shown on the dis play You can then cycle through the different types by pressing the REVERB button the required number of times Reverb types Setting the reverb depth You can change the setting by pressing the NO and YES buttons with the REVERB button held down Avail...

Page 16: ...its For example if you set the transpose amount to 5 the key C will produce the pitch F You could therefore play a song as if it was in C major and the digital piano would transpose it to the key of F major Setting the transpose amount Use the NO and YES buttons while holding down the TRANSPOSE button to set the transpose amount in semitone units To restore the non trans posed default setting 0 pr...

Page 17: ...e of overall instrument by increasing or decreasing the gain in three different frequency bands The EQ section of the control panel contains a slider for each of these bands making it very easy to equal ize to your liking LOW slider Used to adjust the tone in the Low frequency band MID slider Used to adjust the tone in the Mid frequency band HIGH slider Used to adjust the tone in the High frequenc...

Page 18: ...uttons to prevent them being operated uninten tionally while performing 1 Lock the control panel Press the EFFECT and SOUND BOOST but tons together All control panel buttons with the exception of the Standby On switch will be disabled The message is shown on the dis play while the control panel is locked Control panel locked 2 Unlock the control panel Press the EFFECT and SOUND BOOST but tons toge...

Page 19: ...with the METRO NOME button held down Settings of between 0 and 15 are supported for example you can set 4 if you need a metronome with four beats per measure The first beat of each measure is accented with a bell type sound and clicks are used for the other beats When the time signature is set to 0 clicks are used for all beats To restore the default setting of 0 press the NO and YES buttons toget...

Page 20: ...n stop a rhythm track by pressing the RHYTHM button once again If ending play back has been turned on using the corresponding Function parameter page 40 the rhythm track s ending section will be played first Selecting a rhythm track Whenever the RHYTHM button is being held down the display will show the number of the current rhythm track Refer to the Rhythm Track list for the corresponding names Y...

Page 21: ...ing the actions of playing and releasing keys in other words they do not con tain actual audio This data is similar to sheet music in that it indicates the keys that should be played as well as when and how hard they should be played in order to reproduce a specific piece of music Using this data your digital piano s tone generator can recreate the sound of the recorded performance MIDI songs are ...

Page 22: ...you want to stop the song If you selected a specific song using its song num ber in Step 2 above it will stop automatically after playing once to the end Reverb and effect types during playback MIDI songs Whenever you select a song or a new one starts during continuous playback the most suitable reverb and effect types will be selected automatically MIDI songs with sounds not found on the instrume...

Page 23: ... be shown on the display to indicate that the A point has been set Following this set the B point by again pressing the PLAY STOP button with the FUNCTION button held down The message A b will be shown on the display to indicate that the A and B points have been set In addition playback will return to the A point at this time and looping will begin automatically 2 Stop playback When you stop the s...

Page 24: ...e played If you wish to deactivate the Auto Start function again press and hold the PLAY STOP but ton for at least one second The current song will start automatically as soon as you play a key Starting and stopping using a pedal If you have connected a pedal unit see page 12 to your digital piano you can configure either the center or left pedal to operate in the same way as the control panel s P...

Page 25: ...rminal Songs in MIDI format can be recorded either on the instrument itself or on a USB flash drive Audio songs must be recorded on a USB flash drive Be sure to read the section Working with USB flash drives page 30 before recording on a USB flash drive 2 Select the recording method To record in MIDI format Press the SELECT button as many times as nec essary to show USr if you wish to record on th...

Page 26: ...utton to play back your recorded performance To stop playback press the PLAY STOP button once again Please note that if you record to a song any existing data will be overwritten Your digital piano also supports recording together with a rhythm track page 20 In such a case the rhythm track will be recorded to the right part You can also record with the metronome page 19 turned on but the met ronom...

Page 27: ...hat part will start to play when you begin record ing 4 Start recording Recording will start automatically as soon as you play a note on the keyboard If the rhythm track is to be recorded recording will start as soon as you press the RHYTHM button You can also press the PLAY STOP button to start recording if you wish to include an empty section before your per formance begins 5 To stop recording p...

Page 28: ...made up of the following types of data Those data types marked with an asterisk can be changed at any later time Data recorded for each part Notes played Voice Pedal operations damper soft and sostenuto Reverb depth Effect depth Dual mode Voice Dual mode volume balance Dual mode detune Dual mode octave shift Split mode Voice Split mode volume balance Split mode octave shift Rhythm right part only ...

Page 29: ...nce again 4 Save your changes Press the PLAY STOP button with the REC button held down Dashes will scroll across the display to indicate that data is being saved When this process is complete the message End will be shown followed by the song num ber In addition the instrument will automatically leave Record mode Take care not to play the keyboard or press the PLAY STOP button at this time Either ...

Page 30: ...y you can save data you ve created to the connected USB flash memory as well as read data from the connected USB flash memory Number of USB flash memories that can be used Only one USB flash memory device can be connected to the USB TO DEVICE terminal Formatting USB flash memory You should format the USB storage device only with this instrument page 33 A USB storage device for matted on another de...

Page 31: ... digital piano will not be able to select or play songs from a lower level Checking the write protected status Before you use a USB flash drive you should ensure that it is not write protected Your digital piano will not be able to access data on a write protected USB flash drive Managing files on a USB flash drive USB flash drive First level Second level Third level Fourth level Song file Song fi...

Page 32: ...ollowing this the message n Y no yes will be shown To cancel this operation press the NO button while n Y is being shown 4 Press the YES button to copy the song When the song has been copied the message End will be shown If you wish to cancel the Copy operation at this time press the NO but ton Copying a User Song recorded on the instrument to a USB flash drive The message _ _ _ will flash on the ...

Page 33: ...in the USB flash drive 2 Press the FUNCTION button as many times as necessary to select Function parameter F8 9 3 Press the YES button to format the USB flash drive The message n Y no yes will be shown to confirm whether you wish to continue If so press the YES button once again The message will be shown while saving When the data has been saved the message End will be shown The display will then ...

Page 34: ... device when you want to listen to it using the digital piano s built in speakers be sure to turn on the audio device first followed by the digital piano In addition remember to always turn off the digital piano before the audio device CAUTION NOTICE Connecting audio equipment Using the corresponding Function parameter page 40 you can specify whether or not the volume of audio output via the AUX O...

Page 35: ...ifically for your digital piano P 255 Controller is a free app that makes your instrument more convenient to operate For more details of this and other supported appli cations refer to the following Yamaha web page http www yamaha com kbdapps Connecting other MIDI devices When connecting other equipment to your digital piano ensure that all devices are turned off first Freely available from the Ya...

Page 36: ...hen you get his or her OK connect the L L R and R AUX OUT jacks on the instrument s rear panel to the DI box inputs using standard mono audio cables sold separately If DI boxes are not being used connect the L L R and R AUX OUT jacks on the instrument s rear panel to the Performing on stage as part of a band Please read the following before setting up Ensure that the instrument is turned off befor...

Page 37: ...slider should be set between 5 and 7 for playing accompani ment and to 8 or 9 when you need to play louder If set too high your sound may become distorted if too low any background noise will be more noticeable When the volume needs to be finely adjusted for dif ferent Voices or raised in order to play a solo you should do this yourself using the MASTER VOL UME slider Similarly you should use the ...

Page 38: ...n adjust the overall volume using the keyboard amplifier If this slider is set too high your sound may become distorted if too low any background noise will be more noticeable Singing and playing on your own If your keyboard amplifier features multiple inputs you may be able to connect both the vocal microphone and digital piano to it For details please refer to the owner s manual that came with i...

Page 39: ...ey can simultaneously produce the sound of two different Voices See page 14 Split mode One Voice for the left another for the right Your digital piano s Split mode lets you divide the key board at a freely selectable point and assign different Voices to the left and right sides See page 14 Transpose Using the Transpose function you can shift the pitch of keyboard notes up or down in semitone units...

Page 40: ...ion F5 1 OFF F8 4 43 Damper pedal resonance depth F5 2 Voice specific defaults F8 1 43 Soft pedal effect depth F5 3 5 F8 4 43 String resonance depth F5 4 5 44 Sustain sample depth F5 5 5 44 Key off sample volume F5 6 5 44 Intro on off status F5 7 ON 44 Ending on off status F5 8 ON 44 Volume settings Metronome volume F6 1 15 F8 1 44 Rhythm playback volume F6 2 16 F8 4 44 Audio song playback volume ...

Page 41: ...our digital piano supports a range of different tuning sys tems While the Equal Temperament tuning system has now become standard for pianos a wide number of other sys tems were developed over the centuries before it was adopted and these systems invariably paved the way for the birth of new musical styles By selecting different tuning systems you can enjoy the unique harmonics of music from the c...

Page 42: ...balance between the layered Voices For example you could set it such that one Voice serves as the main sound and the other provides a subtle accent or a textured after sound Available settings 0 to 20 The greater the value the louder the volume of Voice 1 10 represents an equal balance Default setting Each combination of Voices has its own default F3 2 Dual detune Use this parameter to slightly de...

Page 43: ...Voices has its own default F4 7 Damper pedal range This parameter can be use to specify whether the damper pedal should affect both Voices ALL only the right Voice 1 or only the left Voice 2 Available settings ALL both Voices 1 right Voice only and 2 left Voice only Default setting 1 F4 8 Reset By pressing the YES button with this Function parame ter shown you can reset all of the Split mode setti...

Page 44: ...nd the sound produced by the key board Available settings 1 to 20 Default setting 16 F6 3 Audio song playback volume Available settings 1 to 20 Default setting 16 Shortcut You can jump directly to Function parameter F6 3 by pressing the FUNCTION button while an audio song is playing The vol ume of the song can then be set using the NO and YES buttons F6 4 MIDI song playback volume This parameter c...

Page 45: ...el 1 to 16 on the sending device must match the MIDI receive channel on the receiv ing device Using Function parameter F7 2 you can set the MIDI channel on which the digital piano will receive data sent by another MIDI device Available settings ALL 1 to 16 and 1 2 Default setting ALL Meaning of ALL setting If you set ALL for this parameter all data will be received from the sending device regardle...

Page 46: ...ment in order to configure it in the same way as the digital piano s 1 Set the control panel as required 2 Connect the sequencer and configure it to receive and record the initial setup data 3 Use the FUNCTION button to select Function parameter F7 7 4 Press the YES button to send the data The message End will be shown when the data has been sent Initial setup data contains the following settings ...

Page 47: ...estore its settings and songs 1 Plug in a USB flash drive 2 With the FUNCTION button held down use the NO and YES buttons to select the required function F8 6 Save backup data F8 7 Load backup data 3 The message bUP Save or rSt Load will be displayed when you press the YES button fol lowed by the message n Y no yes Press the YES button to perform the selected operation You will need to press once ...

Page 48: ...ction parameters to be over written User Songs and Import Songs stored within internal memory will be retained Restoring factory settings You should never turn off the digital piano while the mes sage CLr is shown on the display Failure to observe this precaution may result in all song data page 21 including Import Songs being deleted Default settings The term default settings as used in this manu...

Page 49: ...been completed Enp The digital piano s internal memory or the USB flash drive is nearly full Delete any unnecessary files page 33 to free up some memory before starting to record FCL The digital piano s internal memory was formatted because it was turned off while performing an operation The instrument s settings and any songs recorded or saved on it have been lost You should never turn off the di...

Page 50: ... page 11 If headphones are connected to the instrument try unplugging them page 11 The digital piano s speakers are turned off Please turn them back on page 44 If local control has been turned off try turning it back on page 45 The sound is distorted The volume has been set too high Turn down the volume using the MASTER VOLUME slider page 11 Move the EQ sliders downward page 17 Turn off the Sound ...

Page 51: ...rock music The rotary speed of the ROTARY SP effect can be switched by using the left pedal Jazz Organ 2 or2 The sound of a tonewheel type electric organ without attacks Select the normal or variation Voice depending on the tunes The rotary speed of the ROTARY SP effect can be switched by using the left pedal Pipe Organ Principal or3 O This is a typical pipe organ sound 8 feet 4 feet 2 feet Good f...

Page 52: ...n P 21 Jägerlied op 19b 3 J L F Mendelssohn P 22 Fantaisie Impromptu F F Chopin P 23 Prelude op 28 15 Raindrop F F Chopin P 24 Etude op 10 5 Black keys F F Chopin P 25 Etude op 10 3 Chanson de l adieu F F Chopin P 26 Etude op 10 12 Revolutionary F F Chopin P 27 Valse op 64 1 Petit chien F F Chopin P 28 Valse op 64 2 F F Chopin P 29 Valse op 69 1 L adieu F F Chopin P 30 Nocturne op 9 2 F F Chopin P...

Page 53: ...Number of Songs 24 Voice Demo Songs 50 Piano Preset Songs Data Format Recording SMF Format 0 Playback SMF Format 0 Format 1 Songs Audio Length of Recording Playback max 80 minutes Song Data Format wav 44 1 kHz sample rate 16 bit resolution stereo Overall Controls Metronome Yes Tempo Range 5 500 Transpose 12 to 0 0 to 12 Tuning 414 8 440 466 8 Hz Scale Type 7 types Storage Internal Memory approx 1 ...

Page 54: ...ed Accessories 6 Intro on off 44 iPhone iPad 35 iPhone iPad Connection Manual 6 L Live Music Toolbox 7 M Managing files USB flash drives 31 Metronome 19 Metronome volume 44 MIDI function settings 45 MIDI recording 25 MIDI song 21 MIDI song playback volume 44 Music rest 11 P P 255 Controller 7 35 PA mixer 36 Panel Lock 18 37 Part Playback 23 Part Recording 27 Part button lighting 26 Pedal 11 43 Ped...

Page 55: ...a Park CA90620 The above statements apply ONLY to those products distributed by Yamaha Corporation of America or its subsidiaries FCC INFORMATION U S A This applies only to products distributed by YAMAHA CORPORATION OF AMERICA COMPLIANCE INFORMATION STATEMENT DECLARATION OF CONFORMITY PROCEDURE Responsible Party Yamaha Corporation of America Address 6600 Orangethorpe Ave Buena Park Calif 90620 Tel...

Page 56: ...ne qui pourraient advenir lors d un traitement inapproprié des déchets Pour plus d informations à propos de la collecte et du recyclage des déchets d équipements électriques et électroniques veuillez contacter votre municipalité votre service de traitement des déchets ou le point de vente où vous avez acheté les produits Pour les professionnels dans l Union Européenne Si vous souhaitez vous débarr...

Page 57: ...ase documents will cause this warranty to be void This warranty covers only the Original Owner and is not transferable In Order to Obtain Warranty Service Warranty service will only be provided for defective products within the Warranted Area Contact your local authorized YAMAHA dealer who will advise you of the procedures to be followed If this is not successful contact YAMAHA at the address tele...

Page 58: ...P 255 Owner s Manual 58 ...

Page 59: ...Germany filial Scandinavia J A Wettergrensgata 1 Box 30053 S 400 43 Göteborg Sweden Tel 46 31 89 34 00 DENMARK Yamaha Music Europe GmbH Tyskland filial Denmark Generatorvej 6A DK 2730 Herlev Denmark Tel 44 92 49 00 FINLAND F Musiikki Oy Kluuvikatu 6 P O Box 260 SF 00101 Helsinki Finland Tel 09 618511 NORWAY Yamaha Music Europe GmbH Germany Norwegian Branch Grini Næringspark 1 N 1361 Østerås Norway...

Page 60: ...ZG80540 C S G DMI Development Division 2013 Yamaha Corporation 310POTO A0 Printed in Japan Yamaha Global Site http www yamaha com Yamaha Downloads http download yamaha com ...

Reviews: