background image

Perio

d

ic maintenance an

d

 a

d

justment

7-35

7

EAU25872

Trou

b

leshootin

g

Although Yamaha motorcycles receive
a thorough inspection before shipment
from the factory, trouble may occur
during operation. Any problem in the
fuel, compression, or ignition systems,
for example, can cause poor starting
and loss of power.
The following troubleshooting charts
represent quick and easy procedures
for checking these vital systems your-
self. However, should your motorcycle
require any repair, take it to a Yamaha
dealer, whose skilled technicians have
the necessary tools, experience, and
know-how to service the motorcycle
properly.
Use only genuine Yamaha replace-
ment parts. Imitation parts may look
like Yamaha parts, but they are often
inferior, have a shorter service life and
can lead to expensive repair bills.

WARNING

EWA15142

When checkin

g

 the fuel system, 

d

o

not smoke, an

d

 make sure there are

no open flames or sparks in the ar-
ea, inclu

d

in

g

 pilot li

g

hts from water

heaters or furnaces. Gasoline or

g

asoline vapors can i

g

nite or ex-

plo

d

e, causin

g

 severe injury or prop-

erty 

d

ama

g

e.

UB6CE0E0.book  Page 35  Thursday, October 12, 2017  2:01 PM

Summary of Contents for MT-09 SP

Page 1: ...DIC183 MTN850D OWNER S MANUAL Read this manual carefully before operating this vehicle B6C 28199 E0 English E ...

Page 2: ...tive 2014 53 EU The full text of the EU declaration of conformity is available at the following internet address https global yamaha motor com eu_doc Frequency band 134 2 kHz The maximum radio frequency power 49 0 dBμV m Manufacturer YAMAHA MOTOR ELECTRONICS Co Ltd 1450 6 Mori Mori machi Shuchi Gun Shizuoka 437 0292 Japan Importer YAMAHA MOTOR EUROPE N V Koolhovenlaan 101 1119 NC Schiphol Rijk 111...

Page 3: ...n addition the many tips given in this manual will help keep your motorcycle in the best possible condition If you have any further questions do not hesitate to contact your Yamaha dealer The Yamaha team wishes you many safe and pleasant rides So remember to put safety first Yamaha continually seeks advancements in product design and quality Therefore while this manual contains the most cur rent p...

Page 4: ...tial personal injury hazards Obey all safety messages that follow this symbol to avoid possible injury or death A WARNING indicates a hazardous situation which if not avoided could result in death or serious injury A NOTICE indicates special precautions that must be taken to avoid damage to the vehicle or other property A TIP provides key information to make procedures easier or clearer WARNING NO...

Page 5: ...L 2017 by Yamaha Motor Co Ltd 1st edition September 2017 All rights reserved Any reprinting or unauthorized use without the written permission of Yamaha Motor Co Ltd is expressly prohibited Printed in Japan UB6CE0E0 book Page 2 Thursday October 12 2017 2 01 PM ...

Page 6: ...6 2 Tips for reducing fuel consumption 6 3 Engine break in 6 3 Parking 6 4 Periodic maintenance and adjustment 7 1 Tool kit 7 2 Periodic maintenance charts 7 3 Periodic maintenance chart for the emission control system 7 3 General maintenance and lubrication chart 7 5 Removing and installing the panel 7 9 Checking the spark plugs 7 10 Canister 7 11 Engine oil 7 11 Coolant 7 14 Air filter element 7...

Page 7: ...uses 7 31 Vehicle lights 7 33 Replacing a turn signal light bulb 7 34 Supporting the motorcycle 7 34 Troubleshooting 7 35 Troubleshooting charts 7 36 Motorcycle care and storage 8 1 Matte color caution 8 1 Care 8 1 Storage 8 3 Specifications 9 1 Consumer information 10 1 Identification numbers 10 1 Diagnostic connector 10 2 Vehicle data recording 10 2 Index 11 1 UB6CE0E0 book Page 2 Thursday Octob...

Page 8: ...u Safe Riding Perform the pre operation checks each time you use the vehicle to make sure it is in safe operating condition Failure to inspect or maintain the vehi cle properly increases the possibility of an accident or equipment damage See page 5 1 for a list of pre operation checks This motorcycle is designed to carry the operator and a passen ger The failure of motorists to detect and recogniz...

Page 9: ...main tain control of the motorcycle The passenger should always hold onto the operator the seat strap or grab bar if equipped with both hands and keep both feet on the passenger footrests Never carry a passenger unless he or she can firmly place both feet on the passenger footrests Never ride under the influence of alcohol or other drugs This motorcycle is designed for on road use only It is not s...

Page 10: ...ycle is changed To avoid the possibility of an accident use extreme caution when adding cargo or accessories to your motorcycle Use extra care when riding a motorcycle that has added cargo or accessories Here along with the information about accessories below are some general guidelines to follow if loading cargo to your motorcycle The total weight of the operator pas senger accessories and cargo ...

Page 11: ...hange any of the vehicle s design or operation characteristics can put you and others at greater risk of serious injury or death You are responsible for injuries related to changes in the vehicle Keep the following guidelines in mind as well as those provided under Load ing when mounting accessories Never install accessories or carry cargo that would impair the per formance of your motorcycle Care...

Page 12: ...s Transporting the Motorcycle Be sure to observe following instruc tions before transporting the motorcy cle in another vehicle Remove all loose items from the motorcycle Check that the fuel cock if equipped is in the off position and that there are no fuel leaks Shift the transmission into gear for models with a manual trans mission Secure the motorcycle with tie downs or suitable straps that are...

Page 13: ...e 7 31 4 Spring preload adjuster page 4 23 5 Storage compartment page 4 20 6 Rebound damping force adjuster page 4 23 7 Shift pedal page 4 14 8 Engine oil drain bolt page 7 11 9 Fast compression damping force adjuster page 4 20 10 Slow compression damping force adjuster page 4 20 UB6CE0E0 book Page 1 Thursday October 12 2017 2 01 PM ...

Page 14: ...uster page 4 20 3 Rebound damping force adjuster page 4 20 4 Fuse box 1 page 7 31 5 Coolant reservoir page 7 14 6 Engine oil level check window page 7 11 7 Engine oil filler cap page 7 11 8 Brake pedal page 4 15 9 Rear brake fluid reservoir page 7 21 UB6CE0E0 book Page 2 Thursday October 12 2017 2 01 PM ...

Page 15: ...14 2 Left handlebar switches page 4 4 3 Main switch steering lock page 4 2 4 Multi function meter unit page 4 8 5 Front brake fluid reservoir page 7 21 6 Right handlebar switches page 4 4 7 Throttle grip page 7 16 8 Brake lever page 4 14 UB6CE0E0 book Page 3 Thursday October 12 2017 2 01 PM ...

Page 16: ...rrent drive mode is shown in the drive mode display page 4 10 The current drive mode is saved when the vehicle is turned off Mode STD Mode STD is suitable for various rid ing conditions This mode allows the rider to enjoy smooth and sporty drivability from the low speed range to the high speed range Mode A Mode A offers a sportier engine re sponse in the low to mid speed range compared to mode STD...

Page 17: ...oid especially slip pery surfaces Setting the traction control system With the throttle closed push this switch down to change from TCS 1 to TCS 2 Push up to change from 2 to 1 With the vehicle stopped push this switch up for two seconds to turn the system off Push down to turn the sys tem on TIP The current TCS setting is shown in the TCS display page 4 11 Traction control can be turned on or off...

Page 18: ...ear wheel spin is de tected while riding either wheel is rotated with the key turned to ON such as when per forming maintenance If the traction control system is dis abled both the indicator light and the warning light will come on Should this occur try resetting the sys tem as follows 1 Stop the vehicle and turn the key to OFF 2 Wait a few seconds and then turn the key back to ON 3 The indicator ...

Page 19: ...ects motion in the shift pedal page 4 14 engine power and drive torque are momentarily adjusted to al low the upshift to occur TIP The quick shift system operates when traveling at least 20 km h 12 mi h with an engine speed of 2300 r min or higher and only when accelerating It does not operate when the clutch lever is pulled UB6CE0E0 book Page 4 Thursday October 12 2017 2 01 PM ...

Page 20: ...IATELY IF IT IS LOST If the code re reg istering key is lost registering new codes in the standard keys is impossible The standard keys can still be used to start the vehicle however if code re registering is required i e if a new standard key is made or all keys are lost the entire immobi lizer system must be replaced Therefore it is highly recom mended to use either standard key and keep the cod...

Page 21: ...and only use it for code re registering EAU36872 ON All electrical circuits are supplied with power The meter lighting taillight li cense plate light and auxiliary lights come on and the engine can be start ed The key cannot be removed TIP The headlight comes on automatically when the engine is started and stays on until the key is turned to OFF even if the engine stalls EAU10662 OFF All electrica...

Page 22: ... the handlebars back to the right slight ly To unlock the steering From the LOCK position push the key in and turn it to OFF EAU59680 Parking The hazard lights and turn signal lights can be turned on but all other electri cal systems are off The key can be re moved The steering must be locked before the key can be turned to NOTICE ECA20760 Using the hazard or turn signal lights for an extended len...

Page 23: ...e turned to the center position EAU66030 Horn switch Press this switch to sound the horn EAU73961 Traction control system switch TCS See page 3 2 for an explanation of the traction control system EAU66060 Stop Run Start switch To crank the engine with the starter set this switch to and then push the switch down towards See page 6 1 for starting instructions prior to starting the engine Set this sw...

Page 24: ...the neutral position EAU11081 High beam indicator light This indicator light comes on when the high beam of the headlight is switched on EAU77380 Oil level warning light This warning light comes on if the en gine oil level is low The electrical circuit of the warning light can be checked by turning the key to ON The warning light should come on for a few seconds and then go off If the warning ligh...

Page 25: ...ne overheats see page 7 37 for further instructions EAU73171 Engine trouble warning light This warning light comes on if a prob lem is detected in the engine or other vehicle control system If this occurs have a Yamaha dealer check the on board diagnostic system The electrical circuit of the warning light can be checked by turning the key to ON The warning light should come on for a few seconds an...

Page 26: ...indicator light will flash steadily to indicate the immobilizer system is enabled After 24 hours have passed the indicator light will stop flashing however the immobi lizer system is still enabled The electrical circuit of the indicator light can be checked by turning the key to ON The indicator light should come on for a few seconds and then go off If the indicator light does not come on initiall...

Page 27: ...a fuel meter an eco indicator a transmission gear display a drive mode display a TCS display a multi function display a brightness control function TIP The display units can be switched be tween kilometers and miles To do so set the display to the odometer or a tripmeter and press the SELECT but ton for one second 1 SELECT button 2 RESET button 2 1 1 Transmission gear display 2 Tachometer 3 Eco in...

Page 28: ...et the clock 1 Turn the key to ON 2 Push the SELECT button and the RESET button for two sec onds 3 When the hour digits start flash ing use the RESET button to set the hours 4 Push the SELECT button and the minute digits will start flashing 5 Use the RESET button to set the minutes 6 Push the SELECT button to con firm the settings and start the clock TIP Even when the vehicle is off you can push t...

Page 29: ...evel seg ments and will flash repeat edly If this occurs have a Yamaha dealer check vehicle Eco indicator This indicator comes on when the vehi cle is being operated in an environ mentally friendly fuel efficient manner The indicator goes off when the vehicle is stopped TIP Consider the following to reduce fuel consumption avoid high engine speeds during acceleration travel at a constant speed sel...

Page 30: ...ill lock at 999999 and cannot be reset The tripmeters will lock at 9999 9 but can be manually reset Setting the display item Push the SELECT or RESET button to change the display item SELECT button scrolling possible instant fuel consumption average fuel consumption coolant tempera ture air temperature odometer tripmeter 1 tripmeter 2 fuel re serve tripmeter RESET button scrolling possible fuel re...

Page 31: ... shows the average fuel consumption since it was last reset When using kilometers the average fuel consumption units can be set to AVE_ _ _ km L or AVE_ _ _ L 100 km To change the units push the SELECT button for one second AVE_ _ _ km L The average dis tance that can be traveled on 1 0 L of fuel is shown AVE_ _ _ L 100 km The average amount of fuel necessary to travel 100 km is shown AVE_ _ _ MPG...

Page 32: ...s TIP The displayed temperature may vary from the actual ambient tem perature 9 C will be displayed even if the temperature falls below 9 C Brightness control mode The brightness of the multi function meter unit panel can be adjusted To adjust the brightness 1 Turn the key to OFF 2 While pushing the SELECT but ton turn the key to ON and con tinue pushing the button until the display switches to th...

Page 33: ...shift system is turned on the shift switch senses shift pedal movement and allows for upshifting without operating the clutch lever See page 3 4 EAU26826 Brake lever The brake lever is located on the right side of the handlebar To apply the front brake pull the lever toward the throttle grip The brake lever is equipped with a brake lever position adjusting dial To adjust the distance between the b...

Page 34: ...or gravel roads the brak ing distance may be longer with the ABS than without The ABS is monitored by an ECU which will revert the system to conven tional braking if a malfunction occurs TIP The ABS performs a self diagno sis test each time the vehicle first starts off after the key is turned to ON and the vehicle has traveled at a speed of 10 km h 6 mi h or higher During this test a click ing noi...

Page 35: ... Turn the key 1 4 turn counterclockwise remove it and then close the lock cover TIP The fuel tank cap cannot be closed un less the key is in the lock In addition the key cannot be removed if the cap is not properly closed and locked WARNING EWA11092 Make sure that the fuel tank cap is properly closed after filling fuel Leaking fuel is a fire hazard 1 Front wheel sensor 2 Front wheel sensor rotor 1...

Page 36: ...ed fuel immedi ately NOTICE Immediately wipe off spilled fuel with a clean dry soft cloth since fuel may deteriorate painted surfaces or plastic parts ECA10072 4 Be sure to securely close the fuel tank cap WARNING EWA15152 Gasoline is poisonous and can cause injury or death Handle gaso line with care Never siphon gasoline by mouth If you should swallow some gasoline or inhale a lot of gas oline va...

Page 37: ...te nance costs Gasohol There are two types of gasohol gaso hol containing ethanol and that con taining methanol Gasohol containing ethanol can be used if the ethanol con tent does not exceed 10 E10 Gas ohol containing methanol is not recommended by Yamaha because it can cause damage to the fuel system or vehicle performance problems EAU72972 Fuel tank overflow hose Before operating the vehicle Che...

Page 38: ...s cooled down before doing any maintenance work Do not allow the engine to idle more than a few minutes Long idling can cause a build up of heat NOTICE ECA10702 Use only unleaded gasoline The use of leaded gasoline will cause unre pairable damage to the catalytic converter EAU57991 Seat To remove the seat 1 Open the seat lock cover insert the key into the seat lock and then turn the key counterclo...

Page 39: ...ays adjust both fork legs equally otherwise poor handling and loss of stability may result This front fork is equipped with spring preload adjusting bolts rebound damping force adjusting screws com pression damping force adjusting bolts for fast compression damping and compression damping force adjusting bolts for slow compression damping NOTICE ECA10102 To avoid damaging the mechanism do not atte...

Page 40: ...rce for fast compression damping To increase the compression damping force and thereby harden the com pression damping turn the adjusting bolt on each fork leg in direction a To decrease the compression damping force and thereby soften the compres sion damping turn the adjusting bolt on each fork leg in direction b 1 Spring preload adjusting bolt 1 Distance A b a 1 1 Spring preload setting Minimum...

Page 41: ...ting range To ob tain a precise adjustment it would be advisable to check the number of clicks or turns of each damping force adjusting mechanism and to modify the specifications as necessary 1 Compression damping force adjusting bolt for fast compression damping Compression damping setting for fast compression damping Minimum soft 5 5 turn s in direction b Standard 3 turn s in direction b Maximum...

Page 42: ... b The spring preload setting is deter mined by measuring distance A shown in the illustration The shorter the distance A is the higher the spring preload the longer distance A is the lower the spring preload Rebound damping force To increase the rebound damping force and thereby harden the rebound damping turn the adjusting knob in di rection a To decrease the rebound damping force and thereby so...

Page 43: ...sembly Do not tamper with or attempt to open the cylinder assembly Do not subject the shock ab sorber assembly to an open flame or other high heat source This may cause the unit to ex plode due to excessive gas pressure Do not deform or damage the cylinder in any way Cylinder damage will result in poor damping performance Do not dispose of a damaged or worn out shock absorber as sembly yourself Ta...

Page 44: ...witch is part of the ignition circuit cut off system which cuts the ignition in certain situa tions See the following section for an explanation of the ignition circuit cut off system WARNING EWA10242 The vehicle must not be ridden with the sidestand down or if the side stand cannot be properly moved up or does not stay up otherwise the sidestand could contact the ground and distract the operator ...

Page 45: ... starts unless the clutch lever is pulled and the sidestand is up Also it will stop the running engine should the sidestand be lowered while the trans mission is in gear Periodically check this system via the following procedure TIP This check is most reliable if per formed with a warmed up engine See pages 4 2 and 4 4 for switch operation information UB6CE0E0 book Page 26 Thursday October 12 2017...

Page 46: ...s stalled 10 Move the sidestand up 11 Pull the clutch lever 12 Push the start switch Does the engine start The system is OK The motorcycle can be ridden YES NO YES NO YES NO The neutral switch may not be working The motorcycle should not be ridden until checked by a Yamaha dealer The clutch switch may not be working The motorcycle should not be ridden until checked by a Yamaha dealer The sidestand...

Page 47: ...lowing points ITEM CHECKS PAGE Fuel Check fuel level in fuel tank Refuel if necessary Check fuel line for leakage Check fuel tank overflow hose for obstructions cracks or damage and check hose connection 4 17 4 18 Engine oil Check oil level in engine If necessary add recommended oil to specified level Check vehicle for oil leakage 7 11 Coolant Check coolant level in reservoir If necessary add reco...

Page 48: ...le grip free play and lubricate ca ble and grip housing 7 16 7 26 Control cables Make sure that operation is smooth Lubricate if necessary 7 25 Drive chain Check chain slack Adjust if necessary Check chain condition Lubricate if necessary 7 23 7 25 Wheels and tires Check for damage Check tire condition and tread depth Check air pressure Correct if necessary 7 16 7 19 Brake and shift pedals Make su...

Page 49: ...ightened Tighten if necessary Instruments lights signals and switches Check operation Correct if necessary Sidestand switch Check operation of ignition circuit cut off system If system is not working correctly have Yamaha dealer check vehicle 4 25 ITEM CHECKS PAGE UB6CE0E0 book Page 3 Thursday October 12 2017 2 01 PM ...

Page 50: ...rank when pushing the start switch an engine auto stop system The engine stops automatically if left idling for 20 minutes If the engine stops simply push the start switch to restart the engine EAU77060 Starting the engine In order for the ignition circuit cut off system to enable starting one of the following conditions must be met The transmission is in the neutral position The transmission is i...

Page 51: ...itch toward If the engine fails to start release the start engine stop switch wait a few seconds and then try again Each starting attempt should be as short as possible to preserve the battery Do not crank the en gine more than 10 seconds on any one attempt NOTICE ECA11043 For maximum engine life never ac celerate hard when the engine is cold EAU77401 Shifting Shifting gears lets you control the a...

Page 52: ...id high engine speeds with no load on the en gine Turn the engine off instead of let ting it idle for an extended length of time e g in traffic jams at traf fic lights or at railroad crossings EAU16842 Engine break in There is never a more important period in the life of your engine than the period between 0 and 1600 km 1000 mi For this reason you should read the fol lowing material carefully Sinc...

Page 53: ... cle EAU17214 Parking When parking stop the engine and then remove the key from the main switch WARNING EWA10312 Since the engine and exhaust system can become very hot park in a place where pedestri ans or children are not likely to touch them and be burned Do not park on a slope or on soft ground otherwise the vehicle may overturn increasing the risk of a fuel leak and fire Do not park near gras...

Page 54: ...erforming maintenance unless otherwise specified A running engine has moving parts that can catch on body parts or clothing and electrical parts that can cause shocks or fires Running the engine while ser vicing can lead to eye injury burns fire or carbon monoxide poisoning possibly leading to death See page 1 3 for more in formation about carbon monox ide WARNING EWA15461 Brake discs calipers dru...

Page 55: ...the tool kit are intended to assist you in the perfor mance of preventive maintenance and minor repairs However a torque wrench and other tools are necessary to perform certain maintenance work correctly TIP If you do not have the tools or experi ence required for a particular job have your Yamaha dealer perform it for you 1 Tool kit 1 UB6CE0E0 book Page 2 Thursday October 12 2017 2 01 PM ...

Page 56: ...sion control system NO ITEM CHECK OR MAINTENANCE JOB ODOMETER READING ANNUAL CHECK 1000 km 600 mi 10000 km 6000 mi 20000 km 12000 mi 30000 km 18000 mi 40000 km 24000 mi 1 Fuel line Check fuel hoses for cracks or damage Replace if necessary 2 Spark plugs Check condition Adjust gap and clean Replace 3 Valve clearance Check and adjust Every 40000 km 24000 mi 4 Fuel injection Check engine idle speed C...

Page 57: ...t off valve reed valve and hose for damage Replace any damaged parts if necessary NO ITEM CHECK OR MAINTENANCE JOB ODOMETER READING ANNUAL CHECK 1000 km 600 mi 10000 km 6000 mi 20000 km 12000 mi 30000 km 18000 mi 40000 km 24000 mi UB6CE0E0 book Page 4 Thursday October 12 2017 2 01 PM ...

Page 58: ...0 mi 3 Clutch Check operation Adjust 4 Front brake Check operation fluid level and for fluid leakage Replace brake pads if necessary 5 Rear brake Check operation fluid level and for fluid leakage Replace brake pads if necessary 6 Brake hoses Check for cracks or damage Replace Every 4 years 7 Brake fluid Change Every 2 years 8 Wheels Check runout and for damage Replace if necessary 9 Tires Check tr...

Page 59: ...derately repack with lithium soap based grease 14 Chassis fasteners Make sure that all nuts bolts and screws are properly tightened 15 Brake lever pivot shaft Lubricate with silicone grease 16 Brake pedal pivot shaft Lubricate with lithium soap based grease 17 Clutch lever pivot shaft Lubricate with lithium soap based grease 18 Shift pedal pivot shaft Lubricate with lithium soap based grease 19 Si...

Page 60: ...Check operation 24 Engine oil Change warm engine before draining Check oil level and vehicle for oil leakage 25 Engine oil filter car tridge Replace 26 Cooling system Check coolant level and vehicle for coolant leakage Change Every 3 years 27 Front and rear brake switches Check operation 28 Moving parts and cables Lubricate NO ITEM CHECK OR MAINTENANCE JOB ODOMETER READING ANNUAL CHECK 1000 km 600...

Page 61: ...two years replace the internal components of the brake master cylinders and calipers and change the brake fluid Replace the brake hoses every four years and if cracked or damaged 29 Throttle grip hous ing and cable Check operation and free play Adjust the throttle cable free play if necessary Lubricate the throttle grip housing and cable 30 Lights signals and switches Check operation Adjust headli...

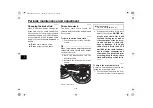
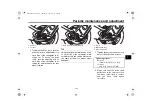
Page 62: ...fasteners TIP The quick fasteners are removed by pushing in the center pin and then pull ing the fastener out 2 Pull the panel off as shown To install the panel 1 Place the panel in the original po sition 2 Install the washer bolt and quick fasteners TIP The quick fasteners are installed by pushing out the center pin inserting the fastener into the panel and then by pushing the center pin flush wi...

Page 63: ... installed in the engine should have the same color If any spark plug shows a dis tinctly different color the engine could be operating improperly Do not at tempt to diagnose such problems yourself Instead have a Yamaha deal er check the vehicle If a spark plug shows signs of elec trode erosion and excessive carbon or other deposits it should be replaced Before installing a spark plug the spark pl...

Page 64: ...ke sure to check the following Check each hose connection Check each hose and canister for cracks or damage Replace if damaged Make sure that the canister breather is not blocked and if necessary clean it EAU1990D Engine oil The engine oil level should be checked regularly In addition the oil must be changed and the oil filter cartridge re placed at the intervals specified in the periodic maintena...

Page 65: ...ing Replace if damaged 6 Install the engine oil filler cap To change the engine oil and filter 1 Start the engine warm it up brief ly and then turn it off 2 Place an oil pan under the engine to collect the used oil 3 Remove the engine oil filler cap and then the engine oil drain bolt and gasket TIP Skip steps 4 6 if the oil filter cartridge is not being replaced 4 Remove the oil filter cartridge w...

Page 66: ... filler cap O ring install the filler cap TIP Wipe off any spilled oil before starting the engine 10 Start the engine and let it idle for several minutes while checking for oil leaks If any leakage is found immediately stop the engine and check for the cause NOTICE ECA10402 If the oil level warning light flickers or remains on even if the oil level is correct immediately turn the engine off and ha...

Page 67: ... voir cap Never attempt to re move the radiator cap when the engine is hot EWA15162 4 Add coolant to the maximum level mark NOTICE If coolant is not available use distilled water or soft tap water instead Do not use hard water or salt water since it is harmful to the engine If water has been used instead of coolant replace it with cool ant as soon as possible other wise the cooling system will not...

Page 68: ...mpt to remove the radiator cap when the engine is hot EWA10382 EAU36765 Air filter element The air filter element must be replaced at the intervals specified in the periodic maintenance and lubrication chart Have a Yamaha dealer replace the air filter element EAU44735 Checking the engine idling speed Check the engine idling speed and if necessary have it corrected by a Yamaha dealer Engine idling ...

Page 69: ...is cold EAU64410 Tires Tires are the only contact between the vehicle and the road Safety in all con ditions of riding depends on a relatively small area of road contact Therefore it is essential to maintain the tires in good condition at all times and replace them at the appropriate time with the speci fied tires Tire air pressure The tire air pressure should be checked and if necessary adjusted ...

Page 70: ...ng illegal operating the vehi cle with excessively worn tires decreases riding stability and can lead to loss of control The replacement of all wheel and brake related parts includ ing the tires should be left to a Yamaha dealer who has the necessary professional knowl edge and experience to do so Ride at moderate speeds after changing a tire since the tire surface must first be broken in for it t...

Page 71: ...es list ed below have been approved for this model by Yamaha WARNING EWA10601 This motorcycle is fitted with super high speed tires Note the following points in order to make the most ef ficient use of these tires Use only the specified replace ment tires Other tires may run the danger of bursting at super high speeds Brand new tires can have a rel atively poor grip on certain road surfaces until ...

Page 72: ...oor performance adverse han dling characteristics and a short ened tire life EAU22083 Adjusting the clutch lever free play Measure the clutch lever free play as shown Periodically check the clutch lever free play and if necessary adjust it as fol lows To increase the clutch lever free play turn the clutch lever free play adjusting bolt in direction a To decrease the clutch lever free play turn the...

Page 73: ...a Yamaha dealer bleed the system be fore operating the vehicle Air in the hydraulic system will diminish the braking performance which may re sult in loss of control and an acci dent EAU36505 Brake light switches The brake light should come on just before braking takes effect The brake light is activated by switches connect ed to the brake lever and brake pedal Since the brake light switches are c...

Page 74: ...amaha dealer replace the brake pads as a set EAU46292 Rear brake pads Each rear brake pad is provided with wear indicator grooves which allow you to check the brake pad wear with out having to disassemble the brake To check the brake pad wear check the wear indicator grooves If a brake pad has worn to the point that a wear indicator groove almost appears have a Yamaha dealer replace the brake pads...

Page 75: ...r or dust does not enter the brake fluid reservoir when refilling Water will significantly lower the boil ing point of the fluid and may re sult in vapor lock and dirt may clog the ABS hydraulic unit valves NOTICE ECA17641 Brake fluid may damage painted surfaces or plastic parts Always clean up spilled fluid immediately As the brake pads wear it is normal for the brake fluid level to gradually go ...

Page 76: ... weight on the motorcycle 2 Shift the transmission into the neutral position 3 Measure the drive chain slack as shown 4 If the drive chain slack is incorrect adjust it as follows NOTICE Im proper drive chain slack will overload the engine as well as other vital parts of the motorcy cle and can lead to chain slip page or breakage If the drive chain slack is more than 25 0 mm 0 98 in the chain can d...

Page 77: ...m make sure that both drive chain pullers are in the same position for proper wheel alignment 3 Tighten the axle nut then the lock nuts to their specified torques 4 Make sure that the drive chain pullers are in the same position the drive chain slack is correct and the drive chain moves smoothly 1 Axle nut 2 Locknut 1 2 1 Drive chain slack adjusting bolt 1 a b 1 Notch 2 Alignment marks 3 Drive cha...

Page 78: ...rive chain dry 3 Thoroughly lubricate the drive chain with a special O ring chain lubricant NOTICE Do not use engine oil or any other lubri cants for the drive chain as they may contain substances that could damage the O rings ECA11112 EAU23098 Checking and lubricating the cables The operation of all control cables and the condition of the cables should be checked before each ride and the ca bles ...

Page 79: ...alled Even though the cover is installed correctly it does not completely protect the cable from wa ter entry Therefore use care not to pour water directly onto the cover or cable when washing the vehicle If the cable or cover becomes dirty wipe clean with a moist cloth EAU44276 Checking and lubricating the brake and shift pedals The operation of the brake and shift pedals should be checked before...

Page 80: ...should be checked before each ride and the sidestand pivot and metal to metal contact surfaces should be lubricated if necessary WARNING EWA10732 If the sidestand does not move up and down smoothly have a Yamaha dealer check or repair it Otherwise the sidestand could contact the ground and distract the operator re sulting in a possible loss of control Recommended lubricants Brake lever Silicone gr...

Page 81: ... the inner tubes for scratches damage and excessive oil leakage To check the operation 1 Place the vehicle on a level sur face and hold it in an upright posi tion WARNING To avoid injury securely support the vehicle so there is no danger of it falling over EWA10752 2 While applying the front brake push down hard on the handle bars several times to check if the front fork compresses and re bounds s...

Page 82: ...Checking the wheel bearings The front and rear wheel bearings must be checked at the intervals specified in the periodic maintenance and lubrica tion chart If there is play in the wheel hub or if the wheel does not turn smoothly have a Yamaha dealer check the wheel bearings EAU50292 Battery The battery is located under the seat See page 4 19 This model is equipped with a VRLA Valve Regulated Lead ...

Page 83: ...s NOTICE ECA16522 To charge a VRLA Valve Regulated Lead Acid battery a special con stant voltage battery charger is re quired Using a conventional battery charger will damage the battery To store the battery 1 If the vehicle will not be used for more than one month remove the battery fully charge it and then place it in a cool dry place NOTICE When removing the battery be sure to turn the main swi...

Page 84: ...2 are located under the seat See page 4 19 1 Fuse box 1 1 1 Ignition fuse 2 ABS control unit fuse 3 Auxiliary fuse 1 4 Parking lighting fuse 5 Signaling system fuse 6 Headlight fuse 7 Grip warmer fuse 8 Spare fuse 1 2 3 8 4 5 6 8 7 1 Fuse box 2 2 Main fuse 3 Fuel injection system fuse 4 Fuel injection system spare fuse 2 3 4 1 UB6CE0E0 book Page 31 Thursday October 12 2017 2 01 PM ...

Page 85: ... question to check if the device operates 1 Radiator fan motor fuse 2 Backup fuse for clock and immobilizer sys tem 3 Electronic throttle valve fuse 4 Terminal fuse 1 5 ABS solenoid fuse 6 ABS motor fuse 7 Spare fuse 1 2 3 4 7 5 6 1 Starter relay cover 2 Fuel injection system fuse 3 Fuel injection system spare fuse 1 2 3 Specified fuses Main fuse 50 0 A Auxiliary fuse 1 2 0 A Terminal fuse 1 2 0 A...

Page 86: ... on check the fuses and then have a Yamaha dealer check the vehicle If a turn signal light does not come check and replace the bulb See page 7 34 TIP When the dimmer switch is set to high beam or the passing switch is pushed all four headlights come on NOTICE ECA16581 Do not affix any type of tinted film or stickers to the headlight lens 1 Headlight low beam 2 Headlight high beam 3 Auxiliary light...

Page 87: ...crew NOTICE Do not over tighten the screw otherwise the lens may break ECA11192 EAU67131 Supporting the motorcycle Since this model is not equipped with a centerstand use maintenance stands when removing the front or rear wheel or when performing other maintenance that requires the motorcycle to stand up right Check that the motorcycle is in a stable and level position before starting any maintena...

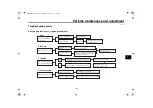
Page 88: ...ire any repair take it to a Yamaha dealer whose skilled technicians have the necessary tools experience and know how to service the motorcycle properly Use only genuine Yamaha replace ment parts Imitation parts may look like Yamaha parts but they are often inferior have a shorter service life and can lead to expensive repair bills WARNING EWA15142 When checking the fuel system do not smoke and mak...

Page 89: ...ave a Yamaha dealer check the vehicle Operate the electric starter 4 Compression There is compression There is no compression The engine does not start Have a Yamaha dealer check the vehicle Have a Yamaha dealer check the vehicle The engine does not start Check the compression Operate the electric starter 2 Battery The engine turns over quickly The engine turns over slowly The engine does not star...

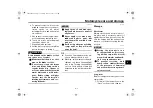
Page 90: ...ss ing sound has stopped press down on the cap while turning it counterclockwise and then remove the cap TIP If coolant is not available tap water can be temporarily used instead provided that it is changed to the recommended cool ant as soon as possible Wait until the engine has cooled Check the coolant level in the reservoir and radiator The coolant level is OK The coolant level is low Check the...

Page 91: ...let with a plastic bag after the engine has cooled down 2 Make sure that all caps and cov ers as well as all electrical cou plers and connectors including the spark plug caps are tightly in stalled 3 Remove extremely stubborn dirt like oil burnt onto the crankcase with a degreasing agent and a brush but never apply such prod ucts onto seals gaskets sprock ets the drive chain and wheel axles Always...

Page 92: ...d detergent and a soft clean sponge and then rinse thoroughly with clean water Use a toothbrush or bottlebrush for hard to reach areas Stubborn dirt and insects will come off more easily if the area is covered with a wet cloth for a few minutes before cleaning After riding in the rain near the sea or on salt sprayed roads Since sea salt or salt sprayed on roads during winter are extremely corrosiv...

Page 93: ...to any rubber and plastic parts but treat them with a suitable care product Avoid using abrasive polishing compounds as they will wear away the paint TIP Consult a Yamaha dealer for ad vice on what products to use Washing rainy weather or humid climates can cause the headlight lens to fog Turning the headlight on for a short period of time will help remove the moisture from the lens EAU26183 Stora...

Page 94: ...e engine over EWA10952 e Remove the spark plug caps from the spark plugs and then install the spark plugs and the spark plug caps 4 Lubricate all control cables and the pivoting points of all levers and pedals as well as of the side stand centerstand 5 Check and if necessary correct the tire air pressure and then lift the motorcycle so that both of its wheels are off the ground Alterna tively turn...

Page 95: ...l change 2 40 L 2 54 US qt 2 11 Imp qt With oil filter removal 2 70 L 2 85 US qt 2 38 Imp qt Coolant quantity Coolant reservoir up to the maximum level mark 0 25 L 0 26 US qt 0 22 Imp qt Radiator including all routes 1 93 L 2 04 US qt 1 70 Imp qt Air filter Air filter element Oil coated paper element Fuel Recommended fuel Premium unleaded gasoline Gasohol E10 acceptable Fuel tank capacity 14 L 3 7...

Page 96: ...m size 17M C x MT3 50 Rear wheel Wheel type Cast wheel Rim size 17M C x MT5 50 Front brake Type Hydraulic dual disc brake Specified brake fluid DOT 4 Rear brake Type Hydraulic single disc brake Specified brake fluid DOT 4 Front suspension Type Telescopic fork Spring Coil spring Shock absorber Hydraulic damper Wheel travel 137 mm 5 4 in Rear suspension Type Swingarm link suspension Spring Coil spri...

Page 97: ...r light LED Traction control system indicator light LED Quick shift indicator light LED Fuse s Main fuse 50 0 A Auxiliary fuse 1 2 0 A Terminal fuse 1 2 0 A Headlight fuse 10 0 A Signaling system fuse 7 5 A Ignition fuse 15 0 A Parking lighting fuse 7 5 A Radiator fan motor fuse 15 0 A Fuel injection system fuse 10 0 A ABS control unit fuse 7 5 A ABS motor fuse 30 0 A ABS solenoid fuse 15 0 A Back...

Page 98: ...L NUMBER MODEL LABEL INFORMATION EAU26401 Vehicle identification number The vehicle identification number is stamped into the steering head pipe Record this number in the space pro vided TIP The vehicle identification number is used to identify your motorcycle and may be used to register your motorcy cle with the licensing authority in your area EAU26442 Engine serial number The engine serial numb...

Page 99: ...This data will be uploaded only when a special Yamaha diagnostic tool is attached to the vehi cle such as when maintenance checks or service procedures are performed Although the sensors and recorded data will vary by model the main data points are Vehicle status and engine perfor mance data Fuel injection and emission relat ed data Yamaha will not disclose this data to a third party except With t...

Page 100: ... for reducing 6 3 Fuel tank cap 4 16 Fuel tank overflow hose 4 18 Fuses replacing 7 31 H Handlebar switches 4 4 Hazard switch 4 5 High beam indicator light 4 5 Horn switch 4 4 I Identification numbers 10 1 Ignition circuit cut off system 4 26 Immobilizer system 4 1 Immobilizer system indicator light 4 7 Indicator lights and warning lights 4 5 L Luggage strap holders 4 25 M Main switch steering loc...

Page 101: ...system indicator light 4 7 Traction control system switch 4 4 Troubleshooting 7 35 Troubleshooting charts 7 36 Turn signal indicator lights 4 5 Turn signal light bulb replacing 7 34 Turn signal switch 4 4 V Valve clearance 7 16 Vehicle identification number 10 1 Vehicle lights 7 33 W Wheel bearings checking 7 29 Wheels 7 19 UB6CE0E0 book Page 2 Thursday October 12 2017 2 01 PM ...

Page 102: ...A5 yoko_Blank fm Page 1 Thursday December 8 2011 2 18 PM ...

Page 103: ...A5 yoko_Blank fm Page 1 Thursday December 8 2011 2 18 PM ...

Page 104: ...DIC183 PRINTED ON RECYCLED PAPER Original instructions PRINTED IN JAPAN 2017 10 0 5 2 CR E ...

Reviews: