


MOX6/MOX8 Remote Editor Windows: Library window
MOX6/MOX8 Remote Editor Owner’s Manual
9
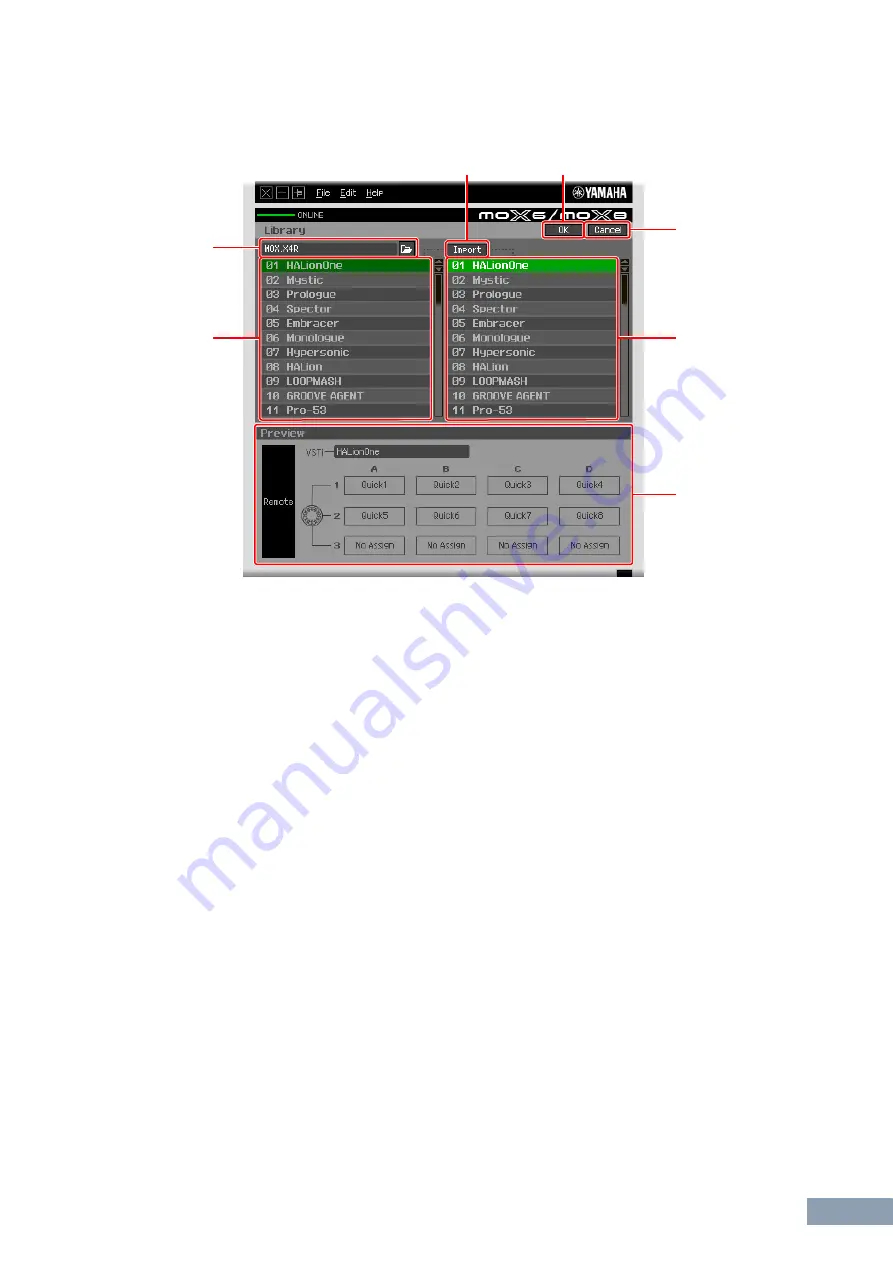
Library window
Clicking the Library button on the Edit window opens the Library window.
1
Control Template List in the File
Displays a list of the Control Templates saved in the File. Select a target Control Template in this list and
a destination location in the
2
Control Template List of the Current Bank, then click the
4
[Import] button
to execute the Import operation. You can view the contents of the selected Control Template in the
7
Preview section.
n
All the Templates listed here were stored to the Current Bank. This means that the Import operation will be
applied to the Templates which were already stored at the File Save timing and will not be applied to the
Templates which were not stored. If you want to import a specific Template from a file, make sure to store the
edited Template before saving the file.
2
Control Template List of the Current Bank
Displays a list of the Control Templates on the Current Bank. Select a desired Control Template in this list,
then click the [OK] button to return to the Edit window. You can view the contents of the selected Control
Template in the
7
Preview section. You can also copy or paste a Control Template in this list.
3
File section
Clicking the icon in this section will call up the File Select dialog. In this dialog, select the file (saved
previously), then execute the File Select operation so that the Templates in the file are listed. In addition,
the name of the selected file appears in the window at the left of the icon.
4
[Import] button
Click this button to import the specific Control Template in the selected file to the Current Bank.
n
The Import operation can be applied to just one Template at a time. You can import all Templates in the
selected file at the same time by operating [File]
[Open] in the Edit window.
5
[OK] button
Click this button to fix the Current Bank and call up the Edit window. If the status is ONLINE, the selected
bank is also transferred to the MOX6/MOX8.
5
4
6
2
7
3
1


