Controlling from an External MIDI Keyboard
MOTIF-RACK XS Owner’s Manual
45
Basic Structure
V
oice
Multi
Utility
Ref
erence
The Contr
ols &
Connector
s
Setting Up
Listening to
the Sound
Connections
Using a Computer
Quic
k Guide
Appendix
For example, in the instructions below, we'll control panning with
an external assignable controller after connecting the external
controller to the MOTIF-RACK XS.
1.
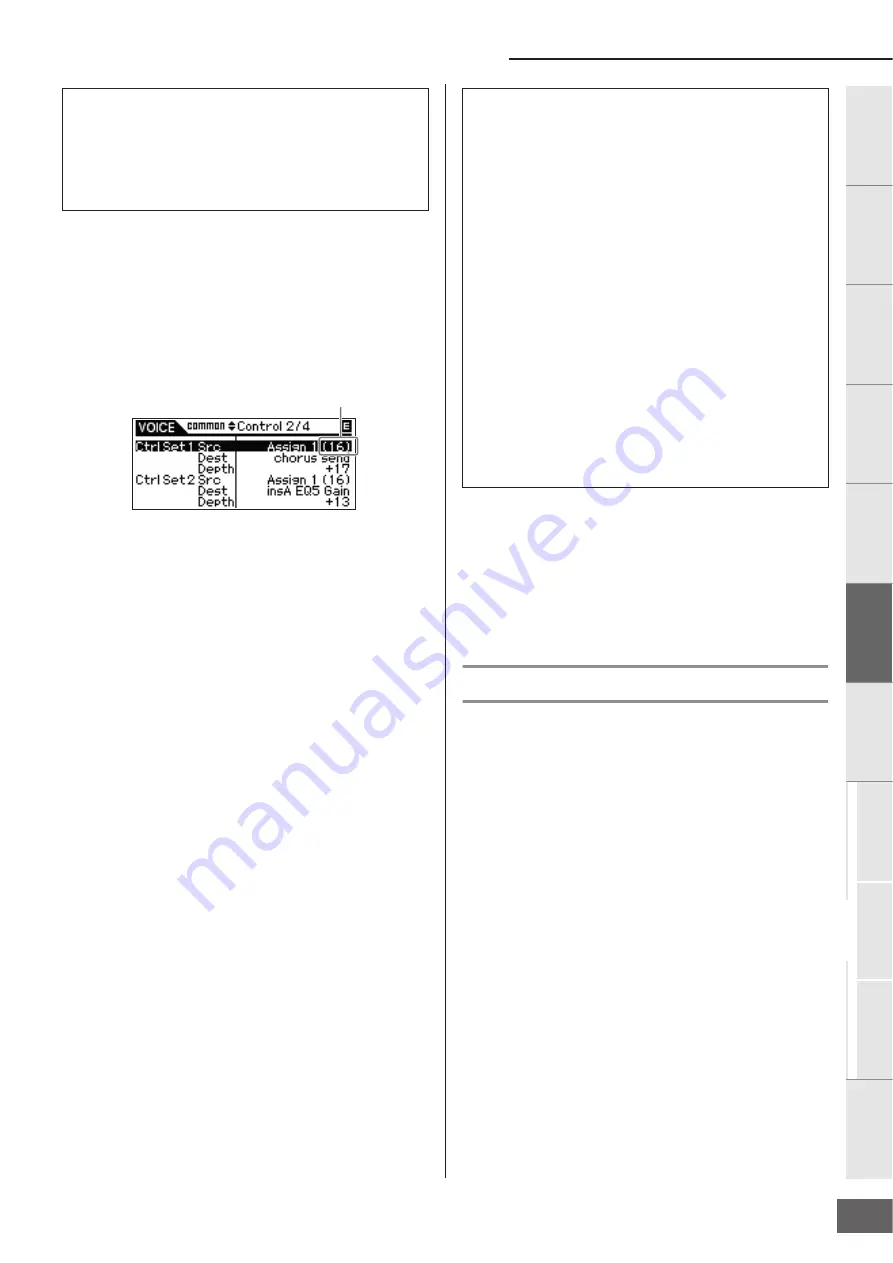
Set the “Ctrl Set 1 Src” parameter to “Assign 1” in
the VOICE COMMON Control display, then confirm
the Control Number for “Assign1.”
The Control Number is displayed in parentheses following
“Assign 1.”
n
For the source parameters, refer to “Ctrl Set 1
–
6 Src (Controller Set
1 – 6 Source)” on page 71.
n
You can change the Control Number corresponding to the source
controller (see right).
2.
On the external controller device connected to the
MOTIF-RACK XS, make sure that the “Assign 1”
setting matches the Control Number generated by
operating the relevant controller.
For details on how to do this, refer to the owner’s manual of
your particular device.
3.
Set the “Ctrl Set 1 Dest” parameter to “E-Pan”
(Element Pan).
n
For details on the available Destination parameter settings, refer to
the Control List in the separate Data List booklet.
4.
Set the depth of control by changing the “Ctrl Set 1
Depth” parameter setting.
5.
Repeat Steps 1 and 3 above to assign the remaining
Control Sets 2 through 6.
6.
Play the sound of the MOTIF-RACK XS and try out
the corresponding controller.
n
You can control the functions specified as destination of “Assign 1”
and “Assign 2” by operating Knobs 3 and 4 respectively as well as
the external controllers.
n
When at least one of the “LFO Set 1 – 3 Element Sw” parameters is
set to “off” and the Element related parameters are assigned to any
of the “Ctrl Set 1 – 6 Dest” parameters, an exclamation mark (“!”) is
shown at the beginning of the value for “Ctrl Set 1 – 6 Src,” “Ctrl Set
1 –
6 Dest” and “Ctrl Set 1 – 6 Depth.” This indicates that the function
specified as destination is not applied to all the Elements.
n
The Controller Set edited in the Voice Edit mode is available when the
corresponding Voice is selected in the Multi mode.
n
Make sure to match the MIDI channel between the MOTIF-RACK XS and
external controller.
In the Voice mode, set the transmit channel of the external controller to the
same one as the Basic Receive channel (set in the Utility mode) of the
MOTIF-RACK XS, and vice versa. In the Multi mode, likewise, set the
transmit channel of the external controller to the same one as the Receive
channel for the Part you want to control of the MOTIF-RACK XS, and vice
versa.
Assigning Control numbers
Each external controller has a pre-assigned Control Change
number. When operating the external controller, each Control
Change message assigned to each controller is transmitted to
the MOTIF-RACK XS, and the Destination (function)
corresponding to the Control Number is performed. The Control
Number assignments on the MOTIF-RACK XS can be made
from the Utility Controller window (page 101).
n
The Control Numbers for Aftertouch, Pitch Bend, and Modulation Wheel
are not changed.
n
Depending on the Control Change number settings of the “Ctrl Set 1 – 6
Src” parameter, the conventional functions of the Control Change
messages may be disabled.
Source and Destination
The term “source” refers to the hardware controller and
“destination” refers to the parameter or function being controlled.
An extensive variety of destination parameters are available, far
more than those listed in the previous page. For a complete list of
destination parameters, see the separate Data List.
Control Number
Using one source to control several destinations
For example, set the Src (Source) parameter of Control Set 1 to
“ModWheel” (Modulation Wheel) and the Dest (Destination)
parameter to “E-LFO PMD” (Element LFO Pitch Modulation
Depth). Then set the Src (Source) parameter of Control Set 2 also
to MW, but set the Dest parameter to “E-Pan” (Element Pan). In
this example, when you move the Modulation Wheel upward, the
amount of Pitch Modulation increases accordingly, and the
Element is panned from left to right. In this way, you can have the
sound change in several different ways, simply by adjusting a
single controller.
Using several sources to control one destination
For example, set the Src (Source) parameter of Control Set 1 to
“ModWheel” (Modulation Wheel) and the Dest (Destination)
parameter to “E-LFO PMD” (Element LFO Pitch Modulation
Depth). Then set the Src (Source) parameter of Control Set 2 to
“Ribbon” (Ribbon Controller) and set the Dest parameter also to
“E-LFO PMD.” Now, Pitch Modulation is assigned to both the
Modulation Wheel and Ribbon Controller. This can be useful in
live performance situations, letting you use any one of several
controllers depending on which is convenient at the time. In this
way, you can have several different controllers affect the same
aspect of the sound.


