■
Preparing for the update
1.
Make sure you have a USB storage device (formatted on computer in FAT32 format) and
a computer with a built-in USB connector.
2.
Download the latest firmware of the MGP32X/MG24X from the Yamaha Pro Audio website.
(This is not necessary if you have already downloaded the firmware together with this
document.)
http://www.yamahaproaudio.com/downloads/
3.
Connect the formatted USB storage device to the USB connector of your computer.
4.
Copy the file “MGP32X_P.PGM” in the “mgp32_frm***” folder (*** indicates the version
number) extracted from the downloaded file to the root directory of the USB storage
device. (Use the same file for the MGP24X.)
5.
Remove the USB storage device when the file has been copied.
For more information on removing the USB storage device, refer to the owner’s manual of
your computer and USB storage device.
■
Updating the MGP32X/MGP24X firmware
Updating the firmware takes about 15 minutes.
1.
Turn on the power of the MGP32X/MGP24X while pressing the TAP button on
the top panel.
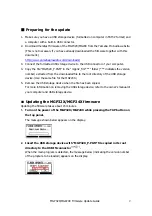
The message shown below appears on the display.
2.
Insert the USB storage device with “MGP32X_P.PGM” file copied in its root
directory to the USB IN connector
.
When the main program is detected, the message below (indicating the version number
of the program to be loaded) appears on the display.
MGP32X/MGP24X Firmware Update Guide
2


