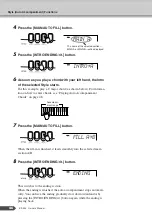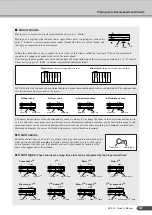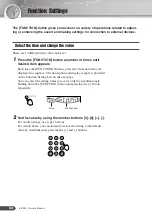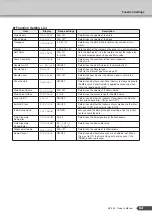
background image

EZ-200   Owner’s Manual

41

Play With a Variety of Effects

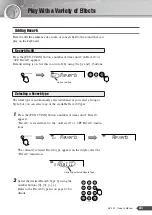
Adding Reverb

Reverb adds the ambience of a room or concert hall to the sound that you
play on the keyboard.

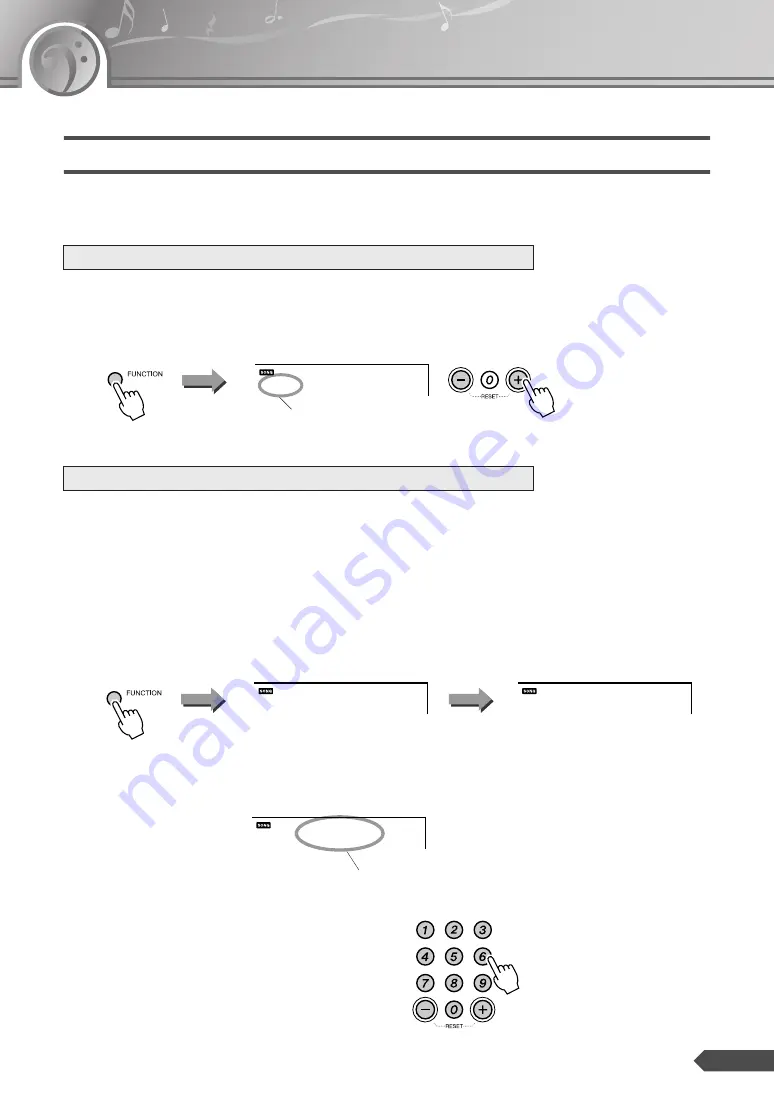
Press the [FUNCTION] button a number of times until “on Reverb” or 
“oFF Reverb” appears.
Default setting is on. Set this to on or off by using the [+] and [-] buttons.

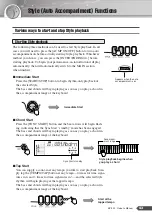
The ideal type is automatically selected whenever you select a Song or 
Style, but you can select any of the available Reverb Types.

1

Press the [FUNCTION] button a number of times until “Reverb” 
appears.
“Reverb” is located next to the “on Reverb” or “oFF Reverb” indica-
tions.

The currently selected Reverb type appears on the display after the 
“Reverb” indication.

2

Select the desired Reverb Type by using the 
number buttons [0]–[9], [+], [-].
Refer to the Reverb Type list on page 67 for 
details.

Reverb On/Off

Selecting a Reverb type

on

Reverb

Current setting

Reverb

on

Reverb

Currently selected Reverb Type

01

Hall1

Summary of Contents for EZ200AD

Page 1: ...Owner s Manual EN ...

Page 2: ... as designed are not covered by the manufac turer s warranty and are therefore the owners responsibil ity Please study this manual carefully and consult your dealer before requesting service ENVIRONMENTAL ISSUES Yamaha strives to produce products that are both user safe and environmentally friendly We sincerely believe that our products and the production methods used to pro duce them meet these g...

Page 3: ...nternational Copyright Secured All Rights Reserved Dancing Queen from MAMMA MIA Words and Music by Benny Andersson Bjorn Ulvaeus and Stig Anderson Copyright 1977 UNION SONGS MUSIKFORLAG AB Copyright Renewed All Rights in the United States and Canada Controlled and Administered by UNIVERSAL SONGS OF POLYGRAM INTERNATIONAL INC and EMI GROVE PARK MUSIC INC All Rights Reserved Used by Permission Daugh...

Page 4: ...ssibility of physical injury to you or others or damage to the instrument or other property These precautions include but are not limited to the following When removing the electric plug from the instrument or an outlet always hold the plug itself and not the cord Unplug the AC power adaptor when not using the instrument or during electrical storms Do not connect the instrument to an electrical ou...

Page 5: ...or place heavy objects on the instrument and do not use excessive force on the buttons switches or connectors Do not use the instrument device or headphones for a long period of time at a high or uncomfortable volume level since this can cause permanent hearing loss If you experience any hearing loss or ringing in the ears consult a physician Always turn the power off when the instrument is not in...

Page 6: ...iming and Waiting Built in lighted Key Guide pages 29 50 When you are using the Lesson feature or the Dictionary the key indicators tell you which keys to play Also during song playback they show the keys that are playing Fingering Guide page 29 The Fingering guide is shown on the display and shows you how to play the keyboard Dictionary page 50 Dictionary is a built in chord encyclopedia that tea...

Page 7: ... 1 Listen Learn 30 Lesson 2 Timing 31 Lesson 3 Waiting 32 Song settings 33 Changing the Melody Voice 33 Song Volume 33 Mute 34 Practice Makes Perfect 35 Handy Performance Features 36 Setting the Split Point 36 Transpose 37 Tuning 37 One Touch Setting 38 Changing the tempo of the Song Style 38 Touch Response 39 Adjusting the Main Voice Parameters 40 Play With a Variety of Effects 41 Adding Reverb 4...

Page 8: ...blems may occur When this happens make sure to replace all batteries follow ing the precautions listed below Power Requirements Use the specified adaptor PA 3C PA 130 or an equiv alent recommended byYamaha only The use of other adaptors may result in irreparable damage to both the adaptor and the instrument WARNING Unplug the AC Power Adaptor when not using the instrument or during electrical stor...

Page 9: ...rned off Connecting headphones PHONES OUTPUT Jack Connecting a footswitch SUSTAIN Jack Avoid listening with the headphones at high volume for long periods of time doing so may not only result in ear fatigue it may be damaging to your hearing WARNING To prevent damage to the speakers set the volume of the external devices at the minimum setting and turn power off the devices before connecting them ...

Page 10: ... METRONOME ON OFF button page 20 4 A B REPEAT button page 35 5 REW button page 14 6 FF button page 14 8 PAUSE button page 14 4 ACMP ON OFF button page 24 5 INTRO ENDING rit button page 45 6 MAIN AUTO FILL button page 45 8 SYNC START button page 24 7 TEMPO TAP button page 38 9 START STOP button page 26 0 PORTABLE GRAND button page 17 1 LIGHT ON OFF button page 29 2 TOUCH ON OFF button page 39 3 DRU...

Page 11: ... u 0 o i 2 3 1 0 Voice List page 58 Display page 28 7 6 5 4 Rear Panel Playing while looking at the lights for a long period of time may cause eyestrain or stiffness in your neck and shoulders For your health and comfort we recommend that you take a ten minute break after every hour of playing CAUTION ...

Page 12: ...a quiet place and want a lower vol ume setting to start with simultaneously hold down the MASTER VOLUME button and turn on the power with the STANDBY ON switch This automatically sets the value to 4 indicated by two bars Press the STANDBY ON switch to turn on the power Press the STANDBY ON switch again to turn the power off Displays the current volume 001 GrandPno 03 When the power is turned on th...

Page 13: ...he Songs play back in the Song number order Press the DEMO or START STOP button again to stop the Song Select the desired song number and play it 1 Press the SONG button The Song number and name are displayed Listen to the Demo Songs Selecting and listening to a specific Song or Song number Song name Appears when the Song mode is active 001 Bad Day 03 ...

Page 14: ...r Operations REW button Fast reverses through the Song if pressed during playback no sound is heard during fast reverse Decreases the measure number if pressed while playback is stopped FF button Fast forwards through the Song if pressed during playback Increases the measure number if pressed while playback is stopped PAUSE button Temporarily stops playback Press this button a second time to resum...

Page 15: ...n 045 Etude op 10 3 Chanson De L adieu F Chopin 046 Turkish March W A Mozart 047 Valse op 64 1 Petit Chien F Chopin 048 Menuett Beethoven L v Beethoven 049 24 Preludes op 28 7 F Chopin 050 Melodie Album für die Jugend R Schumann 051 Fröhlicher Landmann Album für die Jugend R Schumann 052 Träumerei Kinderszenen R Schumann 053 Thema Impromptus D 935 3 F Schubert 054 Invention Nr 1 J S Bach 055 Gavot...

Page 16: ...r and name are displayed 2 Select a Voice Select the desired Voice by using the number buttons 0 9 Refer to the Voice List on page 66 Selecting Voice number 000 One Touch Setting automatically calls the most suitable voice for the currently selected Style or Song Refer to page 38 Try playing a variety of instrument Voices 001 GrandPno 03 Voice number Voice name Appears when the Voice mode 065 Flut...

Page 17: ...yboard Try selecting and playing different Voices When you simply want to play a piano Voice all you have to do is press one convenient button Press the PORTABLE GRAND button The Voice 001 Grand Piano will automatically be selected as the Main Voice Playing the Grand Piano Voice ...

Page 18: ... i d e S t i c k C a s t a n e t S t i c k s B r u s h T a p B r u s h S l a p C o n g a H O p e n T i m b a l e L A g o g o L M a r a c a s G u i r o S h o r t C l a v e s C u i c a M u t e T r i a n g l e M u t e S h a k e r C h i n e s e C y m b a l R i d e C y m b a l C u p S p l a s h C y m b a l C r a s h C y m b a l 2 R i d e C y m b a l 2 B o n g o H C o n g a H M u t e M i d T o m L M i d...

Page 19: ...of drum and percussion sounds Details on the instruments and key assignments of each drum kit can be found in the Drum Kit List on page 63 Drum Kit List 130 Standard Kit 1 131 Standard Kit 2 132 Room Kit 133 Rock Kit 134 Electronic Kit 135 Analog Kit 136 Dance Kit 137 Jazz Kit 138 Brush Kit 139 Symphony Kit 140 SFX Kit 1 141 SFX Kit 2 142 Sound Effect Kit ...

Page 20: ...ressing the METRONOME ON OFF button To stop the metronome press the METRONOME ON OFF but ton again Adjust the metronome tempo 1 Press the TEMPO TAP button to display the tempo 2 Set the metronome tempo by using the number buttons 0 9 The tempo can be adjusted between 11 280 Start the metronome Starting the metronome Setting the metronome tempo 001 GrandPno 1 1 Displays the current beat Current Tem...

Page 21: ...sure 1 Press the FUNCTION button a number of times until TimeSigD appears 2 Set the time signature denominator by using the number buttons The available denominators are 02 1 2 note 04 1 4 note 08 1 8 note and 16 1 16 note Setting the numerator of the metronome time signature Setting the denominator of the metronome time signature 04 TimeSigN Time signature numerator Hold longer than a second The ...

Page 22: ... Owner s Manual 1 Press the FUNCTION button a number of times until MetroVol appears 2 Set the metronome volume 000 127 by using the number buttons 0 9 Setting the metronome volume Metronome volume 100 MetroVol ...

Page 23: ...t the desired Style by using the number buttons 0 9 Refer to the Style List on page 66 3 Press the START STOP button The Style will begin playing You can stop the style at any time by pressing the START STOP button Selecting a rhythm of a Style Appears when Style mode is active 001 8BtModrn 001 Style number Style name HH Light 016 Since the Pianist category Styles 093 100 have no rhythm parts no s...

Page 24: ... Turn SYNC START on Press the SYNC START button When the Sync Start standby mode is engaged Style playback will begin as soon as you play a chord in the accompaniment range of the keyboard You can turn off Sync Start standby mode by pressing the SYNC START button Playing with a Style When auto accompaniment is on The keys to the left of the Split Point 54 F 2 will play only chords This is known as...

Page 25: ...keys any notes will do in the auto accompaniment range of the keyboard Different keys will pro duce different results Refer to page 48 for detailed instructions for playing chords A special Chord Dictionary function is also available which shows you how to play specific chords 5 Try playing other chords with your left hand and play a melody with your right hand 6 You can stop playback at any time ...

Page 26: ...ns Adjusting the volume Press the button to lower the vol ume Press the button to increase the volume Press the START STOP button after pressing the SONG or STYLE button to start playback of the selected Song or Style rhythm About the START STOP button The Press Hold symbol that appears next to some buttons indicates that the button can be pressed and held for longer than a second to call up a rel...

Page 27: ...ted in sequence and the value of the selected item can be changed by using the number but tons 0 9 You can select the setting items in reverse order by simultaneously holding down the FUNCTION button and pressing the button repeatedly Function Settings page 52 Number buttons 0 9 The number buttons can be used to directly enter a Song Style or Voice number or parameter value For numbers that start ...

Page 28: ...Appears when the touch response feature is on Appears when the auto accompa niment is on Measure Beat Display Touch Display ACMP ON 003 The value of MASTER is indicated by the num ber of bars in the display The more bars shown the higher the volume level The range is from 0 14 One bar represents 2 steps in the value MASTER VOLUME indication Sound level is 13 14 Sound level is 3 4 Sound level is 1 ...

Page 29: ...s Practice by using the Light Guide function When Light Guide is on each key of the notes in the Song lights in suc cession showing you which keys to play and when Practice by using the Fingering guide When the Song is started the fingering guide appears on the display and shows you which fingers you should use while playing on LIGHT The Light Guide function is on when power is turned on NOTE 1 2 ...

Page 30: ... the part you want to practice Press the R button for a right hand lesson L button for a left hand lesson or press both the R and L buttons simultaneously for a both hands lesson The selected hand s are displayed A No LPart message is shown in the display if you select the left part in Song 001 005 007 009 013 014 085 090 which does not have left part data These Songs cannot be used for left hand ...

Page 31: ...aying each note in correct time with the rhythm 4 Stop the Lesson You can stop the Lesson at any time by pressing the START STOP button Even after Lesson 1 has started and the Song is playing you can still select the part When the melody Voice of the Song is changed the key position shown in the display may be shifted in octave units depending on the Voice selected You can select Lessons 1 3 by pr...

Page 32: ... want to practice 3 Start Lesson 3 Press the WAITING button to start Lesson 3 Play the correct notes according to the lighted keys The Song pauses until you play the right note 4 Stop the Lesson You can stop the Lesson at any time by pressing the START STOP button Grade You cannot select the part during Song playback before Lesson 3 starts If a Song is currently being played back stop the Song fir...

Page 33: ...board If a Song has played through and stopped during this procedure press the START STOP button to start playback again 3 Press and hold the VOICE button for longer than a sec ond SONG MELODY VOICE appears in the display for a few seconds indicating that the Voice selected in Step 2 has replaced the Song s original melody Voice Song Volume This procedure allows you to adjust the balance between S...

Page 34: ...e R button during Song playback Track 2 can be muted by pressing the L button during Song playback You can cancel the mute function by pressing the corresponding track but tons R or L again during Song playback or by selecting any other Song Current Song Volume 100 SongVol Press the and buttons simultaneously to instantly reset the value to its default setting 100 NOTE Unlit track is muted 001 Bad...

Page 35: ...tting you practice the section over and over You can stop repeat playback by pressing the A B REPEAT button The A B REPEAT mode will be canceled and normal playback of the Song will continue A B Repeat playback of this section The repeat start and end points can be specified in one measure increments You can also set the A B Repeat function when the Song is stopped Simply use the REW and FF but to...

Page 36: ...u change the Split Point the auto accom paniment range also changes 1 Press the FUNCTION button a number of times until SplitPnt appears 2 Set the Split Point by using the number buttons 0 9 36 48 60 72 84 96 Split Point default setting 54 F 2 Currently selected Split Point Split Point 054 SplitPnt 03 Split point key is lighted Press the and buttons simultaneously to instantly reset the value to i...

Page 37: ...p or down by a maximum of 100 cents in 1 cent increments 100 cents 1 semitone 1 Press the FUNCTION button a number of times until Tuning appears 2 Use the number buttons 0 9 and to set the Tuning value between 100 and 100 as required Current transpose value 00 Transpos The pitch of the Drum Kits Voices Voice numbers 130 142 cannot be changed Press the and buttons simultaneously to instantly reset ...

Page 38: ...Voice number Changing the tempo of the Song Style Songs and Styles can be played at any tempo you desire fast or slow 1 Press the TEMPO TAP button to call up the Tempo setting in the dis play after selecting a Style Song 2 Set the Tempo by using the number buttons 0 9 You can also set the Tempo by simply tapping the TEMPO TAP but ton at the required tempo four times for time signatures in 4 and th...

Page 39: ...keys The sensitivity of the keyboard s touch response can be adjusted in three steps 1 3 The higher the number the greater the volume variation pro duced by the same variation in how hard you play the keys i e the key board becomes more sensitive Press and hold the TOUCH button for longer than a second until the touch response sensitivity setting display appears Use the number buttons 1 3 or the a...

Page 40: ...Parameters The volume and octave the pitch of the instrument can be shifted by up or down in octaves for the main voice can be adjusted Main Voice Parameters page 53 Main Voice Volume Main Voice Octave You can adjust each of the parameters above in the Function settings page 52 ...

Page 41: ...cted whenever you select a Song or Style but you can select any of the available Reverb Types 1 Press the FUNCTION button a number of times until Reverb appears Reverb is located next to the on Reverb or oFF Reverb indica tions The currently selected Reverb type appears on the display after the Reverb indication 2 Select the desired Reverb Type by using the number buttons 0 9 Refer to the Reverb T...

Page 42: ...in item appears 2 Press the button to turn the Panel Sustain on Panel Sustain will be added to the notes you play on the keyboard when the Panel Sustain is on To turn it off press the button Adjusting the Reverb depth RevLevel 064 Current Reverb depth value Current setting Sustain oFF See the section Connect ing a footswitch SUSTAIN Jack on page 9 for infor mation on applying sustain with the opti...

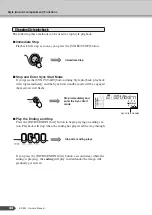
Page 43: ...chord in the accompaniment range of the keyboard Chord Start Press the SYNC START button and the beat arrows will begin flash ing indicating that the Sync Start standby mode has been engaged The bass and chords will begin playing as soon as you play a chord in the accompaniment range of the keyboard Tap Start You can supply a count in at any tempo you like to start playback Sim ply tap the TEMPO T...

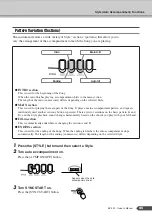
Page 44: ... the Sync Start standby mode will be engaged beat arrows will flash Play the Ending and Stop Press the INTRO ENDING rit button to begin playing an ending sec tion Playback will stop when the ending has played all the way through If you press the INTRO ENDING rit button a second time while the ending is playing the ending will play in ritardando the tempo will gradually get slower Stopping Style pl...

Page 45: ... of the intro in measures differs depending on the selected Style MAIN section This is used for playing the main part of the Song It plays a main accompaniment pattern and repeats indefinitely until another section s button is pressed There are two variations on the basic pattern A and B and the Style playback sound changes harmonically based on the chords you play with your left hand Fill in sect...

Page 46: ...niment Chords on page 48 7 Press the MAIN AUTO FILL button When the fill in is finished it leads smoothly into the selected main section A B 8 Press the INTRO ENDING rit button This switches to the ending section When the ending is finished the auto accompaniment stops automati cally You can have the ending gradually slow down ritardando by pressing the INTRO ENDING rit button again while the endi...

Page 47: ...ay on the keyboard by setting the volume of the play back sound 1 Press the STYLE button 2 Press the FUNCTION button a number of times until the StyleVol appears 3 Set the Style volume by using the number buttons 0 9 The range is from 0 127 Current Style volume setting StyleVol 100 Press the and buttons simultaneously to instantly reset the value to its default setting 100 NOTE ...

Page 48: ...playing chords using normal fingerings in the accompaniment range of the keyboard 36 48 60 72 84 96 Split Point default setting 54 F 2 Root notes and the corre sponding keys NOTE Accompaniment range Accompaniment range To play a major chord Press the root note of the chord To play a minor chord Press the root note together with the near est black key to the left of it To play a seventh chord Press...

Page 49: ...1 b3 b5 Cdim Cdim Diminished seventh dim7 1 b3 b5 6 Cdim7 Cdim7 Seventh 7 1 3 5 b7 or 1 3 5 b7 C7 C7 Seventh flatted ninth 7 b9 1 b2 3 5 b7 C7 b9 C7 b9 Seventh add flatted thirteenth 7 b13 1 3 5 b6 b7 C7 b13 C7 b13 Seventh ninth 7 9 1 2 3 5 b7 C7 9 C7 9 Seventh add sharp eleventh 7 11 1 2 3 4 5 b7 or 1 2 3 4 5 b7 C7 11 C7 11 Seventh add thirteenth 7 13 1 3 5 6 b7 C7 13 C7 13 Seventh sharp ninth 7 ...

Page 50: ...oesn t sound The notes you should play for the specified chord root note and chord type are shown in the display as notation and the keys which you should play will light 4 Try playing a chord in the auto accompaniment section of the key board checking the indications in the display When you ve played the chord properly a bell sound signals your suc cess and the chord name in the display flashes T...

Page 51: ...ful sounding harmonies can be built in this manner and emotional music can be created by playing different chords one after the other according to commonly accepted rules Harmony determines the nature of chords and music is created based on harmony Chord names From the chord name you can tell at a glance what type of chord it is and which notes make up the chord Understanding the basic structure o...

Page 52: ... appears Each time the FUNCTION button is pressed 19 function items are displayed in sequence The description and display sample is provided on the Function Setting List on the next page You can select the setting items in reverse order by simultaneously holding down the FUNCTION button and pressing the button repeatedly 2 Set the value by using the number buttons 0 9 For on off settings use butto...

Page 53: ...rb effect Panel Sustain Sustain ON OFF Determines whether or not Panel Sustain is always applied to the Main voice Panel Sustain is applied continuously when ON or not applied when OFF Main Voice Volume M Volume 000 127 Determines the volume of the Main Voice Main Voice Octave M Octave 2 0 2 Determines the octave range for the Main Voice Local On Off Local ON OFF Determines whether the instrument ...

Page 54: ...c devices When MIDI equipped instruments are connected via a MIDI cable it becomes possible to transfer performance and setting data between them for significantly enhanced performance and production potential What You Can Do With MIDI Transferring performance and setting data between the EZ 200 and MIDI equipped instruments or computers page 55 Connect the EZ 200 to external equipment only after ...

Page 55: ... the instrument is connected with a computer it transmits receives performance data A Yamaha UX16 or similar USB MIDI interface sold separately will be necessary for MIDI connection between the EZ 200 and a USB equipped computer Make sure to purchase aYamaha UX16 or a quality USB MIDI interface at a musical instrument store computer store or electrical appliance store If you use the UX16 interface...

Page 56: ...tings determine whether the instrument is synchronized to its own internal clock OFF or to a clock signal from an external device ON On The instrument s time based functions will be synchronized to the clock from an external device connected to the MIDI terminal Off The instrument uses its own internal clock default You can set the External Clock in the Function Settings page 53 Sends the EZ 200 p...

Page 57: ...e ACMP ON indicator showing in the display If it is not showing press the ACMP ON OFF button so that it does show No rhythm accompaniment plays when the START STOP button is pressed after selecting Style number 093 100 Pianist This is not a malfunction Style number 093 100 Pianist have no rhythm parts so no rhythm will play The other parts will begin playing when you play a chord in the accompanim...

Page 58: ... 0 0 5 Electric Piano 1 007 0 0 6 Electric Piano 2 008 0 0 3 Electric Grand Piano 009 0 0 8 Clavi ORGAN 010 0 0 17 Drawbar Organ 011 0 0 18 Percussive Organ 012 0 0 19 Rock Organ 013 0 0 20 Church Organ 014 0 0 21 Reed Organ ACCORDION 015 0 0 22 Accordion 016 0 0 24 Tango Accordion 017 0 0 23 Harmonica GUITAR 018 0 0 25 Nylon Guitar 019 0 0 26 Steel Guitar 020 0 0 27 Jazz Guitar 021 0 0 28 Clean G...

Page 59: ...l 108 0 0 100 Atmosphere Voice No Bank Select MIDI Program Change 1 128 Voice Name MSB 0 127 LSB 0 127 109 0 0 101 Brightness 110 0 0 102 Goblins 111 0 0 103 Echoes 112 0 0 104 Sci Fi WORLD 113 0 0 105 Sitar 114 0 0 16 Dulcimer 115 0 0 106 Banjo 116 0 0 107 Shamisen 117 0 0 108 Koto 118 0 0 109 Kalimba 119 0 0 110 Bagpipe 120 0 0 111 Fiddle 121 0 0 112 Shanai SOUND EFFECTS 122 0 0 121 Fret Noise 1...

Page 60: ...7 Punch Thumb Bass Voice No Bank Select MIDI Program Change 1 128 Voice Name MSB 0 127 LSB 0 127 199 0 32 53 Mellow Choir 200 0 32 57 Warm Trumpet 201 0 32 61 French Horn 2 202 0 32 105 Detuned Sitar 203 0 33 17 60 s Drawbar Organ 1 204 0 33 18 Light Organ 205 0 33 36 Fretless Bass 3 206 0 34 17 60 s Drawbar Organ 2 207 0 34 36 Fretless Bass 4 208 0 35 7 Harpsichord 3 209 0 35 16 Dulcimer 2 210 0 ...

Page 61: ...ure Pad 287 0 65 88 Soft Whirl 288 0 65 97 African Wind 289 0 65 99 Soft Crystal 290 0 65 100 Harp Vox Voice No Bank Select MIDI Program Change 1 128 Voice Name MSB 0 127 LSB 0 127 291 0 65 102 Creeper 292 0 65 118 Real Tom 293 0 65 119 Electronic Percussion 294 0 66 17 Cheezy Organ 295 0 66 19 Fast Rotary 296 0 66 32 Guitar Harmonics 2 297 0 66 81 Sine Lead 298 0 66 92 Itopia 299 0 66 97 Carib 30...

Page 62: ...ch Split 354 64 0 70 Wind Chime 355 64 0 71 Telephone Ring 2 356 64 0 81 Car Engine Ignition 357 64 0 82 Car Tires Squeal 358 64 0 83 Car Passing 359 64 0 84 Car Crash 360 64 0 85 Siren 361 64 0 86 Train 362 64 0 87 Jet Plane 363 64 0 88 Starship 364 64 0 89 Burst 365 64 0 90 Roller Coaster 366 64 0 91 Submarine 367 64 0 97 Laugh 368 64 0 98 Scream 369 64 0 99 Punch 370 64 0 100 Heartbeat 371 64 0...

Page 63: ...L SD Rock L SD Rock L 51 D 2 39 D 1 Hand Clap 52 E 2 40 E 1 Snare H Hard Snare H Hard 2 SD Room H SD Rock Rim SD Rock H 53 F 2 41 F 1 Floor Tom L Room Tom 1 Rock Tom 1 E Tom 1 54 F 2 42 F 1 1 Hi Hat Closed 55 G 2 43 G 1 Floor Tom H Room Tom 2 Rock Tom 2 E Tom 2 56 G 2 44 G 1 1 Hi Hat Pedal 57 A 2 45 A 1 Low Tom Room Tom 3 Rock Tom 3 E Tom 3 58 A 2 46 A 1 1 Hi Hat Open 59 B 2 47 B 1 Mid Tom L Room ...

Page 64: ... 45 A 1 Low Tom Analog Tom 3 Analog Tom 3 Jazz Tom 3 Brush Tom 3 58 A 2 46 A 1 1 Hi Hat Open Analog HH Open Analog HH Open 2 59 B 2 47 B 1 Mid Tom L Analog Tom 4 Analog Tom 4 Jazz Tom 4 Brush Tom 4 60 C 3 48 C 2 Mid Tom H Analog Tom 5 Analog Tom 5 Jazz Tom 5 Brush Tom 5 61 C 3 49 C 2 Crash Cymbal 1 Analog Cymbal Analog Cymbal 62 D 3 50 D 2 High Tom Analog Tom 6 Analog Tom 6 Jazz Tom 6 Brush Tom 6 ...

Page 65: ...m 4 Rooster 60 C 3 48 C 2 Mid Tom H Jazz Tom 5 Dog 61 C 3 49 C 2 Crash Cymbal 1 Hand Cym L Cat 62 D 3 50 D 2 High Tom Jazz Tom 6 Owl 63 D 3 51 D 2 Ride Cymbal 1 Hand Cym Short L Horse Gallop 64 E 3 52 E 2 Chinese Cymbal Flute Key Click Car Engine Ignition Horse Neigh 65 F 3 53 F 2 Ride Cymbal Cup Car Tires Squeal Cow 66 F 3 54 F 2 Tambourine Car Passing Lion 67 G 3 55 G 2 Splash Cymbal Car Crash S...

Page 66: ...zzClub 043 Swing1 044 Swing2 045 Five Four 046 Dixieland 047 Ragtime R B 048 Soul 049 DetroitPop 050 6 8Soul 051 CrocoTwist 052 Rock Roll 053 ComboBoogie 054 6 8Blues Country 055 CountryPop 056 CountrySwing 057 Country2 4 058 Bluegrass Latin 059 BrazilianSamba 060 BossaNova 061 Tijuana 062 DiscoLatin 063 Mambo 064 Salsa 065 Beguine 066 Reggae Ballroom 067 VienneseWaltz 068 EnglishWaltz 069 Slowfox...

Page 67: ...fect Type List Reverb Types No Reverb Type Description 01 03 Hall 1 3 Concert hall reverb 04 05 Room 1 2 Small room reverb 06 07 Stage 1 2 Reverb for solo instruments 08 09 Plate 1 2 Simulated steel plate reverb 10 Off No effect ...

Page 68: ... Default 1 16 1 16 Channel Changed x x Default 3 3 Mode Messages x x Altered x Note 0 127 0 127 Number True voice 0 127 Velocity Note ON o 9nH v 1 127 o 9nH v 1 127 Note OFF x x After Key s x x Touch Ch s x x Pitch Bend x o 0 32 o o Bank Select 1 x 1 o Modulation wheel 6 x 1 o Data Entry MSB 38 x 1 x Data Entry LSB 7 10 o o Control 11 x 1 o Expression 64 o o Sustain Change 71 73 74 x 1 o ...

Page 69: ... o o All Sound OFF x o 120 126 127 Aux Reset All Cntrls x o 121 Local ON OFF x o 122 Mes All Notes OFF x o 123 125 sages Active Sense o o Reset x x 72 o o Release Time 84 x 1 o Portamento Cntrl 91 93 o o Effect 1 3 Depth 96 97 x o RPN Inc Dec 100 101 x o RPN LSB MSB 1 Refer to 2 on page 70 Mode 1 OMNI ON POLY Mode 2 OMNI ON MONO o Yes Mode 3 OMNI OFF POLY Mode 4 OMNI OFF MONO x No ...

Page 70: ...I Master Tuning The default value of mm and ll are 08H and 00H respectively Any values can be used for n and cc Reverb Type F0H 43H 1nH 4CH 02H 01H 00H mmH llH F7H mm Reverb Type MSB ll Reverb Type LSB Refer to the Effect Map page 70 for details Chorus Type F0H 43H 1nH 4CH 02H 01H 20H mmH llH F7H mm Chorus Type MSB ll Chorus Type LSB Refer to the Effect Map page 70 for details 4 When the accompani...

Page 71: ...nal Clock Initial Setup Send Time Signature Numerator Time Signature Denominator Metronome Volume Demo Cancel Effects Reverb 9 types Song 100 Preset Songs Song Volume MIDI Local On Off Initial Setup Send External Clock Auxiliary jacks PHONES OUTPUT DC IN 12V MIDI in out SUSTAIN Amplifier 2 5W 2 5W Speakers 12cm x 2 Power Consumption 10W When using PA 3C power adaptor Power Supply Adaptor Yamaha PA...

Page 72: ...ING button 31 TOUCH ON OFF button 39 VOICE button 16 27 WAITING button 32 DC IN 12V jack 8 MIDI IN OUT terminals 54 PHONES OUTPUT jack 9 SUSTAIN jack 9 A AB Repeat 35 AC Power Adaptor 8 ACMP ON OFF 24 Auto Accompaniment 23 24 Auto accompaniment range 24 25 B Battery 8 Beat Display 28 C Chord 25 48 49 51 Chord Dictionary 50 Chord Display 28 49 Computer 55 56 D Demo 13 Demo Cancel 53 Display 28 Drum...

Page 73: ...a while 26 R Reverb 41 Reverb Level 53 Reverb on off 53 Reverb Type 53 Reverb Type List 67 REW 14 Rhythm 23 Right Display 28 Root 48 50 S Song 12 Song List 15 Song Volume 33 Split Point 36 Start 26 Stop 26 Style 23 24 43 46 Style List 66 Style Volume 47 Supplied Accessories 6 71 Synchro Start 24 43 T Tempo 38 Time Signature Denominator 21 Time Signature Numerator 21 Touch Display 28 Touch Response...

Page 74: ...r assistance You may also contactYamaha directly at the address provided below 2 Deliver the unit to be serviced under warranty to the retailer selling the product an authorized service center or to Yamaha with an explanation of the problem Please be prepared to provide proof purchase date sales receipt credit card copy etc when requesting service and or parts under warranty 3 Shipping and or insu...

Page 75: ... 147 Skiathou Street 112 55 Athens Greece Tel 01 228 2160 SWEDEN Yamaha Scandinavia AB J A Wettergrens Gata 1 Box 30053 S 400 43 Göteborg Sweden Tel 031 89 34 00 DENMARK YS Copenhagen Liaison Office Generatorvej 6A DK 2730 Herlev Denmark Tel 44 92 49 00 FINLAND F Musiikki Oy Kluuvikatu 6 P O Box 260 SF 00101 Helsinki Finland Tel 09 618511 NORWAY Norsk filial av Yamaha Scandinavia AB Grini Næringsp...

Page 76: ...Instrument Division Yamaha Corporation 2007 Yamaha Corporation WH74060 XXXPOXXX X 01A0 Printed in China Yamaha Home Keyboards Home Page English Only http music yamaha com homekeyboard Yamaha Manual Library http www yamaha co jp manual ...

Reviews: