Yamaha EXCITER 270 Installation Manual Download Page 4

4   

Accessory CD-ROM for Windows Installation Guide

• • • • • • • • • • • • • • • • • • • • • • • • • • • • • • • • • • • • • • • • • • • • • • • • • • • • • • • 


USB MIDI Driver


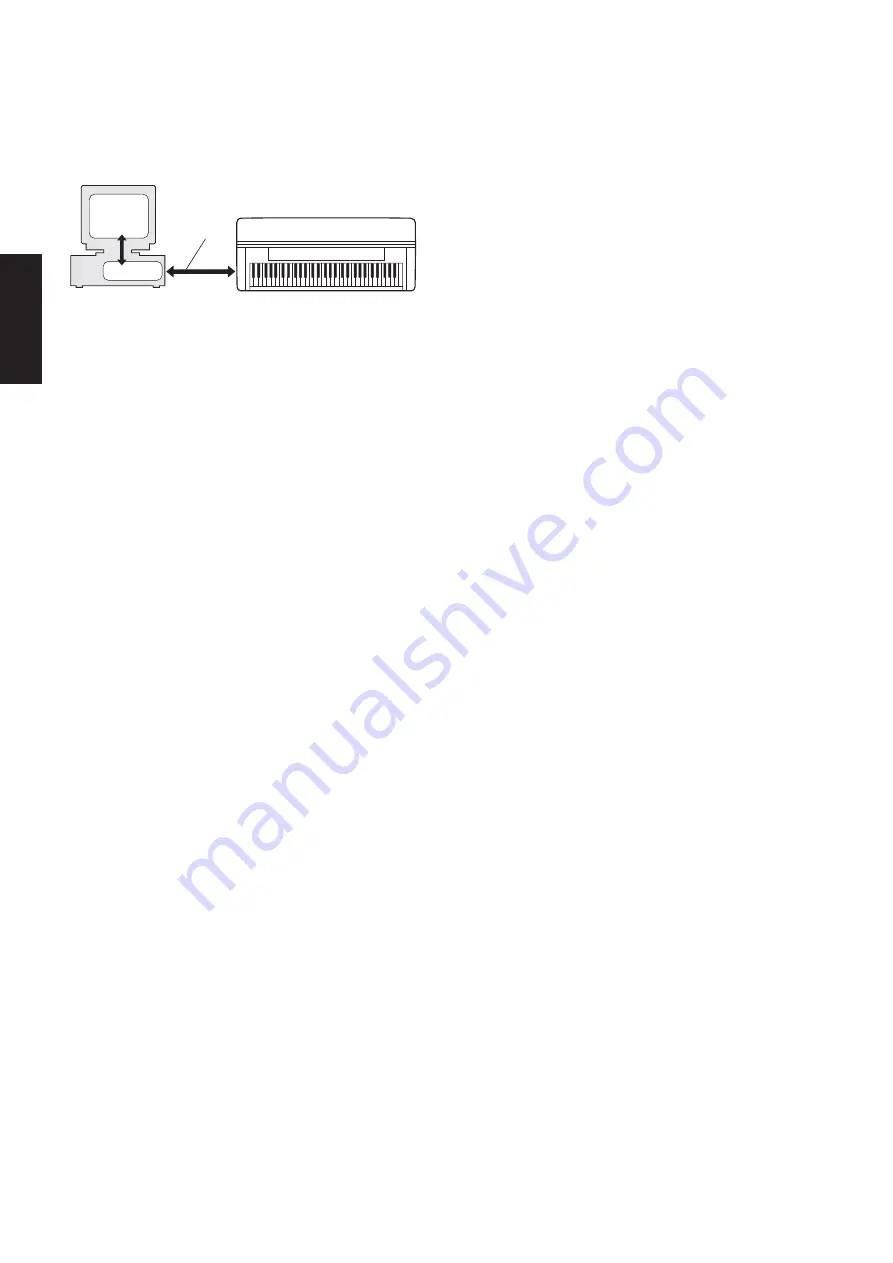
To operate the instrument from your computer via USB, you’ll need 
to install the appropriate driver software.
The USB-MIDI driver is software that transfers MIDI data back and 
forth between sequence software and the instrument via a USB cable.

The installation procedure differs depending on the operating system.


n


If you have questions concerning the USB-MIDI driver, see 
“Troubleshooting” on page 5.


Installing the driver on Windows 98/Me

1

Start the computer.

2

Insert the included CD-ROM into the CD-ROM drive.

3

First, make sure the POWER switch on the instrument is set to 
OFF, then use a USB cable to connect the USB terminal of the 
computer (or the USB hub) to the USB TO HOST terminal of the 
instrument. When the instrument is turned on, the computer 
automatically displays the “Add New Hardware Wizard.” If the 
Add New Hardware Wizard does not appear, click “Add New 
Hardware” in the Control Panel.

n

For Windows Me users, check the radio button to the left of 
“Automatic search for a better driver (Recommended)” and click 
[Next]. The system automatically starts searching and installing 
the driver. Proceed to Step 8. If the system does not detect the 
driver, select “Specify the location of the driver (Advanced)” and 
specify the CD-ROM drive’s “USBdrv_” folder to install the driver. 

4

Click [Next].
The window enables you to select the search method.

5

Check the radio button to the left of “Search for the best driver for 
your device. (Recommended).” Click [Next]. The window enables 
you to select a location in which to install the driver.

6

When using Windows 98, check the “Specify a location” box, click 
“Browse..”, then specify the USBdrv directory of the CD-ROM 
drive (such as D:\USBdrv_\) and continue the installation. 
When using Windows Me, check the “CD-ROM drive” box and 
uncheck all other items. Click [Next].

n

When using Windows Me, the system may ask you to insert a 
Windows CD-ROM while it checks for the driver. Specify the 
USBdrv directory of the CD-ROM drive (such as D:\USBdrv_\) 
and continue the installation.

7

When the system detects the driver on the CD-ROM and is ready 
for installation, it is shown as a message on the screen.
Make sure that the “YAMAHA USB MIDI Driver” is listed, and 
click [Next]. The system starts the installation.

8

When installation is complete, a message indicating so appears.
Click [Finish].

n

Some computers may take about ten seconds to show this screen 
after the installation is complete.

The driver has been installed.

Installing the driver on Windows 2000

1

Start the computer and use the “Administrator” account to log into 
Windows 2000.

2

Select [My Computer | Control Panel | System | Hardware | Driver 
Signing | File Signature Verification], and check the radio button to 
the left of “Ignore -Install all files, regardless of file signature” and 
click [OK].

3

Insert the included CD-ROM into the CD-ROM drive.

4

First, make sure the POWER switch on the instrument is set to 
OFF, then use a USB cable to connect the USB terminal of the 
computer (or the USB hub) to the USB TO HOST terminal of the 
instrument. When the instrument is turned on, the computer 
automatically displays the “Found New Hardware Wizard.” Click 
[Next].

5

Check the radio button to the left of “Search for a suitable driver 
for my device. (Recommended).” Click [Next].
The window that appears enables you to select a location in which 
to install the driver.

6

Check the “CD-ROM drives” box and uncheck all other items. 
Click [Next].

n

The system may ask you to insert a Windows CD-ROM while it 
checks for the driver. Specify the “USBdrv2k_” directory of the 
CD-ROM drive (such as D:\USBdrv2k_\) and continue the 
installation.

7

When the installation is complete, the system displays 
“Completing the Found New Hardware Wizard.” Click [Finish].

n

Some computers may take about ten seconds to show this screen 
after the installation is complete. 

8

Restart the computer. 
The driver has been installed.

Installing the driver on Windows XP

1

Start the computer and use the “Administrator” account to log into 
Windows XP.

2

Select [Start] 

 [Control Panel].

If the control panel appears as “Pick a category”, click “Switch to 
Classic View” in the upper left of the window.
All control panels and icons will be displayed.

3

Go to [System] 

 [Hardware] 

 [Driver Signing Options], and 

check the radio button to the left of “Ignore” and click [OK].

4

Click the [OK] button to close System Properties, and then click 
“X” in the upper right of the window to close the Control Panel.

5

Insert the included CD-ROM into the CD-ROM drive.

6

First, make sure the POWER switch on the instrument is set to 
OFF, then use a USB cable to connect the USB terminal of the 
computer (or the USB hub) to the USB TO HOST terminal of the 
instrument. When the instrument is turned on, the computer 
automatically displays the “Found New Hardware Wizard.”

n

Some computers may take a few minutes to show this screen.

7

Check the radio button to the left of “Install the software 
automatically. (Recommended).” Click [Next].
The system starts the installation.

8

When the installation is complete, the system displays 
“Completing the Found New Hardware Wizard.” Click [Finish].

n

Some computers may take about a few minutes to show this screen 
after the installation is complete.

9

Restart the computer.
The driver has been installed.

Computer

MIDI instrument (Clavinova, etc.)

USB cable

Driver

Sequence

Software

English

Summary of Contents for EXCITER 270

Page 1: ...msoftware sowie jede Änderung der technischen Daten und Funktionen werden separat bekanntgegeben REMARQUES PARTICULIERES Les droits d auteurs copyright de ce logiciel et de ce manuel d installation appartiennent exclusivement à Yamaha Corporation L usage de ce logiciel et de ce manuel est défini par l accord de licence auquel l acheteur déclare souscrire sans réserve lorsqu il ouvre le sceau de l ...

Page 2: ...n from the Adobe website at the following URL http www adobe com n When you have questions about the driver or playback response etc see Troubleshooting on page 5 Contents of the CD ROM The CD ROM contains the applications with installers and data shown on the menu window These are contained in the following folders All the applications listed above are supplied with online PDF manuals To view PDF...

Page 3: ...tallation of Digital Music Notebook requires that your computer be connected to the Internet and be online This is because the CD ROM does not contain the actual program and installer but instead uses the Internet connection to download the necessary files When installing Digital Music Notebook make sure that Internet Explorer 6 0 with SP1 or higher is installed to your computer 1 Insert Accessory...

Page 4: ... Administrator account to log into Windows 2000 2 Select My Computer Control Panel System Hardware Driver Signing File Signature Verification and check the radio button to the left of Ignore Install all files regardless of file signature and click OK 3 Insert the included CD ROM into the CD ROM drive 4 First make sure the POWER switch on the instrument is set to OFF then use a USB cable to connect...

Page 5: ...B cable from the instrument and make the connection again 5 Install the driver again page 4 When controlling the instrument from your computer via USB the instrument does not operate correctly or no sound is heard Did you install the driver Is the USB cable connected correctly Are the volume settings of the instrument playback device and application program set to the appropriate levels Have you s...

Page 6: ...ie das Programm unter der folgenden URL von der Adobe Website herunterladen http www adobe com Wenn Sie Fragen zum Treiber oder zur Wiedergabe haben lesen Sie bitte den Abschnitt Problembehandlung auf Seite 5 Inhalt der CD ROM Die CD ROM enthält die im Menüfenster angezeigten Anwendungen mit Installationsroutinen und Daten Sie befinden sich in den folgenden Ordnern Alle oben aufgeführte Anwendunge...

Page 7: ...ktive Verbindung zum Internet haben Der Grund dafür ist dass die CD ROM nicht das Programm und die Installationsroutine enthält sondern statt dessen die Internetverbindung verwendet um die benötigten Dateien herunterzuladen Stellen Sie bei der Installation von Digital Music Notebook sicher dass auf Ihrem Computer Internet Explorer 6 0 mit SP1 oder eine spätere Version installiert ist 1 Legen Sie d...

Page 8: ...platz Systemsteuerung System Hardware Treibersignierung Dateisignaturverifizierung aktivieren Sie die Option Ignorieren Alle Dateien installieren unabhängig von der Dateisignatur und klicken Sie auf OK 3 Legen Sie die mitgelieferte CD ROM in das CD ROM Laufwerk ein 4 Vergewissern Sie sich zunächst dass der Netzschalter POWER am Instrument auf OFF Aus gestellt ist und verwenden Sie dann ein USB Kab...

Page 9: ...ie auf die Entfernen Schaltfläche 4 Ziehen Sie das USB Kabel vom Instrument ab und stecken Sie es gleich wieder ein 5 Installieren Sie den Treiber neu Seite 4 Wenn das Instrument vom Computer aus über USB bedient wird funktioniert es nicht richtig oder erzeugt keinen Ton Haben Sie den Treiber installiert Ist das USB Kabel korrekt angeschlossen Sind die Lautstärke Einstellungen des Instruments des ...

Page 10: ... com n Pour toute question relative au lecteur à la réponse de reproduction etc reportez vous à la section Dépistage des pannes en page 5 Contenu du CD ROM Le CD ROM contient les applications sans les fichiers d installation et les données qui s affichent dans la fenêtre de menu Ces éléments se trouvent dans les dossiers suivants Toutes les applications répertoriées ci dessus sont fournies avec de...

Page 11: ... de Digital Music Notebook sous Windows XP ou 2000 veillez à vous connecter au compte Administrateur L installation de Digital Music Notebook nécessite que l ordinateur soit connecté à Internet et en ligne car le CD ROM ne contient pas le programme et les fichiers d installation en tant que tels mais utilise la connexion Internet pour télécharger les fichiers nécessaires Lors de l installation de ...

Page 12: ...configuration Système Matériel Signature du pilote Vérification des signatures de fichiers et cochez la case d option à gauche de Ignorer installe tous les fichiers quelles que soient leurs signatures et cliquez sur OK 3 Insérez le CD ROM fourni dans le lecteur de CD ROM 4 Vérifiez tout d abord que l interrupteur POWER de l instrument est positionné sur OFF et raccordez la borne USB de l ordinateu...

Page 13: ... et cliquez sur le bouton Supprimer 4 Retirez le câble USB de l instrument et rebranchez le 5 Réinstallez le pilote page 4 Lorsque l instrument est contrôlé à partir de l ordinateur via USB il ne fonctionne pas correctement ou ne produit aucun son Avez vous installé le pilote Le câble USB est il correctement connecté Les volumes respectifs de l instrument du périphérique de reproduction et du prog...

Page 14: ...untas acerca del controlador o de la respuesta de reproducción etc consulte Solución de problemas en la página 5 Contenido del CD ROM El CD ROM contiene las aplicaciones con instaladores y los datos mostrados en la ventana de menús Están contenidos en las carpetas siguientes Todas las aplicaciones indicadas anteriormente se suministran con manuales en formato PDF o en línea Para ver los archivos P...

Page 15: ...istrador Para poder instalar Digital Music Notebook es necesario que el ordenador esté conectado a Internet y en línea Esto se debe a que el CD ROM no contiene el programa real y el instalador sino que utiliza la conexión a Internet para descargar los archivos necesarios Cuando instale Digital Music Notebook asegúrese de tener instalado en su ordenador Internet Explorer 6 0 con SP1 o una versión p...

Page 16: ... Panel de control Sistema Hardware Firmas de controladores Comprobación de firma de archivos marque el botón de opción de la izquierda en Ignorar Instalar todos los archivos sin tener en cuenta la firma y haga clic en Aceptar 3 Inserte en la unidad de CD ROM el CD ROM incluido 4 En primer lugar compruebe que el interruptor POWER del instrumento está en la posición OFF y a continuación utilice un c...

Page 17: ...instrumento y vuelva a realizar la conexión 5 Vuelva a instalar el controlador página 4 Al controlar el instrumento desde el ordenador a través de USB el instrumento no funciona correctamente o no se oye ningún sonido Ha instalado el controlador Está conectado correctamente el cable USB Está ajustado al nivel correcto el volumen del instrumento del dispositivo de reproducción y del programa de apl...

Page 18: ...rk the SOFTWARE with other computers You may transfer ownership of the SOFTWARE and the accompanying written materials on a permanent basis provided that you retain no copies and the recipient agrees to the terms of the licensing agreement 3 TERMINATION The licensing condition of the software program becomes effective on the day that you receive the SOFTWARE If any one of the copyright laws or cla...

Page 19: ...stellen Sie dürfen die SOFTWARE nicht an andere Computer senden oder in Netzwerke einspeisen Sie dürfen das Eigentum an der SOFTWARE und den schriftlichen Begleitmaterialien auf unbefristeter Basis unter den Voraussetzungen übertragen daß Sie keine Kopien zurückbehalten und sich der Empfänger mit den Bedingungen der Lizenzvereinbarung einverstanden erklärt 3 BEENDIGUNG Die Lizenzbedingung des Soft...

Page 20: ...en réseau Vous êtes en droit de céder à titre permanent le LOGICIEL et la documentation imprimée qui l accompagne sous réserve que vous n en conserviez aucun exemplaire et que le bénéficiaire accepte les termes du présent contrat 3 RESILIATION Les conditions énoncées dans le présent contrat de licence prennent effet à compter du jour où le LOGICIEL vous est remis Si l une quelconque des dispositio...

Page 21: ...r ni utilizar en red el SOFTWARE con otros ordenadores Puede transferir la propiedad del SOFTWARE y los materiales escritos que acompañan al mismo de forma permanente siempre que no realice copias y que el destinatario acepte los términos de este acuerdo de licencia 3 FINALIZACIÓN La condición de licencia del programa es efectiva en el día que reciba el SOFTWARE Si se infringe alguna de las leyes ...

Page 22: ...10 Accessory CD ROM for Windows Installation Guide MEMO ...

Page 23: ...Accessory CD ROM for Windows Installation Guide 11 MEMO ...

Page 24: ...U R G Pro Audio Digital Musical Instrument Division Yamaha Corporation 2005 Yamaha Corporation Printed in China WD96020 501MWAP7 3 01A0 ...

Reviews: