


14
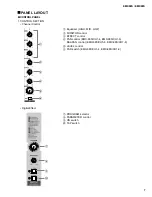
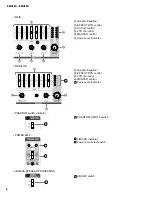
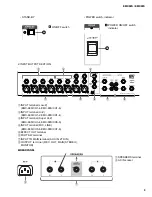
EMX68S / EMX88S
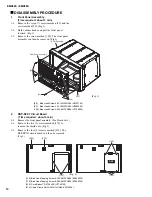
DISASSEMBLY PROCEDURE
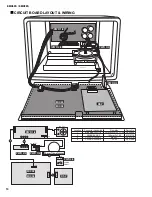
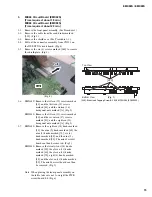
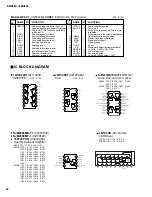
1.
Front Panel Assembly
(Time required: about 3 min)
1-1.
Remove the seven (7) screws marked [80] and the
screw marked [90]. (Fig.1)
1-2.
Hold volume knobs and pull the front panel
forward. (Fig.1)
1-3.
Remove the screw marked [100]. The front panel
assembly can then be removed. (Fig.1)
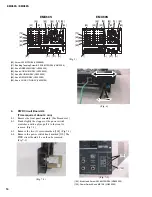
2.
DSP-SPX1 Circuit Board
(Time required: about 4 min)
2-1.
Remove the front panel assembly. (See Procedure 1)
2-2.
Remove the two (2) screws marked [170] to
remove the shield case. (Fig.2)
2-3.
Remove the four (4) screws marked [140]. The
DSP-SPX1 circuit board can then be removed.
(Fig.2)
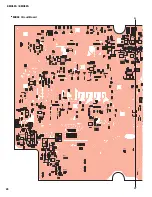
[80]
[80]
[90]
[100]
Body Assembly
Front Panel Assembly
DSP
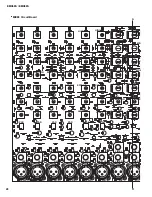
[170]
[140]
[140]
[250]
[270]
(Fig. 1)
[80]: Bind Head Screw 4.0X12 MFZN2BL (VB132700)
[90]: Bind Head Screw 4.0X20 MFZN2BL (VB403600)
[100]: Bind Head Screw A4.0X8 MFZN2BL (VP156800)
(Fig. 2)
[140]: Bind Head Tapping Screw-B 3.0X6 MFZN2BL (EP600230)
[170]: Bind Head Tapping Screw-B 3.0X6 MFZN2BL (EP600230)
[250]: Cord Binder TS-0708 KSS (VZ765100)
[270]: Cable Cramp AB-3S-3M NYLON66 (V9078900)
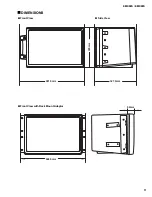
Summary of Contents for EMX88S
Page 5: ...5 EMX68S EMX88S ...
Page 6: ...6 EMX68S EMX88S ...
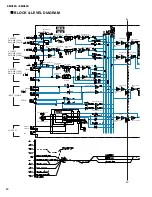
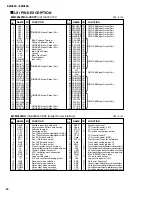
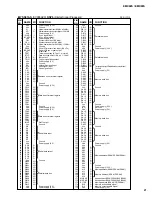
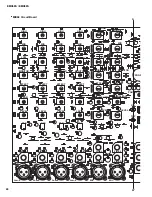
Page 26: ...26 EMX68S EMX88S A A MIX68 Circuit Board ...
Page 27: ...27 EMX68S EMX88S A A Pattern side ...
Page 30: ...30 EMX68S EMX88S A A MIX88 Circuit Board ...
Page 31: ...31 EMX68S EMX88S A A Pattern side ...
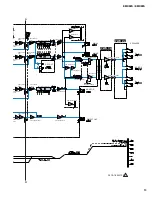
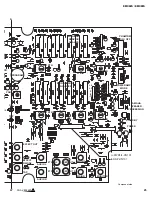
Page 32: ...32 EMX68S EMX88S Component side DSP Circuit Board non connect to MIX88 CN901 to MIX68 CN901 ...
Page 33: ...33 EMX68S EMX88S Pattern side DSP Circuit Board 3NA V826720 ...
Page 43: ...43 EMX68S EMX88S ...
Page 44: ...44 EMX68S EMX88S ...
Page 45: ...45 EMX68S EMX88S ...
Page 46: ...46 EMX68S EMX88S ...
Page 47: ...47 EMX68S EMX88S ...
Page 48: ...48 EMX68S EMX88S ...
Page 49: ...49 EMX68S EMX88S ...