background image

E-

19

Picture zoom [DVD] [Video CD]

1.

Press the SHIFT + 4 ZOOM buttons during play. The central part of the
picture is magnified.

-

Each time you press the SHIFT + 4 ZOOM buttons or press the
RETURN button, the picture zooms in or out (“Zoom +15” – “Zoom
–15”).

-

Each time you press the 

4

a

5

 or 

b

 button, the picture moves

from side to side, up and down.

2.

To return to normal play, press the CANCEL button.

Note:
Picture zoom operation may not work with some discs.

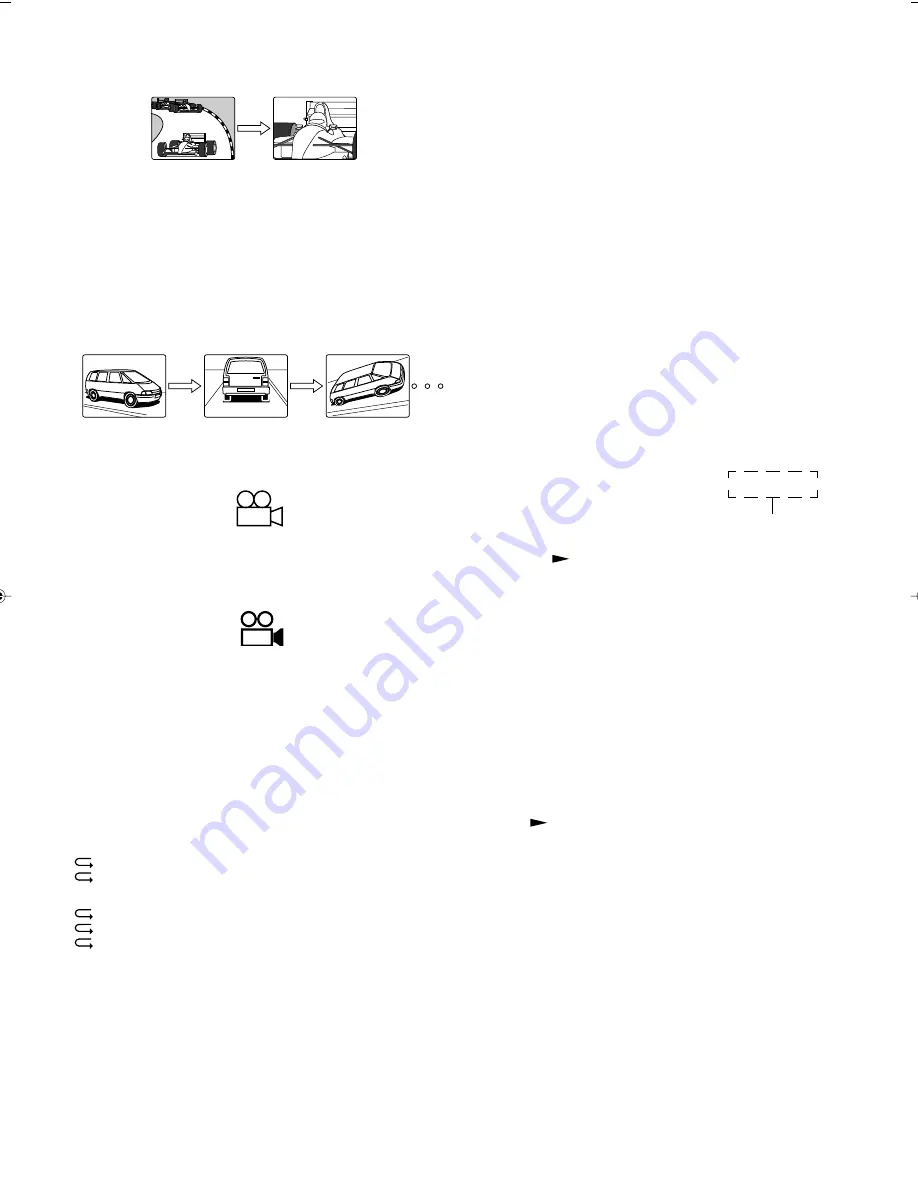
Viewing from a desired camera angle (Multi-Angle)
[DVD]

Some DVD discs may contain scenes which have been  shot simultaneously
from a number of different camera angles. The jacket or case of a disc that
are recorded with multi-angle scenes will be marked.

Example:

Note: The recorded angles differ depending on the disc used.

1.

Play the disc that is recorded with multi-angle scenes.

2.

Press the SHIFT + 2 ANGLE buttons repeatedly until the desired
angle appears.

Example:

Angle replay [DVD]

During playing a Multi-angle scene, press the SHIFT + 3 REPLAY buttons.
The player skips back to last approximately 10 seconds, then changes it
to the next camera angle and plays it, and continues play. (If desired, press
both buttons again.)

Repeat play

Press the REPEAT button during play (or programmed play) of the title (or
track) you want to repeat. Each time the button is pressed, the repeat
mode changes as follows.

[DVD]

 Title (1 REP.): Repeat of the title being played
 Off: Normal play mode

[Video CD] [CD]

 1 (1 REP.): Repeat of the track being played
 All (ALL REP.): Repeat all tracks
 Off: Normal play mode

Note:
-

Repeat play mode may not work correctly with some discs.

-

Repeat play does not work during menu play of a Video CD with
playback control.

Programmed play [Video CD] [CD]

Up to 32 selections can be programmed.

Programming procedure

1.

Press the PROGRAM button in the stop mode. “PROGRAM” screen
appears. “PROG.” flashes and “Pr 1” appears on the display.

2.

Press the number button(s) to select the track number.
Example:
To select track No. 3, press 3.
To select track No.10, press 1, then 0.
To select track No.24, press 2, then 4.
Note:
-

If you made a mistake, press the CANCEL button.

-

Do not use the 

10 button.

-

Press the PROGRAM button to quit this menu.

3.

Press the ENTER button. The highlighted box automatically moves to
the next program number.

Example:

4.

Repeat step 2–3 above to select another track.

5.

Press the 

 button to start play. “PROG.” remains lit.

When all programmed selections have played, the player stops
automatically.
-

The program contents are retained in memory.

To clear the program one by one

In the programming mode, press the 

4

 or 

5

 button to select the program

number. Then press the CANCEL button.

To clear all the programs

In the programming mode, press the 

n

 button.

To change the program

1.

In the programming mode, press the 

4

 or 

5

 button to select the

program number.

2.

Press the number button(s) to select the track number to be replaced,
then press the ENTER button.

To use the program again with the same contents

Press the PROGRAM button to call up the “PROGRAM” screen, then
press the 

 button.

PROGRAM

#

Track

Track Time

1

0 2

00 : 04 : 57

_ _
_ _
_ _
_ _
_ _
_ _
_ _

00 : 04 : 57

Total programmed time

2

3

A3-60U-E (02.7.26)a

02.8.8, 3:39 PM

19

Summary of Contents for DVR-S60

Page 1: ...DVD HOME THEATER SOUND SYSTEM DVX S60 DVX S60 DVR S60 NX S60S NX S60C SW S60 U PHONES STANDBY ON FM MODE TUNING SURROUND BASS MUSIC INPUT PRESET MEMORY VOLUME OWNER S MANUAL ...

Page 2: ...ernating current line plug a plug having one blade wider than the other This plug will fit into the power outlet only one way This is a safety feature If you are unable to insert the plug fully into the outlet try reversing the plug If the plug should still fail to fit contact your electrician to replace your obsolete outlet Do not defeat the safety purpose of the polarized plug 13 Power Cord Prot...

Page 3: ...requencies and if not installed and used according to the instructions found in the users manual may cause interference harmful to the operation of other electronic devices Compliance with FCC regulations does not guarantee that interference will not occur in all installations If this product is found to be the source of interference which can be determined by turning the unit OFF and ON please tr...

Page 4: ...R S60 NX SW60 NX S60S x 4 NX S60C SW S60 This product incorporates copyright protection technology that is protected by method claims of certain U S patents and other intellectual property rights owned by Macrovision Corporation and other rights owners Use of this copyright protection technology must be authorized by Macrovision Corporation and is intended for home and other limited viewing uses o...

Page 5: ...ed YAMAHA service personnel when any service is needed The cabinet should never be opened for any reasons 16 When not planning to use this system for long periods of time i e vacation disconnect the AC power plug from the wall outlet 17 Be sure to read the TROUBLESHOOTING GUIDE section on common operating errors before concluding that this system is faulty 18 Before moving this system press STANDB...

Page 6: ... 15 Loading a disc 15 Starting play 15 Stopping play 15 SETTINGS ON THE SET UP MENU 16 Common procedures of settings 16 Language 16 Display 16 Speaker 17 Parental 17 VARIOUS DISC PLAYING FUNCTIONS 18 Selecting a DVD menu DVD 18 Selecting a title menu DVD 18 Return button RETURN Video CD 18 Chapter Track skip 18 Title search DVD 18 Chapter search DVD 18 Track search Video CD CD 18 Time search 18 Fa...

Page 7: ... 18 Dolby Digital indicator DOLBY DIGITAL 1 Dolby Pro Logic indicator DOLBY PL 2 DTS indicator DTS 3 Title and Track indicator T 4 Message or number indicators Title chapter track playing time or other information 5 Program indicator PROG see page 19 23 6 Repeat mode indicators ALL 1 REP see page 19 7 Timer indicator 0 see page 24 8 Timer off indicator OFF see page 24 9 Timer on indicator ON see p...

Page 8: ... 1 2 3 4 5 6 7 8 9 0 10 CANCEL SET UP ANGLE REPLAY ZOOM SLEEP TIMER ADJUST CLOCK FM MODE BASS TEST LEVEL TUNER MUTE SURROUND MUSIC VOLUME TITLE ON SCREEN SEARCH SEARCH MODE PROGRAM LAST MEMO REPEAT SLOW AUDIO SUBTITLE SKIP RETURN ENTER MENU INPUT TUNING PRESET SET CLEAR SHIFT POWER 27 26 25 6 7 8 9 24 23 20 22 11 13 15 14 16 17 18 10 12 21 19 Note In this instruction manual any operation of pressi...

Page 9: ...ove the cover 2 Insert the two batteries AA R06 UM 3 type with and oriented properly 3 Attach the cover so that it snaps into place Notes on batteries Change all of the batteries if you notice a decrease in the operating range of the remote control Do not use old batteries together with new ones Do not use different types of batteries such as alkaline and manganese batteries together Read the pack...

Page 10: ...ve plates to radiate the sound in four horizontal directions Caution for carrying the subwoofer Do not insert your hands into the openings at the lower part of the subwoofer when carrying it If you touch the inside speaker unit it may be damaged Remove the warning label put by the factory setting when using the subwoofer Surround right speaker Surround left speaker Subwoofer Front right speaker Fr...

Page 11: ...a Speaker Stand SPS 80 speakers can be placed on the floor The SPS 80 is not available in some areas Wall wall support Min 20 mm Diam 3 5 4 mm 10 mm 70 mm 70 mm 70 mm Round head screw not supplied SPS 80 Placing the the front surround speakers When placing the speakers on a flat surface attach the included nonskid pads to the corners on the bottom of the speakers This prevents the speakers from sl...

Page 12: ...ode VIDEO S VIDEO DVD ONLY MONITOR OUT L R L R SPEAKERS 8Ω CENTER FRONT SUB WOOFER REAR SURROUND VIDEO 1 VIDEO 2 VIDEO AUDIO IN OUT IN IN IN OUT L R L R VIDEO OUT SELECT DVD ONLY VIDEO OUT SCAN SELECT S VIDEO COMPONENT COMPONENT VIDEO OUT 480p 480i DVD ONLY Y PB PR SELECTABLE INTERLACE 480p 480i 480i DVD ONLY FRONT R FRONT L CENTER REAR R REAR L SUBWOOFER Front right speaker Front left speaker Cen...

Page 13: ...to the system Connecting to a TV with the video pin cable Connect the included or commercially available video pin cable between the MONITOR OUT VIDEO jack of the unit and the video input jack of the TV Notes on connections Please refer to the instruction manuals for the components that you are connecting TV etc When you connect the unit to your TV and other equipment be sure to turn off the power...

Page 14: ...O S VIDEO DVD ONLY MONITOR OUT L R L R SPEAKERS 8Ω CENTER FRONT SUB WOOFER SURROUND TUNER FM ANT AM ANT VIDEO 1 VIDEO 2 VIDEO AUDIO IN OUT IN IN IN OUT L R L R 75Ω GND VIDEO OUT SELECT DVD ONLY VIDEO OUT SCAN SELECT S VIDEO COMPONENT COMPONENT VIDEO OUT 480p 480i DVD ONLY Y PB PR SELECTABLE INTERLACE VHF UHF FROM ANT IN OUT TO TV IN OUT 3 4 LINE1 AUX1 VIDEO CH L R L R AUDIO VHF UHF FROM ANT IN OUT...

Page 15: ... units from the wall outlet until all the connections have been made After the above connections have been made there are no video signals from the MONITOR OUT VIDEO and VIDEO 1 VIDEO OUT jacks Do not connect the unit to a VCR directly The playback picture will be distorted because DVD video discs are copy protected Component video cable Green Red Blue TV with progressive scan capability Progressi...

Page 16: ... display To restore the previous volume setting press the MUTE button again Bass extension Press the BASS button to select the desired bass boost effect BASS OFF v BASS ON1 v BASS ON2 v BASS OFF Selecting the sound mode Press the MUSIC button to select the sound mode matching the source to be listened to POP Pops etc CLASSIC Classical music etc ROCK Rock music etc JAZZ Jazz etc What to do if If th...

Page 17: ...urround left speaker 4 Press the or VOLUME button until the test tone turns into a comfortable level If the test tone level is not the same from each speaker you may need fine adjustment of the volume level Please follow the steps as below Note Ifyoumakenooperation theoriginaldisplayreturnsafterapproximately a minute 1 Press the TEST button to turn the test tone off 2 Press the SURROUND button to ...

Page 18: ...les as well However some CD R RWs can not be played back depending on the recording conditions ACD R RWthathasnomusicdataornon MP3filescannotbeplayed back This unit is to be used exclusively with the PAL or NTSC color system SECAM system discs cannot be used with this unit Notes on handling discs Do not expose the disc to direct sunlight high humidity or high temperature for extended periods of ti...

Page 19: ...y scratched disc is loaded NO DISC or NO PLAY appears If this occurs load the disc correctly or replace the disc The producing method of commercially available discs may differ with each disc Though there may be a case that the sound becomes intermittent just after the playback of a disc starts this is dependent on the disc and not a malfunction of this system If a menu appears on the TV screen Pr...

Page 20: ... Select when a wide screen TV set is connected Played in FULL size Setting the wide screenTVto FULL modeisalsonecessary Note The screen size may differ depending on the DVD video discs If you select 16 9 to get rid of the black bands on screen when wide screen disc is played back picture may be slightly distorted In some discs even if 4 3 PS is selected the black bands may remain on the screen Dis...

Page 21: ... and under admitted Level 6 R Restricted Level 4 PG13 Parental guidance cautioned Level 3 PG Parental guidance suggested Level 1 G General audiences Some DVD discs contain a restriction level which enables parents to prevent playback of discs by children This DVD player is equipped with a password designed to prevent children changing the level You cannot play DVD discs rated higher than the level...

Page 22: ...ay CHAPTER SEARCH screen appears 2 Press the number button s to enter the chapter number Play starts from the selected chapter Track search Video CD CD Press the number button s during play or in the stop mode Play starts from the selected track Time search DVD 1 Press the SEARCH MODE buttons three times during play TIME SEARCH screen appears 2 Press the number button s to enter the time Example 2...

Page 23: ...ll ALL REP Repeat all tracks Off Normal play mode Note Repeat play mode may not work correctly with some discs Repeat play does not work during menu play of a Video CD with playback control Programmed play Video CD CD Up to 32 selections can be programmed Programming procedure 1 Press the PROGRAM button in the stop mode PROGRAM screen appears PROG flashes and Pr 1 appears on the display 2 Press th...

Page 24: ...he playback is muted temporarilywhenyouswitchtheaudiosoundtracklanguagetoanother on a disc that has two or more audio soundtrack languages this is not a malfunction of this system Changing the audio channel output Video CD During a Video CD play press the AUDIO buttons to select an audio channel LEFT MONO v RIGHT MONO v STEREO v LEFT MONO Selecting on screen information Press the ON SCREEN button ...

Page 25: ... many sub folders by preference Some MP3 CDs can not be played back depending on the recording conditions MP3 CD Play 1 Load an MP3 CD A table of contents in the root directory appears on the TV screen Example the root directory Note If nothing appears on the TV screen press the MENU button 2 Select the desired file by pressing the 4 or 5 button The selected file is highlighted To go on to the nex...

Page 26: ...ashmiri 7585 ku Kurdish 7589 ky Kirghiz 7665 la Latin 7678 ln Lingala 7679 lo Laothian 7684 lt Lithuanian 7686 lv Latvian Lettish 7771 mg Malagasy 7773 mi Maori 7775 mk Macedonian 7776 ml Malayalam 7778 mn Mongolian 7779 mo Moldavian 7782 mr Marathi 7783 ms Malay 7784 mt Maltese 7789 my Burmese 7865 na Nauru 7869 ne Nepali 7876 nl Dutch 7879 no Norwegian 7967 oc Occitan 7977 om Afan Oromo 7982 or ...

Page 27: ...stations will be programmed Manual presetting 1 Tune in the station to be preset as described in Automatic Manual tuning 2 Press the MEMORY button 3 While PROG is flashing press the PRESET button to select the channel to be preset 4 While PROG is flashing press the MEMORY button In this example 90 1 MHz FM station is preset on FM channel 9 5 Repeat steps above to add more preset stations When pres...

Page 28: ...FT 7 TIMER buttons The previously set timer on time setting appears 2 Press the SHIFT 8 ADJUST buttons within 15 seconds 3 Set the hour of the on time by pressing the TUNING or button then press the SHIFT 8 ADJUST buttons Set the minute in the same way The timer off time setting appears 4 Set the timer off time as described in step 3 0 blinks 5 While 0 is flashing press the INPUT button to select ...

Page 29: ...ct input function on the TV Select the correct source Turn up the volume Load a playable disc Check the disc logo type color system and regional code The feature or action cannot be completed at this time because The feature is not available at the moment The DVD software restricts it The DVD software does not support the feature e g angles Load a disc Load a playable disc Check the disc logo type...

Page 30: ... Canada models 87 9 to 107 9 MHz Other models 87 50 to 108 00 MHz AM Tuning Range U S A and Canada models 520 to 1710 kHz U K and Europe models 522 to 1611 kHz Australia China and Korean models 522 to 1710 kHz General model 522 520 to 1710 kHz SPEAKER SECTION Front and Surround Speakers Model Name NX S60S Type Acoustic suspension Speakers 5 cm 2 inch full range cone x 2 magnetic shielding Impedanc...

Page 31: ... BEI HAMBURG F R OF GERMANY YAMAHA ELECTRONIQUE FRANCE S A RUE AMBROISE CROIZAT BP70 CROISSY BEAUBOURG 77312 MARNE LA VALLEE CEDEX02 FRANCE YAMAHA ELECTRONICS UK LTD YAMAHA HOUSE 200 RICKMANSWORTH ROAD WATFORD HERTS WD1 7JS ENGLAND YAMAHA SCANDINAVIA A B J A WETTERGRENS GATA 1 BOX 30053 400 43 VASTRA FRÖLUNDA SWEDEN YAMAHA MUSIC AUSTRALIA PTY LTD 17 33 MARKET ST SOUTH MELBOURNE 3205 VIC AUSTRALIA ...

Reviews: