background image

100

DGX-620/520, YPG-625/525  Owner’s Manual

Connections

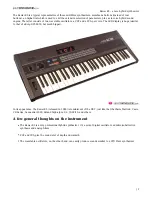
By connecting the instrument to a computer, the instrument’s performance data can be used on the com-
puter, and performance data from the computer can be played on the instrument.

When the instrument is connected with computer, 
it transmits/receives performance data.

MIDI settings

  ●  ●  ●  ●  ●  ●  ●  ●  ●  ●  ●  ●  ●  ●  ●  ●  ●  ●  ●  ●  ●  ●  ●  ●  ●  ●  ●  ●  ●  ●  ●  ●  ●  ●  ●  ●  ●  ●  ●  ●  ●  ●  ●  ●  ●  ●  ●  ●  

These settings pertain to performance data transmission and reception.

1

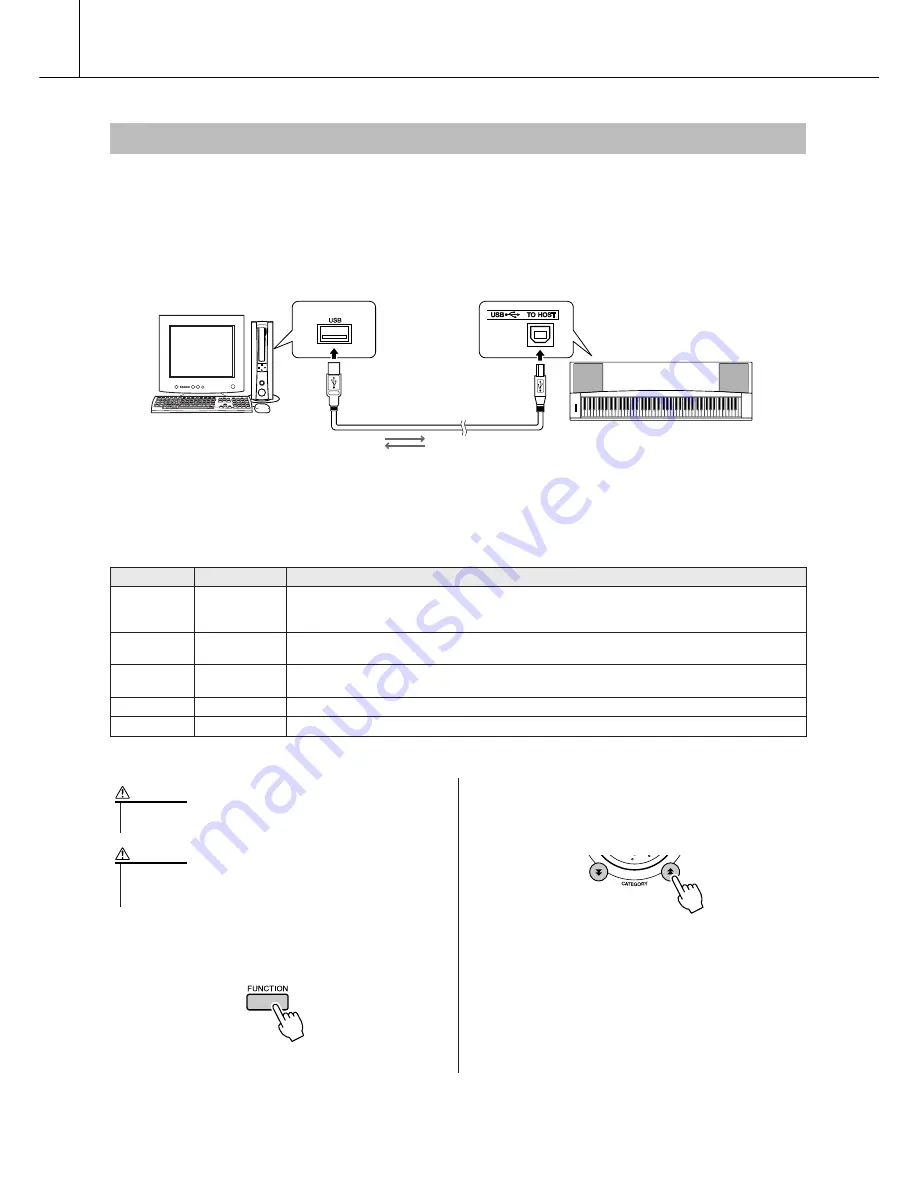
Press the [FUNCTION] button.

2

Use the CATEGORY [

] and [

] buttons 

to select the item you want to change its 
value.

3

Use the dial to select ON or OFF.

Transferring Performance Data to and from a Computer

USB cable

USB terminal

USB terminal

Instrument

Computer

Item

Range/Settings

Description

Local

ON/OFF

Local control determines whether or not notes played on the instrument are sounded by its internal 
tone generator system: the internal tone generator is active when local control is on, and inactive when 
local control is off.

External Clock

ON/OFF

These settings determine whether the instrument is synchronized to its own internal clock (OFF), or to 
a clock signal from an external device (ON).

Keyboard Out

ON/OFF

These settings determine whether keyboard performance data of the instrument is transmitted (ON) or 
not (OFF).

Style Out

ON/OFF

These settings determine whether Style data is transmitted (ON) or not (OFF) during Style playback.

Song Out

ON/OFF

These settings determine whether Song data is transmitted (ON) or not (OFF) during Song playback.

• If you can’t get any sound out of the instrument, this may be the 

most likely cause.

CAUTION

• If External Clock is ON and no clock signal is being received from 

an external device, the song, style, and metronome functions will 
not start.

CAUTION

f

r

Summary of Contents for DGX620 - Portable Keyboard - 88 Keys

Page 1: ...Owner s Manual EN ...

Page 2: ... pro duction methods used to produce them meet these goals In keeping with both the letter and the spirit of the law we want you to be aware of the following Battery Notice This product MAY contain a small non rechargeable battery which if applicable is soldered in place The average life span of this type of battery is approximately five years When replacement becomes neces sary contact a qualifie...

Page 3: ...rcuits or install AC line filter s In the case of radio or TV interference relocate reorient the antenna If the antenna lead in is 300 ohm ribbon lead change the lead in to co axial type cable If these corrective measures do not produce satisfactory results please contact the local retailer authorized to distribute this type of product If you can not locate the appropriate retailer please contact ...

Page 4: ...rument or if any unusual smells or smoke should appear to be caused by it immediately turn off the power switch disconnect the adaptor plug from the outlet and have the instrument inspected by qualified Yamaha service personnel CAUTION Always follow the basic precautions listed below to avoid the possibility of physical injury to you or others or damage to the instrument or other property These pr...

Page 5: ...g and backing up your data The panel settings and some other types of data are not retained in memory when you turn off the power to the instrument Save data you want to keep to the Registration Memory page 85 Saved data may be lost due to malfunction or incorrect operation Save important data to a USB storage device or other external device such as a computer pages 93 104 Backing up the USB stora...

Page 6: ...XGlite is a simplified version of Yamaha s high quality XG tone generation format Naturally you can play back any XG song data using an XGlite tone generator However keep in mind that some songs may play back differently compared to the original data due to the reduced set of control parameters and effects XF The Yamaha XF format enhances the SMF Standard MIDI File standard with greater functional...

Page 7: ...ke sure to keep this manual in a safe and handy place even after you finish reading and refer to it often when you need to better understand an operation or function The DGX 620 520 YPG 625 525 package includes the following items Please check that you have them all Music rest Accessory CD ROM Owner s manual this book Keyboard stand Footswitch AC Power Adaptor May not be included depending on your...

Page 8: ...ill play the melody simply by tapping one key All you need is one finger Play a Variety of Instrument Voices Page 15 With the DGX 620 520 YPG 625 525 the instrument voice that sounds when you play the keyboard can be changed to violin flute harp or any of an extensive range of voices You can change the mood of a song written for piano for example by using violin to play it instead Experience a who...

Page 9: ... a User Song 60 Backup and Initialization 61 Backup 61 Initialization 61 Basic Operation 62 Basic Operation 62 The Displays 64 MAIN Display Items 65 Reference Play with a Variety of Effects 66 Adding Harmony 66 Adding Reverb 67 Adding Chorus 68 Panel Sustain 69 Pitch Bend 69 Handy Performance Features 70 Tap Start 70 Touch Response Sensitivity 70 One Touch Setting 71 Select an EQ Setting for the B...

Page 10: ...r specifically recommended by Yamaha to power your instrument from the AC mains The use of other adaptors may result in irreparable damage to both the adaptor and the instrument WARNING Unplug the AC Power Adaptor when not using the instrument or during electrical storms CAUTION PA 5D AC outlet Connecting Headphones PHONES OUTPUT Jack Connecting a Footswitch SUSTAIN Jack Avoid listening with the h...

Page 11: ...ress the STANDBY ON switch to turn on the power Press the STANDBY ON switch again to turn the power OFF Backup data in the flash memory is loaded to the instru ment when the power is turned on If no backup data exists on flash memory all instrument settings are restored to the initial factory defaults when the power is turned on Connecting to a Computer USB Terminal Turning the Power On Even when ...

Page 12: ... buttons page 48 1 METRONOME ON OFF button page 20 2 TEMPO TAP button pages 46 70 3 SONG MEMORY REC 1 5 A buttons page 57 4 REPEAT LEARN ACMP ON OFF button pages 52 24 5 A B REPEAT INTRO ENDING rit button pages 83 74 6 REW MAIN AUTO FILL button pages 30 74 7 FF SYNC STOP button pages 30 76 8 PAUSE SYNC START button pages 30 75 9 START STOP button pages 23 30 63 0 SONG button page 29 1 EASY SONG AR...

Page 13: ...tons page 85 0 PORTABLE GRAND button page 18 1 SPLIT ON OFF button page 17 2 DUAL ON OFF button page 16 3 HARMONY ON OFF button page 66 4 PITCH BEND wheel page 69 5 CONTRAST knob page 65 6 USB TO DEVICE TO HOST terminals pages 11 99 7 SUSTAIN jack page 10 8 PHONES OUTPUT jack page 10 9 DC IN 12V jack page 10 3 4 5 6 7 8 9 0 1 2 3 5 6 7 8 9 0 1 2 Rear Panel Music Database List page 131 Voice Catego...

Page 14: ... 2 Press the CATEGORY and buttons a number of times until the Language item appears The currently selected display language will appear below the Lan guage item When highlighted you can use the and buttons to select the lan guage as required 3 Select a display language The button selects English and the button selects Japanese The language selection will be stored in the internal flash memory so t...

Page 15: ... the VOICE button The main voice selection display will appear The currently selected voice number and name will be highlighted 2 Select the voice you want to play While watching the highlighted voice name rotate the dial The avail able voices will be selected and displayed in sequence The voice selected here becomes the main voice For this example select the 102 Flute voice 3 Play the keyboard Tr...

Page 16: ...y The currently selected dual voice will sound in addition to the main voice when you play the keyboard 2 Press and hold the DUAL ON OFF button for longer than a second The dual voice selection display will appear 3 Select the desired dual voice Watch the displayed dual voice and rotate the dial until the voice you want to use is selected The voice selected here becomes the dual voice For this exa...

Page 17: ...plit point setting can be changed as required page 77 1 Press the SPLIT ON OFF button The SPLIT ON OFF button turns the split voice on or off When turned on the split voice SPLIT will appear in the MAIN display The currently selected split voice will sound to the left of the keyboard split point 2 Press and hold the SPLIT ON OFF button for longer than a second The split voice selection display wil...

Page 18: ... the 038 Folk Guitar voice 4 Play the keyboard Try selecting and playing a range of split voices Press the EXIT button to return to the MAIN display When you just want to play piano all you have to do is press one convenient button Press the PORTABLE GRAND button The 001 Grand Piano voice will be selected Play the Grand Piano Voice When you press the PORTA BLE GRAND button all settings other than ...

Page 19: ...the VOICE button 2 Use the dial to select 139 SFX Kit 2 3 Try out each key and enjoy the sound effects As you try out the various keys you ll hear the sound of a submarine a telephone bell a creaking door and many other useful effects 138 SFX Kit 1 includes lightning running water dogs barking and others Some keys do not have assigned sound effects and will therefore pro duce no sound For details ...

Page 20: ...e METRONOME ON OFF button again 1 Press the TEMPO TAP button to call up the tempo set ting 2 Use the dial to select a tempo from 11 to 280 Start the Metronome MEASURE 1 Indicates the beat number in the measure Adjusting the Metronome Tempo Tempo The instrument includes a metronome with adjustable tempo and time signature Play and set the tempo that is most com fortable for you ...

Page 21: ...ailable range is from 0 through 60 Select 5 for this example 3 Press the CATEGORY and buttons as many times as necessary to select the beat length function Time Sig nature Denominator 4 Use the dial to select the beat length Select the required length for each beat 2 4 8 or 16 half note quarter note eighth note or 16th note Select 8 for this example Setting the Number of Beats per Measure and the ...

Page 22: ... YPG 625 525 Owner s Manual 1 Press the FUNCTION button 2 Use the CATEGORY and buttons to select the Met ronome Volume item 3 Use the dial to set the metronome volume as required Adjusting the Metronome Volume f r Metronome volume ...

Page 23: ... rhythm part is played using percussion instruments only 1 Press the STYLE button The style select display will appear The currently selected style number and name will be highlighted 2 Select a style Use the dial to select the style you want to use A list of all the available styles is provided on page 130 3 Press the START STOP button The style rhythm will start playing Press the START STOP butt...

Page 24: ...n Pressing this button a second time will turn automatic accompaniment off 3 Turn sync start on Press the SYNC START button to turn the sync start function on When automatic accompaniment is on The area of the keyboard to the left of the split point 54 F 2 becomes the auto accompaniment region and is used only for specifying the accompaniment chords Play Along with a Style This icon appears when a...

Page 25: ...y ing from one to three notes at the same time to the left of the split point The accompaniment will change according to the left hand notes you play 5 Play a variety of left hand chords while playing a melody with your right hand 6 Press the START STOP button to stop style playback when you re done You can switch style sections to add variety to the accompaniment Refer to Pattern Variation Sectio...

Page 26: ...w level On these pages we ll introduce three easy to use chord progressions Be sure to try them out with the instrument s accompaniment styles The style will respond to the chord progression you play effectively creating a complete song Playing the Chord Progressions Play the scores with the left hand Before playing the scores follow steps 1 through 3 of Play Along with a Style on page 24 The scor...

Page 27: ...order of the chords Bossa nova with jazz style chords This progression includes jazzy two five II V changes Try playing it through several times When you re ready to stop playing press the INTRO ENDING rit button Recommended Style 138 Piano Boogie Recommended Style 086 Bossa Nova F G F C C C Press the INTRO ENDING rit button Press the INTRO ENDING rit button G7 E7 Dm CM7 Am A7 FM7 Bm7 5 Press the ...

Page 28: ...niment range of the keyboard Playing Auto accompaniment Chords C Db Eb F G Bb Db Eb F D E F G A B C D E F Split point default 54 F 2 Root notes and the corresponding keys Accompaniment range To play a major chord Press the root note of the chord C Cm C7 Cm7 To play a minor chord Press the root note together with the nearest black key to the left of it To play a seventh chord Press the root note to...

Page 29: ...riefly describe the 30 songs provided 1 Press the SONG button The song selection display will appear The currently selected song number and name will be highlighted 2 Select a song Select a song after referring to the preset song category list on page 31 Use the dial to select the song you want to listen to Listen Lesson Record Song Select and Listen to a Song The currently selected song number an...

Page 30: ... Built in Songs see next page 031 035 User Songs Songs you record yourself 036 Songs transferred from a computer pages 102 104 or Songs in a USB flash memory connected to the instrument page 91 Song start Song Fast Forward Fast Reverse and Pause PAUSE Press the pause button to pause playback REW Press the fast reverse button to rapidly return to an earlier point in the song FF Press the fast for w...

Page 31: ...Demo 7 Cool Galaxy Electric Piano Demo 8 ModernHarp Sweet Soprano Demo Function Demo 9 Hallelujah Chorus Use these songs to experience some of the instrument s advanced features song number 9 for the easy song arranger and songs 10 and 11 for the performance assistant technology feature 10 Ave Maria 11 Nocturne op 9 2 Piano Solo 12 For Elise These piano solo pieces are ideally suited for use as le...

Page 32: ...page 102 Hint You can have some one play a piece and tempo rarily save it in a user bank as a user song then save it as SMF format to the USB memory from where it can be used as a lesson song Your own performance Song Song Computer USB flash memory Song Song Song SMF conversion Save Play DGX 620 520 YPG 625 525 Song Storage locations Flash Memory USB 036 User Songs 031 035 Preset Songs 001 030 The...

Page 33: ...display single staff and double staff These are alternately selected each time the SCORE button is pressed 3 Press the START STOP button The song will begin playing The triangular will move across the top of the score to indicate the current location 4 Press the EXIT button to return to the MAIN display Displaying the Song Score Both chords and lyrics will be shown in single staff score dis play o...

Page 34: ...rics will be highlighted to show the current location in the song Preset Songs That Can be Used For Lyrics Display Number Name 016 Mona Lisa Jay Livingston and Ray Evans 020 Against all odds Collins 0007403 030 Can t Help Falling In Love George David Weiss Hugo Peretti and Luigi Creatore Display the Lyrics If the lyrics display shows gar bled characters try changing the display language page 14 NO...

Page 35: ... the greatest freedom allowing you to play anything with both your left and right hands Chord Free If you can play simple right hand melodies but have trouble with left hand chords this is the type for you The Chord type applies to only the left hand section of the keyboard allowing you to easily play chords to support the melody you are playing with your right hand Melody This type lets you play ...

Page 36: ... Press the SONG button and the Song Select display appears Select a song by using the dial For this example try selecting the 010 Ave Maria When the Chord type is selected features only available for this song can be seen in the display What is a Song You know the normal meaning of this word but in this instrument the term Song refers to the data that makes up a complete song The performance assis...

Page 37: ...ng the score on the left with both hands You can even play the same keys over and over C E G C E G C E You ll notice that at measure five the notes will come out according to the score on the right Keep playing and performance assistant technology Chord type will continue to correct the notes that you play This is the performance assistant technology Chord type You can stop song playback at any ti...

Page 38: ... the P A T ON OFF button for longer than a second so that the performance assistant technology type appears Select the Chord Free type by using the dial 3 Select a song Press the SONG button and the Song Select display appears Select a song by using the dial For this example try selecting the 011 Noc turne CHORD FREE Type Applying the Chord Type to the Left Hand Only Hold for longer than a second ...

Page 39: ...the score shown in the display Although you re repeatedly playing the same notes with your left hand the actual notes produced will change to match the music This is the performance assistant technology Chord Free type Press the SCORE button if you want to see the score for the right hand part in the display You can stop song playback at any time by pressing the START STOP button 6 Press the P A T...

Page 40: ...t technology feature is on 2 Select the MELODY type Press and hold the P A T ON OFF button for longer than a second so that the performance assistant technology type appears Select the Mel ody type by using the dial 3 Select a song Press the SONG button and the Song Select display appears Select a song by using the dial MELODY Type Play with One Finger Select Melody Hold for longer than a second U...

Page 41: ... a key with one fin ger of your right hand in time with the music You can play any key If you want to play the melody with the melody score press the SCORE button to call up the melody score in the display How does it sound You ve played the melody using only one finger thanks to the performance assistant technology Melody type You can stop song playback at any time by pressing the START STOP butt...

Page 42: ...DY type Press and hold the P A T ON OFF button for longer than a second so that the performance assistant technology type appears Select the Chord Melody type by using the dial 3 Select a song Press the SONG button and the Song Select display appears Select a song by using the dial CHORD MELODY Chord Type with the Left Hand Melody with the Right Select Chord Melody Hold for longer than a second Us...

Page 43: ...re playing to the right of the split point At the same time play accompaniment like chords and phrases with your left hand No matter what you play you ll produce the song melody with your right hand and beautiful chords and phrases with your left hand This is the performance assistant technology Chord Melody type If you want to play the melody with the melody score press the SCORE button to call u...

Page 44: ...Chord type Next try the three playing methods illustrated below Different ways of playing produce different results Once you get a feel for it try playing chords with your left hand and a melody with your right or any other combination The chord information included in the song is displayed in the lower area of the MAIN display You will get even better results if you match your left hand rhythm to...

Page 45: ...s that include chord data When the Melody type is selected the performance assistant technology will only work with songs that include melody data In order to find out if a song includes the required data first select the song and then press the SCORE button If chords appear on the display when you press the SCORE button you can use the Chord type or any combination type that includes the Chord ty...

Page 46: ...rd type with the demo song other types cannot be used 1 Press the DEMO button The demo display that introduces some of the instrument s features will appear and the demo song will start playing Listen to some of the out standing instrument voices provided 2 Try playing the keyboard The following display will appear after the demo song has been playing for a while This indicates that the performanc...

Page 47: ...mble category The practice methods Lesson 1 Learn to play the correct notes Lesson 2 Learn to play the correct notes with the correct timing Lesson 3 Learn to play the correct notes at the correct timing along with the song In this lesson try playing the correct notes Play the note shown in the display The song will wait until you play the right note 1 Select a song for your lesson Press the SONG ...

Page 48: ...s pressed the lesson modes are selected in sequence Lesson 1 Lesson 2 Lesson 3 Off Lesson 1 An explanation of the selected lesson will appear on the display for a few seconds before the lesson begins Song playback will begin automatically when you select Lesson 1 Select R for right hand lesson Select L for left hand lesson Select LR for bothhands lesson If the score display is not ready by the tim...

Page 49: ...pressing the or button 61 keys of the keyboard s range are shown on the display The DGX 620 520 and YPG 625 525 actually have 88 keys In some songs that include very high or low notes those notes may fall outside the displayed range and may not be shown on the display In such cases an over indicator appear to the left or right of the graphic keyboard Use the or button to shift the keyboard left or...

Page 50: ...layback will begin automatically when Lesson 2 is selected The triangular marker will appear in the score display and will move to indicate the current note in the song Try to play the notes at the correct timing As you learn to play the right notes at the right timing the tempo will increase until eventually you ll be playing at the song s original tempo 3 Stop the Lesson mode You can stop the Le...

Page 51: ...n is pressed the lesson modes are selected in sequence Lesson 1 Lesson 2 Lesson 3 Off Les son 1 Song playback will begin automatically when Lesson 3 is selected Play along while listening to the song The score marker and keyboard marker in the display will indicate the notes to play 3 Stop the Lesson mode You can stop the Lesson mode at any time by pressing the START STOP button Lesson 3 Minus One...

Page 52: ...nt in Playback will continue up to the point at which you pressed the REPEAT LEARN button and then jump back four mea sures and begin again after a count in This process will repeat so all you have to do is press the REPEAT LEARN button when you make a mistake in order to repeat practice of that section until you get it right Practice Makes Perfect Repeat and Learn You can change the number of mea...

Page 53: ...isplay 2 Select a Music Database Referring to the list on the panel or Music Database List on page 131 of the manual use the dial to select a music database Select one that matches the image of the song you intend to play For this example select the 115 DayOfW R 3 Play the chords with your left hand and melody with your right The jazz style will start playing when you play a left hand chord to the...

Page 54: ...ong Press the SONG button and use the dial to select 009 Hallelujah Chorus Press the START STOP button begin playback of the song An explanation of the Easy Song Arranger feature will appear on the display As the song progresses the styles will change changing the overall image of the song Keep in mind that you can enjoy using Easy Song Arranger with other songs as well any songs that include chor...

Page 55: ...ame while only the melody voice changes if you have stopped the song start it again by pressing the START STOP button When playing song numbers 010 011 and 020 to 030 while using the Easy Song Arranger melody tracks will be automati cally muted and no melody will sound In order to hear the mel ody tracks you will need to press the SONG MEMORY buttons 3 to 5 NOTE Song start The currently selected s...

Page 56: ... to the melody tracks Up to approximately 5 500 chord changes can be recorded if you record only to the style track User songs cannot display a score as is but they can be con verted to SMF Standard MIDI File format and stored to USB flash memory page 94 from which they can be played with score display NOTE Track Configuration Track 1 Will play back as the right hand melody part MELODY R Track 2 W...

Page 57: ...e selected track will be highlighted in the display To cancel recording to a selected track press that track button a sec ond time Style accompaniment cannot be turned on or off while recording is in progress Recording Procedure Rotate the dial to select a song number between 031 and 035 If you record to track that con tains previously recorded data the previous data will be overwritten and lost C...

Page 58: ...t the user song 031 035 you want to play 3 Press the START STOP button to start playback To Save a User Song to USB flash memory page 93 To save a User Song to USB flash memory in SMF format page 94 To Record Other Tracks Repeat steps 2 through 4 to record any of the remaining tracks By selecting an unrecorded track SONG MEMORY buttons 1 5 A you can record the new track while listening to previous...

Page 59: ... button 4 Press the button to clear the song The clear in progress message will appear briefly on the display while the song is being cleared Data that cannot be recorded Split voice The following items are recorded at the beginning of the track Changes made during the song will not be recorded Reverb type Chorus type Time signature Style number Style volume Tempo When the style track is recorded ...

Page 60: ... than a second A confirmation message will appear on the display 3 Press the button A confirmation message will appear on the display You can cancel the clear operation by pressing the button 4 Press the button to clear the track The clear in progress message will appear briefly on the display while the track is being cleared Track Clear Deleting a Specified Track from a User Song Hold for longer ...

Page 61: ...ch while holding the highest white key on the keyboard The backed up data will be erased and the default values restored Flash Clear To clear song data and style files that have been transferred to the inter nal flash memory from a computer turn the power on by pressing the STANDBY ON switch while simultaneously holding the highest white key on the keyboard and the three highest black keys The Bac...

Page 62: ... Start a function Display pages 64 65 Volume Adjustment Adjusts the volume of the sound heard via the instrument s speakers or a pair of headphones plugged into the PHONES jack Rotate counter clockwise to lower the volume Rotate clockwise to increase the vol ume 3 Start a function 2 Select an item or value 1 Select a basic function Select a song you want to listen to or a song you want to use for ...

Page 63: ... can be omitted see below Decrease Increase Press briefly to decre ment Press briefly to incre ment Example Song number 003 can be entered in three ways 0 0 3 0 3 003 will appear on the dis play after a brief delay 3 003 will appear on the dis play after a brief delay Press number buttons 0 0 3 CATEGORY and buttons When selecting a song style or voice you can use these buttons to jump to the first...

Page 64: ...of functions Press the CATEGORY button s as many times as necessary until the required function appears You can then use the dial the and buttons or the number 0 9 buttons to adjust the value of the function as required To Return To the MAIN Display Most basic operations are carried out from the instrument s MAIN display You can return to the MAIN display from any other display by pressing the EXI...

Page 65: ...assistant technology is on Harmony Appears when Harmony is on When this icon is showing har mony notes will be added to the main voice File Control When this icon is showing you can control file operations Chord Display Style Auto accompaniment Status page 24 Appears when the ACMP ON OFF button is pressed to turn accompaniment on after selecting a style When showing the key board range to the left...

Page 66: ...y When harmony is on the har mony icon will appear in the display When you press the HARMONY ON OFF button to turn this feature on the appropriate harmony type for the currently selected main voice is automatically selected NOTE Hold for longer than a second The currently selected harmony type The harmony notes can be added only to the Main Voice not to Dual or Split Voices The keys left of the Sp...

Page 67: ...ormation about the available reverb types 1 Press the FUNCTION button to call up the FUNCTION display 2 Use the CATEGORY and but tons to select the Reverb Type item 3 Use the dial to select a reverb type You can check how the selected reverb type sounds by playing on the keyboard Refer to the Effect Type List on page 133 for information about the available reverb types Adjusting the Reverb Level Y...

Page 68: ...select a different chorus type use the procedure described below 1 Press the FUNCTION button to call up the FUNCTION display 2 Use the CATEGORY and but tons to select the Chorus Type item 3 Use the dial to select a chorus type You can check how the selected chorus type sounds by playing on the keyboard Adjusting the Chorus Level You can individually adjust the amount of chorus that is applied to t...

Page 69: ... displayed 3 You can then use the and buttons to turn panel sustain on or off The pitch bend wheel can be used to add smooth pitch variations to notes you play on the keyboard Roll the wheel upward to raise the pitch or downward to lower the pitch If you use this feature with a voice such as the 045 Overdriven guitar voice page 15 you can produce remarkably realistic string bending effects You can...

Page 70: ...ON button The currently selected function will appear in the display 2 Use the CATEGORY and but tons to select the Touch Sensitivity item The currently selected touch sensitivity will be displayed 3 Use the dial to select a touch sensitivity setting between 1 and 3 Higher values produce greater easier volume varia tion in response to keyboard dynamics i e greater sensitivity A setting of 4 results...

Page 71: ... to 2 on page 15 2 Select and play back any song steps 1 to 3 on page 29 3 Play the keyboard and remember the sound of the voice If you have stopped playback at some point during this procedure press the START STOP button to start playback again 4 Use the dial to change songs then play the keyboard and listen to the voice You should hear a different keyboard voice than you played in step 3 Watch t...

Page 72: ...cted function will appear in the display 2 Press the CATEGORY and but tons as many times as necessary to select the master EQ type function Master EQ Type The currently selected EQ type will appear 3 Use the dial to select the desired Master EQ setting Five settings are available 1 5 Settings 1 and 2 are best for listening via the instrument s built in speakers setting 3 is for headphones and sett...

Page 73: ...2 and 12 as required Small Pitch Changes Tuning The overall tuning of the instrument can by shifted up or down by a maximum of 100 cents in 1 cent increments 100 cents 1 semitone 1 Press the FUNCTION button 2 Use the CATEGORY and but tons to select the Tuning item 3 Use the dial to set the tuning value between 100 and 100 as required Pitch Controls f r Transpose item Can be set between 12 and 12 T...

Page 74: ... accompaniment shifts to the main section The length of the intro in measures differs depending on the selected Style MAIN section This is used for playing the main part of the Song It plays a main accompaniment pattern and repeats indefinitely until another section s button is pressed There are two variations on the basic pattern A and B and the Style playback sound changes harmonically based on ...

Page 75: ...ted Style starts For this example play a C major chord as shown below For information on how to enter chords see Playing Auto accompaniment Chords on page 28 Synchro Start When the synchro start standby mode is engaged style playback will begin as soon as you play a chord in the accompaniment range of the keyboard You can disengage the synchro start standby mode by pressing the SYNC START button a...

Page 76: ...nt stops automatically You can have the ending gradually slow down ritardando by pressing the INTRO ENDING rit button again while the ending is playing back Synchro Stop When this function is selected the accompaniment style will only play while you are playing chords in the accompaniment range of the keyboard Style playback will stop when you release the keys To turn the function on press the SYN...

Page 77: ...nt item 3 Use the dial to set the split point to any key from 000 C 2 through 127 G8 Setting the Split Point f r Split point 54 F 2 Main voice Split voice When you change the split point the auto accompaniment split point also changes The split point cannot be changed during a song lesson The split voice sounds when the split point key is played NOTE You can also access the Split Point item by pre...

Page 78: ...ent and any of the chord fingerings recognized by the instrument can be used page 28 Press the ACMP ON OFF button to turn auto accompaniment on after pressing the STYLE button Press the STYLE button to engage the style function 1 Press the FUNCTION button 2 Use the CATEGORY and but tons to select the Style Volume item 3 Use the dial to set the style volume between 000 and 127 Play a Style with Cho...

Page 79: ...ange the order of the notes to create different inversions Successive chords in a chord progression can be smoothly connected for example by choosing the appropriate inversions or chord voicings Reading Chord Names Chord names tell you just about everything you need to know about a chord other than the inversion voicing The chord name tells you what the root of the chord is whether it is a major m...

Page 80: ...nth flatted ninth 7 b9 1 b2 3 5 b7 C7b9 Seventh add flatted thirteenth 7 b13 1 3 5 b6 b7 C7b13 Seventh ninth 7 9 1 2 3 5 b7 C79 Seventh add sharp eleventh 7 11 1 2 3 4 5 b7 or 1 2 3 4 5 b7 C7 11 Seventh add thirteenth 7 13 1 3 5 6 b7 C713 Seventh sharp ninth 7 9 1 2 3 5 b7 C7 9 Seventh flatted fifth 7b5 1 3 b5 b7 C7b5 Seventh augmented 7aug 1 3 5 b7 C7aug Seventh suspended fourth 7sus4 1 4 5 b7 C7...

Page 81: ... to the USB TO DEVICE connector Refer to Transferring Performance Data to and from a Computer on page 100 for details on the file transfer proce dure If you use a USB flash memory refer to Loading User Files and Style Files on page 95 In Play Along with a Style on page 24 we described a method of playing styles in which chords were detected only to the left of the keyboard split point By making th...

Page 82: ...he display both as notation and in the keyboard diagram To call up possible inversions of the chord press the buttons 4 Try playing a chord in the auto accom paniment section of the keyboard checking the indications in the display When you ve played the chord properly a bell sound signals your success and the chord name in the display flash Press the EXIT button to return to the MAIN display Looki...

Page 83: ...A B REPEAT button a sec ond time at the end of the section you want to repeat the B point 3 The specified A B section of the song will now play repeatedly You can stop repeat playback at any time by pressing the A B REPEAT button Song Volume f r Can be set between 000 and 127 Song volume item Song volume can be adjusted while a song is selected NOTE A B Repeat A B The repeat start and end points c...

Page 84: ...ss the lesson L and R buttons simul taneously so that LR appears in the upper right corner of the MAIN display Select the song and play it 1 Press the VOICE button for longer than a second The VOICE SELECT MELODY R or MEL ODY L display will appear so you can select the Melody R or Melody L voice Pressing the VOICE button alternates between VOICE SELECT MELODY R and MELODY L 2 Use the dial to selec...

Page 85: ...to store the current panel settings to the specified registration memory Press the EXIT button to return to the MAIN display in order to check the bank and registra tion memory numbers 8 Banks Memory 1 Up to 16 presets eight banks of two each can be memorized Memory 2 Saving to the Registration Memory Bank number Data cannot be saved to the registration memory during song play back NOTE Bank numbe...

Page 86: ...lling a Registration Memory Bank number Settings That Can be Saved to the Registra tion Memory Style settings Style number Auto Accompaniment ON OFF Split Point Style settings Main A B Style Volume Tempo Chord Fingering Voice settings Main Voice setting Voice number Volume Octave Pan Reverb Level Chorus Level Dual Voice settings Dual ON OFF Voice number Volume Octave Pan Reverb Level Chorus Level ...

Page 87: ...ATEGORY and buttons as many times as necessary until the function s display name appears in the display 4 Use the dial the and buttons or the 0 9 number buttons to set the selected function as required The and buttons are used to make ON OFF type settings ON OFF In some cases the button will initiate execu tion of the selected function and the will cancel the selection Function settings are stored...

Page 88: ...al is sent to the Reverb effect Main Chorus Level 000 127 Determines how much of the Main voice s signal is sent to the Chorus effect DUAL VOICE Dual Volume 000 127 Determines the volume of the Dual voice Dual Octave 2 2 Determines the octave range for the Dual voice Dual Pan 000 left 64 center 127 right Determines the pan position of the Dual voice in the stereo image The value 0 results in the s...

Page 89: ... Sets the length of each metronome beat Metronome Volume 000 127 Determines the volume of the Metronome SCORE Quantize 1 1 4 note 2 1 4 note triplet 3 1 8 note 4 1 8 note triplet 5 1 16 note 6 1 16 note triplet 7 1 32 note 8 1 32 note triplet Depending on the song data you can make the score more readable by adjusting the timing of the notes This determines the minimum timing resolution used in th...

Page 90: ...nd from them Before using a USB device read through the Precautions when using the USB TO DEVICE terminal sec tion on page 99 For information about USB devices compatible with the instrument see Connection to a USB Storage Device on page 97 If you don t have a USB flash memory you will need to purchase one or more as needed The instrument does not necessarily support all commercially available USB...

Page 91: ...played as song numbers 036 535 page 32 Songs stored in third level folders created inside a second level folder cannot be selected and played by this instrument USB flash memory Root Song File Song File Song File Can be selected played Cannot be selected played Song File IMPORTANT Menu Reference Page Format 92 Save 93 SMF Save 94 Load 95 Delete 96 A message information or confirmation dialog somet...

Page 92: ...tion 5 Press the EXECUTE button again or the button and the format operation will begin 6 A message will appear on the display to inform you that the operation has fin ished Press the EXIT button to return to the MAIN display Formatting USB Flash Memory If you format a USB flash memory that already contains data all of the data will be erased Be careful not to erase important data when using the f...

Page 93: ... on the display to inform you that the operation has fin ished Press the EXIT button to return to the MAIN display Saving Data To Overwrite an Existing File If you want to overwrite a file that already exists on the USB flash memory use the dial or the and buttons to select the file then skip ahead to step 6 f r Up to 100 user files can be saved to a single USB flash memory If the USB flash memory...

Page 94: ...ration will begin The user song will be stored to the USER FILE folder in the USB flash memory 10 A message will appear on the display to inform you that the operation has fin ished Press the EXIT button to return to the MAIN display Convert a User Song to SMF Format and Save What is SMF Standard MIDI File The SMF Standard MIDI File format is one of the most common and widely compatible sequence f...

Page 95: ...played first followed by the style files 5 Press the EXECUTE button The dis play prompts you for confirmation You can cancel the load operation at this point by pressing the button 6 Press the EXECUTE button again or the button and the load operation will begin 7 A message will appear on the display to inform you that the operation has fin ished Press the EXIT button to return to the MAIN display ...

Page 96: ...e EXECUTE button again or the button and the delete operation will begin 7 A message will appear on the display to inform you that the operation has fin ished Press the EXIT button to return to the MAIN display 1 Make sure that the USB flash memory containing the song you want to play has been properly connected to the instrument s USB TO DEVICE terminal and that the icon is showing in the MAIN di...

Page 97: ...amaha dealer or an authorized Yamaha distributor see list at end of the Owner s Manual for advice Connection to a USB storage device Connectors w q Connection to a USB Storage Device Avoid frequently turning the power on off to the USB storage device or connecting disconnecting the cable too often Doing so may result in the operation of the instrument freezing or hang ing up While the instrument i...

Page 98: ...rom the hard disk of the computer Once you ve copied the data connect the device to the USB TO DEVICE terminal of the instrument and play back the MIDI songs or load the user file or style file on the instrument Disconnect the USB storage device from the instrument and connect it to the computer Saves internal data to a USB storage device USB TO DEVICE terminal Instrument USB storage device Backin...

Page 99: ... a USB cable Failure to do so can cause the instrument and or the computer to hang up freeze possibly causing corruption or loss of data If the instrument or computer does hang up turn the power to both devices off and then on again and restart the computer Connecting a Personal Computer USB cable Instrument Computer Wake the computer from a sleep suspended standby mode before connecting the USB c...

Page 100: ...t notes played on the instrument are sounded by its internal tone generator system the internal tone generator is active when local control is on and inactive when local control is off External Clock ON OFF These settings determine whether the instrument is synchronized to its own internal clock OFF or to a clock signal from an external device ON Keyboard Out ON OFF These settings determine whethe...

Page 101: ...k application on your computer via the USB connection controlling playback stop and transport functions from the panel Remote control keys To use the remote control functions simulta neously hold down the lowest two keys on the key board A 1 and A 1 and press the appropriate key shown below PC1 PC2 OFF Local OFF OFF ON External Clock ON OFF OFF Song Out OFF OFF OFF Style Out OFF OFF OFF Keyboard O...

Page 102: ...need to install the Musicsoft Downloader application and the USB MIDI Driver included on the Accessory CD ROM on your computer Refer to the Accessory CD ROM Installation Guide on page 105 for installa tion details With the Musicsoft Downloader You Can Transfer MIDI songs you have downloaded from the Internet or created on your computer from the computer to the instrument s flash memory refer to th...

Page 103: ...t to transfer to the instrument and click Open 6 A copy of the selected MIDI song file will appear in the List of files stored temporarily at the top of the window The memory medium will also be displayed at the bottom of the window to specify the desti nation for the transfer Click Instrument and then Flash memory 7 After selecting the file in the List of files stored temporarily click the downwa...

Page 104: ...ns it is necessary to specify which channels are to be played back as the right hand and left hand parts 1 Press the SONG button and select the song 036 residing in flash memory for which you want to set the guide track 2 Press the FUNCTION button 3 Use the CATEGORY and buttons to select the R Part or L Part item 4 Use the dial to select the channel you want to play back as the specified right or ...

Page 105: ...presentations or warranties with regard to the use of the software and documentation and can not be held responsible for the results of the use of this manual and the software This disk is a CD ROM Do not attempt to play the disk on an audio CD player Doing so may result in irreparable damage to your audio CD player Future upgrades of application and system software and any changes in specificatio...

Page 106: ...ata Name Contents q MSD_ Musicsoft Downloader This application can be used to download MIDI song data from the Internet and transfer it from the computer to the instrument s memory w DMN_FlashDemo Flash Demo Digital Music Notebook is an educational content that lets you enjoy music while learning Full motion demo software which introduces all features of the Digital Music Notebook DMN_DemoSong Dem...

Page 107: ...ndows 2000 XP Windows 2000 XP Home Edition XP Professional Digital Music Notebook Windows XP Professional Edition SP1a more Windows XP Home Edition SP1a more Windows 2000 Professional SP4 more 400MHz or higher Intel Pentium Celeron Processor family 1GHz or more is recommended 128 MB or more 256 MB or more is recommended at least 50 MB of free space 1024 x 768 HighColor 16 bit Digital Music Noteboo...

Page 108: ...starts the installation 8 When installation is complete a message indicating so appears Click Finish The driver has been installed Installing the driver on Windows 2000 1 Start the computer and use the Adminis trator account to log into Windows 2000 2 Select My Computer Control Panel System Hardware Driver Sign ing File Signature Verification and check the radio button to the left of Ignore Instal...

Page 109: ...Wizard window The USB MIDI driver installation is complete Installing the Musicsoft Downloader and Digital Music Notebook Applications 1 Insert the Accessory CD ROM into your computer s CD ROM drive The start win dow will appear automatically showing software applications 2 Click Musicsoft Downloader or Digital Music Notebook 3 Click the install button or Digital Music Notebook Download button and...

Page 110: ...Remove the USB cable from the instru ment and make the connection again 5 Install the driver again Windows 98 Me users see page 108 Windows 2000 users see page 108 Windows XP users see page 109 Did you install the driver page 107 Is the USB cable connected correctly Are the volume settings of the instrument playback device and application program set to the appropriate levels Have you selected an ...

Page 111: ...authorizedYamaha dealer within fourteen days with a copy of the receipt Yamaha is not responsible for replacing media dam aged by accident abuse or misapplication TO THE FULLEST EXTENT PERMITTED BY LAW YAMAHA EXPRESSLY DISCLAIMS ANY IMPLIED WARRANTIES ON THE TANGIBLE MEDIA INCLUDING THE IMPLIED WARRANTIES OF MERCHANTABILITY AND FITNESS FOR A PARTICULAR PURPOSE 5 DISCLAIMER OF WARRANTY ON SOFTWARE ...

Page 112: ... at an appropriate key for the chords you are play ing Set the split point at an appropriate key page 77 Is the ACMP indicator showing in the display If it is not showing press the ACMP ON OFF button so that it does show No rhythm accompaniment plays when the START STOP button is pressed after selecting style number 121 or a style between 133 and 150 Pianist This is not a malfunction Style number ...

Page 113: ...E ASSISTANT button to turn it off The ACMP indicator does not appear when the ACMP ON OFF button is pressed Is the STYLE button lit Always press the STYLE button first when you are going to use any style related function There is no harmony sound The harmony effects 01 26 behave differently according to their type Types 01 05 function when style playback is on chords are played in the accompanimen...

Page 114: ...nd Displayed when the transmission of Initial Send has been completed Error Displayed when writing has failed File information area is not large enough Indicates that saving data in the media cannot be executed since the total number of files have become too many File is not found Indicates there is no file File too large Loading is impossible Indicates that loading data cannot be executed since t...

Page 115: ...that saving data cannot be executed since the folder directory structure has become too complicated The media is not formatted Indicates the inserted media has not been formatted The media is write protected Indicates that the inserted media cannot be written since it is write pro tected Set to the write protect switch to the overwrite position before use The song data is too large to be converted...

Page 116: ...l pro vide you with safe and prolonged use Be careful not to confuse parts and be sure to install all parts in the correct direction Please assemble in accordance with the sequence given below Assembly should be carried out by at least two persons Be sure to use the correct screw size as indicated above Use of incorrect screws can cause damage Use the stand after assembly is complete An uncomplete...

Page 117: ...y aligned with the holes on the angle brackets b Install the keyboard to the stand Fix the keyboard to the angle brackets using the 5 x 16 mm roundhead screws r 2 e 6 x 30 mm roundhead screw 3 y 4 x 45 mm flathead screws t Support rail 4 5 r 5 x 16 mm roundhead screws Post assembly checklist Once you ve assembled the stand check the fol lowing points Are there any parts left over If so read the as...

Page 118: ...20 YPG 625 525 Owner s Manual Scores This demo is an example of how the Easy Song Arranger can be used to change styles throughout a piece Hallelujah Chorus Song No 9 q q q q 123 Function Demo for Easy Song Arranger ...

Page 119: ...Scores DGX 620 520 YPG 625 525 Owner s Manual 119 ...

Page 120: ...mance assistant technol ogy feature If you play the Play These Notes part using the performance assistant technology feature the part will be corrected and played so that it matches the backing part Ave Maria Song No 10 q q q q 61 Function Demo for performance assistant technology Repeatedly Play the Same Key P A T Your Turn Type CHORD ...

Page 121: ...Scores DGX 620 520 YPG 625 525 Owner s Manual 121 ...

Page 122: ...by the performance assistant technol ogy feature If you play the Play These Notes part using the performance assistant technology feature the part will be corrected and played so that it matches the backing part Nocturne op 9 2 Song No 11 q q q q 108 Function Demo for performance assistant technology P A T Type CHORD FREE ...

Page 123: ...Scores DGX 620 520 YPG 625 525 Owner s Manual 123 ...

Page 124: ...0 16 2 Organ 028 000 120 020 16 4 Organ 029 000 113 020 Chapel Organ 030 000 112 020 Church Organ 031 000 112 021 Reed Organ ACCORDION 032 000 112 022 Musette Accordion 033 000 113 022 Traditional Accordion 034 000 113 024 Bandoneon 035 000 113 023 Modern Harp 036 000 112 023 Harmonica GUITAR 037 000 112 025 Classical Guitar 038 000 112 026 Folk Guitar 039 000 112 027 Jazz Guitar 040 000 117 028 6...

Page 125: ...Name MSB 0 127 LSB 0 127 161 000 000 008 Clavi 162 000 001 008 Clavi KSP XG CHROMATIC 163 000 000 009 Celesta 164 000 000 010 Glockenspiel 165 000 000 011 Music Box 166 000 064 011 Orgel 167 000 000 012 Vibraphone 168 000 001 012 Vibraphone KSP 169 000 000 013 Marimba 170 000 001 013 Marimba KSP 171 000 064 013 Sine Marimba 172 000 097 013 Balimba 173 000 098 013 Log Drums 174 000 000 014 Xylophon...

Page 126: ...00 053 Choir Aahs 295 000 003 053 Stereo Choir 296 000 032 053 Mellow Choir 297 000 040 053 Choir Strings 298 000 000 054 Voice Oohs 299 000 000 055 Synth Voice Voice No Bank Select MIDI Program Change 1 128 Voice Name MSB 0 127 LSB 0 127 300 000 040 055 Synth Voice 2 301 000 041 055 Choral 302 000 064 055 Analog Voice 303 000 000 056 Orchestra Hit 304 000 035 056 Orchestra Hit 2 305 000 064 056 I...

Page 127: ...13 Bonang 432 000 097 113 Altair 433 000 098 113 Gamelan Gongs Voice No Bank Select MIDI Program Change 1 128 Voice Name MSB 0 127 LSB 0 127 434 000 099 113 Stereo Gamelan Gongs 435 000 100 113 Rama Cymbal 436 000 000 114 Agogo 437 000 000 115 Steel Drums 438 000 097 115 Glass Percussion 439 000 098 115 Thai Bells 440 000 000 116 Woodblock 441 000 096 116 Castanets 442 000 000 117 Taiko Drum 443 0...

Page 128: ...om Rock 4 Tom Electro 4 Tom Analog 4 60 C 3 48 C 2 Mid Tom H Tom Room 5 Tom Rock 5 Tom Electro 5 Tom Analog 5 61 C 3 49 C 2 Crash Cymbal 1 Crash Analog 62 D 3 50 D 2 High Tom Tom Room 6 Tom Rock 6 Tom Electro 6 Tom Analog 6 63 D 3 51 D 2 Ride Cymbal 1 64 E 3 52 E 2 Chinese Cymbal 65 F 3 53 F 2 Ride Cymbal Cup 66 F 3 54 F 2 Tambourine 67 G 3 55 G 2 Splash Cymbal 68 G 3 56 G 2 Cowbell Cowbell Analog...

Page 129: ...46 A 1 1 Hi Hat Open Hi Hat Open Analog 2 59 B 2 47 B 1 Mid Tom L Tom Analog 4 Tom Jazz 4 Tom Brush 4 Tom Jazz 4 60 C 3 48 C 2 Mid Tom H Tom Analog 5 Tom Jazz 5 Tom Brush 5 Tom Jazz 5 61 C 3 49 C 2 Crash Cymbal 1 Crash Analog Hand Cymbal 62 D 3 50 D 2 High Tom Tom Analog 6 Tom Jazz 6 Tom Brush 6 Tom Jazz 6 63 D 3 51 D 2 Ride Cymbal 1 Hand Cymbal Short 64 E 3 52 E 2 Chinese Cymbal Flute Key Click C...

Page 130: ...troitPop1 069 60 sRock Roll 070 6 8Soul 071 CrocoTwist 072 Rock Roll 073 DetroitPop2 074 BoogieWoogie 075 ComboBoogie 076 6 8Blues COUNTRY 077 Country8Beat 078 CountryPop 079 CountrySwing 080 CountryBallad 081 Country2 4 082 CowboyBoogie 083 CountryShuffle 084 Bluegrass LATIN 085 BrazilianSamba 086 BossaNova 087 PopBossa 088 Tijuana 089 DiscoLatin 090 Mambo 091 Salsa 092 Beguine 093 GuitarRumba 09...

Page 131: ...SatinDll 127 SF Heart 128 ShearJz 129 SplnkyTb 130 SunnySde 131 TstHoney 132 Tunisia 133 TwoFoot5 134 USPatrol MDB No Song Name 135 WhatsNew 136 Wild Cat EASY LISTENING 137 BlackFst 138 ByeBlues 139 CaliBlue 140 CiaoCpri 141 Close2U 142 DAmorStr 143 DolanesM 144 ElCondor 145 Entrtain 146 Frippers 147 LoveLove 148 LuckySax 149 LuvStory 150 MyPrince 151 OSoleMio 152 PupetStr 153 Raindrop 154 RedMoul...

Page 132: ...itional 032Lomon mid Loch Lomond Traditional 033Bonni mid My Bonnie Traditional 034Londo mid Londonderry Air Traditional 035Banjo mid Ring de Banjo S C Foster 036Vogle mid Wenn ich ein Vöglein wär Traditional 037Lorel mid Die Lorelei F Silcher 038Funic mid Funiculi Funicula L Denza 039Turke mid Turkey in the Straw Traditional 040Campt mid Camptown Races S C Foster 041Jingl mid Jingle Bells J S Pie...

Page 133: ...te triplets 1 12 eighth note triplets 1 24 sixteenth note triplets The Trill effect Types 06 12 create two note trills alternating notes when two notes are held The Tremolo effect Types 13 19 repeat all held notes up to four The Echo effect Types 20 26 create delayed repeats of each note played 07 Trill 1 6 note 08 Trill 1 8 note 09 Trill 1 12 note 10 Trill 1 16 note 11 Trill 1 24 note 12 Trill 1 ...

Page 134: ...efault 3 3 Mode Messages x x Altered x Note 0 127 0 127 Number True voice 0 127 Velocity Note ON o 9nH v 1 127 o 9nH v 1 127 Note OFF x 9nH v 0 x After Key s x x Touch Ch s x x Pitch Bend o 0 24 semi o 0 24 semi 0 32 o o Bank Select 1 11 84 x 1 o 6 38 o o Data Entry 7 10 o o Control 64 o o Sustain 71 x 1 o Harmonic Content Change 72 o o Release Time 73 x 1 o Attack Time 74 x 1 o Brightness 91 93 o...

Page 135: ...x x Common Song Sel x x Tune x x System Clock o o Real Time Commands o o Aux All Sound OFF x o 120 126 127 Reset All Cntrls x o 121 Local ON OFF x o 122 All Notes OFF x o 123 125 Mes Active Sense o o sages Reset x x 1 Refer to 2 on page 136 Mode 1 OMNI ON POLY Mode 2 OMNI ON MONO o Yes Mode 3 OMNI OFF POLY Mode 4 OMNI OFF MONO x No ...

Page 136: ...ed for MIDI Master Tuning The default value of mm and ll are 08H and 00H respec tively Any values can be used for n and cc Reverb Type F0H 43H 1nH 4CH 02H 01H 00H mmH llH F7H mm Reverb Type MSB ll Reverb Type LSB Refer to the Effect Map page 136 for details Chorus Type F0H 43H 1nH 4CH 02H 01H 20H mmH llH F7H mm Chorus Type MSB ll Chorus Type LSB Refer to the Effect Map page 136 for details 4 When ...

Page 137: ... Type PC PC Mode MIDI Local On Off External Clock Initial Send Keyboard Out Style Out Song Out METRONOME Time Signature Numerator Time Signature Denominator Metronome Volume SCORE Quantize LESSON Lesson Track R Lesson Track L Grade UTILITY Demo Cancel Language Effects Reverb 9 types Chorus 4 types Harmony 26 types Song 30 Preset Songs 5 User Songs Accessory CD ROM Songs 70 Song Clear Track Clear S...

Page 138: ...1 Chord root 82 Chord type Chord Dictionary 82 Chord type performance assistant technology 35 36 Chord Free type performance assistant technology 35 38 Chord Melody type performance assistant technology 35 42 Chorus 68 Chorus Type 133 Computer 98 100 102 D Default Setting 87 Delete File Control 96 Delete Song Track 60 Delete User Song 59 Demo 46 Demo Cancel 89 Display 64 65 Double Staff Score 33 D...

Page 139: ...dard MIDI File 94 SMF Save 94 Song 29 Song Clear 59 Song List 31 Song Memory 56 57 Song Out 89 100 Song Volume 83 Specifications 137 Split Chorus Level 88 Split Octave 88 Split Pan 88 Split Point 17 77 Split Reverb Level 88 Split Voice 17 Split Volume 88 Standard Chords 28 Style 23 26 74 Style File 81 95 Style List 130 Style Out 89 100 Style Volume 78 Sustain Footswitch 10 Sustain Panel 69 88 Sync...

Page 140: ...the product for assistance You may also contact Yamaha directly at the address provided below 2 Deliver the unit to be serviced under warranty to the retailer selling the product an authorized service center or toYamaha with an explanation of the problem Please be prepared to provide proof purchase date sales receipt credit card copy etc when requesting service and or parts under warranty 3 Shippi...

Page 141: ...hou Street 112 55 Athens Greece Tel 01 228 2160 SWEDEN Yamaha Scandinavia AB J A Wettergrens Gata 1 Box 30053 S 400 43 Göteborg Sweden Tel 031 89 34 00 DENMARK YS Copenhagen Liaison Office Generatorvej 6A DK 2730 Herlev Denmark Tel 44 92 49 00 FINLAND F Musiikki Oy Kluuvikatu 6 P O Box 260 SF 00101 Helsinki Finland Tel 09 618511 NORWAY Norsk filial av Yamaha Scandinavia AB Grini Næringspark 1 N 13...

Page 142: ...Instrument Division Yamaha Corporation 2006 Yamaha Corporation WG29380 XXXPOXXX X 01A0 Printed in China Yamaha Home Keyboards Home Page English Only http music yamaha com homekeyboard Yamaha Manual Library http www yamaha co jp manual ...

Reviews: