Yamaha Clavinova CLP-150 Owner'S Manual Download Page 74

74

CLP-170/150

Detailed settings for recording and playback [SONG SETTING]

This parameter enables you to specify whether a 
song that starts from the middle of a bar, or a song 
with a silence prior to the first note, should be 
played from the first note or from the top of the bar 
(rest or blank). 
See the procedure on page 71.

Setting range:

[On] Playing from the first note
[Off] Playing from the top of the bar (including a 

rest or blank)

You can select a single channel to listen to its con-
tents. Playback starts from the first note.
See the procedure on page 71.

Setting range:

Ch1 - Ch16

Usually, channels that do not contain any data are not 
displayed. However, for some songs, all channels 
(including the channels that contain no data) may be dis-
played.

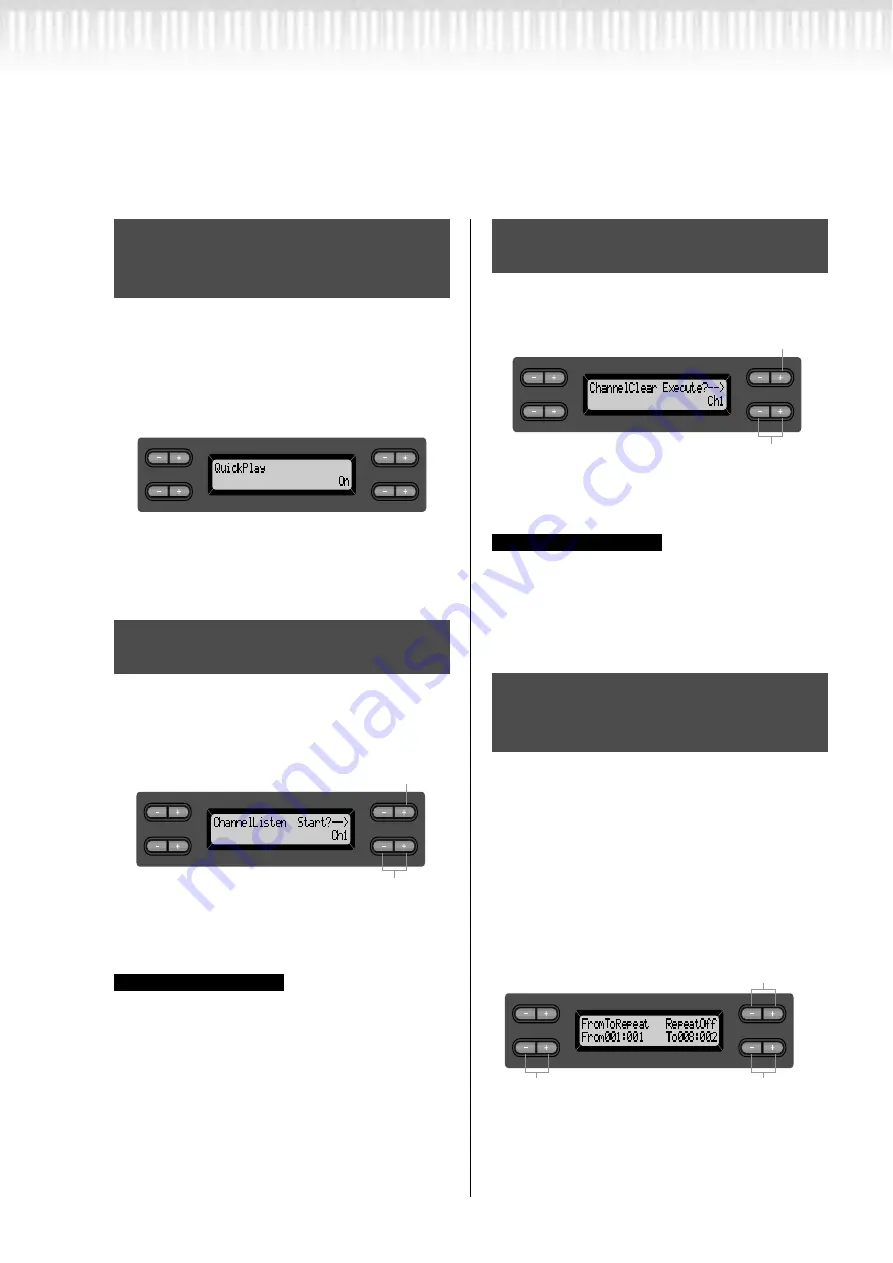
You can delete data from each of 16 channels.
See the procedure on page 71.

Setting range:

Ch1 - Ch16, ALL (all channels)

• Channels that do not contain any data are not dis-

played. However, for some songs, all channels 
(including the channels that contain no data) may be 
displayed.

• Save the edited song data to memory or disk (CLP-

170). (See page 48.)

You can specify a range (in steps of beats) in a song 
to play back repeatedly.
• Playback repeats after it reaches just prior to the 

beat specified as the end point.

• If you start playing back a song with “Repeat 

On” selected, the count down starts, followed by 
the repeated playback of the specified part until 
you press the [TOP] button.

• If you select “Repeat Off,” normal playback starts.
See the procedure on page 71.

Specifying whether playback 
starts immediately along with 
the first voicing [QuickPlay]

Auditioning the channels 
[ChannelListen]

C

A

D

B

NO

YES

C

A

D

B

Use these buttons to select the 
desired channel for playback.

Playback continues as long 
as you press and hold down this button.

NO

YES

TIP

Deleting data from each chan-
nel [ChannelClear]

Specifying the range and play-
ing back repeatedly [From-
ToRepeat]

C

A

D

B

Press this button to delete data.

Use these buttons to select the 
desired channel for deletion.

NO

YES

TIP

C

A

D

B

Use these buttons 
to specify the end point 
of the repeated range.

Use these buttons to select “Repeat On.”

Use these buttons 
to specify the start point 
of the repeated range.

NO

YES

Summary of Contents for Clavinova CLP-150

Page 1: ...oltage in your area The voltage selector is set at 240V when the unit is initially shipped To change the setting use a minus screwdriver to rotate the selector dial so that the correct voltage appears next to the pointer on the panel Clavinova Web site English only http www yamahaclavinova com Yamaha Manual Library http www2 yamaha co jp manual english M D G Pro Audio Digital Musical Instrument Di...

Page 2: ...erely believe that our products and the production methods used to produce them meet these goals In keeping with both the letter and the spirit of the law we want you to be aware of the following Battery Notice This product MAY contain a small non rechargable battery which if applicable is soldered in place The average life span of this type of battery is approximately five years When replacement ...

Page 3: ...off the power switch disconnect the electric plug from the outlet and have the instrument inspected by qualified Yamaha service personnel CAUTION Always follow the basic precautions listed below to avoid the possibility of physical injury to you or others or damage to the instrument or other property These precautions include but are not limited to the following When removing the electric plug fro...

Page 4: ...ectors Do not operate the instrument for a long period of time at a high or uncomfortable volume level since this can cause permanent hearing loss If you experience any hearing loss or ringing in the ears consult a physician Do not place the bench in an unstable position where it might accidentally fall over Do not play carelessly with or stand on the bench Using it as a tool or step ladder or for...

Page 5: ... The illustrations and LCD screens as shown in this Owner s Manual are for instructional purposes only and may appear somewhat different from those on your instrument Copying of the commercially available software is strictry prohibited except for your personal use Trademarks Apple and Macintosh are trademarks of Apple Computer Inc registered in the U S and other countries Windows is the registere...

Page 6: ...s 22 Listening to 50 Piano Preset Songs 24 Playing the 50 piano preset songs 24 Practicing a one hand part using 50 preset songs 26 Selecting and Playing Voices 28 Selecting Voices 28 Using the pedals 29 Adding variation to the sound BRILLIANCE REVERB CHORUS 30 To enhance the acoustic realism of the sound iAFC Instrumental Active Field Control CLP 170 32 Combining two voices Dual mode 33 Splitting...

Page 7: ...k on and off 57 Supported song data type 57 Connections 59 Connectors 59 Connecting a personal computer 61 Detailed Settings 67 Detailed Settings 68 Parameter List 68 Making detailed settings 71 Detailed settings for recording and playback SONG SETTING 73 Correcting note timing Quantize 73 Specifying whether playback starts immediately along with the first voicing QuickPlay 74 Auditioning the chan...

Page 8: ...ype 85 Adjusting the iAFC depth iAFC Depth 85 Calibration automatic adjustment Calibration 86 Restoring the default iAFC settings iAFC Default 86 MIDI MIDI SETTING 87 About MIDI 87 Setting the MIDI transmit channel MidiOutChannel 88 Setting the MIDI receive channel MidiInChannel 88 Setting Local control on off LocalControl 89 Selecting performance from the keyboard or song data for MIDI transmissi...

Page 9: ...ing the normal default settings FactorySet 95 Other method for restoring the normal settings 95 Message List 96 Questions about Operations and Functions 102 Appendix 105 Troubleshooting 106 Data Compatibility 107 Preset Voice List 109 Voice Combination Examples Dual and Split 111 CLP 150 Keyboard Stand Assembly 112 CLP 170 Keyboard Stand Assembly 115 Index 118 ...

Page 10: ...of voices Preset Voice List on page 109 Simulating a concert hall REVERB on page 31 Combining two voices Combining two voices Dual mode on page 33 Playing different sounds with left and right hands Splitting the keyboard range and playing two different voices Split mode on page 35 Making a voice brighter and sharper or softer and smoother BRILLIANCE on page 30 Adding spread to the sound CHORUS on ...

Page 11: ... AUX OUT R L Pin jacks LEVEL FIXED R L L R Phone jacks on page 60 Outputting other instruments sound from the Clavinova AUX IN R L L R jacks on page 60 Connecting a computer Connecting a personal computer on page 61 Assembling Assemble disassemble the Clavinova CLP 150 Keyboard Stand Assembly on page 112 CLP 170 Keyboard Stand Assembly on page 115 Quick solution What the Clavinova offers Applicati...

Page 12: ...ng the eject button once again or push the disk back into the slot and then repeat the eject procedure Be sure to remove the floppy disk from the disk drive before turning off the power A floppy disk left in the drive for extended periods can easily pick up dust and dirt that can cause data read and write errors Cleaning the Disk Drive Read Write Head Clean the read write head regularly This instr...

Page 13: ...e tuned It always stays perfectly in tune Transporting If you move to another location you can transport the Clavinova along with your other belongings You can move the unit as it is assembled or you can disassemble the unit Transport the keyboard horizontally Do not lean it up against a wall or stand it up on its side Do not subject the instrument to excessive vibration or shock The CLP 170 featu...

Page 14: ...ing and other music applications page 61 66 Connect the pedal cord here to use the Clavinova s pedals page 110 115 This connector can be connected to your computer allowing you to transfer MIDI data between the Clavinova and the computer page 59 You can output the sound of the Clavinova from an exter nal audio system or connect it to a cassette tape recorder etc and record your playing page 60 Fea...

Page 15: ...ailed MIDI settings such as MIDI receive transmit channels page 87 FILE Save recorded songs and manage song files page 46 METRONOME Use the metronome functions page 37 The Clavinova includes 50 preset songs This section enables you to listen to these songs prac tice using a convenient practice function play back Clavinova music data sold in music stores and re cord and play back your performance p...

Page 16: ...try to use the music rest in a half raised position When lowering the music rest do not release your hands from the music rest until it is all the way down About the music braces These braces are for holding the pages of music books in place Be careful to avoid catching your fingers when opening or closing the cover CAUTION Hold the cover with both hands when opening or closing it Do not release i...

Page 17: ...aha dealer The use of an inappropriate replacement can pose a fire and shock hazard The type of AC power cord provided with the CLP 170 150 may be different depending on the country in which it is purchased In some areas a plug adaptor may be provided to match the pin configuration of the AC wall outlets in your area Do NOT mod ify the plug provided with the CLP 170 150 If the plug will not fit th...

Page 18: ...eadphone hanger using included two screws 4 10mm as shown in the figure CAUTION Do not hang anything other than the headphones on the hanger Otherwise the Clavi nova or the hanger may be damaged Performing the iAFC automatic adjustment CLP 170 The CLP 170 features an iAFC Instrumental Active Field Control effect This produces sound from the speaker located on the rear of the Clavinova enhancing th...

Page 19: ...CLP 170 150 19 Basic Operation ...

Page 20: ... GRAND PIANO 2 JAZZ ORGAN HARPSI CHORD SYNTH PAD VIBRA PHONE VOICE SETTING MIDI SETTING OTHER SETTING iAFC SETTING iAFC D B NO YES E BASS XG GUITAR E CLAVI CHORD WOOD BASS VOICE EXIT CONTRAST EFFECT 6 2 3 4 5 7 8 9 0 A B E F G H I J K N P L M O Q 1 R S T U C D C D CLP 170 _ a Center C C0 D0 E0 F0 G0 A0 B0 C1 D1 E1 F1 G1 A1 B1 C2 D2 E2 F2 G2 A2 B2 C3 D3 E3 F3 G3 A3 B3 C4 D4 E4 F4 G4 A4 B4 C5 D5 E5 ...

Page 21: ...ol CLP 170 This is functionality that uses a multi channel speaker system to generate three dimensional acoustical effects from musical instruments C LCD buttons D LCD Use the LCD button A B C or D to select the contents dis played on the LCD Check the screen located in the center of the top panel after every operation A voice name appears on the screen when you turn on the power to the unit F EXI...

Page 22: ... the DEMO button to engage the demo mode The indicators of the voice group buttons will blink in succession Voice group Tunes Composer GRAND PIANO1 Consolation No 3 F Liszt HARPSICHORD Gavotte J S Bach DEMO TEMPO SONG BALANCE MASTER VOLUME SONG KEYBOARD VARIATION BRIGHT MELLOW BRILLIANCE GRAND PIANO 1 CHURCH ORGAN E PIANO 1 STRINGS E PIANO 2 CHOIR SPLIT CHORUS REVERB GRAND PIANO 2 JAZZ ORGAN HARPS...

Page 23: ...g down DEMO and pressing A to get the Piano Demo display you can hear the piano demo iAFC demo CLP 170 The piano demo lets you compare the result of enabling dis abling each sampling technology The iAFC demo CLP 170 lets you compare three iAFC types The demo songs are assigned to the sound buttons as follows GRAND PIANO1 Stereo Piano stereo sampling GRAND PIANO2 Mono Piano mono sampling E PIANO1 m...

Page 24: ...R VOLUME SONG KEYBOARD VARIATION BRIGHT MELLOW BRILLIANCE GRAND PIANO 1 CHURCH ORGAN E PIANO 1 STRINGS E PIANO 2 CHOIR SPLIT CHORUS REVERB GRAND PIANO 2 JAZZ ORGAN HARPSI CHORD SYNTH PAD VIBRA PHONE VOICE SETTING MIDI SETTING OTHER SETTING SONG SETTING FILE SETTING START STOP UP DOWN E BASS XG GUITAR E CLAVI CHORD WOOD BASS VOICE TRACK 1 TOP EXTRA TRACKS TRACK 2 START STOP SONG SELECT NEW SONG SYN...

Page 25: ...ps when you press the button Fast forward and rewind You can perform the following operations in the song select screen If you have selected a disc song CLP 170 and there is a folder before the song the folder will appear on the dis play when you press the SONG SELECT buttons or C buttons during song playback Use the B buttons to move back and forth rewind and fast for ward through the song while ...

Page 26: ...en playback on and off 2 Start playback and playing Press the SONG START STOP button to start playback Play the part you just turned off Synchro Synchronous occurring at the same time Starting playback automatically as you start playing the keyboard Synchro Start You can cause playback to begin when you play the keyboard Syn chro Start Hold down TOP and press SONG START STOP The SONG START STOP in...

Page 27: ...t automatically stops and the Clavinova locates the top of the song If you wish to stop playback in the middle of a song press the TOP button You can also pause playback by pressing the SONG START STOP button Playback stops when you press the button TIP You can also assign a phrase in a song to repeatedly practice that part Refer to the FromToRepeat option in the SONG SETTING menu on page 74 ...

Page 28: ...s located beside the XG voice name display to access a screen where you can select XG voices 2 2 Use A to select the voice group 2 3 Use C to select the desired voice For details on XG voices refer to XG voice list the separate data list booklet DEMO TEMPO SONG BALANCE MASTER VOLUME SONG KEYBOARD VARIATION BRIGHT MELLOW BRILLIANCE GRAND PIANO 1 CHURCH ORGAN E PIANO 1 STRINGS E PIANO 2 CHOIR SPLIT ...

Page 29: ...meter in the OTHER SETTING menu See page 93 Sostenuto center pedal If you play a note or chord on the keyboard and press the sostenuto pedal while holding the note s the notes will sustain as long as the pedal is held All subsequent notes will not sustain You can assign a function to each pedal via the R Pedal M Pedal and L Pedal parameters in the VOICE SETTING menu See pages 83 84 The center and ...

Page 30: ...ted In this case lower the volume accordingly Press one of the BRILLIANCE MELLOW BRIGHT buttons to select the desired tonality Normal Standard tone Press the EXIT button to return to the main screen DEMO TEMPO SONG BALANCE MASTER VOLUME SONG KEYBOARD VARIATION BRIGHT MELLOW BRILLIANCE GRAND PIANO 1 CHURCH ORGAN E PIANO 1 STRINGS E PIANO 2 CHOIR SPLIT CHORUS REVERB GRAND PIANO 2 JAZZ ORGAN HARPSI C...

Page 31: ...rus Type param eter in the VOICE SET TING menu and adjust the chorus depth for the selected voice via the Reverb Send parameter You can also turn chorus on or off via the Chorus On Off parameter See page 79 Normal Setting The normal chorus on off setting is different for each voice Pressing the CHORUS button repeatedly toggles the cho rus on and off You can turn the chorus effect on and off by pre...

Page 32: ...m the rear speaker to enhance acoustic realism of the sound iAFC uses Yamaha s EMR Electronic Microphone Rotator technology to ensure stability against acoustic feedback iAFC cannot be used in the following cases When using iAFC do not block the speaker located on the rear panel of the Clavi nova The optimal iAFC effect cannot be obtained if this speaker is blocked iAFC SETTING lets you select the...

Page 33: ...ces listed in the upper row in Preset Voice List on page 109 are called voice 1 and those listed in the bottom row are called voice 2 3 Exit Dual mode and return to normal play mode Press any voice group button DEMO TEMPO SONG BALANCE MASTER VOLUME SONG KEYBOARD VARIATION BRIGHT MELLOW BRILLIANCE GRAND PIANO 1 CHURCH ORGAN E PIANO 1 STRINGS E PIANO 2 CHOIR SPLIT CHORUS REVERB GRAND PIANO 2 JAZZ OR...

Page 34: ... mode press the desired voice group but ton 2 Select a voice Use the A buttons to select a voice 3 Select another voice Use the B buttons to select another voice in the same voice group To use the identical voices press the B buttons once To use different voices within the same voice group press the B but tons repeatedly 4 Exit Dual mode and return to normal play mode Press any voice group button ...

Page 35: ...oice Combination Examples Dual and Split on page 111 for examples of effective voice combinations Procedure 1 Enter Split mode Press SPLIT You can also use A to select a voice for the right hand area Refer to page 28 for details on how to select XG voice 2 Select a voice for the right hand Use the voice group buttons and VARIATION to select the voice for the right hand area 3 Select a voice for th...

Page 36: ...point is F 2 To change the split point setting Hold down SPLIT then use the D to specify the split point Optional Press and hold down the SPLIT and play the key you wish to assign as the split point Release the SPLIT button to return to the main screen 5 Exit Split mode and return to normal play mode Press SPLIT TIP TIP You can use Dual see page 33 in each area right hand and left hand of Split mo...

Page 37: ... the TEMPO DOWN UP or the D buttons To reset the tempo to the normal default setting press the DOWN and UP keys or the D and keys simultaneously Press the EXIT button to return to the normal screen 2 Stop the metronome Press the METRONOME START STOP button DEMO TEMPO SONG BALANCE MASTER VOLUME SONG KEYBOARD VARIATION BRIGHT MELLOW BRILLIANCE GRAND PIANO 1 CHURCH ORGAN E PIANO 1 STRINGS E PIANO 2 C...

Page 38: ...he saved information Therefore recording on the Clavinova may be more accurately called saving information However this book often uses the word recording because it seems to make more sense A message information or confirmation dialog sometimes appears on the screen to facilitate operation Refer to the Message List on page 96 for an explanation of each message appropriate actions to take and trou...

Page 39: ...C or TOP button Set the tempo if necessary If this record standby screen does not appear press one of the SONG SELECT buttons once You can record data while using the metronome The metronome is not recorded When you press the SONG START STOP button dur ing recording recording is paused To resume record ing press the SONG START STOP button again or play a note on the key board 4 Start and stop reco...

Page 40: ...T STOP button Playback stops when you press the button Re recording TRACK 1 This section explains how to record again in case your performance was not satisfactory Procedure 1 Select a voice or voices for recording if necessary Repeat Step 2 on page 39 if you wish to change the previ ous settings Follow the procedure from Step 3 on page 39 to re record The original performance data will be overwri...

Page 41: ...ice or voices for recording if necessary Repeat Step 2 on page 39 if you wish to change the previ ous settings 3 Select the recording method and enter record mode 3 1 Press and hold down the REC button and press the C buttons repeatedly to specify how the recording should start and press the D buttons repeatedly to specify how the recording should end While you are holding down the REC button the ...

Page 42: ...1 but ton repeatedly toggles between playback on the indicator lights up in green and off the indicator turns off 2 Enter record mode and select a recording track Press and hold down the REC button and press the TRACK 2 button The TRACK 2 indicator flashes in red To cancel recording press the REC or TOP button Make the recording by following the procedure beginning with Step 4 on page 39 You can r...

Page 43: ...rom the beginning by selecting a blank P 000 NewSong You can also add your performance to or overwrite existing songs such as 50 preset songs P 001 P 050 commercially available music data see page 58 or your old recorded performances see page 46 Procedure If you record on a track that already has data the exist ing data on the track will be lost 1 Select a song for recording P 001 P 050 Select one...

Page 44: ...with caution 1 Select a song you wish to change by using the SONG SELECT buttons 2 To change the voice or tempo in the middle of the song specify the measure to change using the B buttons 3 Change the settings voice reverb etc For example if you wish to change the recorded E Piano1 voice to E Piano2 use the voice group buttons and the A buttons to select E Piano2 When the setting is complete press...

Page 45: ...acks are assigned to each voice CAUTION When you record multiple parts into tracks one by one or when you record new data over an existing song see page 43 the existing data will be erased Proceed with caution In the following example Tracks 1 2 and EXTRA TRACKn have been selected for recording Note TRACKn TRACK 3 TRACK 16 If n 1 n 2 and n 3 exceed 16 TRACKs 1 2 and 3 are used Switching between Du...

Page 46: ...eset songs Storage memory This memory area enables you to save recorded songs or song data loaded from floppy disk CLP 170 When you select a song in the song select screen it is loaded from Preset song memory Storage memory or floppy disk CLP 170 into Current memory You will use Current memory to play back and record songs When you turn off the power to the Clavinova songs saved in Preset song mem...

Page 47: ...SaveToMemory SaveToDisk CLP 170 DeleteSong Rename Song CopyDisk CLP 170 FormatDisk CLP 170 Floppy DiskSongAutoOpen CLP 170 CharacterCode 4 Set the parameter or execute the command Use the B NO YES C D buttons For more information regarding this procedure refer to the corre sponding section below 5 Close the File menu Press the EXIT button DEMO TEMPO SONG BALANCE MASTER VOLUME SONG KEYBOARD VARIATI...

Page 48: ...cters for a song name If the name is longer than the screen use the C buttons to move the cursor and scroll the name Execute Do you wish to execute the operation Sure Are you sure Executing The Clavinova is executing the operation Completed The operation is complete 4 2 Execute the operation Press the B YES button located next to Execute Sure appears on the screen Press the B YES button again to c...

Page 49: ... the save location When the Sure display appears press either C to display the folder Use C to select the folder You can use D to enter a folder Press D to return to the previous higher level Do not turn off the power or eject the floppy disk while the screen displays Execut ing See page 47 for basic operation information The following is a detailed pro cedure of Step 4 4 Make sure that a formatte...

Page 50: ... song data from Current memory However if you return to the song select screen song information other than the song name is replaced by After you delete a song the Clavinova automatically updates the song numbers When you delete a folder from disk all files within that folder will be deleted CLP 170 If a folder is displayed for a disk song CLP 170 the indicator is displayed in the lower right of t...

Page 51: ... Procedure Do not turn off the power or eject the floppy disk while the screen displays Execut ing After you rename a song the Clavinova sorts songs alphabetically and renum bers them See page 47 for basic operation information The following is a detailed pro cedure for Step 4 4 Name the song as described in the SaveToMemory section page 48 C A D B NO YES CAUTION TIP ...

Page 52: ...ation The following is a detailed pro cedure for Step 4 4 1 Make sure that a formatted floppy disk is inserted in the disk drive 4 2 Press the B YES button located next to Exe cute Insrt Target Disk Insert the destination tar get disk Do not turn off the power or eject the floppy disk while the screen displays Execut ing 4 3 When the screen indicates Insrt Target Disk eject the source disk and ins...

Page 53: ...avinova Procedure Refer to page 47 for the basic procedure Perform the following operations in step 4 4 1 Make sure that the formatted floppy disk is inserted in the disk drive Do not turn off the power or eject the floppy disk while the screen displays Execut ing 4 2 Press the B YES button located next to Exe cute Follow the instructions on screen C A D B NO YES CAUTION ...

Page 54: ... a disk Procedure Refer to page 47 for the basic procedure Perform the following operation in step 4 4 Use D to select ON or OFF Changing the type of characters on screen Char acterCode You can change the type of characters that appear on screen The default setting is International To input katakana change this setting to Japanese Options International Japanese Character list International Japanes...

Page 55: ...C or SONG SELECT buttons to select a song TIP TIP TIP DEMO TEMPO SONG BALANCE MASTER VOLUME SONG KEYBOARD VARIATION BRIGHT MELLOW BRILLIANCE GRAND PIANO 1 CHURCH ORGAN E PIANO 1 STRINGS E PIANO 2 CHOIR SPLIT CHORUS REVERB GRAND PIANO 2 JAZZ ORGAN HARPSI CHORD SYNTH PAD VIBRA PHONE VOICE SETTING MIDI SETTING OTHER SETTING SONG SETTING FILE SETTING START STOP UP DOWN E BASS XG GUITAR E CLAVI CHORD W...

Page 56: ...ume balance between the playback parts and your current performance using the SONG BALANCE slider See page 45 Press either of the SONG SELECT buttons to return to the song select screen Adjusting the tempo You can use the TEMPO DOWN UP buttons to adjust the playback tempo as required before or during playback The default tempo the song s original tempo is set when you press the DOWN and UP buttons...

Page 57: ...ese track buttons turn off the indicators and the data on those tracks will not be played Pressing the track buttons toggles track playback on and off You can play the part that is turned off Supported song data type Data formats that can be played on the CLP 170 150 The Clavinova CLP 170 150 plays song data in the following formats Disk format CLP 170 A structured method for writ ing data to disk...

Page 58: ...arrangement GM system level 1 voice arrangement DOC voice arrangement CLP 170 Performance data recorded with preset XG voices on the CLP 170 150 can be played on other XG compatible instruments See page 6 of the separate Reference Booklet for the XG voice list Refer to Data compatibility on page 107 for more information on formats TERMINOLOGY CLP170 150E book Page 58 Thursday October 31 2002 2 29 ...

Page 59: ...be assigned to a foot switch See page 94 2 MIDI IN OUT THRU connectors Use MIDI cables to connect external MIDI devices to these connectors Make sure you set the HOST SELECT switch described on the privious page to MIDI when you use these connectors 3 HOST SELECT switch This switch should be set according to the type of connected MIDI device or personal computer Refer to Connecting a personal comp...

Page 60: ...nd use audio cables for connec tion CAUTION When the Clavinova s AUX IN jacks are connected to an external device first turn on the power to the external divice then to the Clavinova Reverse this order when you turn the power off 7 AUX OUT R L Pin jacks LEVEL FIXED R L L R Phone jacks These jacks let you connect the Clavinova to your stereo system etc to play at higher volumes or connect a cassett...

Page 61: ...ns and switch settings turn on the power to the computer first then to the Clavinova If you are not using the connection between the Clavinova and your computer you must disconnect the cable from the TO HOST jack or USB jack The Clavinova may not operate correctly if a cable is left connected The connectors that can be used will depend on the setting of the HOST SELECT switch HOST SELECT switch se...

Page 62: ... port RS 232C or RS 422 to the Clavi nova s TO HOST jack TO HOST Windows Macintosh modem port Clavinova RS 232C D sub 9 pin TO HOST HOST SELECT MIDI Mac PC 2 USB Note for Windows users regarding the MIDI driver To transfer data via the computer s serial port and the Clavinova s TO HOST jack you need to install a specific MIDI driver the Yamaha CBX driver for Windows You can download this driver fr...

Page 63: ...re different settings Check your software operation manual and set the HOST SELECT switch to the proper data transfer rate 8 CTS 7 RTS 2 RxD 5 GND 3 TxD 1 2 3 4 8 5 Windows with a serial port of D sub 9 pin 8 pin mini DIN plug D sub 9 pin plug Yamaha CCJ PC2 or equivalent mini DIN 8 pin D sub 9 pin mini DIN 8 pin 2 HSK i 1 HSK O 5 RxD 4 GND 3 TxD 8 RxD 7 GP 6 TxD 1 2 3 4 5 6 7 8 mini DIN 8 pin Mac...

Page 64: ...face device to connect a computer to the Clavinova using special MIDI cables Clavinova HOST SELECT switch setting Set the Clavinova HOST SELECT switch to MIDI MIDI OUT MIDI IN CLP 170 THRU HOST SELECT MIDI Mac PC 2 USB OUT IN Windows Macintosh MIDI OUT MIDI OUT MIDI IN MIDI IN Clavinova MIDI interface MIDI interface ...

Page 65: ...nova accepts a B type connector Connect the A type connector of the USB cable to the USB port on your computer Connect the B type connector to the USB jack on the Clavinova Clavinova HOST SELECT switch setting Set the Clavinova HOST SELECT switch to USB Clavinova computer TO HOST USB HOST SELECT MIDI Mac PC 2 USB USB cable TIP About the USB driver You must install the specified USB driver YAMAHA U...

Page 66: ... causes it to enter an unstable state CAUTION If you turn the power of the Clavinova on off or connect disconnect the USB cable in the following states problems will occur in the computer system possibly causing it to freeze hang up or causing the Clavinova to stop functioning While installing the driver While starting up or shutting down the operating system While your computer is suspended sleep...

Page 67: ...CLP 170 150 67 Detailed Settings ...

Page 68: ...tings Parameter name Reference page Correcting note timing Quantize 73 Specifying whether playback starts immediately along with the first voicing QuickPlay 74 Auditioning the channels ChannelListen 74 Deleting data by each channel ChannelClear 74 Specifying the range and playing back repeatedly FromToRepeat 74 Playing back the phrase specified by the phrase number PhraseMark 75 Playing back a son...

Page 69: ...e speed of the rotary speaker RotarySpeed Rot Speed 81 Adjust the DSP effect depth DSPDepth 81 Adjust the brightness of the sound Brightness 81 Adjust the resonance effect HarmonicContent Harmonic 81 Adjust the low range frequency of the equalizer EQ LowFreq EQ L Freq 82 Adjust the low range gain boost cut of the equal izer EQ LowGain 82 Adjust the high range frequency of the equalizer EQ HighFreq...

Page 70: ...ne 91 Selecting a tuning curve for a piano voice PianoTuningCurve 91 Selecting a scale Scale 92 Specifying the Split Point Split Point 92 Change the key Transpose 92 Specify the depth of the Soft pedal SoftPedalDepth 93 Depth of string resonance StringResonanceDepth 93 Depth of sustain sampling for the damper pedal SustainSamplingDepth 93 Specify the volume of the key off sound KeyOffSamplingDepth...

Page 71: ...re options Use the B NO YES C and D buttons to select or set the option To restore the normal parameter value press the and buttons simultaneously DEMO TEMPO SONG BALANCE MASTER VOLUME SONG KEYBOARD VARIATION BRIGHT MELLOW BRILLIANCE GRAND PIANO 1 CHURCH ORGAN E PIANO 1 STRINGS E PIANO 2 CHOIR SPLIT CHORUS REVERB GRAND PIANO 2 JAZZ ORGAN HARPSI CHORD SYNTH PAD VIBRA PHONE VOICE SETTING MIDI SETTIN...

Page 72: ...el the operation press the B NO button instead of the B YES button If Set appears Press the B YES button to execute the setting The Clavinova dis plays Executing and saves the data When the operation is complete it displays Completed for three seconds then returns to the previ ous screen However the Completed display that appears when Calibration page 86 and VoiceBulkDump page 90 is finished will ...

Page 73: ...ute See the procedure on page 71 Notes for which you can adjust the timing If you select 1 8 or 1 16 for correction the Clavinova displays SwingRate xx which enables you to make the entire feel of a song more lively and swinging Setting range 0 100 If you select 1 8 for correction Save the edited song data to memory or CLP 170 only a disk See page 48 SONG SETTING Correcting note timing Quantize C ...

Page 74: ...data may be displayed Save the edited song data to memory or disk CLP 170 See page 48 You can specify a range in steps of beats in a song to play back repeatedly Playback repeats after it reaches just prior to the beat specified as the end point If you start playing back a song with Repeat On selected the count down starts followed by the repeated playback of the specified part until you press the...

Page 75: ...cified 1 the last phrase number of the song If you select any song other than those from the Disk Orchestra Collection or one of the XG for Piano disks you can select only Off You can repeatedly play back all songs or a single song selected from the 50 preset songs or from the floppy disks CLP 170 When you start playback the Clavinova plays the song you selected using the front panel then starts r...

Page 76: ...the procedure on page 71 Setting range BellOff Click standard metronome sound EnglishVoice Click and 1 2 3 4 in English GermanVoice Click and 1 2 3 4 in German JapaneseVoice Click and 1 2 3 4 in Japa nese FrenchVoice Click and 1 2 3 4 in French SpanishVoice Click and 1 2 3 4 in Spanish BellOn Click and bell To mute the beat count select BellOff METRONOME SETTING Setting the metronome time signatur...

Page 77: ...ttings Procedure 1 Select a voice and press the VOICE SETTING button to access the Voice Set ting menu 2 Press the A buttons to select the part for which you wish to change the voice The range of the displayed part varies depending on the selected voice Main MAIN voices displayed with a single voice or in Split mode Main Layer MAIN Voice 1 and Voice 2 displayed when the MAIN side is in Dual mode L...

Page 78: ...ear the sound See the procedure on page 71 In Dual mode Setting range L64 hard left C center R63 hard right The pitch of the two sounds selected in Dual mode can be skewed slightly away from each other See the procedure on page 71 Setting range 20 20 Positive settings will raise the pitch of the first sound and lower the pitch of the second sound Negative settings will do the opposite Setting the ...

Page 79: ...o 0 See the procedure on page 71 In Dual mode Setting range 0 127 You cannot set this parameter for the voice parts Left and Left Layer See the procedure on page 71 Setting range Chorus Adds a rich spacious sound Celeste Adds swell and a spacious sound Flanger Adds swell effects of an ascending or descending jet plane See the procedure on page 71 In Dual mode Setting range 0 127 Selecting the reve...

Page 80: ...aker Adds the vibrato effect of a rotary speaker Tremolo The volume level changes in rapid cycles VibeRotor The vibrato effect of a vibra phone AutoPan The sound pans left to right and back and forth Phaser The phase changes periodically swelling the sound AutoWah The center frequency of the wah filter changes periodically SoundBoardRev Simulates the reverberation of a piano soundboard Off No effe...

Page 81: ...ype settings do not allow you to set the DSPDepth See the procedure on page 71 Setting range 1 output only the original sound with almost no effect applied 127 output only the sound pro cessed by the effect See the procedure on page 71 Setting range 64 63 See the procedure on page 71 Setting range 64 63 Resonance can produce a distinctive peaky tone mak ing the sound brighter and harder Turning th...

Page 82: ...range 12 12 dB See the procedure on page 71 Setting range 500 Hz 16 0 kHz See the procedure on page 71 Setting range 12 12 dB Adjusting the low range fre quency of the equalizer EQ LowFreq EQ L Freq Adjusting the low range gain amount of boost cut of the equalizer EQ LowGain TERMINOLOGY Low Gain High Gain Low Freq High Freq C A D B NO YES Adjusting the high range fre quency of the equalizer EQ Hig...

Page 83: ... you press the pedal Sostenuto Sostenuto page 29 Soft Soft page 29 Expression A function that lets you create changes in dynamics volume as you play PitchBend Up A function that smoothly raises the pitch PitchBend Down A function that smoothly lowers the pitch RotarySpeed Change the rotational speed of the JazzOrgan rotary speaker switch between fast slow each time you press the pedal Viberotor Sw...

Page 84: ... Clavinova s AUX PEDAL jack See the procedure on page 71 Setting range Same as Right pedal function assignment page 83 Normal setting Expression YAMAHA FC7 foot controller This foot controller is suitable for controlling Expression SustainCont or PitchBend Up Down YAMAHA FC4 foot switch YAMAHA FC5 foot switch These foot switches are suitable for controlling Sustain Sostenuto Soft RotarySpeed or Vi...

Page 85: ...alSndBrd Natural Soundboard This creates the resonance and enhances the acous tic realism of the sound that is characteristic of acoustic instruments When used on a grand piano sound it produces a more natural sounding piano The sound of the instrument itself is picked up by a mic and processed to create a virtual soundboard DynDmpEfx Dynamic Damper Effect This simulates the sustain sound that occ...

Page 86: ...olume of the Clavinova If a sound occurs in the vicinity of the Clavinova during automatic adjustment the automatic adjustment may be aborted and the settings reset to their default values If this occurs we recommend that you perform the auto matic adjustment once again If any low range noise such as an air conditioner or traf fic is audible around the Clavinova during the automatic adjustment the...

Page 87: ...r Refer to Connect ing a Personal Computer on page 61 for more information USB connector Use this connector to connect the Clavinova and computer TIP TIP MIDI performance data and commands are transferred in the form of numeric values Since MIDI data that can be transmitted or received var ies depending on the type of MIDI device check the MIDI Implementation Chart to find out what MIDI data and c...

Page 88: ...See the procedure on page 71 Setting for Ch1 Ch32 Setting range Song Main Left Layer LeftLayer Keyboard Off Normal setting Ch1 16 Song Ch17 Keyboard Ch18 Main Ch19 Left Ch20 Layer Ch21 LeftLayer Others Off MIDI SETTING Setting the MIDI transmit channel MidiOutChannel C A D B Select a voice part Specify the channel NO YES Setting the MIDI receive chan nel MidiInChannel C A D B Select a channel Sele...

Page 89: ...Keyboard performance data played on the key board Song song playback data Normal setting Keyboard This parameter enables you to specify which MIDI data the Clavinova can receive See the procedure on page 71 Type of data Note Control Program Pitch Bend SysEx Sys tem Exclusive Setting range On Off Normal setting On for all types of data This parameter enables you to specify which MIDI data the Clavi...

Page 90: ...he performance data the panel setup data for your performance during playback See the procedure on page 71 You can transmit the voice data specified in the Voice Setting menu page 77 as MIDI bulk data You can interrupt voice data bulk dump transmis sion by pressing the B NO button See the procedure on page 71 Transmitting the initial set tings on the panel Ini tialSetup Executing voice data bulk d...

Page 91: ...e keys Use the B buttons to set the volume level Setting range of the Fixed volume level 1 127 You can fine tune the pitch of the entire instru ment This function is useful when you play the Clavinova along with other instruments or CD music See the procedure on page 71 Setting range A3 427 0Hz 453 0Hz 0 1Hz steps You can select a tuning curve from GrandPiano1 and GrandPiano2 Select Flat if you fe...

Page 92: ...sed in the era of Bach and Beethoven They are also often used now to reproduce the music of that era on harpsichords Normal setting Equal If you select a scale other than Equal you need to specify the root note using the B buttons Setting range C C I D E b E F F I G A b A B b B You can specify the split point the boundary between the right hand and left hand keyboard areas See the procedure on pag...

Page 93: ...ord and on the voice E Piano2 See the procedure on page 71 Setting range Off 1 10 This parameter enables you to select whether the sound is sustained while you press the keys on the keyboard PianoLike or the sound is sustained only while you press and hold down the sustain pedal like playing a real vibraphone Normal See the procedure on page 71 Setting range PianoLike Normal Normal setting PianoLi...

Page 94: ...n is not affected by this setting If the effect is an on off type effect this setting specifies the point at which the effect will be switched on off Setting range 2 effective with the shallowest press 0 2 effective with the deepest press This specifies the amount of change that can be produced by the pitch bend function which smoothly varies the pitch This setting applies only to the manually pla...

Page 95: ...rameters are set to Off Other parameters are set to On You can reset the Clavinova to its normal factory default settings The CharacterCode parameter setting in the File menu does not change The MemoryBackUp parameter setting On Off left column is reset to the normal setting You can specify whether the memory songs are erased or kept See the procedure on page 71 Selecting for MemorySong MemorySong...

Page 96: ...justment of iAFC is not possi ble because no sound is output from the rear speaker In this case if the Speaker setting is Off turn Speaker On If Speaker is set to Normal and headphones are connected unplug the headphones This message confirms that in the VoiceBulkDump operation page 90 you pressed B NO to cancel while data was being transmitted This message is displayed following the message Execu...

Page 97: ...stored This message also appears if you press and hold down the C7 and Bb6 keys and turn on the power to the Clavinova page 95 The Clavinova s flash memory storage memory has expired Con sult your Yamaha dealer If this message appears the Clavinova will not back up the songs and settings in memory Press the EXIT but ton to return to the previous screen There is a problem with the TO HOST USB conne...

Page 98: ...deleted While a preset song was being read the Clavinova detected defects in memory Reset the Clavinova to its normal factory default settings with MemorySongIncluded page 95 after you back up all song data This message indicates that there may be a problem with the mem ory If the message appears repeatedly when you continue using the Clavinova back up the song data then restore the default settin...

Page 99: ...licate such a disk You tried to copy or delete data in internally protected files such as commercially available music data You cannot write to copy or delete such files After you load an internally protected song into the Clavinova s Current memory or storage memory you tried to save the song to a floppy disk You cannot save such a song to another disk You cannot write or copy to such a disk This...

Page 100: ...ge 74 to delete the unneeded track so that you will then be able to record the equiva lent amount of additional material 2 This message will be displayed when you select a song if that song is larger than the capacity of the current memory page 102 This song cannot be loaded into the CLP 170 150 and cannot be played back Please select a different song This message will be displayed when you edit a...

Page 101: ...s functioning correctly Then try transmitting the data once again You tried to copy data to a different type of disk e x 2DD 2HD 2HD 2DD during the CopyDisk operation page 52 Eject the disk and insert an appropriate disk You used a period or space at the beginning of a song name or you tried to change a song name that includes a character or characters not supported by the CLP 170 150 and the CLP ...

Page 102: ...s to editing the tempo after recording Performance in Dual or Split mode is not recorded Track data is lost unexpectedly For Dual or Split mode recording the recording track for the second voice that is the voice for the left hand part is automatically assigned page 33 Therefore if the track already has data the data will be overwritten during recording Also switching to Dual mode or Split mode in...

Page 103: ...al pedal set ting The song title is not correct The CharacterCode setting may be different than that used when you named the song Also if the song was recorded on another instru ment the title might be displayed incorrectly Use the CharacterCode parameter page 54 in the FILE menu to change the setting How ever if the song was recorded on another instrument changing the CharacterCode parameter sett...

Page 104: ...104 CLP 170 150 MEMO ...

Page 105: ...CLP 170 150 105 Appendix ...

Page 106: ...g is off Set Speaker to Normal or ON page 95 Local Control is turned off Set Local control ON page 89 Expression is assigned to one of the right center and left pedals Assign any function other than Expression to the pedal The keyboard volume is lower than the song playback volume The volume level for the keyboard performance is set too low Move SONG BALANCE toward the keyboard to increase the key...

Page 107: ... density and MF2HD double sided high density and each type has different for matting systems CLP 170 can record and playback with both types of floppy disks When formatted by the CLP 170 a 2DD disk saves up to 720 KB kilobytes and a 2HD disk saves up to 1 44 MB megabytes The figures 720 KB and 1 44 MB indicate the data memory capacity They are also used to indicate the format type of disk Playback...

Page 108: ...ystem Level 1 format and was developed by Yamaha specifically to provide more voices and variations as well as greater expressive control over voices and effects and to ensure compatibility of data well into the future The CLP 170 150 is compatible with XG Performance data recorded with preset voices on the CLP 170 150 can be played on other XG compatible instruments DOC Disk Orchestra Collection ...

Page 109: ...ular music SynthPiano This voice simulates the electric piano sound pro duced by synthesizers in popular music It also goes well with the acoustic piano sound E PIANO2 E Piano2 The sound of an electric piano using hammer struck metallic tines Soft tone when played lightly and an aggressive tone when played hard Vintage E Piano A different type of electric piano sound Widely used in rock and popula...

Page 110: ...s RotaryOrgan A bright electric organ sound MellowOrgan A mellow electric organ sound Ideal for calmer songs STRINGS Strings Stereo sampled large scale strings ensemble with realistic reverb Try combining this voice with piano in the Dual mode SynthStrings A bright and spacious strings sound Suitable for sustained parts in the background of an ensemble SlowStrings The sound of a string ensemble wi...

Page 111: ...bal This is recommended for light Jazz music The damper pedal is effective on the voice assigned to the right hand range MAIN LEFT Celesta Choir This is suitable for a peaceful somewhat cute song MAIN LEFT Choir GrandPiano1 Play these voices elegantly along with piano arpeggio Playing the Choir voice in chords would be more effective MAIN LEFT Scat WoodBass This combination features a cool stylish...

Page 112: ...Have a Phillips head screwdriver ready Assembly Parts 6 25 mm long screws 4 1 4 12 mm thin screws 2 3 Cord holders 2 6 16 mm short screws 6 2 4 20 mm tapping screws 4 4 Pedal box Rear panel Main unit Bundled pedal cord inside AC power cord Side panel left Side panel right side panel left side panel right 1 Untie and straighten out the bundled cord attached to the bottom of the pedal box 2 Use the ...

Page 113: ...may be also provided in some areas to match the pin configuration of the AC wall outlets in your area WARNING An improper voltage setting can cause serious damage to the Clavinova or result in improper operation CAUTION Fingers can become pinched between the main unit and the rear or side panels be extra careful so as not to drop the main unit CAUTION Do not hold the keyboard in any position other...

Page 114: ...e way when you step on the pedals Turn the adjuster so that it is set firmly against the floor Are the pedal and power cords inserted securely into the sockets Check the connection If the main unit creaks or is otherwise unsteady when you play on the keyboard refer to the assembly dia grams and retighten all screws Rotate the adjuster until it comes in firm contact with the floor surface Key cover...

Page 115: ...ou do the following Position the Clavinova so that its rear panel is at least 10 cm away from the wall Perform the automatic adjustment after you turn on the power of the Clavinova for the first time and after each time you move the Clavinova to a different location page 86 Remove the following parts from the package 1 Attach the side panels to the pedal box TIP Have a Phillips head screwdriver re...

Page 116: ...ront panel in alignment with the metal hardware of the pedal box side panel right and side panel left At least 10c Be sure to place your hands at least 10 cm from either end of the main unit when posi tioning it 2 Use 6 16 mm short screws 2 to secure the main unit from the rear 3 Use 6 16 mm short screws 2 to fasten the main unit from the front 1 Center the main unit to produce equal clear ance on...

Page 117: ...ing Are there any parts left over Review the assembly procedure and correct any errors Is the Clavinova clear of doors and other movable fixtures Move the Clavinova to an appropriate location Does the Clavinova make a rattling noise when you shake it Tighten all screws Does the pedal box rattle or give way when you step on the pedals Turn the adjuster so that it is set firmly against the floor Are...

Page 118: ...onstration tunes 22 Detailed Settings 68 iAFC 85 Metronome 76 MIDI 87 Other settings 91 recording and playback 73 voices 77 Disk Copy 52 Format 53 SongAutoOpen 54 Disk song 46 Display contrast 18 DOWN TEMPO 50 Piano Preset Songs 25 metronome 37 Dual Detailed settings 77 Recording 45 Dual mode combining two voices 33 E Effect function 30 equalizer 82 EXIT 21 EXTRA TRACKS the third or more tracks 43...

Page 119: ...START STOP 50 Piano Preset Songs 24 Recorded Songs and Music Data 56 Recording 39 SONG BALANCE 45 SONG SELECT 50 Piano Preset Songs 24 Recorded Songs and Music Data 55 Recording 38 SONG SETTING 73 Sostenuto center pedal 29 Sound brilliance 30 expression 30 reverberation 31 spread and spaciousness 31 Soundboard reverb 31 Split Detailed settings 77 Recording 45 Split mode playing two voices 35 Split...

Page 120: ...120 CLP 170 150 MEMO ...

Page 121: ...locations that do not significantly contribute to their operating temperature Placement of this product close to heat sources such as radiators heat registers and other devices that produce heat should be avoided 8 This product was NOT designed for use in wet damp loca tions and should not be used near water or exposed to rain Examples of wet damp locations are near a swimming pool spa tub sink or...

Page 122: ...e which can be determined by turning the unit OFF and ON please try to eliminate the problem by using one of the following measures Relocate either this product or the device that is being affected by the interference Utilize power outlets that are on different branch circuit breaker or fuse circuits or install AC line filter s In the case of radio or TV interference relocate reorient the antenna ...

Page 123: ... 3R1 Canada Tel 416 298 1311 U S A Yamaha Corporation of America 6600 Orangethorpe Ave Buena Park Calif 90620 U S A Tel 714 522 9011 MEXICO Yamaha de Mexico S A De C V Departamento de ventas Javier Rojo Gomez No 1149 Col Gpe Del Moral Deleg Iztapalapa 09300 Mexico D F Tel 686 00 33 BRAZIL Yamaha Musical do Brasil LTDA Av Rebouças 2636 São Paulo Brasil Tel 011 853 1377 ARGENTINA Yamaha de Panamá S ...

Page 124: ...oltage in your area The voltage selector is set at 240V when the unit is initially shipped To change the setting use a minus screwdriver to rotate the selector dial so that the correct voltage appears next to the pointer on the panel Clavinova Web site English only http www yamahaclavinova com Yamaha Manual Library http www2 yamaha co jp manual english M D G Pro Audio Digital Musical Instrument Di...

Reviews: