MIDI and utility functions
158
E
ALL INIT button
Resets all MIDI messages assigned to the faders/
[TRACK SEL] keys to the initial settings. To initialize,
move the cursor to this button and press the
[ENTER] key.
F
FADER button
If you turn this button on, the MIDI message
assigned to the fader of the currently selected chan-
nel will be displayed.
This button will automatically be turned on when
you operate the fader of a track channel.
G
SEL SW button
If you turn this button on, the MIDI message
assigned to the [TRACK SEL] key of the currently
selected channel will be displayed.
This button will automatically be turned on when
you operate the [TRACK SEL] key of a track chan-
nel.
H
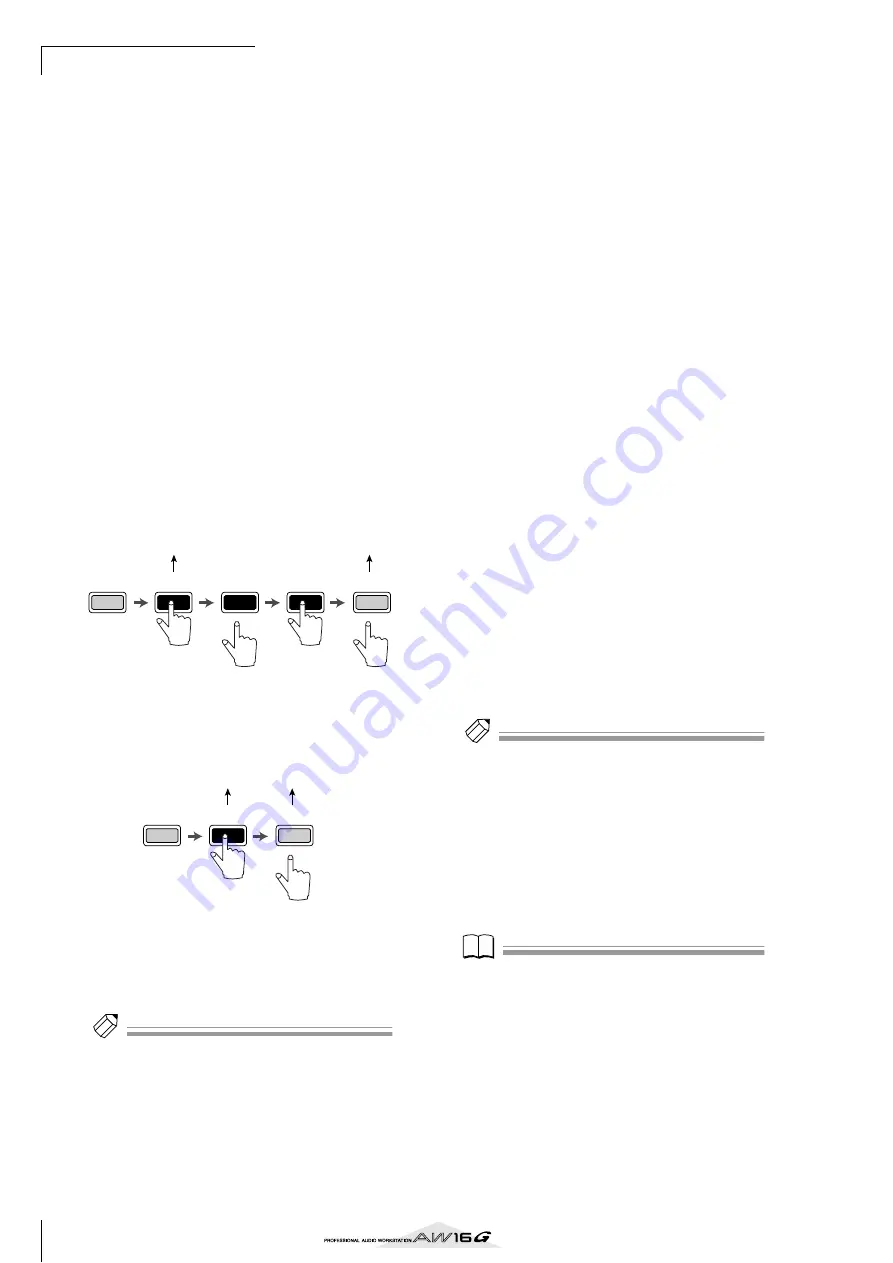
LATCH/UNLATCH button
Selects how the [TRACK SEL] key of a track channel
will operate when pressed.
LATCH
....................... The setting will alternate on/off
each time you press the [TRACK
SEL] key.
UNLATCH
.................. The setting will be on while you
hold down the [TRACK SEL] key,
and will turn off when you release
the key.
I
LEARN button
When this button is on, the MIDI message received
from the MIDI IN connector will be assigned to the
currently selected fader or [TRACK SEL] key. This is
a convenient way to assign MIDI messages quickly.
Tip!
Tip!
• If two or more MIDI messages are received while the
LEARN button is on, the last-received MIDI message
will be input in the MIDI message field.
• If a system exclusive message longer than sixteen bytes
is received, the first sixteen bytes will be displayed.
J
MIDI message
This area displays (in hexadecimal form) the MIDI
message that is assigned to the currently selected
fader or [TRACK SEL] key.
You can move the cursor to each numeric box and
turn the [DATA/JOG] dial to edit the value of each
byte (two-digital hexadecimal number). You can
select the following values.
00–FF (hexadecimal)
..Corresponds to the actual value of
the MIDI message that is transmit-
ted.
END
............................Indicates the end of the MIDI mes-
sage. When you operate a fader or
[TRACK SEL] key, the MIDI mes-
sage starting with the first byte and
ending with the byte that precedes
END will be transmitted.
SW ([TRACK SEL] key
only)
...........................Indicates the on/off status of the
[TRACK SEL] key. The byte you
specify as SW will be transmitted
as 7F (hexadecimal) when the key
is turned on, or 00 (hexadecimal)
when the key is turned off.
FAD
............................Indicates the current position of
the fader. If the message is assigned
to a fader, the byte you specify as
FAD will be transmitted as a value
of 00–7F (hexadecimal) corre-
sponding to the fader position
when you operate the fader.
If the message is assigned to a
[TRACK SEL] key, this byte will be
transmitted as a value correspond-
ing to the current position of the
fader when the [TRACK SEL] key is
turned on, and will be transmitted
as a value of 00 (hexadecimal)
when the [TRACK SEL] key is
turned off.
Tip!
Tip!
• The MIDI message assigned to a single fader or key can-
not be longer than sixteen bytes.
• If a SW byte is not assigned to a [TRACK SEL] key, the
MIDI message you input will be transmitted only when
you turn the key on. (In this case you will normally use
the UNLATCH setting.)
• When you use the LEARN button to assign a control
change to a fader, the END byte will automatically be
input at the end of the MIDI message.
• When you use the LEARN button to assign a control
change to a fader, the FAD byte will be automatically
input as the variable value.
Note
Note
• If you assign a MIDI message manually, be sure to input
END at the end of the MIDI message.
• When you assign a MIDI message to a fader, FAD must
be input for one of the bytes. If FAD is not input, oper-
ating the fader will not do anything.
• If you input the values manually, it is possible that an
invalid MIDI message will be input. For this reason, you
should use the
9
LEARN button to assign MIDI mes-
sages whenever possible.
MIDI data transmitted
(SW=7F)
MIDI data transmitted
(SW=00)
off
off
on
off
off
on
MIDI data transmitted
(SW=7F)
MIDI data transmitted
(SW=00)
Summary of Contents for AW 16G
Page 1: ...E Owner s Manual Owner s Manual Owner s Manual Keep This Manual For Future Reference ...
Page 8: ...Contents 8 ...
Page 26: ...Introducing the AW16G 26 ...
Page 32: ...Listening to the demo song 32 ...
Page 38: ...Recording to a sound clip 38 ...
Page 54: ...Track recording 54 ...
Page 136: ...Track editing 136 ...
Page 218: ...Appendix 218 Block diagram ...


