PERIODIC MAINTENANCE AND ADJUSTMENT
6-25
6
is turne
d
to “
”, then connect
the positive lea
d
b
efore con-
nectin
g
the ne
g
ative lea
d
.
[ECA17721]
4. After installation, make sure that
the battery leads are properly con-
nected to the battery terminals
and that the breather hose is
properly routed, in good condi-
tion, and not obstructed.
NOTICE:
If the
b
reather hose is posi-
tione
d
in such a way that the
frame is expose
d
to electrolyte
or
g
as expelle
d
from the
b
at-
tery, the frame coul
d
suffer
structural an
d
external
d
ama
g
-
es.
[ECA10602]
NOTICE
ECAM1120
Always keep the
b
attery
char
g
e
d
. Storin
g
a
d
ischar
g
e
d
b
attery can cause permanent
b
attery
d
ama
g
e.
After installin
g
the
b
attery,
b
e
sure to turn the main switch
from “
” to “
” three times in
3 secon
d
s intervals to initialize
the i
d
le spee
d
control system.
EAUM3270
Replacin
g
the fuse
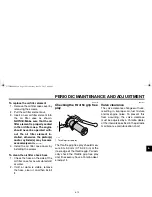
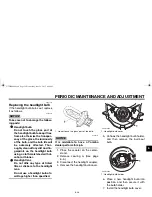
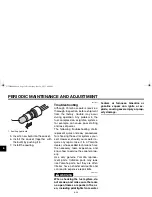
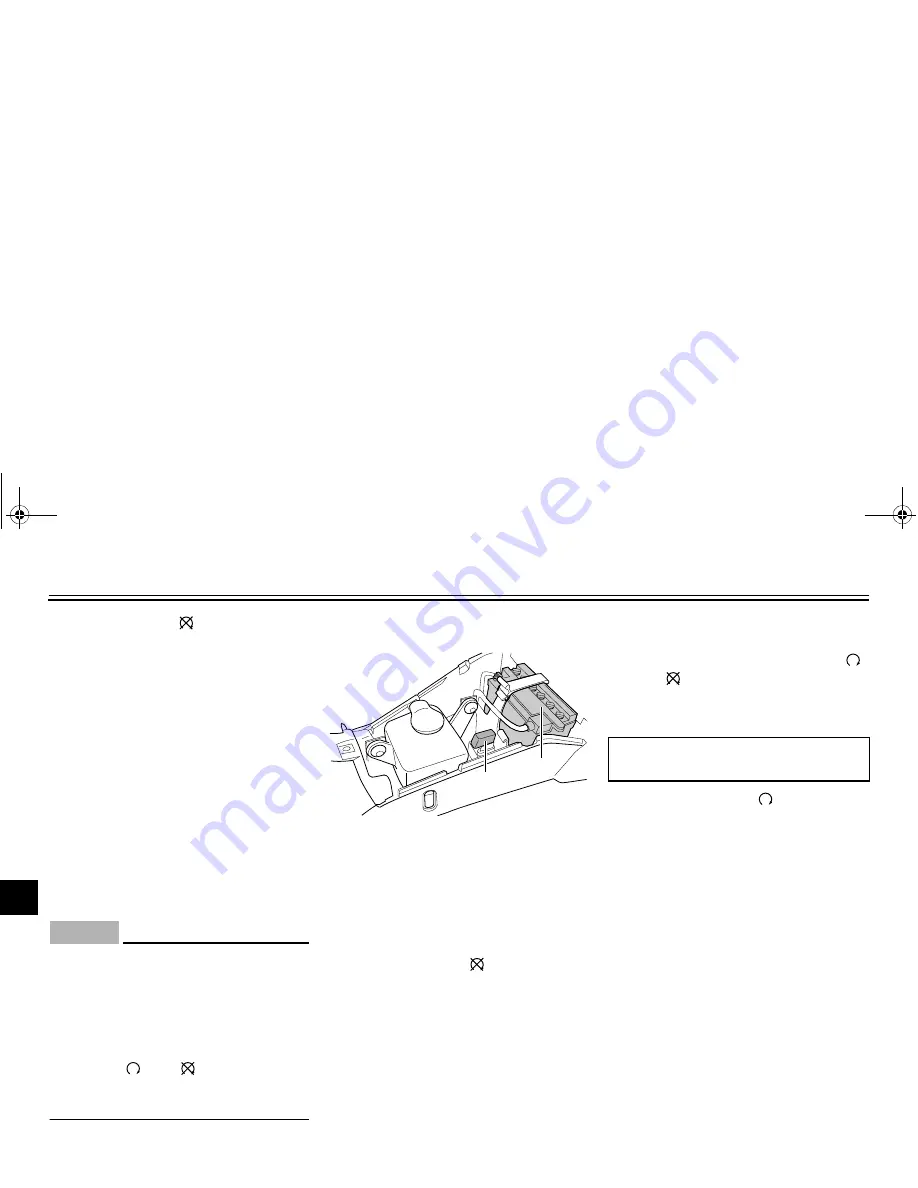
The fuse holder is located beside the
battery. Remove panel A to access the
fuse. (See page 6-6.)
If the fuse is blown, replace it as fol-
lows.
1. Turn the key to “
” and turn off all
electrical circuits.
2. Remove the blown fuse, and then
install a new fuse of the specified
amperage.
WARNING! Do not
use a fuse of a hi
g
her ampera
g
e
ratin
g
than recommen
d
e
d
to
avoi
d
causin
g
extensive
d
am-
a
g
e to the electrical system an
d
possi
b
ly a fire.
[EWA15132]
NOTICE:
After removin
g
an
d
installin
g
the main fuse,
b
e sure to turn
the main switch from “
”
to “
” three times in 3 secon
d
s
intervals to initialize the i
d
le
spee
d
control system.
[ECAM1130]
3. Turn the key to “
” and turn on
the electrical circuits to check if
the devices operate.
4. If the fuse immediately blows
again, have a Yamaha dealer
check the electrical system.
1. Fuse
2. Battery
ZAUM1079
1
2
Specifie
d
fuse:
15.0 A
U1GBE0E0.book Page 25 Wednesday, June 26, 2013 4:04 PM

