


8
6.Pilot valve Assembly, Guide and Bushing
6.1 Removal
■
NDP-5
▪
Remove the diaphragm and center rod etc.(see [5.1
Removal] on P.5)
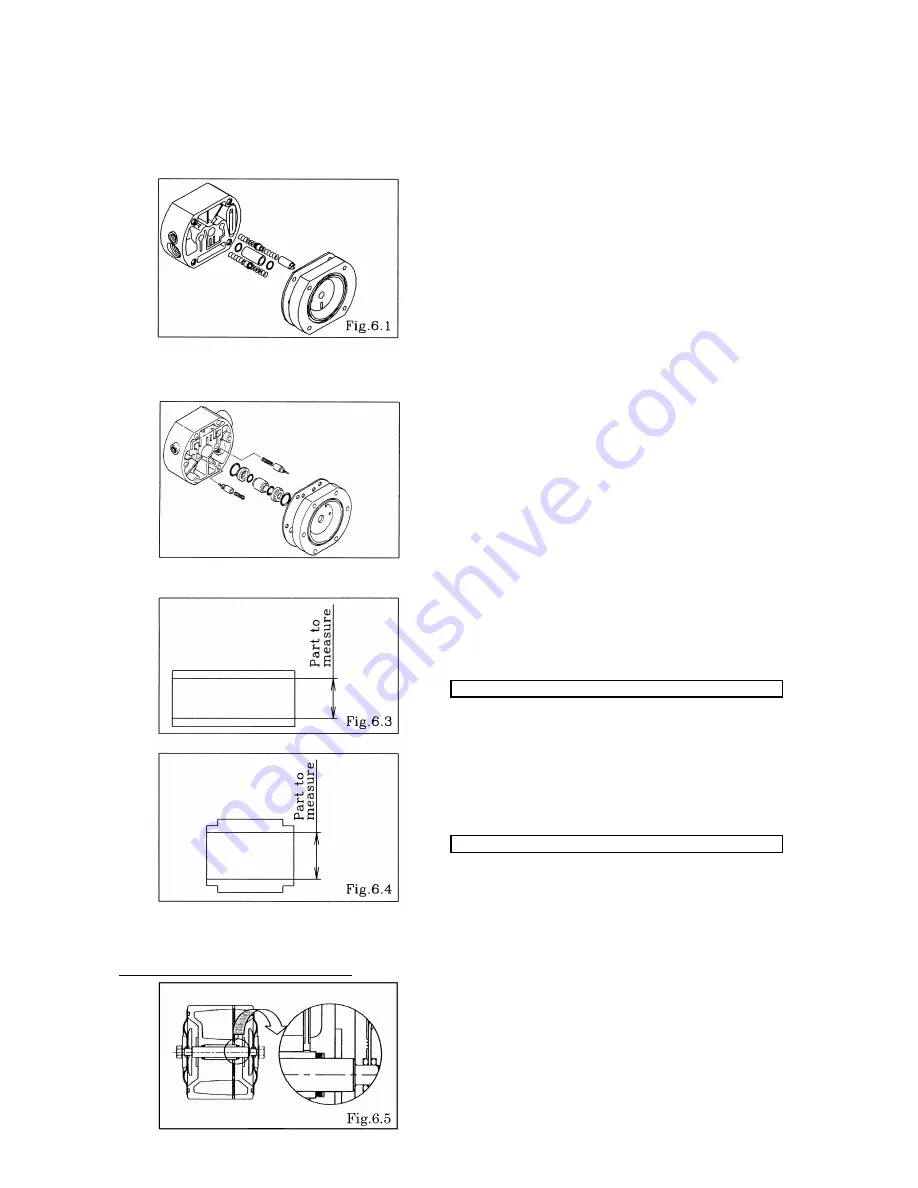
▪
Remove the main body. [Fig.6.1]
▪
Draw out the pilot valve assembly. [Fig.6.1]
▪
Remove the packing and bushing. [Fig.6.1]
■
NDP-15
▪
Remove the diaphragm and center rod etc.(see [5.1
Removal] on P.5)
▪
Remove the body B. [Fig.6.2]
▪
Draw out the pilot valve assembly. [Fig.6.2]
▪
Remove the packing, bushing and guide. [Fig.6.2]
6.2 Inspection
▪
Bushing (NDP-5) [Fig.6.3]
Measure the inside diameter, and if it is outside the usable
range, replace the bushing.
Usable range of bushing
Ø
10.1 ~
Ø
10.3 mm
▪
Guide ( NDP-15 ) [Fig.6.4]
Measure the inside diameter, and if it is outside the usable
range, replace the guide.
Usable range of guide
Ø
14.1 ~
Ø
14.2 mm
▪
O ring, Packing
If the O ring is worn out or cracked, replace it.
▪
Pilot valve assembly
If the pilot valve is worn out or cracked, replace it.
6.3 Installation
For installation, see [Exploded View] on the separate sheet and install in the reverse order of disassembly.
The correct direction of the V packing
<NOTE>
▪
Make sure there is no dust on the seal surface and the
seal is not damaged.
▪
Apply grease to packing.
▪
The open side of the V faces toward the diaphragm (air
chamber).
F
ig.6.2


