DOWN SIDE
Press the [DIAL] knob of the
sub-band.
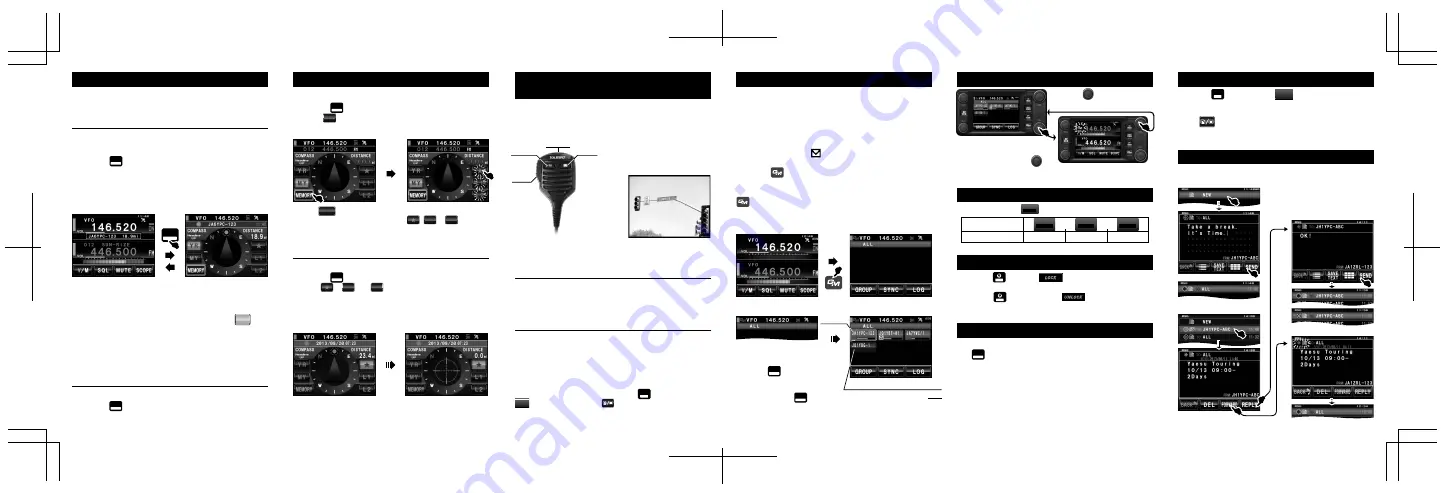
Press the key and touch on the screen to display
the message and picture list (the micro-SD card must be
inserted).
Touch to switch between the lists. The contents can be
checked and new messages can be created, sent, replied
to and forwarded.
*Show whether there is any
ACK (acknowledgement) from
the destination station in the
transmission results when the
address is specified.
Press the key and will appear temporarily
on the display, indicating the keys and dial are locked.
Press the key again and will appear
temporarily on the display indicating the keys and dial
are unlocked.
To return to the frequency display during setting, press
the key for one second or longer, or press the
microphone [PTT] while in the set-up menu.
*Touch [RESET/CLONE] in the set-up menu, and then
run [1 FACTORY RESET] in the next screen to return
to the default factory settings. The settings registered
at a certain point in time under [2 PRESET] can be
recalled using [3 RECALL PRESET].
Touch the function key to change the transmit power
The GM function will be temporarily
stopped and operation will be on
Band B. Upon pressing the
[DIAL] knob of Band A after the sub-band operation, the GM function
will resume operation.
Group members within and outside the sphere of
communication can be shown in different colors.
Information such as the distance and position can be
displayed.
Messages and pictures can also be sent and received.
The member from which new messages are received
is also displayed in “ ”.
Tune Band A to the GM operating frequency and
press the key to display “ALL” and commence GM
operation. The frequency cannot be changed when
GM is active. To change the frequency, press the
key to cancel GM operation.
The GM function can also be used among friends only
(refer to the GM operating manual for details).
The call sign and position information of a partner
station can be displayed when receiving a C4FM
digital signal.
Press the key to display the compass screen.
When the received signal contains position
information, the “station name and time of receipt”,
and the “direction” and “distance” to the transmitter
location will be displayed.
Press the key to return to the frequency display
screen.
During transmissions, movements of the partner
station or your own station will be updated in real time
in the display.
Message sending position, picture taking position,
APRS beacon position information
*The display can be switched between “Heading Up” and
“North Up” by touching the screen close to the compass
center.
Displaying the direction and distance of a
partner station on the compass screen
Returning to the frequency display screen
Registering the departure point
Returning to the departure point
Sending pictures
Creating and sending
new messages
Checking messages received
Forwarding messages received
Replying to messages received
Taking snapshots with the optional camera attached to
the speaker mike MH-85A11U
Receiving pictures
SETUP
DISP
SETUP
DISP
Y R
Station outside the communication range
(gray)
Finding the call sign and position of a partner station
Registering the departure point and returning to that position
Using the GM (Group Monitor) function
When operating the sub-band with the GM function active
Taking pictures with the microphone camera and
sending and receiving pictures
SETUP
DISP
Press the key to display the compass screen.
Touch on the screen to display your current
location.
Upon arrival at the registered point, the triangular
arrow will turn into a green aiming mark.
Press the [D-TX] key on the microphone with the built-in
camera to send the latest picture taken.
Press [PTT] to stop the transmission (it may take a while for
the transmission to stop).
After appearing for 10 seconds, the picture taken will be
saved on the micro-SD card in JPEG format.
You can check and retake the picture as many times as you
want.
Point the lens at the object to
be captured and press the
shutter button.
(Maintain a focal distance of at least
50 cm from the object to be captured
in order to take clear pictures)
Touch the partner station and
press the key to display the
compass screen and position
information of the partner
station. Press the key again
to return to the screen in the
figure on the right.
Station within the
communication range
(green)
* Remains even when the station moves
outside the communication range
When picture reception starts with the AMS function active,
“DATA RX” will appear and then “>>>” representing the
progress status will appear.
The received picture will be shown for 10 seconds on the
screen, after which the display returns to the previous screen.
To view a received picture, press the key followed by
on the screen. Touch to display the picture list and
then select the desired picture from the list.
Touch on the screen.
Touch one of the blinking keys , or that you
want to register.
The current location will be registered in the touched
key.
SETUP
DISP
Press the key to display the compass screen.
Touch , or where the return point was
registered.
The distance and a triangular arrow showing the
direction from the current location to the registration
point will be displayed.
SETUP
DISP
M Y
L
L
L
L
MEMORY
Picture
forwarding button
Lens
PTT
Shutter
button
M W
F
Sending and receiving messages
LO G
Displaying the “LOG” (MSG / PICT list)
With
ACK
w/o
ACK
When in doubt during operation set-up
SETUP
DISP
Other positions may be viewed using
* Default setting
320 * 240 px
NORMAL picture
quality (transmission
time about 30 seconds)
Changing the transmit power
Tx PW R
H I
Tx PW R
H I
Tx PW R
M D
Tx PW R
L O
50W
20W
5W
FTM-400DR/DE
Locking the dial and keys
LOCK
LOCK
SETUP
DISP
SETUP
DISP
M W
F
LO G


