MAIN Software Update
This procedure is used for uploading new Software into the FT
-
2000/D Amateur Transceivers using
the CT
-
119 program cable. If you have the 8pin mini
-
DIN PGM
-
SW (P0091526) refer to the
8-pin
mini-DIN PGM-SW
page 4.
*Don't forget to write down (or save to a CF Card) any personal menu settings you have changed from the
default before you start. Please see the DMU-2000 Data Management Operation Manual for the procedure
to save your settings to a CF card.
(1)
Turn off the main power switch located on the back of the FT
-
2000 (or turn off the power
supply for FT
-
2000D and wait a minute, until the capacitors discharge) and remove the AC
power cord.
(2) Connect
the
CT
-
119 Cable’s DB9F connector to the serial port COM1 in the back of your
computer. If you use a USB to serial adapter, you might need to change the COM Port number.
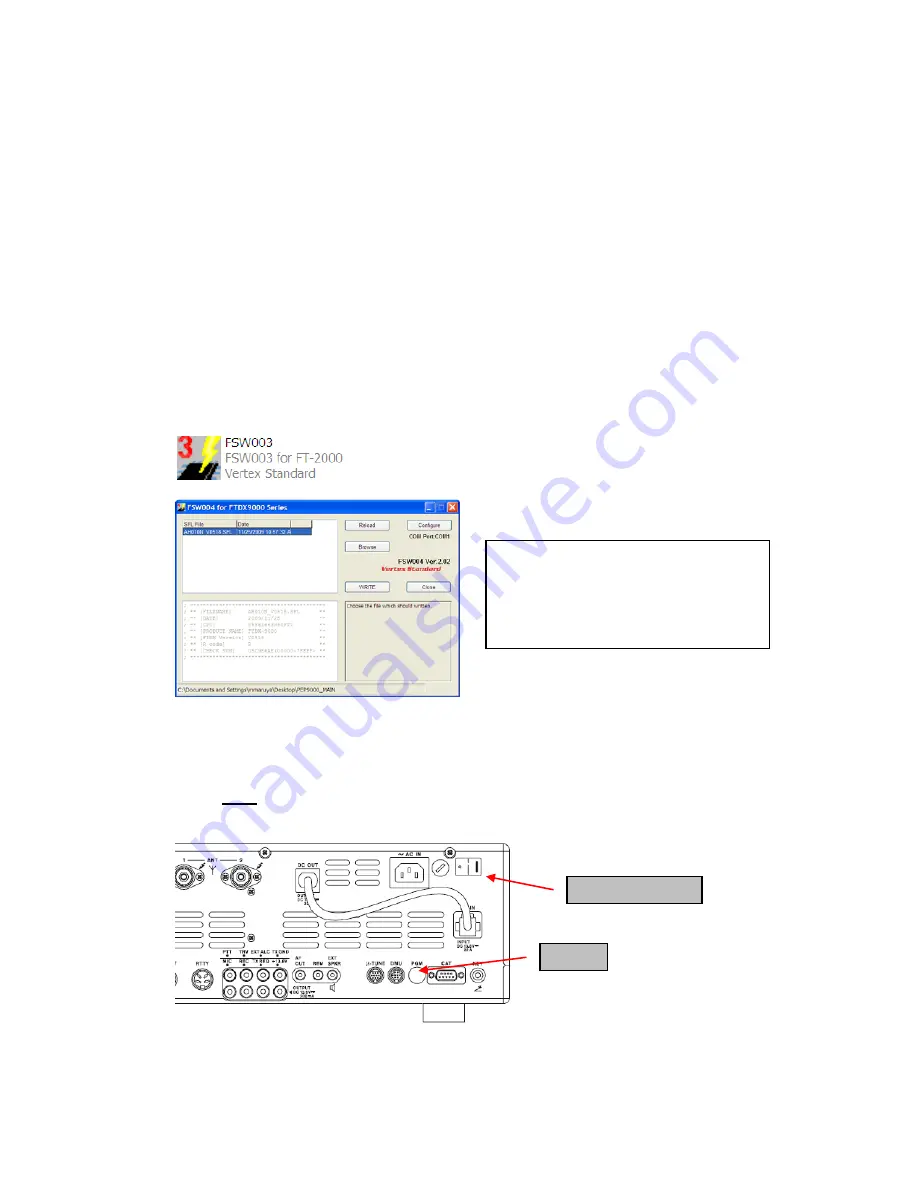
(3) Now go to the desktop open PEP2000_MAIN folder and find the
FSW003
icon as shown
below. Double-click
the FSW003
icon, displayed on the Program Screen.
(4) When the program opens, confirm that the file AH025_V0150.SFL is highlighted; if not, click
on it to highlight it.
(5)
Remove the black cover from the PGM jack (bottom left on the rear panel). Plug the mini-DIN
connector of the CT-119 into the PGM jack. Be sure that the
arrow
indicator on the mini
-
DIN
plug is
down
. Plug the AC cord into the radio and turn the main power switch on the back of the
radio to the ON position. [NOTE: The radio will not show a display now.]
(6)
Click on [WRITE] in the program window. A status bar with green bars should appear below
the [WRITE] button.
Note disregard the on screen instruction to [3. Turn “S3004” on].
PGM
Main Power SW
NOTE:
I
f you receive a “communications
error” message on your screen, click on the
Configure
box and choose a different COM
port from the drop down menu. Then click the
WRITE button again.


