background image

7

8

5.  Rinse the pH and ATC/Temp probe in distilled water and immerse 

them in the third buffer solution (either 9.18/10.01 or 4.00/4.01). 
Allow temperature reading to stabilize, then press “Slope” key to 
calibrate. The “WAIT” icon will flash until the unit detects a stable 
reading. Once the instrument calibrates the third point, the unit will 
save the calibration and automatically exit the calibration mode.  
3-point calibration is complete.

6.  The unit calculates and compensates for the pH electrode slope 

deviation corresponding to the values of the three calibration 
buffers. After calibration, press and hold “Meas. / Effic.” key for 
about 3 seconds to display the new electrode efficiency. 

CALIBRATION WITH MANUAL TEMPERATURE 

COMPENSATION IN THE PH-AUTOLOCK MODE

1.  Turn the unit on. Press “Clear” key for 2 seconds, all LCD elements 

will light up. The meter clears all calibration values stored in internal 
memory.                           

2.  Connect the pH electrode to the BNC connector of the unit, “MAN” 

will light up. “pH” and “AUTO” will light up. One of the buffers in the 
buffer set will flash.

3.  Rinse the pH probes in distilled water and immerse it in the first 

buffer solution (6.86/7.00 if doing a multipoint calibration). Adjust 
the temperature reading to that of the first buffer using the

 “

up” 

or “down” keys (0.0 to 60.0

 °

C). Then press and hold “Stand” key 

for 2 seconds to calibrate. The “WAIT” icon will flash until the unit 
detects a stable reading. Once the unit calibrates the first point, the 
selected buffer remains lit while the remaining two buffers flash. The 
unit is ready to be sloped at the second buffer.

Note: 

If the first buffer solution is 6.86/7.00, at this moment, Press 

the “Mode” key, the unit will save the calibration and exit calibration 
mode. Single point calibration is complete. If the first buffer solution 
is 4.00/4.01, 9.18/10.00, at this moment, the unit will automatically


exit


the calibration mode. Single point calibration is complete.

4.  Repeat steps 4-6 of “Calibration with an ATC/Temp probe in the 

pH-AUTOLOCK mode” for dual and three point calibration.

CALIBRATION WITH AN ATC/TEMP PROBE 

IN THE PH-NON-AUTOLOCK MODE

1.  Turn the unit on. Press “Clear” key for 2 seconds, all LCD elements 

will light up. The meter clears all calibration values stored in internal 
memory.      

2.  Connect the pH electrode to the BNC connector and the ATC/

Temp probe to the ATC/Temp connector of the unit: “ATC” will light 
up. Press “Mode” key to select “pH” mode. “pH” is on. One of the 
buffers in the buffer set will flash.

3.  Rinse the pH and ATC/Temp probes in distilled water and immerse 

them in the first buffer solution (6.86/7.00 if doing a multipoint 
calibration). Allow temperature and pH readings to stabilize, then 
press and hold “Stand” key for 2 seconds to calibrate, the unit 
immediately calibrates the first point, the selected buffer remains lit 
while the remaining two buffers flash. The unit is ready to be sloped 
at the second buffer.

Note: 

If the first buffer solution is 6.86/7.00, at this moment, press the 

“Mode” key, the unit will save the calibration and exit the calibration. 
Single point calibration is complete. If the first buffer solution is 
4.00/4.01, 9.18/10.00, at this moment, the unit will automatically exit 
the calibration mode. Single point calibration is complete.

4.  Rinse the pH and ATC/Temp probe in distilled water and immerse 

them in the second buffer solution (either 4.00/4.01 or 9.18/10.01). 
Allow temperature and pH readings to stabilize, then press “Slope” 
key to calibrate. The unit immediately calibrates the second point, 
the other buffer solution will flash. The unit is ready to be sloped at 
the third buffer. 

Note: 

At this moment, press the “Mode” key, the unit will save the 

calibration and exit the calibration. Dual point calibration is complete.

5.  Rinse the pH and ATC/Temp probe in distilled water and immerse 

them in the third buffer solution (either 9.18/10.01 or 4.00/4.01). 
Allow temperature and pH readings to stabilize, then press “Slope” 
key to calibrate. The unit immediately calibrates the third point and 
the unit will automatically save and exit the calibration mode. Three 
point calibration is complete.

6.  The unit calculates and compensates for the pH electrode slope 

deviation corresponding to the values of the three calibration 
buffers. After calibration, press and hold “Meas. / Effic.” key for 
about 3 seconds to display the new electrode efficiency. 
Summary of Contents for YSI pH1200

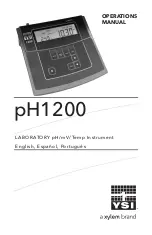
Page 1: ...OPERATIONS MANUAL pH1200 LABORATORY pH mV Temp Instrument English Espa ol Portugu s...

Page 2: ...compensation n the pH NON AUTOLOCK mode 9 pH Measurements 9 Measurement with an ATC Temp probe in the pH AUTOLOCK mode 9 Measurement with manual temperature compensation in the pH AUTOLOCK mode 10 Me...

Page 3: ...ent will be made and the product returned transportation prepaid Repaired or replaced products are warranted for the balance of the original warranty period or at least 90 days from date of repair or...

Page 4: ...tic Temperature Compensation indicator will be displayed if a temperature probe is connected 12 EFF This will be displayed if the user is viewing the efficiency of the electrode It is recommended to u...

Page 5: ...01 or 9 18 10 01 CALIBRATION WITH AN ATC TEMP PROBE IN THE PH AUTOLOCK MODE 1 Turn the unit on Press Clear key for 2 seconds all LCD elements will light up The meter clears all calibration values stor...

Page 6: ...PROBE IN THE PH NON AUTOLOCK MODE 1 Turn the unit on Press Clear key for 2 seconds all LCD elements will light up The meter clears all calibration values stored in internal memory 2 Connect the pH el...

Page 7: ...Temp probe to the ATC Temp connector of the unit ATC will light up 2 Press Mode key until pH and AUTO light up 3 Rinse the pH electrode and ATC temp probe with distilled water and immerse in the samp...

Page 8: ...display the mV value of the sample T R O U B L E S H O O T I N G Error on Main Display Display Possible cause s Corrective Action s Er1 1 Stand was pressed before the electrode and ATC Temp probe sett...

Page 9: ...cated metals When the time comes for you to recycle follow the easy steps outlined at ysi com BATTERY DISPOSAL The 1200 is powered by alkaline batteries which the user must remove and dispose of when...

Page 10: ...ent for service The form may be downloaded from www ysi com by clicking on the Support N D I C E Garant a 17 C mo Empezar 18 Pantalla 18 Teclas 19 Selecci n del Juego de Soluciones Buffer 21 Calibraci...

Page 11: ...trucciones escritas de YSI maltrato o uso indebido del producto incumplimiento del mantenimiento del producto conforme a las instrucciones escritas de YSI o el procedimiento est ndar de la industria t...

Page 12: ...diciones normales de uso la tecla no se activar a menos que se mantenga pulsada durante 2 segundos para evitar que se borre accidentalmente la memoria almacenada Al pulsar la tecla Clear se encender n...

Page 13: ...ompletado Si la primera soluci n buffer es 4 00 4 01 9 18 10 00 la unidad saldr autom ticamente en ese momento del modo de calibraci n La calibraci n de punto nico se ha completado 4 Enjuague las sond...

Page 14: ...6 86 7 00 si realiza una calibraci n de puntos m ltiples Ajuste la lectura de la temperatura a la de la puntos m ltiples Ajuste la lectura de la temperatura a la de la primera soluci n buffer usando l...

Page 15: ...dici n El icono WAIT espere parpadear La unidad est esperando una lectura estable La pantalla rastrear el valor de pH seg n lo medido por el electrodo de pH y la sonda ATC Temp 5 Cuando desaparezca el...

Page 16: ...I N D E P R O B L E M A S Error Posible Causa Acci n correctiva Er1 1 El bot n stand fue presionado antes que el electrodo y la compensaci n de temperatura estabilicen a 1 5 pH del valor del buffer 2...

Page 17: ...atorio 605170 Stand para electrodo 603824 Caja de buffers de pH 2 pintas de cada uno 4 7 y 10 R E C I C L A J E YSI se compromete a reducir el impacto medioambiental que produce su actividad Aunque la...

Page 18: ...volver un producto para su mantenimiento o reparaci n incluya el formulario de devoluci n del producto con su certificado de limpieza El formulario debe completarse en su totalidad para que un centro...

Page 19: ...scritas da YSI Neglig ncia ou m utiliza o do produto Falha em manter o produto de acordo com as instru es escritas da YSI ou com os procedimentos normais do sector Quaisquer repara es indevidas no pro...

Page 20: ...e ser novamente calibrada antes de ser utilizada Up Down As duas teclas s o utilizadas manualmente para inserir os valores da temperatura N o t m efeito na unidade quando esta operada em modo ATC Stan...

Page 21: ...enha premida a tecla Meas Effic durante cerca de 3 segundos para visualizar a efici ncia do novo el ctrodo CALIBRA O COM COMPENSA O MANUAL DA TEMPERATURA NO MODO PH AUTOLOCK 1 Ligue a unidade Prima a...

Page 22: ...ado permanece aceso enquanto os dois tamp es restantes ficam intermitentes A unidade est pronta para ser inclinada no segundo tamp o Nota Se a primeira solu o tamp o for 6 86 7 00 nesse momento prima...

Page 23: ...o com uma sonda ATC Temp no modo pH NON AUTOLOCK M E D I E S D E T E M P E R AT U R A O pH1200 pode medir temperaturas de modo independente com a sonda ATC temp sem utilizar o el ctrodo de pH Coloque...

Page 24: ...14 00 2 MV medido estiver fora da faixa de mV 1 999 9 1999 9 3 Temperatura medido est fora da faixa 0 0 100 0 C 1 Trazer pH da amostra para a faixa de medi o correta 2 Trazer amostra ORP para a faixa...

Page 25: ...maneira respons vel com os materiais no final de um ciclo de vida longo e produtivo O programa de reciclagem da YSI certifica se de que o equipamento antigo processado de uma maneira ecol gica reduzin...

Page 26: ...Item 601204REF Rev A October 2012 2012 YSI Inc Xylem Inc...

Reviews: