


- 30 -
Troubleshooting
WARNING
Under no circumstances should you try to repair the system yourself, as this will invalidate the warranty. Do not
open the system as there is a risk of electric shock. If a fault occurs, first check the points listed below before
taking the system for repair. If you are unable to solve a problem by following these instructions, consult your
dealer for help.
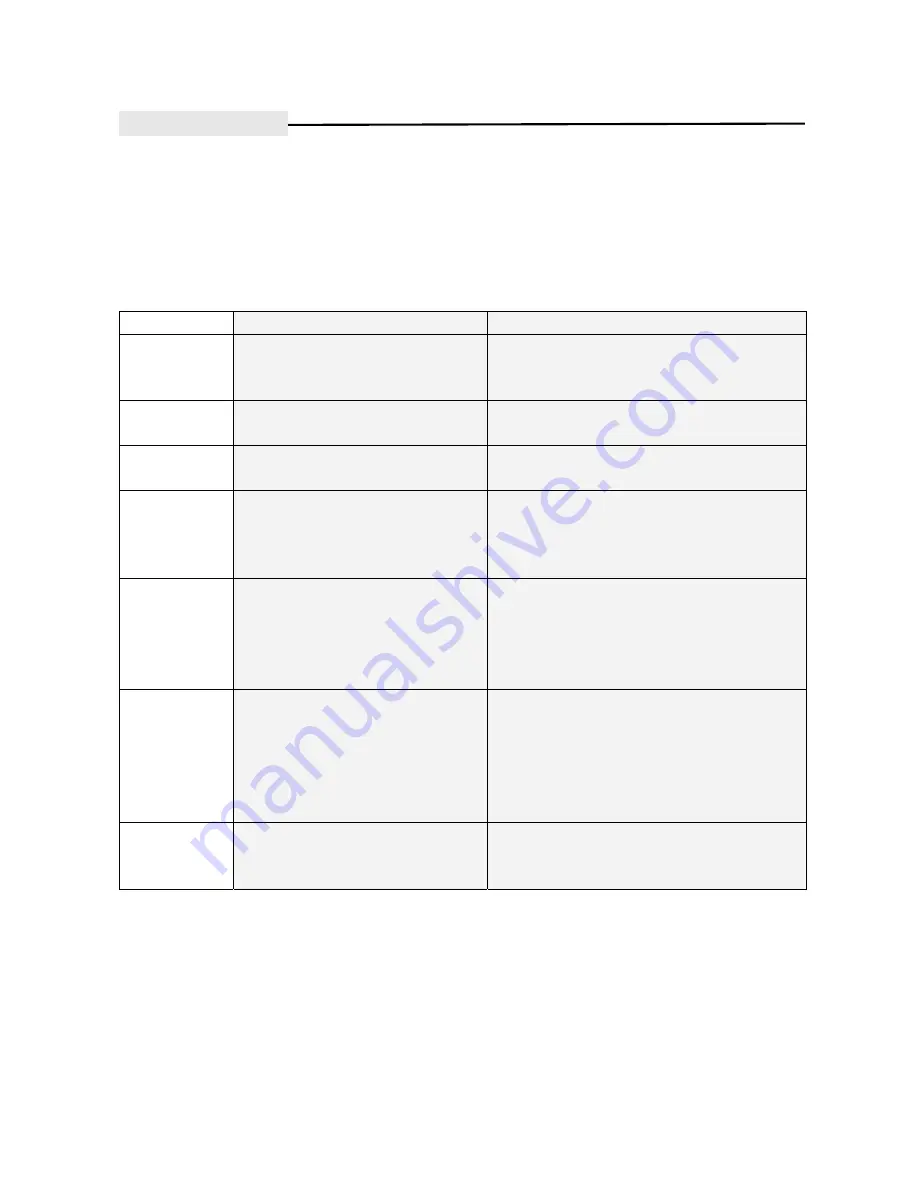
Symptom
Cause
Solution
No sound
Cables not properly connected.
Disc warped or dirty.
Player in mute status.
Connect cables securely.
Clean your disc.
Press MUTE button again.
No picture
Cables not properly connected.
Correct input not selected on TV.
Connect cables securely.
Reset the AV/TV status of your TV set.
No color
TV system not right.
TV set color not properly adjusted.
Press PAL/NTSC button.
Adjust color of the TV set.
No disc reading
No disc in the player.
Disc not properly loaded.
Condensation on the laser head.
Load a disc
Reload a disc, with the label side facing up.
Turn on the player, unload the disc and leave it on
for about an hour.
Remote control
failure
Remote control not pointing to the
sensor window.
Remote control’s operating distance is
more than 8 meters away from the TV.
Batteries is low.
Point the remote at the unit.
Use the remote control within 8 meters of the unit.
Replace the batteries.
Temporary
function failure
Badly fabricated disc used.
Wrong buttons pressed.
External electrical interference
Wait 5-10secs and the player will return to normal
operation once more.
Wait 1-3 seconds and press correct button Turn of
the player for 1-2 minutes, then switch back on.
If problem persists relocate the player or eliminate
source of interference.
Rolling Picture
TV set not properly adjusted
Incorrect output format on DVD unit
Readjust TV system
Select correct output format for your TV
(PAL/NTSC)


