background image

XC Camera Setup and OSD Guide


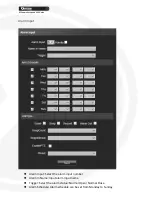
Preset: Alarm input to link the preset. 


Snap Interval: Set the snapshot interval time 


Snap Count: Set the snapshot count in every second 


After all parameter settings are completed, click “Save” these settings will take 
immediate effect. 

Video Tampering 


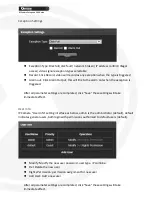
Enable: Set to enable video tempering 


Alarm Schedule: Set the alarm schedule from Monday to Sunday. 


Drawing: Click Drawing, then set the video tampering area. 


Clear: Click Clear to clear the current video tampering areas. 


Sensitivity: The higher of the sensitivity, the more video tampering will be detected. 


Email: Send Email to appointed mailbox when alarm triggered. 


Snap: Snapshot and install the picture in the HDD when alarm triggered. 


Record: Video record and installed in the HDD or send as FTP to keep when alarm 
triggered. 


Alarm Output: Connect the alarm output port, alarm triggered the embedded relay 
switch to call alarm output. 


Enable PTZ: Alarm input to link the PTZ motion. 

Summary of Contents for Pro HD

Page 1: ......

Page 2: ...11 Motion Detection 12 Video Tampering 13 Privacy Mask 14 Network Settings 15 Management Platform 16 Multicast Config 17 DDNS Settings 18 NTP Settings 19 Email Settings 20 Alarm Input 22 Alarm Output...

Page 3: ...ot place this equipment near a heat source to avoid risk of fire 4 Please do not store install and use this product in danger areas with inflammable or explosive substances 5 Please make sure the powe...

Page 4: ...is in accordance with the product The instructions may include some technical inaccuracies or typographical errors these will be corrected in future updates The product or procedures described in the...

Page 5: ...ugh all the menu options Navigate back to your XC device http 192 168 1 100 that we previously setup Input User name admin Password Blank Select your chosen Language Click Submit as shown below Live V...

Page 6: ...e path is changeable Full Screen Live preview in full screen press keyboard ESC to exit from full screen display Record ON OFF selectable When select ON the icon will turn blue as The device is now re...

Page 7: ...o call on the preset drop down list then click to call it Cruise 255 presets addable cruise time 1 255s adjustable cruise speed 1 10 levels selectable All cruise tracking can be called and delete inde...

Page 8: ...splay the product serial No Master Version Display the software version date Hardware Version Display the hardware version number Format Switch to select the PAL and NTSC image scanning system not sup...

Page 9: ...5 adjustable Baud Rate Baud rate selectable Operation method Connect analog high speed dome at the IP camera AB port set the protocol and baud rate and control the high speed dome through IPC preview...

Page 10: ...channel Bright Adjust the brightness for the appointed channel Contrast Adjust the contrast for the appointed channel Saturation Adjust the saturation for the appointed channel Hue Adjust the hue for...

Page 11: ...ed this field will have different values Frame Rate Set different frame rate for channel Video Encode H264 MJPEG H264 Profile Main profile Baseline High profile I frame Interval Set the I frame intern...

Page 12: ...hreshold 0 255 selectable users adjust it according to the need default is 119 Color Normal Bright Nature three options default is Normal Mirror Close Horizontal Mirror Vertical Mirror 180 Rotation fo...

Page 13: ...le Set the alarm schedule from Monday to Sunday Drawing Click Drawing then set the motion area Clear Click Clear to clear the current motion areas Sensitivity The higher of the sensitivity the motion...

Page 14: ...Drawing Click Drawing then set the video tampering area Clear Click Clear to clear the current video tampering areas Sensitivity The higher of the sensitivity the more video tampering will be detecte...

Page 15: ...fter all parameter settings are completed click Save these settings will take immediate effect Privacy Mask Enable Click to enable the video mask function Drawing Click drawing to select the mask area...

Page 16: ...dress not always required but add your routers IP Address if doing manually SNMP Enable for networking monitoring SNMP Manager IP Input the corresponding SNMP manager IP address HTTP Port This default...

Page 17: ...XC Camera Setup and OSD Guide Management Platform For future Management applications...

Page 18: ...SD Guide Multicast Config Default value is disabled for multicast config After you Enable Multicast users can set IP address port TTL of the primary stream video sub stream video primary stream audio...

Page 19: ...more information please contact your network administrator Enable DDNS Click to enable Dynamic Domain Name Server Server Type Select DDNS server type There are Dyndns PeanutHull NO IP 3322 DnsDynamic...

Page 20: ...t NTP server IP address NTP Port Only TCP transmission supported default is 123 Adjust time interval Input the interval time Select Time Zone Different time zones are selectable GMT Adjust the time Af...

Page 21: ...the password of the outbox Confirm pwd Input the password again to confirm sent SMTP Server Input the smtp server address of the outbox SMTP Port Input the smtp server port of the outbox Sending inte...

Page 22: ...use the FTP feature Enable Click to enable the FTP service Server Address Input the upload server address Port Input the server port default is 21 Username Input the upload username Password Input the...

Page 23: ...OSD Guide Alarm Input Alarm Input Select the alarm input number Alarm In Name Input alarm input name Trigger Select the alarm statue Normal Open Normal Close Alarm Schedule Alarm schedule can be set f...

Page 24: ...ger Snap count Set the snapshot count in every second Snap Interval Set the snapshot interval time Enable PTZ Click Enable PTZ it will linkage PTZ operation when alarm input Preset set the linkage pre...

Page 25: ...gered After all parameter settings are completed click Save these settings will take immediate effect User Info IP Camera User Info setting interface as below admin is the administrator default defaul...

Page 26: ...only the network administrator should apply firmware updates please check with your supplier before applying any updates Always follow the firmware update instructions included in the update file Sto...

Page 27: ...6 9 Preview Capture Select the preview capture file storage path File Download Select the download file storage path Rec Capture Select the Rec Capture file storage path Record File Type AVI I8 format...

Page 28: ...lay the backup video image file Stop Click button to stop the play back Slow Click button to slow play the backup video image file Fast Click button to fast play the backup video image file Frame Clic...

Page 29: ...Tab Main Type All Alarm Exception Settings Operation Additional Information four types selectable Start Time Set the start time End Time Set the end time Page Num Set the log numbers on each page Sea...

Page 30: ...udio video data transmission port talkback data transmission port UDP 5050 Audio video data transmission port Multi cast port 28080 Onvif port 8000 RTSP port 554 RTSP port 8002 Search port 10000 Telne...

Page 31: ...ge frame rate is slow or choppy Possible reason 1 The frame rate of IP camera is too low Solution Increase the video frame rate Possible reason 2 Too many users are viewing the images Solution Block s...

Page 32: ...e or run C windows system32 Config exe to set the following parameters of display buffer auto detection used display card memory or system memory then reopen IE and connect IP camera 6 There is no sou...

Page 33: ...XC Camera Setup and OSD Guide...

Reviews: