XVision HD 960H Quick Manual Download Page 11


11 

8        Display       

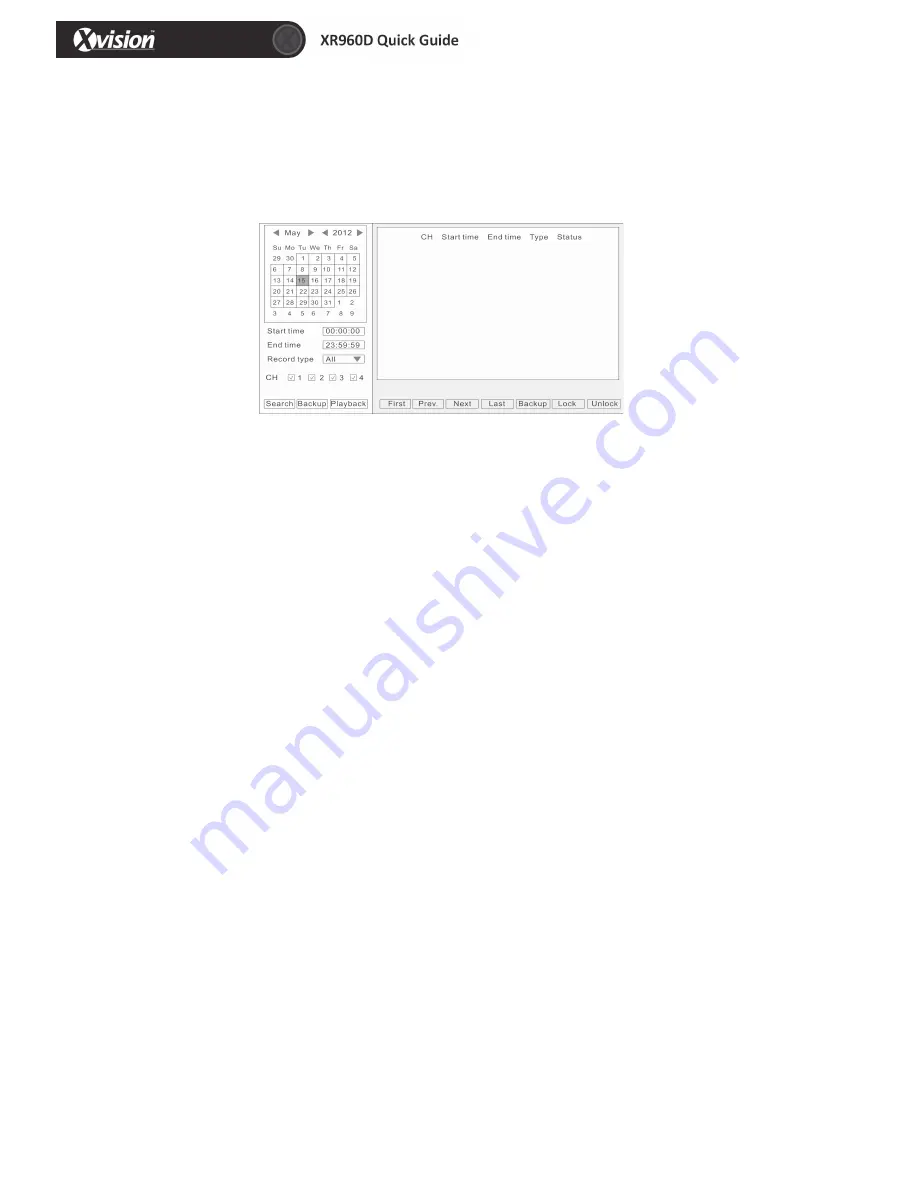
In   the   main   menu,   click   “Search”,   display   as   below.   


1)        After    entering    the    playback    interface,    the    DVR    will    automatically    search    the    current    day’s   

(today)   recording   files   and   show   in   the   right   window.   If   there   is   no   recording,   the   right   window   
will   be   empty.   

2)        Calendar:    Green    &    red    background    means    there    is    a    recording    that    day,    grey    background   

means   there   is   no   recording   that   day,   blue   back   ground   shows   the   date   you   have   selected.   


Please   Note

:   When   you   open   the   playback   interface,   the   calendar   displays   the   current   month,   and   

the   blue   background   date   is   the   current   date   (today).   
   
3)        Record   Type:   All/Alarm/Normal           
4)        CH:   Choose   the   channel   you   want   to   playback.   
5)        First,   Prev.,   Next,   Last:   Check   the   recording   page   by   page.   
6)        Lock/unlock:   Place   a   check   mark   '√'for   the   recording   you   want   to   lock,   then   click   lock,   after       

       locked,   the   recording   cannot   delete   and   overwrite.   

7)        If   want   to   unlock,   click   “Unlock”.   
8)        Backup:   check   '√'   the   recording   files   that   you   want   to   backup   on   the   right   window,   and   then                                       

       click   backup.   If   the   files   capacity   you   select   is   larger   than   your   USB   capacity,   the   system   will   
       prompt   you   to   change   to   a   bigger   capacity   USB   or   reduce   the   quantity   of   selected   recording   
       files.   

9)        Search:   click   “SEARCH”,   and   the   right   window   will   display   the   recording   files.   
10)   Playback:   click   “PLAYBACK”   to   enter   into   playback   interface.       

The   left   side   shows   the   calendar,   the   right   side   displays   the   playback   time   zone.   Green   color   
means   normal   recording,   red   color   means   alarm   recording,   and   black   color   (back   ground   color)   
means   no   recording.   On   the   time   line,   there   is   a   time   bar   that   you   can   drag   to   any   time   you   
want   to   playback.   


Summary of Contents for HD 960H

Page 1: ...nnel Quick Guide Version 1 HD 960H Thank you for purchasing the XR960 DVR from Xvision Please ensure that you read and understand this Quick Guide before operating the DVR Please store this Quick Guid...

Page 2: ...c Setup 4 2 4 Network Setup 5 2 5 Network Testing 5 2 6 DDNS Port Setup 5 2 7 Record Mode Record Setup 6 2 8 HDD Setup 7 3 User Login 8 4 Interface Introduction 9 5 Basic Record Setup 9 6 Record Bit R...

Page 3: ...ill be able to perform basic functions after the setup wizard has finished If personalized settings are desired please login to the main menu and setup to complete this function 2 1 Wizard interface W...

Page 4: ...format types MM DD YYYY DD MM YYYY and YYYY MM DD Time Format 24 hour 12 hour Time Zone Click the down arrow time zone options will be displayed please select your time zone Please Note Once the DVR c...

Page 5: ...f a network connection is abnormal please return to the previous page to correct the settings and then click Next If there is no testing is required just click Skip to go to the next page as displayed...

Page 6: ...ver port please change to an idle port Web Port Http port default 80 if you change the web port for example 8088 when you need to access through browser you will need to add the web port after the IP...

Page 7: ...hrough our DVR before usage Overwrite There are three options to choose from by days by capacity and never Please select the desired method After the setup of the disk the save and confirm interface w...

Page 8: ...askbar you can then drag it to any position Iif the taskbar is not displayed right click the mouse button Click START to enter the login interface insert the Device ID the default Device ID is 0 The i...

Page 9: ...enu click Basic and then click RECORD as displayed below CH Order of the DVR channel Enable click to enable the basic setting Audio click to enable audio recording Mode Click Always or Time recording...

Page 10: ...or option Quality Best Better Good Normal Copy CH Copy one CH setting to another CH 7 Schedule CH Order of the DVR channel Set the mode of recording Manual Normal Alarm Double click the recording sche...

Page 11: ...g page by page 6 Lock unlock Place a check mark for the recording you want to lock then click lock after locked the recording cannot delete and overwrite 7 If want to unlock click Unlock 8 Backup chec...

Page 12: ...uttons Click PLAY STOP STEP FAST FORWARD FAST BACKWARD and SLOW to do corresponding operation Drag the slider to adjust volume if you don t need audio click the speaker to mute Click X to exit playbac...

Page 13: ...rding to your network settings If there is no router in your network fill in the IP you get from your Internet Service Provider ISP If there is a router in your network make sure you have set the subn...

Page 14: ...s will be filled automatically Click Apply after setup to save 3 3G 4 Port 1 Media Port One private communication port is between the DVR and PC the default is Port 9000 If this port is occupied by an...

Page 15: ...r setup 10 DDNS Setup To enter the DDNS Setup menu click ADVANCE in the main menu and then click COMM 1 DDNS Enable Disable please enable the DDNS when you use domain name server 2 Server Choose your...

Page 16: ...tc Baud rate 1200 2400 4800 9600 Address Input the address you get from PTZ parameters Copy For ease setup one channel and then copy to the others Click Apply after setup to save For more information...

Page 17: ...The warranty excludes products that have been misused including accidental damage and damage caused by normal wear and tear In the unlikely event that you encounter a problem with this product it sho...

Reviews: