
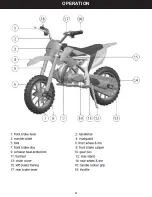
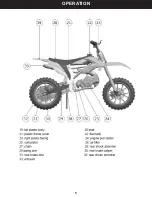
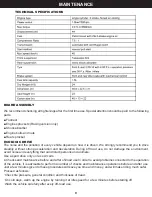

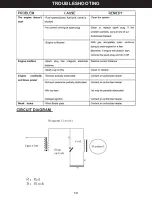


OPERATION
5
6
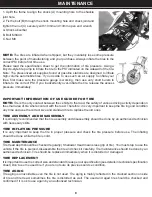
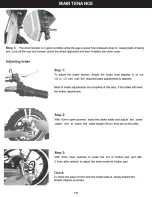
If the mini bike is not starting or is not performing well,
you might have a clogged or partially obstructed fuel cap
vent. Park the mini bike on a firm, level surface and turn
the engine stop switch to the “off” position. Remove the
fuel cap to allow air into the fuel tank and then screw the
fuel cap back onto the fuel tank. Try starting the engine.
If the engine starts after air has been let into the tank,
the fuel cap vent is probably clogged. To remedy the
problem, clean dirt and debris from the fuel cap vent.
ESTIMATED ASSEMBLY AND SET-UP TIME
We recommend assembly by an adult with experience in motorbike or bicycle mechanics.
• Allow up to 30-40 minutes for assembly.
• Required Tools
•
Some tools may be supplied; however, we recommend the use of mechanic’s grade tools. Use the supplied
tools only as a last resort.
• The list of tool required is as follows:
• Open end wrench 10mm / 13mm/ 17mm / 22mm
• Allen wrench 5mm / 6mm/ 8mm
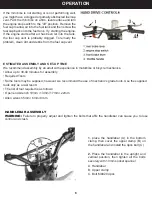
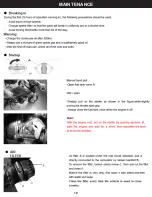
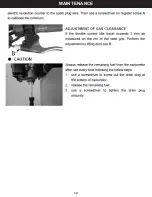
HANDLEBAR ASSEMBLY
WARNING:
Failure to properly adjust and tighten the bolts that affix the handlebar can cause you to lose
control and crash.
1.
place the handlebar (A) in the bottom
clamp, then cover the upper clamp (B) on
the handlebar and install the 4pcs bolt (C)
2.
Place the handlebar in the upright and
vertical position, then tighten all the bolts
securely with 10mm socket spanner.
A.
Handlebar
B. Upper clamp
C. Bolt M8X20 4pcs
Summary of Contents for 99782
Page 5: ...OPERATION 4 ...
Page 6: ...OPERATION 5 ...
Page 11: ...MAINTENANCE 10 ...
Page 12: ...EXERCISE MONITOR MAINTENANCE 9 ...
Page 13: ...MAINTENANCE 10 ...
Page 14: ...EXERCISE MONITOR MAINTENANCE 11 ...
Page 15: ...MAINTENANCE 12 ...
Page 16: ...EXERCISE MONITOR TROUBLESHOOTING 13 ...
Page 17: ...OF NOTE 14 ...


