background image

VAG401                                                                          VW/AUDI/SEAT/SKODA                         

www.Xtooltech.com 

5. Main features 


  Display: Backlit LCD,160*160 pixel display. 


Favorable----about only 10% of that of professional tool. 


Powerful function-----with all the function of VAG1551/1552. 


Conveniently connection and simply operation. 


Powered  via  diagnostic  connector,  no  need  of  power  exteriorly 
charged. 


Operating Temperature: -20

 to 50

 . 


Storage Temperature: -50

 to

70

 . 

6. Appearance and Key Descriptions 


The appearance of a VAG401 is as shown in the above figure. 
1.  LCD screen: 160*160 
2.  Enter key:    confirm selection and enter 
3.  Esc key:      go back to the previous screens 
4.  up/down arrows:    moves the selection pointer and scrolls up or down   
5.  LEFT/RIGHT arrows:    move cursor. 
6.  Diagnostic extension cable:    OBDII -16PIN 

Summary of Contents for VAG401

Page 1: ...ct the VAG401 7 3 Diagnosis system 8 3 1 READ ECU version 10 3 2 Read Fault codes 10 3 3 ERASE Fault 11 3 4 Read measuring data value 11 3 5 Output test 12 3 6 Basic items setting 13 3 7 Route adaptat...

Page 2: ...n When an engine is running many parts such as the coolant fan pulleys fan belt etc turn at high speed To avoid serious injury always be aware of moving parts Keep a safe distance from these parts as...

Page 3: ...tery and fuel fuel vapors DO NOT SMOKE NEAR THE VEHICLE DUR ING TESTING Don t wear loose clothing or jewelry when working on an engine Loose clothing can become caught in the fan pulleys belts etc Jew...

Page 4: ...t PC 2 Available Functions Controller Info Fault Codes Clear Codes Measure Blocks Output Tests Basic Settings Adaptation Coding Security Access Readiness Advanced ID 3 Supported Systems VAG401 can sup...

Page 5: ...red via diagnostic connector no need of power exteriorly charged Operating Temperature 20 to 50 Storage Temperature 50 to 70 6 Appearance and Key Descriptions The appearance of a VAG401 is as shown in...

Page 6: ...the air filter ducts for holes rips or cracks Make sure all engine belts are in good condition Check for cracked torn brittle loose or missing belts Make sure mechanical linkages to engine sensors th...

Page 7: ...3 Connect the VAG401 cable connector to the vehicle s DLC Turn on the ignition The VAG401 will auto start the following screen will be displayed 2 4 Wait a moment the screen will auto display the mai...

Page 8: ...m selection menu as follow Now we can select a version then press Enter The screen will display as the following shows Systems that the VAG401 supports are listed as the following 7 ones Each system i...

Page 9: ...oltech com 9 Now we can select any one system say selecting 17 Instruments then press Enter The screen will display as the following shows If it runs successfully then the following will be displayed...

Page 10: ...CU version Select 01 READ ECU version and then press Enter key The screen will display the control unit information 3 2 Read Fault Codes Select 02 Fault Codes and then press Enter key The screen will...

Page 11: ...ss Enter as the following You need to press Enter button for the second time to perform code erase Of course you can also press Esc button to give u If code erasing successfully it will display as the...

Page 12: ...hoose the number of places by up down button to select the input number and press Enter button to confirm Figure shows that 3 5 Output test Select 03 Output Test and then press Enter If failed it will...

Page 13: ...Enter The way of operating likes that of point 3 4 regarding of measuring data value 3 7 Route adaptation Select 10 Adaptation and then press Enter The way of operating likes that of point 3 4 regard...

Page 14: ...to confirm After all information written press Enter If operation is successful it will display as the following 3 9 Login the system Choose 16 Security Access and then press Enter button It shows as...

Page 15: ...AT SKODA www Xtooltech com 15 displayed if you login successfully If failed it shows as the following 3 10 Advanced ID Choose 1A Advanced ID and then press Enter button It shows as the following Press...

Page 16: ...ess Esc to login out 3 12 Professional function Return to the main memu choose Diagnose and then press Enter Press right arrow to go to the next page Choose Special Function Press Enter It will show t...

Page 17: ...set and Enter it shows as the following If connected successfully it will read code before it returns to the original if it finds error code it will display the following Then press Enter and it will...

Page 18: ...d please press Esc to draw out After finishing code erasing you can reset airbag 4 Language select Choose Language at the main memu Then press Enter The screen will display as the following 5 Contrast...

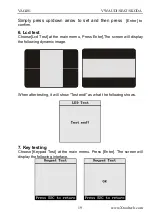
Page 19: ...r to confirm 6 Lcd test Choose Lcd Test at the main memu Press Enter The screen will display the following dynamic image When after testing it will show Test end as what the following shows 7 Key test...

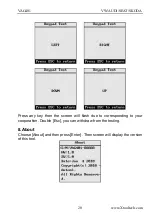
Page 20: ...oltech com 20 Press any key then the screen will flash due to corresponding to your cooperation Double Esc you can withdraw from the testing 8 About Choose About and then press Enter Then screen will...

Page 21: ...II 16pin as the following For VW GOLF it locates in the right side of steering column for Jetta it locates in the left side of the bottom of the dashboard which is at the driver s ca for Santana it lo...

Reviews: