XTline XT102870 User Manual Download Page 17

6457_XTLINE S_R_O_---XT102870_AKU ŘETĚZOVÁ PILA BEZUHLÍKOVÁ_ 36 V.DOCX


2


ENGLAND 

FRANCE 

DEUTSCHLAND 


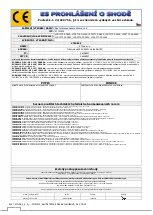
declare that the product 

déclarer que le produit 

erklären, dass das Produkt 

XT102870 /serial number: 

complies with the relevant EC Directives: 

est conforme aux directives communautaires 

pertinentes: 

entspricht den einschlägigen EG-Richtlinien: 

Technical requirements for machinery- 2006/42/EU - 

Exigences techniques pour les machines- 2006/42/EU - 

Technische Anforderungen für Maschinen- 2006/42/EU - 

Low Voltage- 2014/35/EU - 

Low Voltage- 2014/35/EU - 

Low Voltage- 2014/35/EU - 

Electromagnetic compatibility- 2014/30/EU - 

compatibilité électromagnétique- 2014/30/EU - 

Elektromagnetische Verträglichkeit- 2014/30/EU - 

The technical requirements for products in terms of noise 

emissions- 86/594/EHS, 2000/14/EU, 2005/88/EU - 

Les exigences techniques pour les produits en termes 

d'émissions sonores- 86/594/EHS, 2000/14/EU, 2005/88/EU 

Die technischen Anforderungen an Produkte in Bezug auf 

Lärmemissionen- 86/594/EHS, 2000/14/EU, 2005/88/EU - 

RoHS - Restriction on the use of certain hazardous 

substances in electrical and electronic equipment- 

2015/863/EU - 

RoHS - Restriction sur l'utilisation de certaines substances 

dangereuses dans les équipements électriques et 

électroniques- 2015/863/EU - 

RoHS - Beschränkung der Verwendung bestimmter 

gefährlicher Stoffe in Elektro- und Elektronikgeräten- 

2015/863/EU - 

CE mark- 93/68/EEC - 

marque CE- 93/68/EEC - 

CE-Zeichen- 93/68/EEC - 

Conformity assessment carried out by an authorized 

laboratory. The certificate number. 

Évaluation de la conformité effectuée par un 

laboratoire agréé. Le numéro de certificat. 

Konformitätsbewertung durchgeführt von einem 

autorisierten Labor aus. Die Zertifikat-Nummer. 

The device is not subject to the type testing 

Le dispositif est pas soumis à l'essai de type 

Das Gerät ist nicht abhängig von der Typprüfung 

European standards 

normes européennes 

Europäische Normen 

EN ISO 12100; Safety of machinery - General principles for design - Risk assessment and risk reduction, 2011-06-01 

EN ISO 14118; Safety of machinery - Prevention of unexpected start-up, 2018-12-01 

EN ISO 13857; Safety of machinery - Safety distances to prevent hazard zones being reached by upper and lower limbs, 2022-09-01 

EN 1005-3+A1; Safety of machinery - Human physical performance - Part 3: Recommended force limits for machinery operation, 2009-04-01 

EN ISO 13854; Safety of machinery - Minimum gaps to avoid crushing of parts of the human body, 2021-01-01 

EN ISO 14120; Safety of machinery - Guards - General requirements for the design and construction of fixed and movable guards, 2017-01-01 

EN ISO 20607; Safety of machinery - Instruction handbook - General drafting principles, 2021-01-01 

ISO 3864-1; Graphical symbols - Safety colours and safety signs - Part 1: Design principles for safety signs and safety markings, 2012-12-01 

ISO 3864-3; Graphical symbols - Safety colours and safety signs - Part 3: Design principles for graphical symbols for use in safety signs, 2012-12-01 

EN 50581; Technical documentation for the assessment of electrical and electronic products with respect to the restriction of hazardous substances, 2013-06-01 

EN 62321-1; Determination of certain substances in electrotechnical products - Part 1: Introduction and overview, 2014-01-01 

EN 60745-1 ed. 2; Hand-held motor-operated electric tools - Safety Part 1: General requirements (IEC 60745-1:2006, modified), 2011-12-01 

EN 60745-1 ed. 3; Hand-held motor-operated electric tools - Safety - Part 1: General requirements, 2009-12-01 

EN 60335-1 ed. 2; Household and similar electrical appliances - Safety - Part 1: General requirements, 2003-05-01 

EN 60335-1 ed. 3; Household and similar electrical appliances - Safety - Part 1: General requirements, 2012-09-01 

EN 60335-1; Safety of household and similar electrical appliances. Part 1: General requirements, 1997-03-01 

EN 60335-2-29 ed. 2; Household and similar electrical appliances - Safety - Part 2-29: Particular requirements for battery chargers, 2004-12-01 

EN IEC 60335-2-29 ed. 3; Household and similar electrical appliances - Safety - Part 2-29: Particular requirements for battery chargers, 2022-08-01 

EN 62133-2; Secondary cells and batteries containing alkaline or other non-acid electrolytes - Safety requirements for portable sealed secondary cells and for batteries made from them, for use in portable application - Part 2: 

Lithium systems, 2017-10-01 

EN IEC 61058-1 ed. 2; Switches for appliances - Part 1: General requirements, 2018-11-01 

EN 60745-2-13; Hand-held motor-operated electric tools - Safety - Part 2-13: Particular requirements for chain saws, 2009-12-01 

EN 55014-1 ed. 4; Electromagnetic compatibility - Requirements for household appliances, electric tools and similar apparatus - Part 1: Emission, 2017-10-01 

EN 55014-2 ed. 2; Electromagnetic compatibility - Requirements for household appliances, electric tools and similar apparatus - Part 2: Immunity - Product family standard, 2017-11-01 

EN IEC 55014-1 ed. 5; Electromagnetic compatibility - Requirements for household appliances, electric tools and similar apparatus - Part 1: Emission, 2021-09-01 

EN IEC 55014-2 ed. 3; Electromagnetic compatibility - Requirements for household appliances, electric tools and similar apparatus - Part 2: Immunity - Product family standard, 2021-09-01 


Declares that the (product) complies with all 

relevant provisions of this Directive 

Déclare que le (produit) est conforme à toutes les 

dispositions pertinentes de la présente directive 

Erklärt, dass das (Produkt) mit allen einschlägigen 

Bestimmungen dieser Richtlinie entsprechen, 

Person authorized to complete the technical 

documentation (according to Annex No. VII point A): 

Personne autorisée à remplir la documentation 

technique (conformément à l'annexe n ° VII, point 

A): 

Person, die zur Vervollständigung der technischen 

Dokumentation befugt ist (gemäß Anhang Nr. VII 

Punkt A): 

AKPTESTING - Ing. Petr Vrána, 614 00 BRNO, Proškovo nám. 21, ČESKÁ REPUBLIKA 

number of technical documentation: 

nombre de documents techniques: 

Anzahl der technischen Dokumentation: 

BCW 99 - 6457 

Identification of the person empowered to draw up 

the declaration on behalf of the manufacturer or his 

authorized representative and its signature. 

Identification de la personne habilitée à établir la 

déclaration au nom du fabricant ou de son 

mandataire et sa signature. 

Identifizierung der Person, die befugt ist, die 

Erklärung im Namen des Herstellers oder seines 

Bevollmächtigten und dessen Unterschrift zu 

erstellen. 


----------------------------------- 

2022-12-08 


Summary of Contents for XT102870

Page 1: ...KUMUL TOROV ET ZOV PILA BEZUHL KOV Model Nap t Rychlost et ze D lka li ty Rozte et zu Bezpe nostn brzda Ostatn vlastnosti Hmotnost bez baterie 36V 0 19 m s 350 mm 3 8 ANO Automatick maz n et zu Li ta...

Page 2: ...kami pr ce sni uj nebezpe poran n osob c Vyvarujte se ne mysln ho spu t n Ujist te se zda je sp na p i zapojov n vidlice do z suvky vypnut P en en n ad s prstem na sp na i nebo zapojov n vidlice n ad...

Page 3: ...ov n podle n vodu k obsluze v robek byl pou v n v jin ch podm nk ch nebo k jin m el m ne ke kter m je ur en nebo pou v n m nevhodn ch nebo nekvalitn ch maziv apod kody vznikl p soben m vn j ch mechan...

Page 4: ...adech zp sobit n hlou zp tnou reakci po kter m e doj t k vymr t n vod c li ty sm rem vzh ru a a proti obsluze za zen Sev en pilov ho et zu pod l horn hrany vod c li ty m e zatla it vod c li tu siln sm...

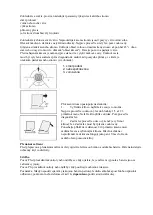
Page 5: ...hladiny oleje 9 P edn rukoje 10 Kryt pilov li ty 11 Jist c tla tko 12 Zadn rukoje 13 Hlavn provozn sp na 14 Kryt pastorku Obsluha Pozor P ed prov d n m jak koliv zm ny nastaven nebo kontroly funk nos...

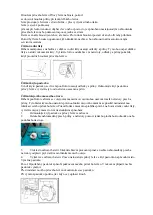
Page 6: ...et z se mus pln zastavit nejpozd ji do 1 sekundy Instalace Pozor P ed prov d n m jak chkoliv prav se v dy ujist te e je za zen vypnut a akumul tor je ze za zen odpojen Pozor Nedot kejte se pilov ho et...

Page 7: ...dokud nedoc l te po adovan ho napnut Pro kontrolu spr vn ho nastaven napnut et zu zat hn te za pilov et z silou p ibli n 1kg Napnut et zu je nastaveno spr vn pokud se mezi pilov m et zem a vod c li to...

Page 8: ...iz obr zek 3 Lehce p idr ujte vod c li tu a ut hn te kryt pastorku Ujist te se e pilov et z nen na sv spodn stran uvoln n 4 Vra te p ku do p vodn polohy Ujist te se e pilov et z p il h ke spodn stran...

Page 9: ...v jejich ot en Pozn mka Udr ujte v echny sti t la v dostate n vzd lenosti od pilov ho et zu pokud je motor za zen v provozu Pozor Dr te pilu pevn ob ma rukama pokud je motor za zen v provozu Pozor Ne...

Page 10: ...vejte nepodep en v tve sm rem zespodu P i prov d n odv tvov n nest jte na kmeni pok cen ho stromu Zano ov n a paraleln ez Pozor Zano ov n a paraleln ez sm b t prov d ny pouze obsluhou se speci ln m tr...

Page 11: ...i k cen stromu postupujte n sledovn 1 Vy zn te kl n co nejbl e k zemi je to mo n Nejprve prove te vodorovn ez do hloubky 1 5 a 1 3 pr m ru kmene Ne e te kl n p li ze iroka Pot prove te diagon ln ez 2...

Page 12: ...ntujte kryt pastorku a pilov et z a vy ist te tyto od ne istot usazenin a pilin i t n olejov ho mazac ho otvoru B hem pou v n za zen se v olejov m mazac m otvoru mohou usazovat mal ne istoty prach a p...

Page 13: ...dov n n ad 1 P ed ukl d n m za zen o ist te Odstra te v echny ne istoty prach a piliny po odmontov n krytu pastorku 2 Po vy i t n za zen jej nechte b et napr zdno a nechte promazat pilov et z a vod c...

Page 14: ......

Page 15: ......

Page 16: ...fick ch zna ek pro pou it v bezpe nostn ch zna k ch 2012 12 01 SN EN 50581 Technick dokumentace k posuzov n elektrick ch a elektrotechnick ch v robk z hlediska omezov n nebezpe n ch l tek 2013 06 01 S...

Page 17: ...ous substances 2013 06 01 EN 62321 1 Determination of certain substances in electrotechnical products Part 1 Introduction and overview 2014 01 01 EN 60745 1 ed 2 Hand held motor operated electric tool...

Page 18: ...T102870 AKU RE AZOV P LA BEZUHL KOV Nap tie R chlos re aze D ka li ty Delenie re aze Bezpe nostn brzda Ostatn vlastnosti Hmotnos bez baterie 36V 0 19 m s 350 mm 3 8 ANO Automatick mazanie re aze Li ta...

Page 19: ...es k v nemu poraneniu os b b Pou vajte ochrann pom cky V dy pou vajte ochranu o Ochrann pom cky ako napr Respir tor bezpe nostn obuv s proti mykovou pravou tvrd pokr vka hlavy alebo ochrana sluchu pou...

Page 20: ...ktor s ur en alebo pou van m nevhodn ch alebo nekvalitn ch maz v a pod kody vznikli p soben m vonkaj ch mechanick ch teplotn ch i chemick ch vplyvov chyby boli sp soben nevhodn m skladovan m i manipul...

Page 21: ...och sp sobi n hlu sp tn reakciu po ktorej m e d js k vymr teniu vodiacej li ty smerom nahor a a proti obsluhe zariadenia Zovretie re aze pozd hornej hrany vodiacej li ty m e zatla i vodiacu li tu siln...

Page 22: ...omto manu li m u sp sobi v ne zranenia obsluha Pozor Pred vykonan m akejko vek zmeny nastavenia alebo kontroly funk nosti zariaden sa v dy uistite e je zariadenie vypnut bat rie je zo zariadenia odstr...

Page 23: ...orizovan servisn centrum 1 Stla te istiace tla idlo a potom hlavn prev dzkov sp na P lov re az sa okam ite rozto 2 Pomocou dlane va ej ruky zatla te na kryt prednej rukov ti smerom vpred P lov re az b...

Page 24: ...era o ve kosti 5 7mm pozri ni ie otvo r 1 otvo r 2 6 Ot ajte p kou v smere hodinov ch ru i iek k m nie je kryt pastorka zaisten a potom vr te p ku do p vodnej polohy Nastavenie napnutie re aze Pozor V...

Page 25: ...e olej a po doln okraj stia n dr e Funkcia mazania m e by v opa nom pr pade naru en Pozn mka Nikdy nepou vajte olej v ktorom sa nach dza prach a in asti alebo nestabiln olej Pozn mka Pri prerez van st...

Page 26: ...iacej li ty pou van na rezanie m e d js k vych leniu p ly va m smerom pokia d jde k zaseknutiu re aze Z tohto d vodu re te iba spodnou hranou p lov li ty aby nemohlo d js k vych leniu p ly va m smerom...

Page 27: ...v ktorej je o ak van p d sk cen ho stromu Vi obr zok 1 smer padania 2 nebezpe n z na 3 vo n z na Pri p len stromu postupujte nasledovne 1 Vyre te klin o najbli ie k zemi je to mo n Najsk r vykonajte...

Page 28: ...k funkcia mazania neprebieha spr vne na hornej strane vodiacej li ty vy istite olejov mazac otvor nasleduj cim sp sobom 1 Odmontujte kryt pastorka a p lov re az zo zariadenia 2 Odstr te nahromaden pra...

Page 29: ...OBSLUGI XT102870 PI A A CUCHOWA AKU BRUSHLESS Napi cie Striedav motor Pr dko a cucha D ugo prowadnicy Skok Hamulec bezpiecze stwa Automatyczne smarowanie a cucha Pr t i a cuch Oregon 36V 64 0 19 m s...

Page 30: ...buwia ochronnego c Nale y unika niezamierzonego uruchomienia Przed pod czeniem do r d a zasilania lub akumulatora nale y upewni si e prze cznik znajduje si w pozycji OFF d Nale y ubiera si prawid owo...

Page 31: ...zolowane powierzchnie chwytne poniewa a cuch pi y mo e styka si z ukrytym okablowaniem a cuchy pi y stykaj ce si z drutem pod napi ciem mog sprawi e ods oni te metalowe cz ci elektronarz dzia znajd si...

Page 32: ...cuchowej obiema r kami na pi y i ustaw cia o i rami aby m g oprze si si om odrzutu Si y odrzutu mog by kontrolowane przez operatora je li zostan podj te odpowiednie rodki ostro no ci Nie puszczaj pi y...

Page 33: ...y spust w cznika dzia a prawid owo i powraca do po o enia OFF po zwolnieniu OSTRZE ENIE Nie ci gnij mocno spustu prze cznika bez naciskania d wigni blokuj cej Mo e to spowodowa uszkodzenie prze cznika...

Page 34: ...d przyst pieniem do jakichkolwiek prac OSTRZE ENIE Nie dotykaj a cucha pi y go ymi r kami Zawsze no r kawice podczas obs ugi a cucha pi y Demonta lub monta a cucha pi y UWAGA a cuch pi y i prowadnica...

Page 35: ...krywie do dw ch odpowiednich otwor w jak pokazano poni ej 6 Obr pokr t o napinaj ce w prawo i sprawd napi cie a cucha obracaj zgodnie z ruchem wskaz wek zegara a do odpowiedniego momentu Aby sprawdzi...

Page 36: ...ach u ytkowania Od czasu do czasu sprawdzaj napi cie a cucha pi y przed u yciem 1 Naci nij i ca kowicie otw rz d wigni a us yszysz klikni cie Lekko obr w lewo aby delikatnie poluzowa os on ko a a cuch...

Page 37: ...A Z PI A CUCHOW OSTRZE ENIE U ytkownik po raz pierwszy powinien jako minimaln praktyk ci drzewo w koby ce OSRZE ENIE Do ci cia wst pnie przyci tego drewna u yj bezpiecznego podparcia koby ka Nie podtr...

Page 38: ...w wytnij stron t oczon B Nast pnie wykonaj ko cowe ci cie od strony napi tej A Zapobiega to uwi zieniu pi y Korowanie UWAGA Korowania mog wykonywa wy cznie przeszkolone osoby Zagro enie jest spowodowa...

Page 39: ...aj ce ga zie Przed rozpocz ciem ci nale y oczy ci i przygotowa cie k ewakuacyjn cie ka ewakuacyjna powinna rozci ga si do ty u i po przek tnej do ty u oczekiwanej linii upadku jak pokazano na rysunku...

Page 40: ...ci prowadnicy wyczy otw r spustowy oleju w nast puj cy spos b 1 zdj os on ko a a cuchowego i a cuch pi y z narz dzia 2 usun ma y kurz lub cz steczki za pomoc p askiego rubokr ta lub podobnym narz dzi...

Page 41: ...0 CORDLESS CHAIN SAW BRUSHLESS Model Voltage Chain speed Guide bar length Pitch Safety break Other features Weight without battery 36V 0 19 m s 350 mm 3 8 YES Automatic chain lubrication Bar and chain...

Page 42: ...Use safety glasses and face or dust mask Wear protective hearing equipment helmet and boots c Avoid unintentional starting Before connecting to power source or battery make sure the switch is at OFF p...

Page 43: ...front handle with the chain saw switched off and away from your body When transporting or storing the chain saw always fit the guide bar cover Proper handling of the chain saw will reduce the likeliho...

Page 44: ...The bar and the sprocket cover are fitted correctly The chain has been sharpened and tensioned in accordance with the regulations 15 Do not start the chain saw with the chain cover being installed on...

Page 45: ...switching it on Hold the rear handle with your right hand the front handle with your left The bar and the chain must not be in contact with any object CAUTION Should the saw chain not stop immediatel...

Page 46: ...Rest the guide bar in place on the chain saw 4 Place the sprocket cover on the chain saw and matching the two posts on the cover to the two corresponding holes as shown below 6 Turn the tension knob c...

Page 47: ...ttle to loosen sprocket cover lightly 2 Turn the tension knob clockwise to tighten the saw chain until the lower side of the saw chain fits in the guide bar rail as illustrated 3 Keep holding the guid...

Page 48: ...foot and do not allow anyone else to hold or steady it CAUTION Secure round pieces against rotation CAUTION Keep all parts of the body away from the saw chain when the motor is operating CAUTION Hold...

Page 49: ...injury Perform parallel to grain cuts at as shallow an angle as possible Take an extra caution when carrying out the cut as the spike bumper cannot be used Felling CAUTION Felling work may only be pe...

Page 50: ...awdust is produced when damp wood is cut The chain penetrates the wood with difficulty even when heavy pressure is applied The cutting edge is obviously damaged The saw pulls to the left or right in t...

Page 51: ...ilt up dust or particles off the oil discharge hole by discharging chain oil 4 remove the battery cartridge from the tool Reistall the sprocket cover and saw chain on the tool Replacing the sprocket A...

Reviews: