background image

8

MENU OPTION CONT’D:

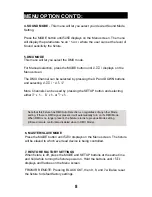
6. MASTER/SLAVE MODE

Press the MODE button until 

SLAV

 displays on the Menu screen. The fixture 

will be slaved to which ever lead device is being controlled.

7. RESTORE FACTORY SETTINGS

When fixture is off, press the MODE and SETUP buttons at the same time 
and hold while turning the fixture power on. Hold the buttons until 

rSEt


displays and flashes on the Menu screen. 

FROM IR REMOTE: Pressing BLACK OUT, then 9, 8, and 7 will also reset 

the fixture to default factory settings.

Note that this fixture has DMX Auto Detection, so regardless of any other Mode 

setting, if there is DMX signal present, it will automatically turn on it’s DMX Mode. 

When DMX is no longer present, the fixture returns to previous Mode setting 
(infrared remote control also disabled when in DMX Mode).

4. SOUND MODE

 - This menu will let you select your desired Sound Mode 

Setting. 

Press the MODE button until 

SUND

 displays on the Menu screen. The menu 

will display the parameters 

SU.00 - SU.3 1.

 where the user can set the level of 

Sound sensitivity the fixture. 

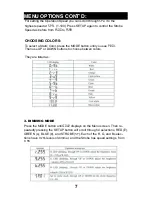
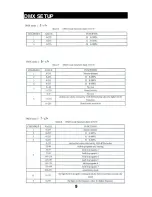
5. DMX MODE

This menu will let you select the DMX mode. 

For Manual selection, press the MODE button until 

d.

001

 displays on the 

Menu screen. 

The DMX Channel can be selected by pressing the UP and DOWN buttons 
and selecting 

d.

001

 - 

d.

512

More Channels can be used by pressing the SETUP button and selecting 
either 

3-ch

6

-ch

,

or 

7-ch

Summary of Contents for X-PARTRI18 IRC

Page 1: ......

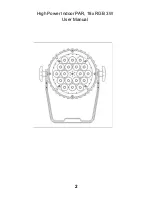
Page 2: ...2 High Power Indoor PAR 18x RGB 3W User Manual...

Page 3: ...a Standard PC Power connector is required and included with the unit If the fixture expereiences a power failure check the fuse located on the power input port There is also a power Output plug availa...

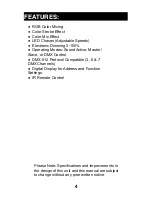
Page 4: ...00 Operating Modes Sound Active Master Slave or DMX Control DMX 512 Protocol Compatible 3 6 7 DMX Channels Digital Display for Address and Function Settings IR Remote Control Please Note Specification...

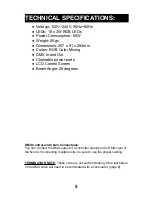
Page 5: ...ng TERMINATION NOTE These units are not self terminating If the last fixture in the DMX chain will need to be terminated with a Terminator page 9 Voltage 100V 240V 50Hz 60Hz LEDs 18 x 3W RGB LEDs Powe...

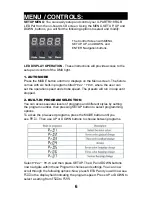
Page 6: ...ll run in loop until stopped 2 BUILT IN PROGRAM SELECTION You can access several levels of programs and different styles by setting the program number then pressing SETUP button to select programming...

Page 7: ...s have 0 255 levels of dimmer and the Strobe has speed settings from 0 99 MENU OPTIONS CONT D For setting the Operation Speed you can scroll through SP 0 1 to the highest speed at Sp fl 1 100 Press SE...

Page 8: ...there is DMX signal present it will automatically turn on it s DMX Mode When DMX is no longer present the fixture returns to previous Mode setting infrared remote control also disabled when in DMX Mod...

Page 9: ...9 DMX SETUP...

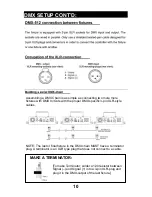
Page 10: ...X output of the last fixture NOTE The last or final fixture in the DMX chain MUST have a terminator plug A terminator is an XLR type plug that does not connect to a cable Assembling a DMX Chain is as...

Page 11: ...11 INFRARED REMOTE FUNCTIONS...

Page 12: ...DIRECT SALES DEALERS AND DISTRIBUTORS ONLY Please Register your product warranty on ProXDirect com submit your testimonials and setup photos to our website Tag us on your social media websites proxdi...

Reviews: